08/09/2015
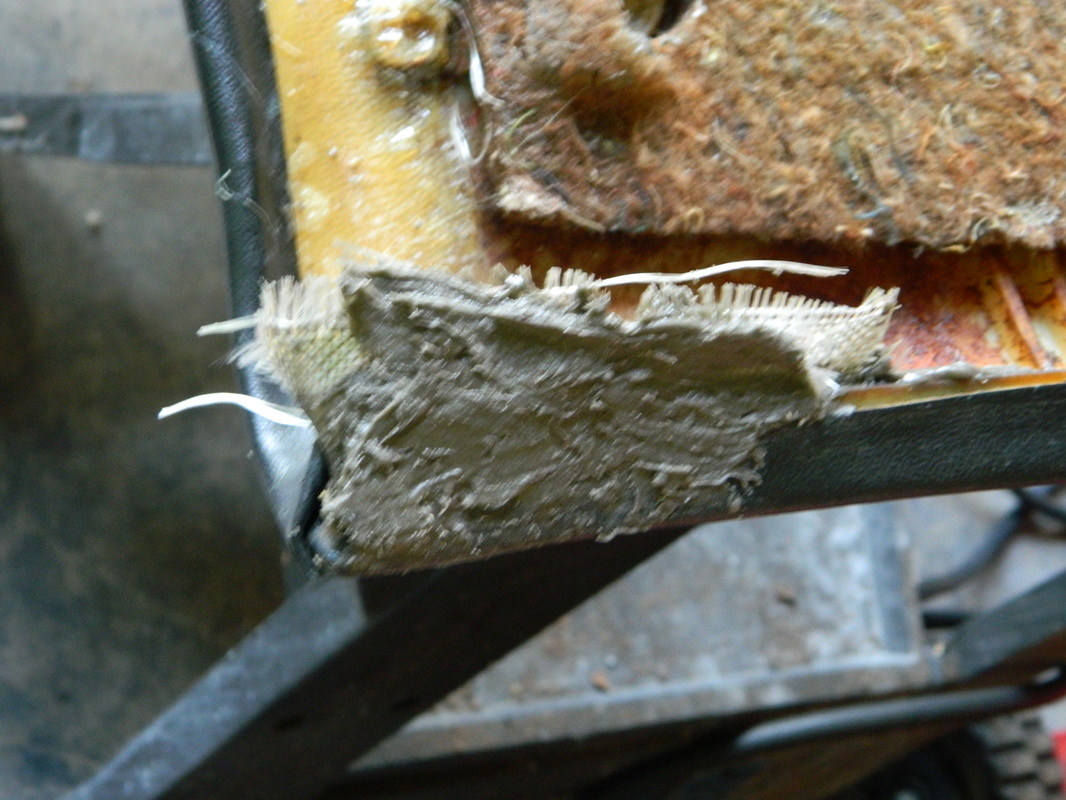
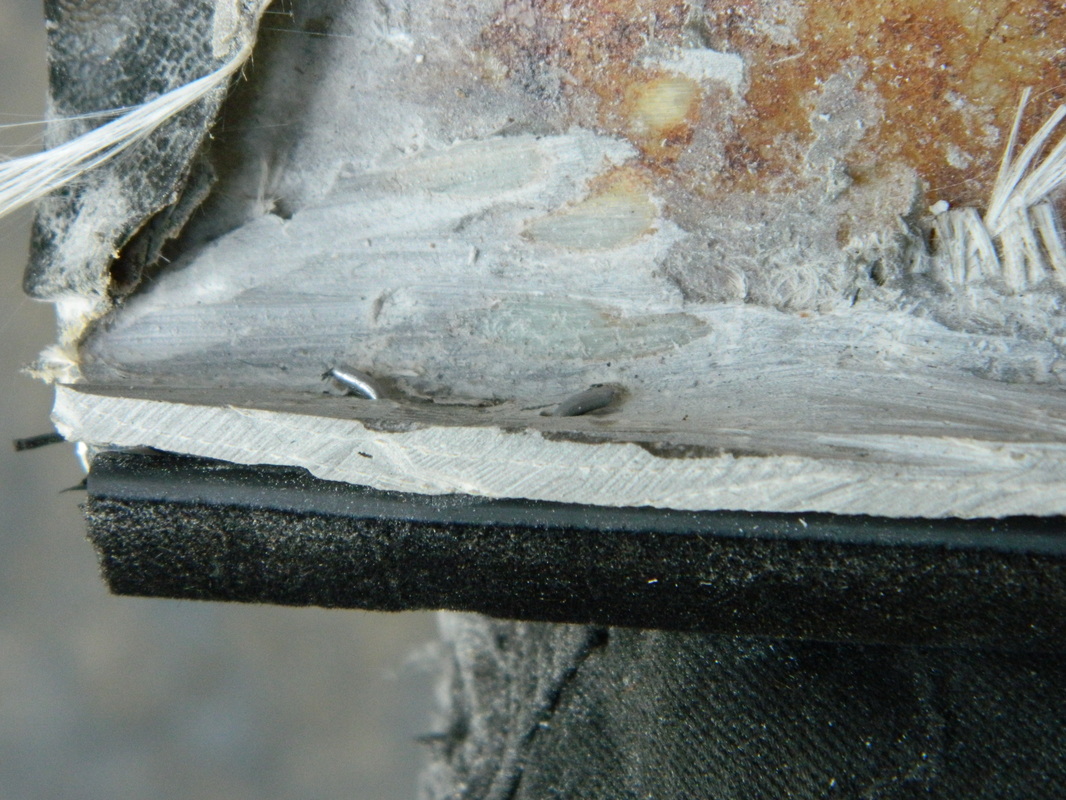
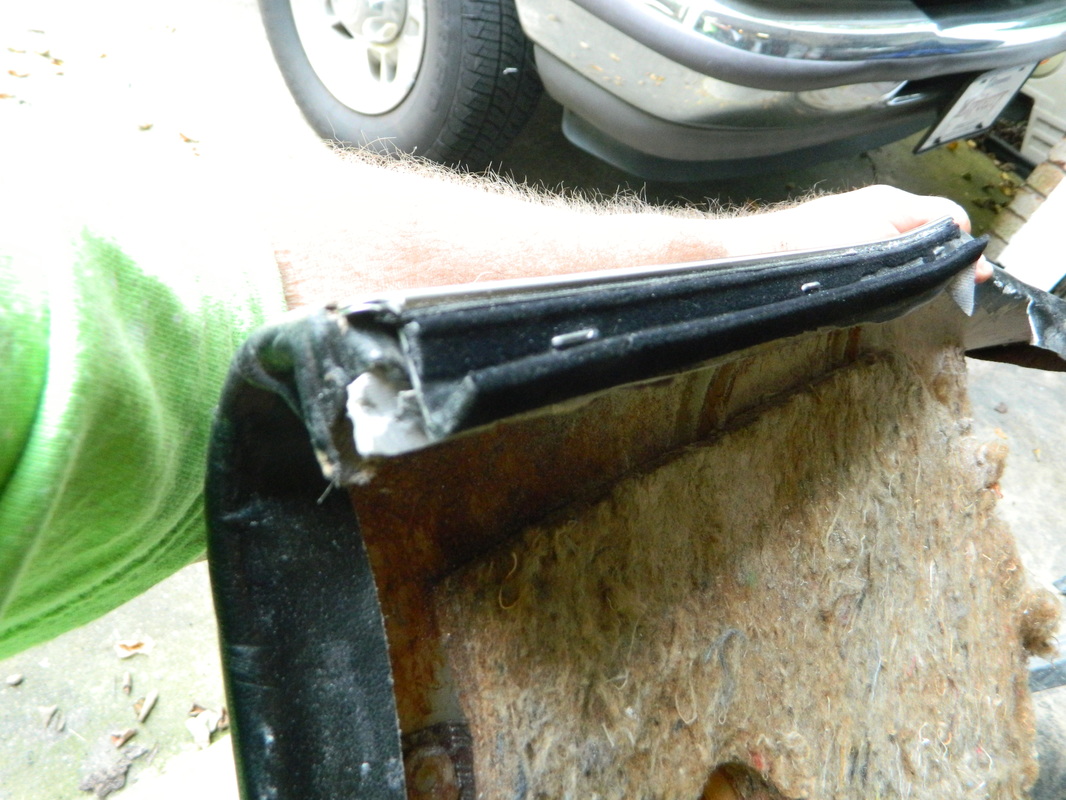
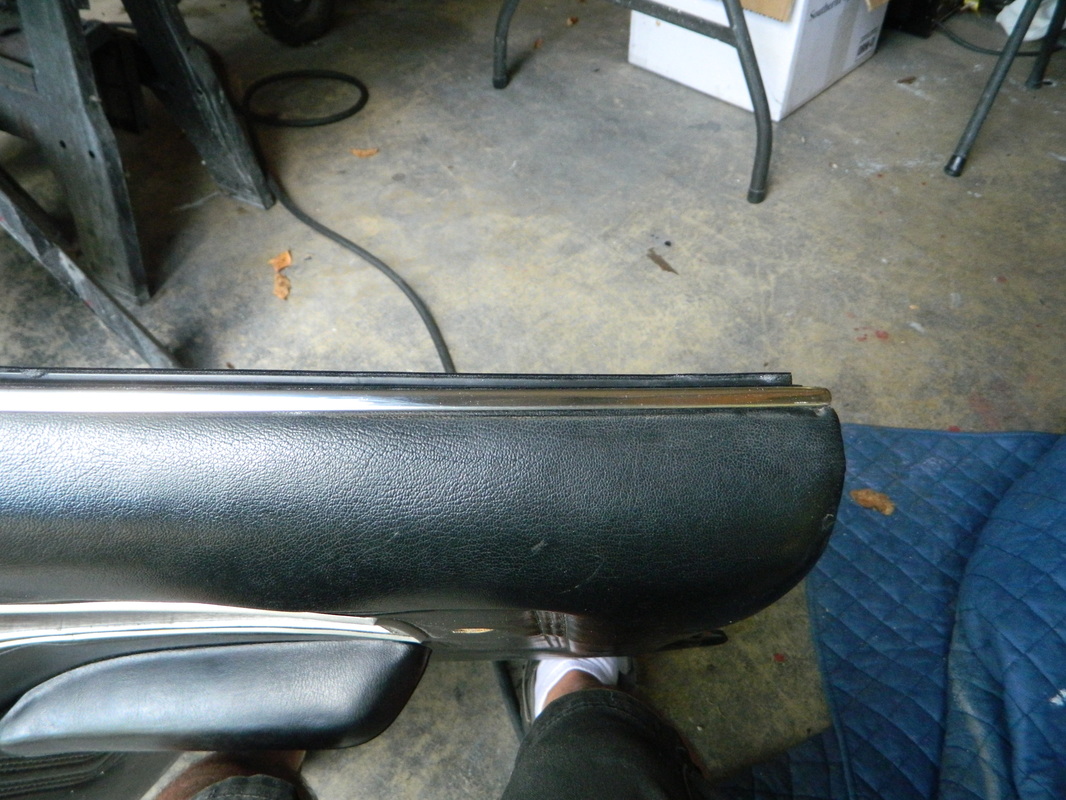
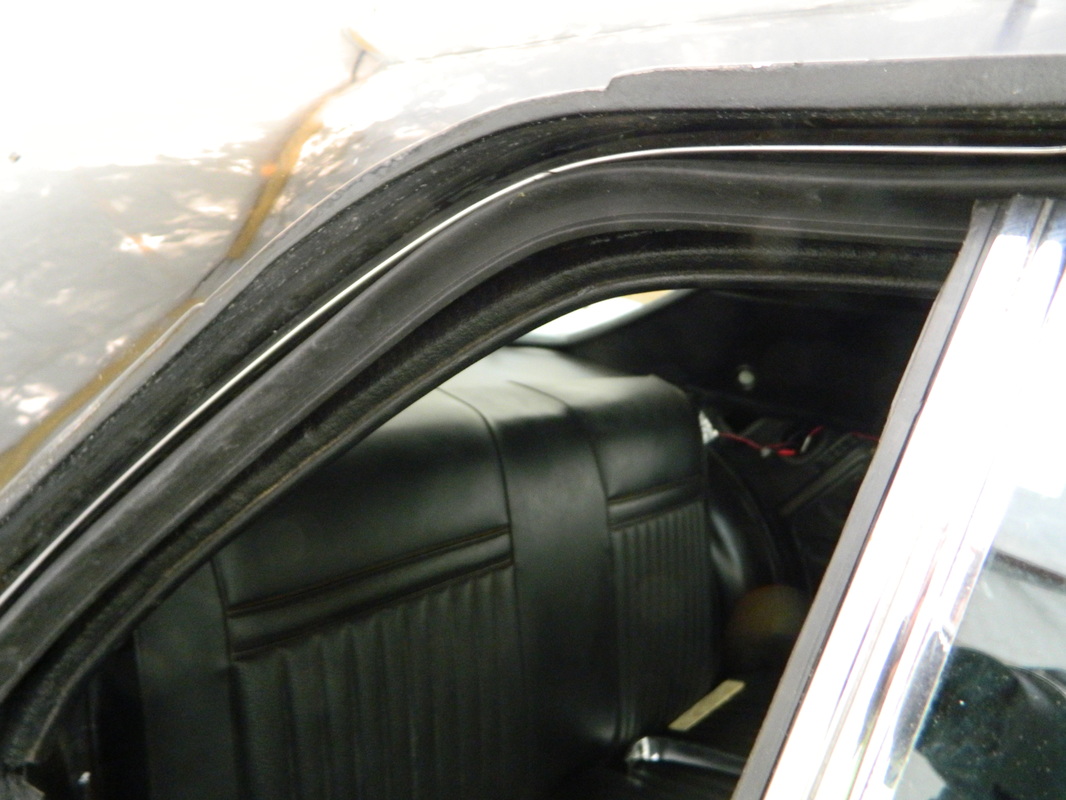
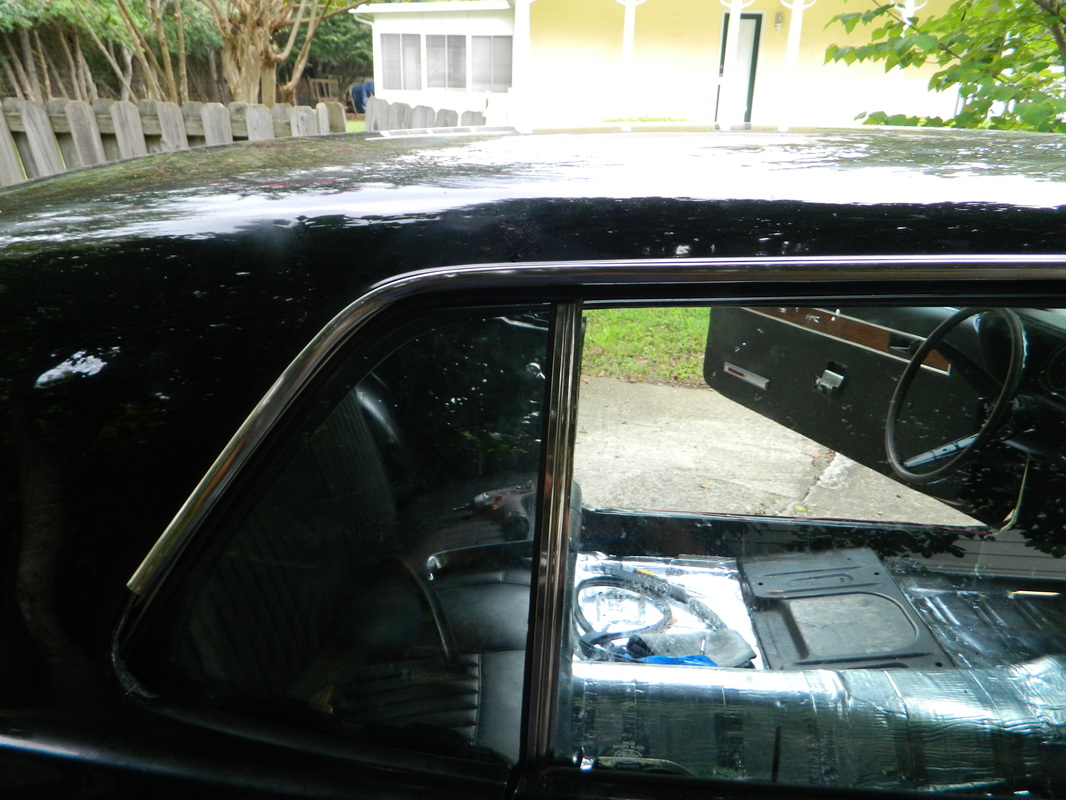
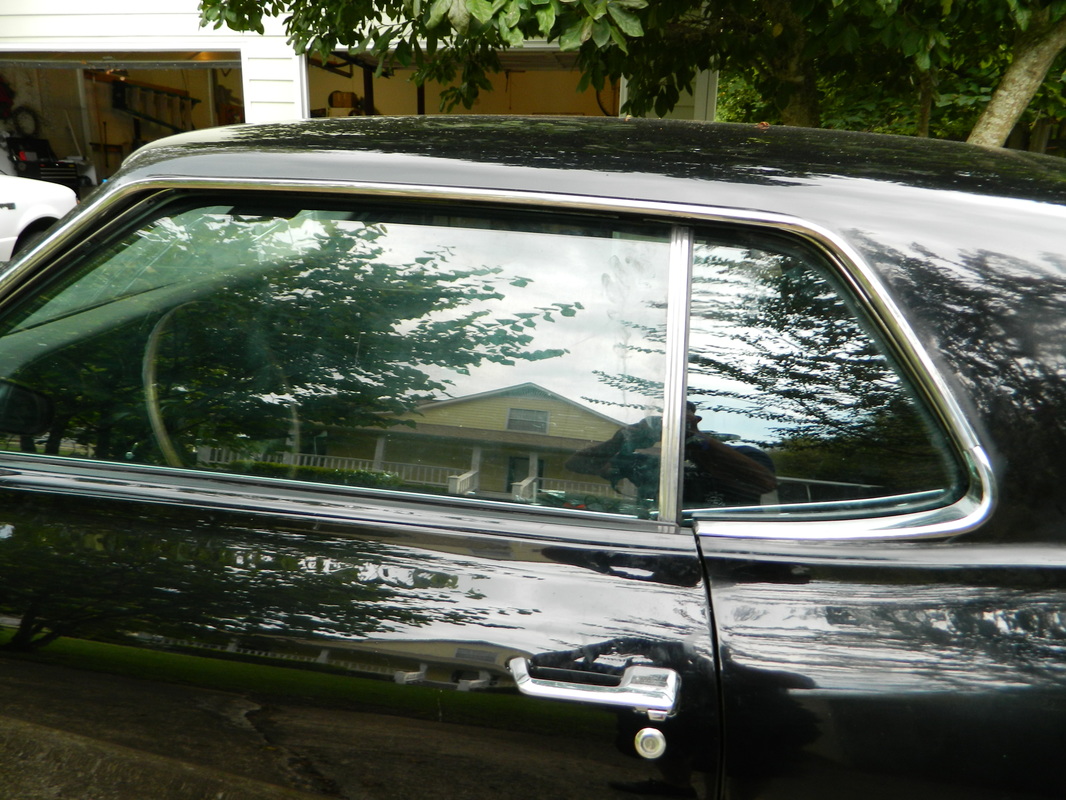
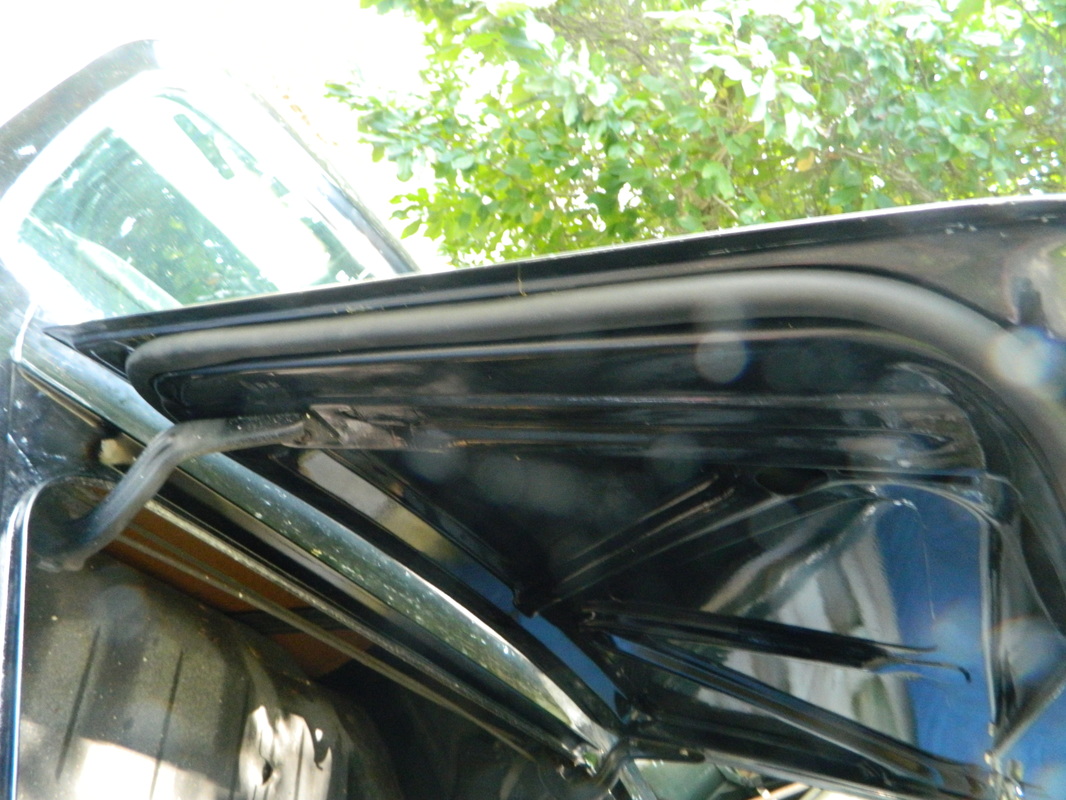
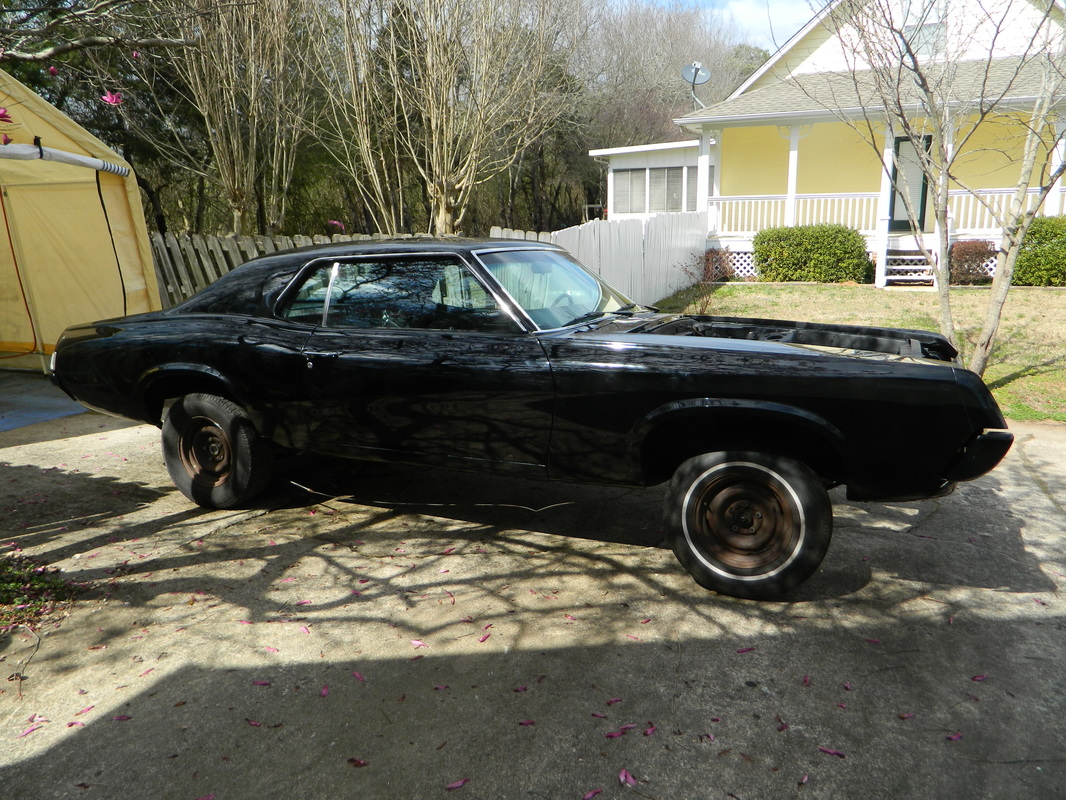
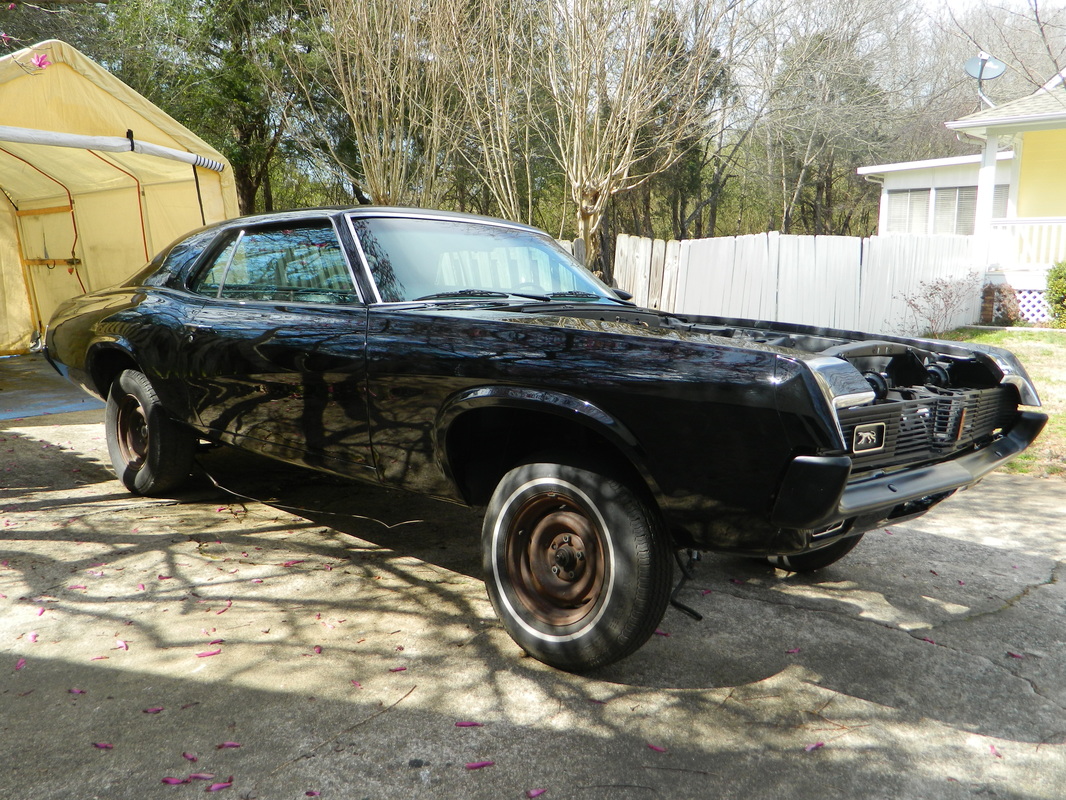
Today I worked on the rear interior quarter panels, repairing the corners on both of them. Where the corner was broken is where the brad staples attach the window felts for the quarter windows. Then, I managed to get the passenger side roof rail weather stripping installed. Next, I found that the window as out of adjustment. I think I have the front window adjusted now, but the rear one needs more work. I give up for today, too HOT! 4 hrs


Aug 10, 2015
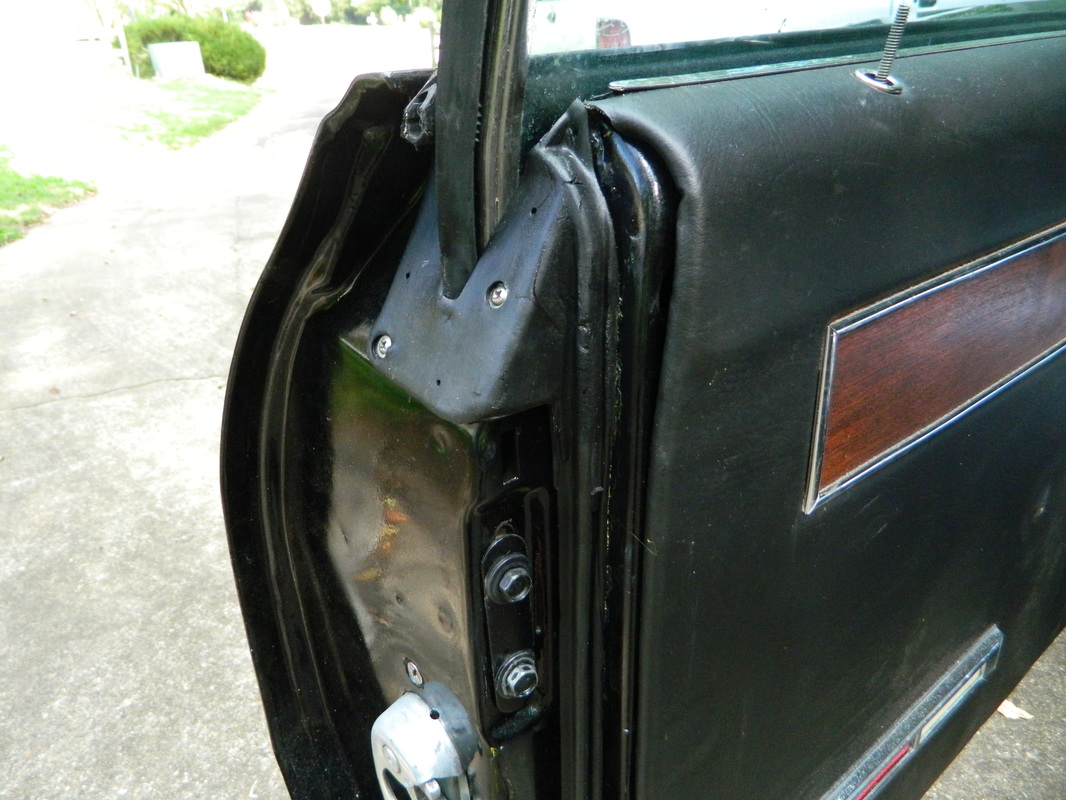
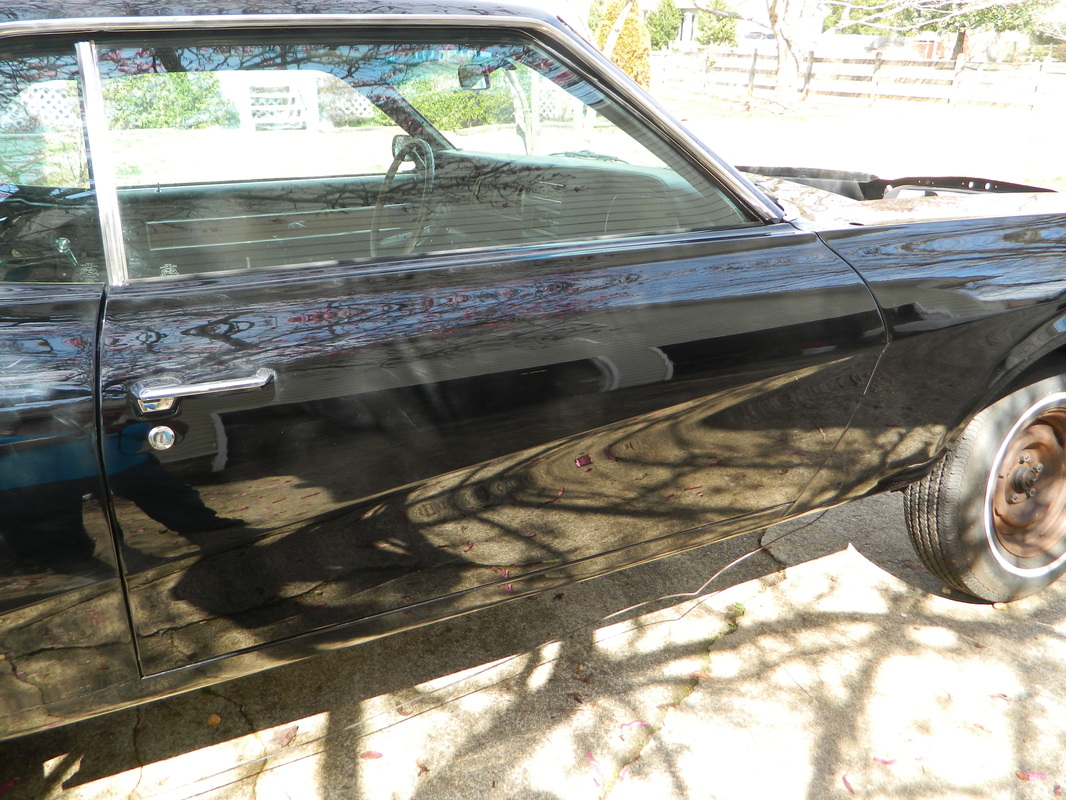
I was off today waiting for the A/C repairman, so I did a little more on the Cougar. I finished adjusting the passenger side windows and then installed the door weather stripping. Not much to say here, except that adjusting windows is a pain and weather stripping in general is tedious and messy, glue everywhere.


Aug 20, 2015
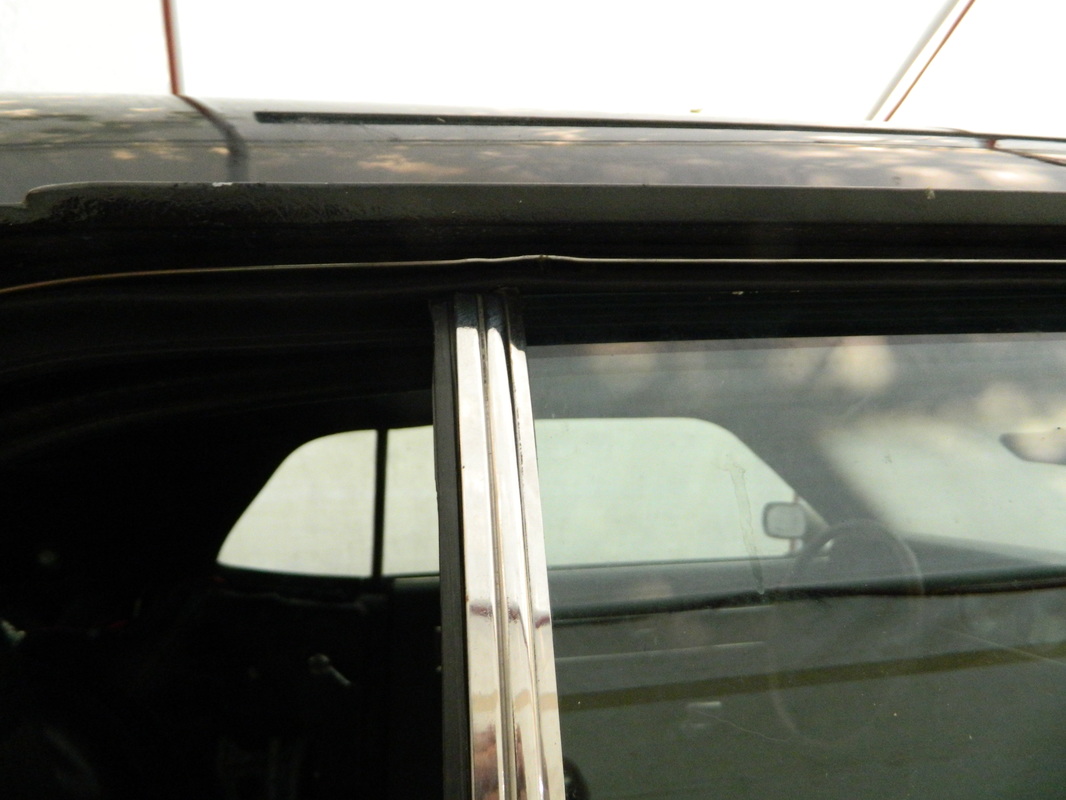
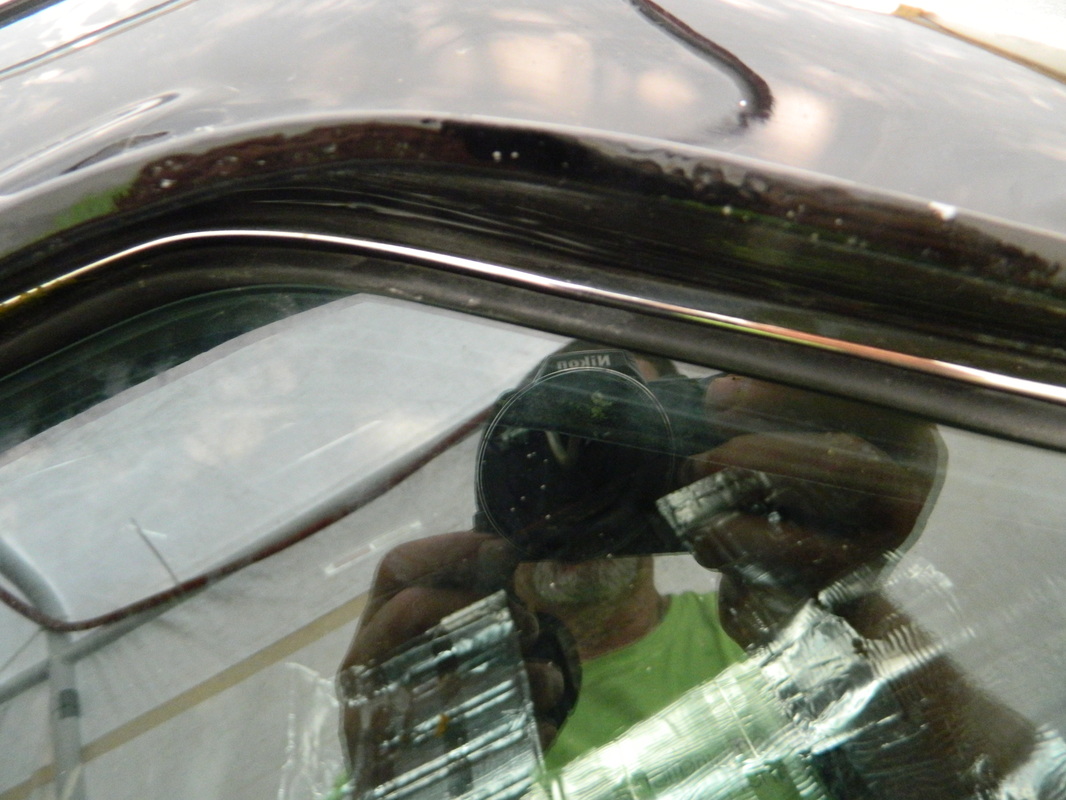
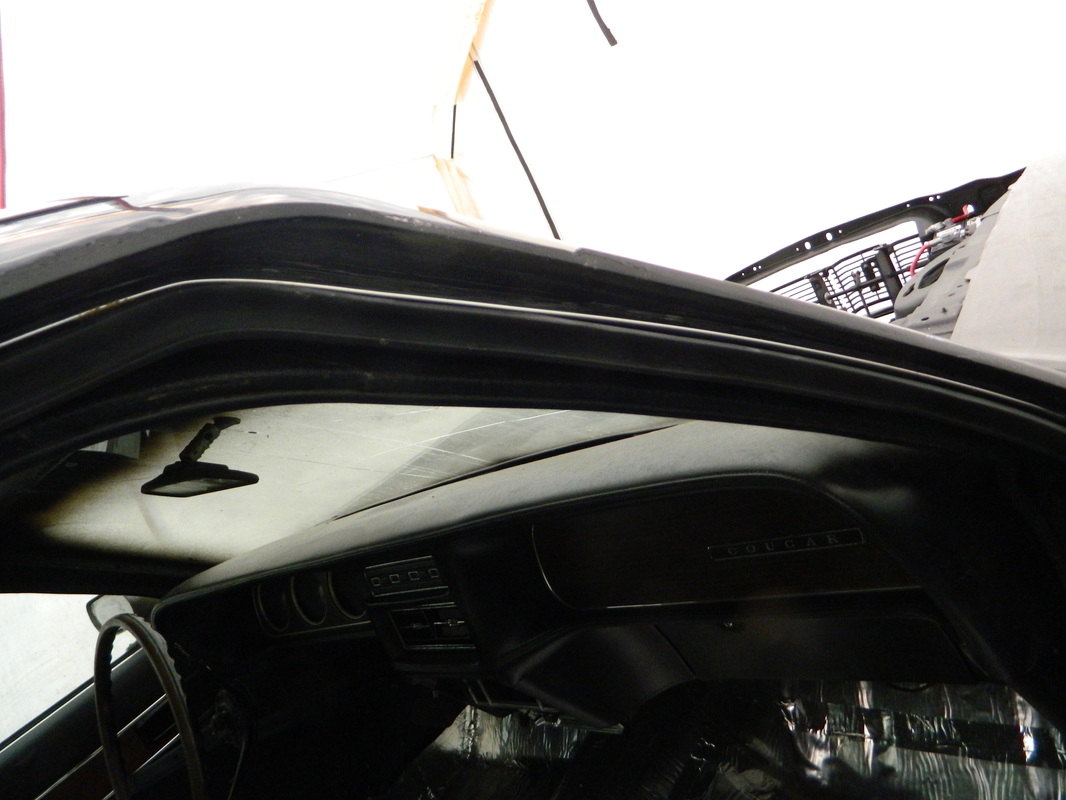
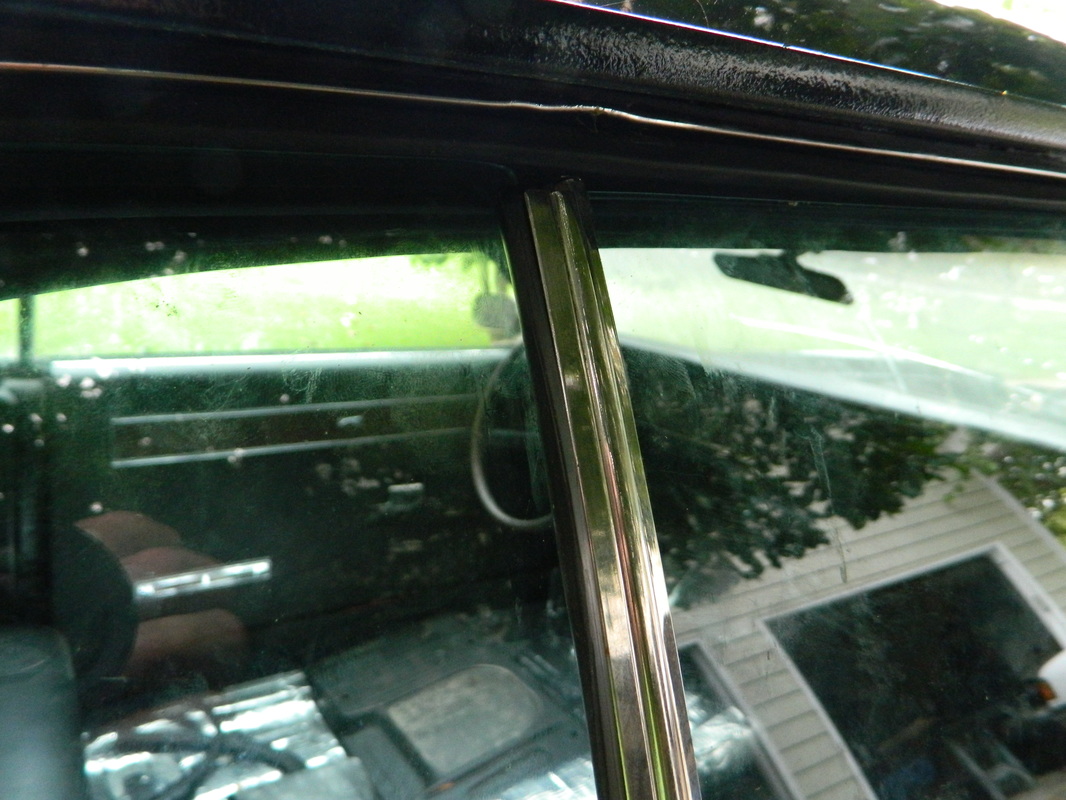
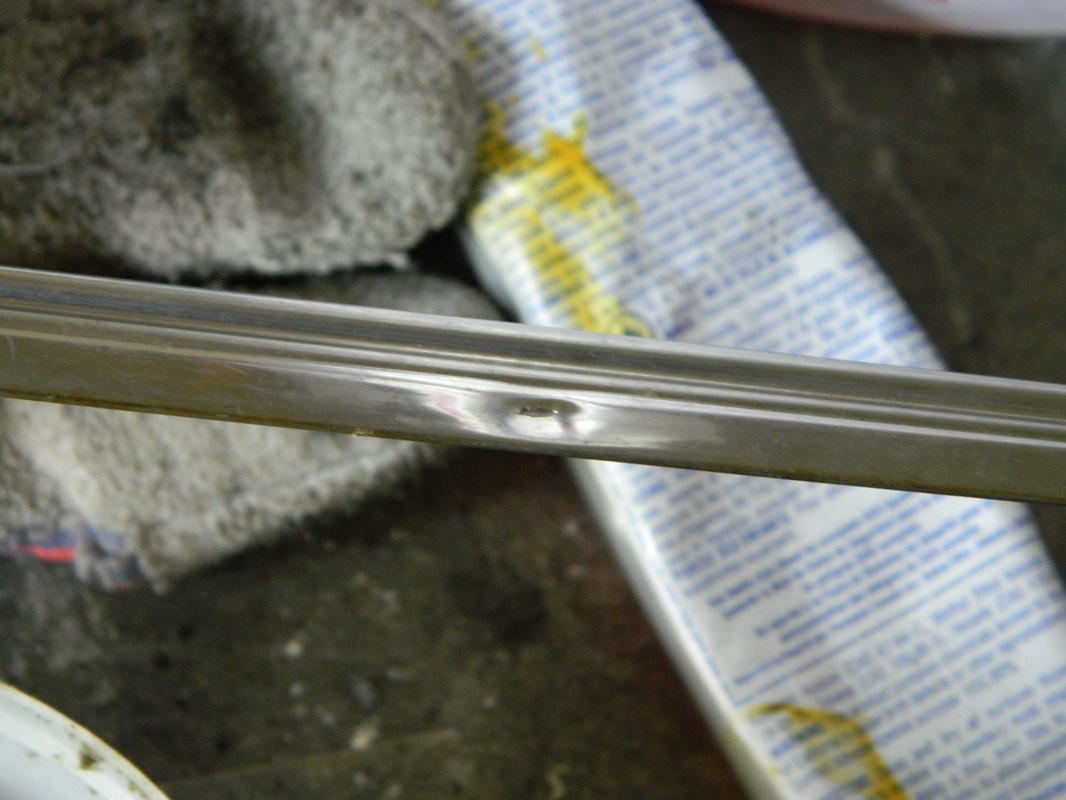
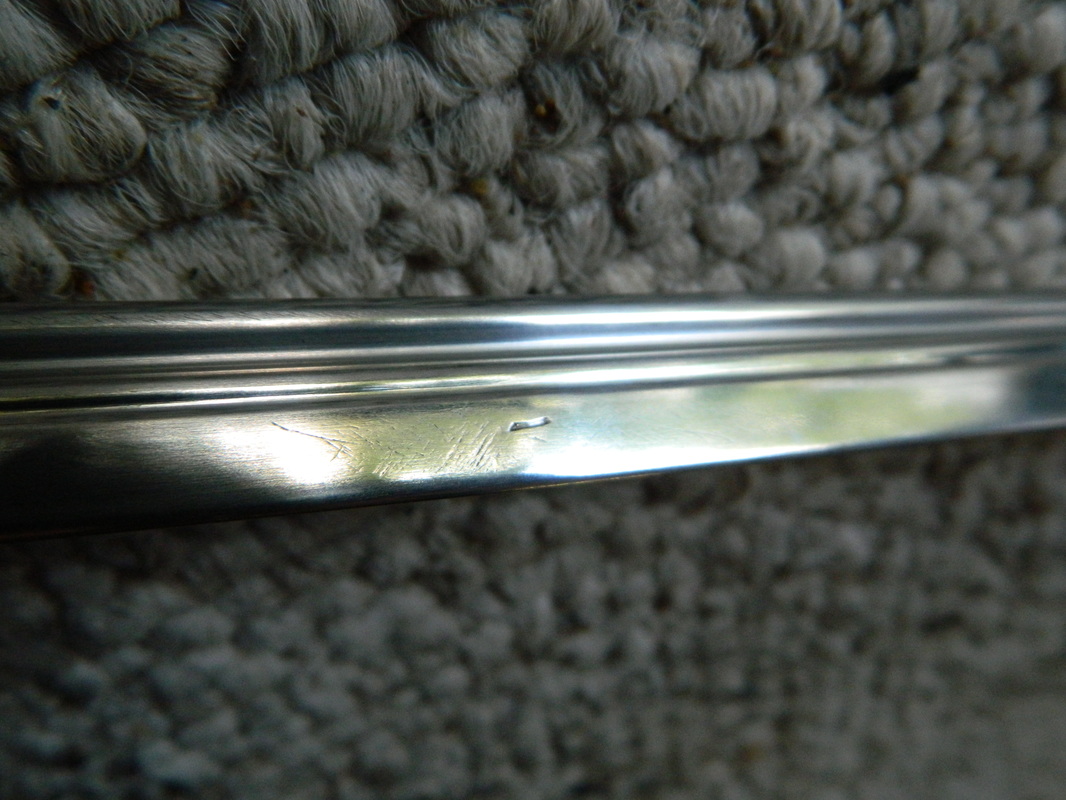
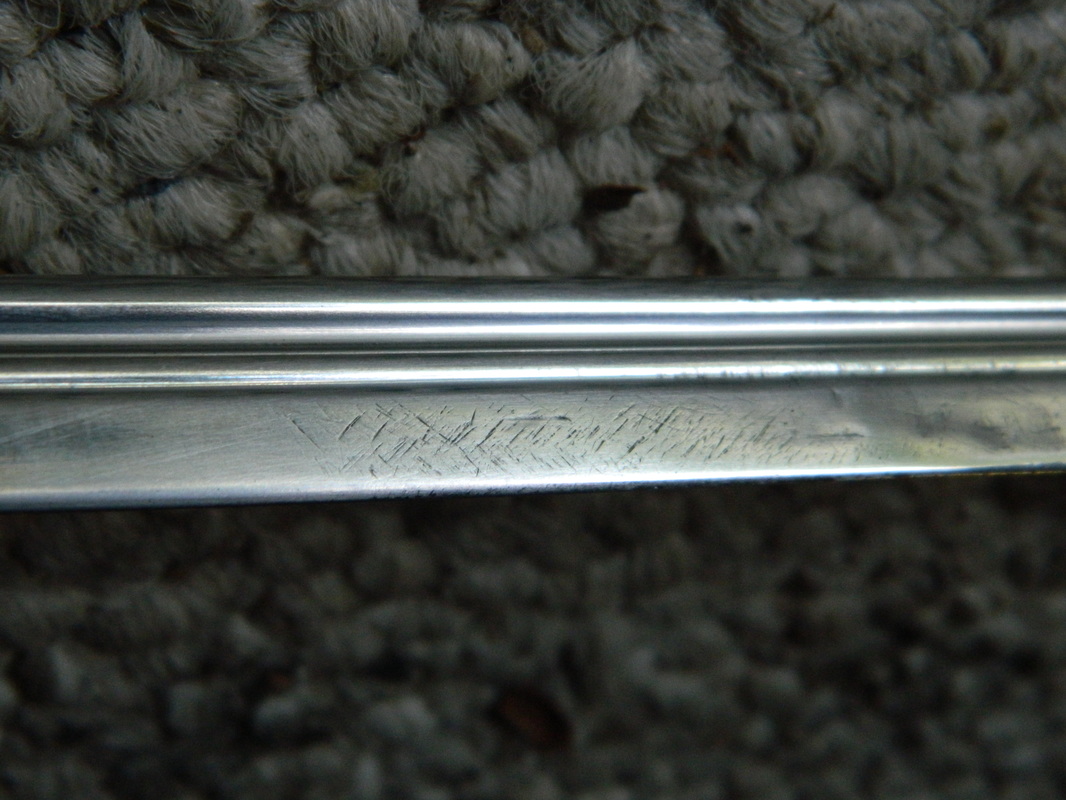
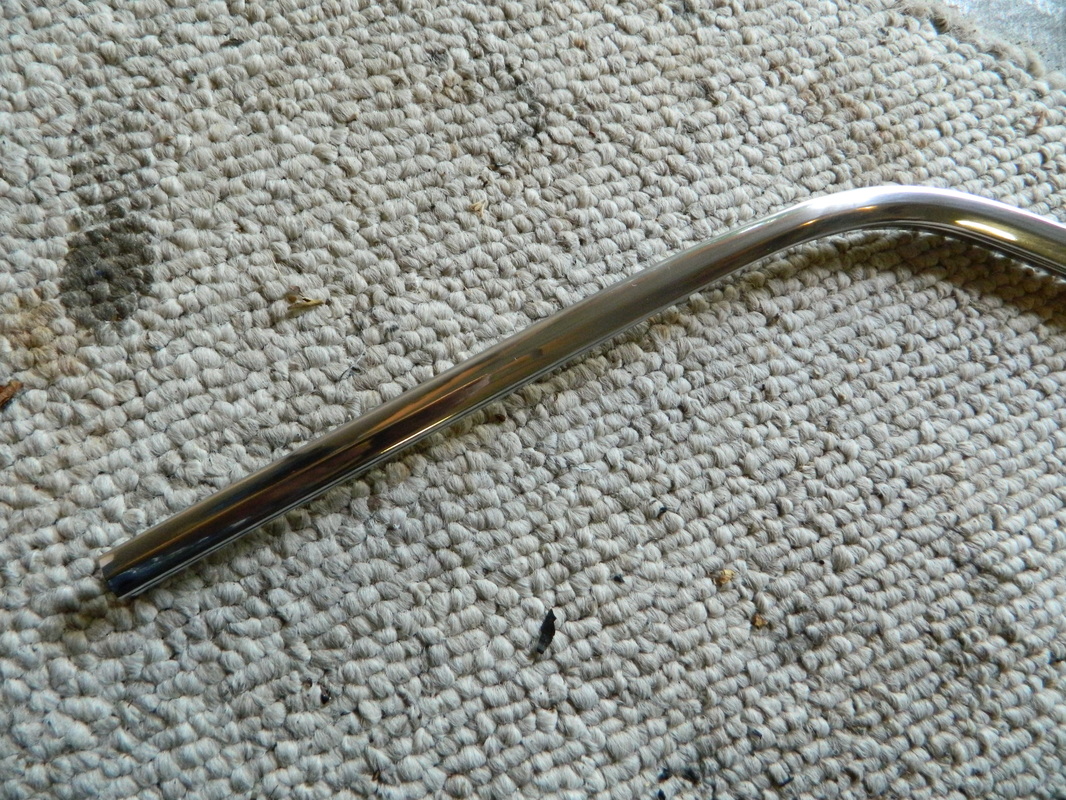
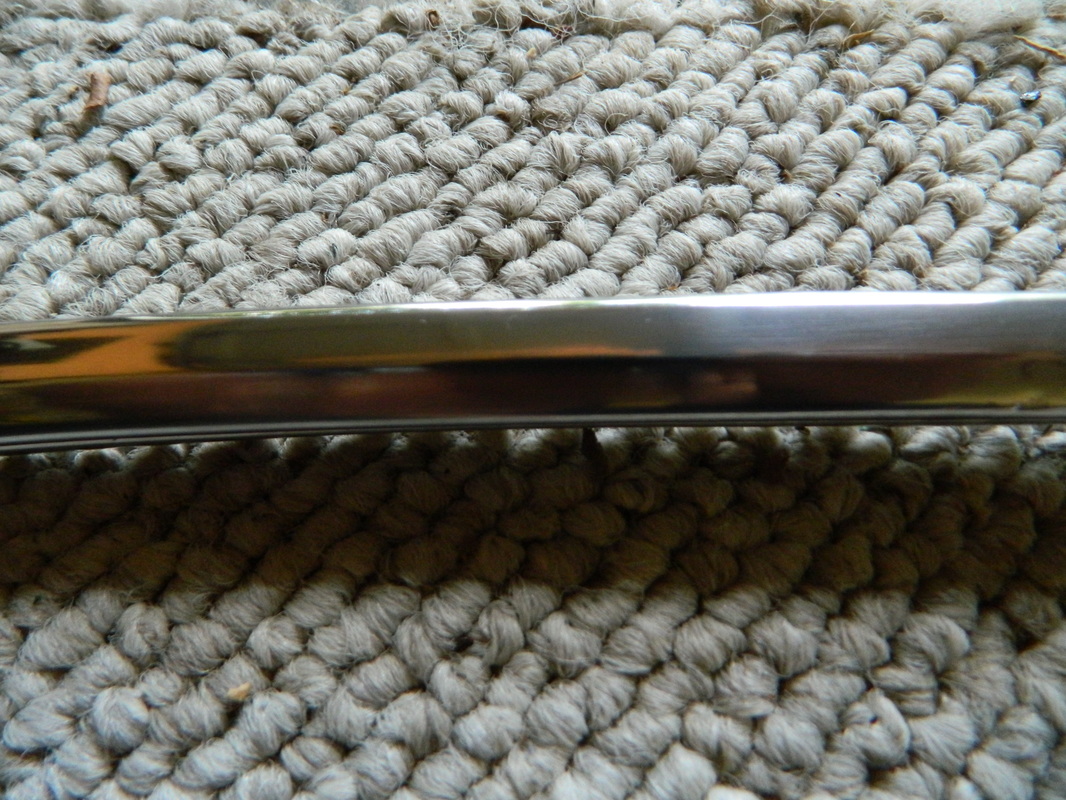
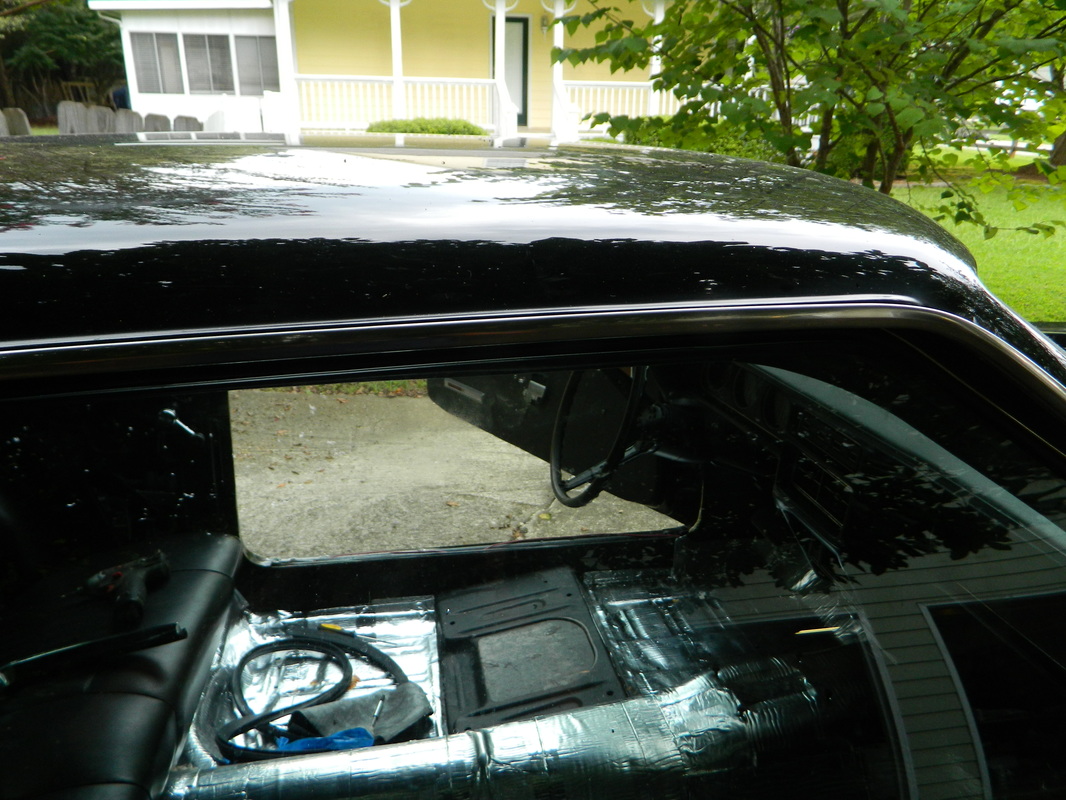
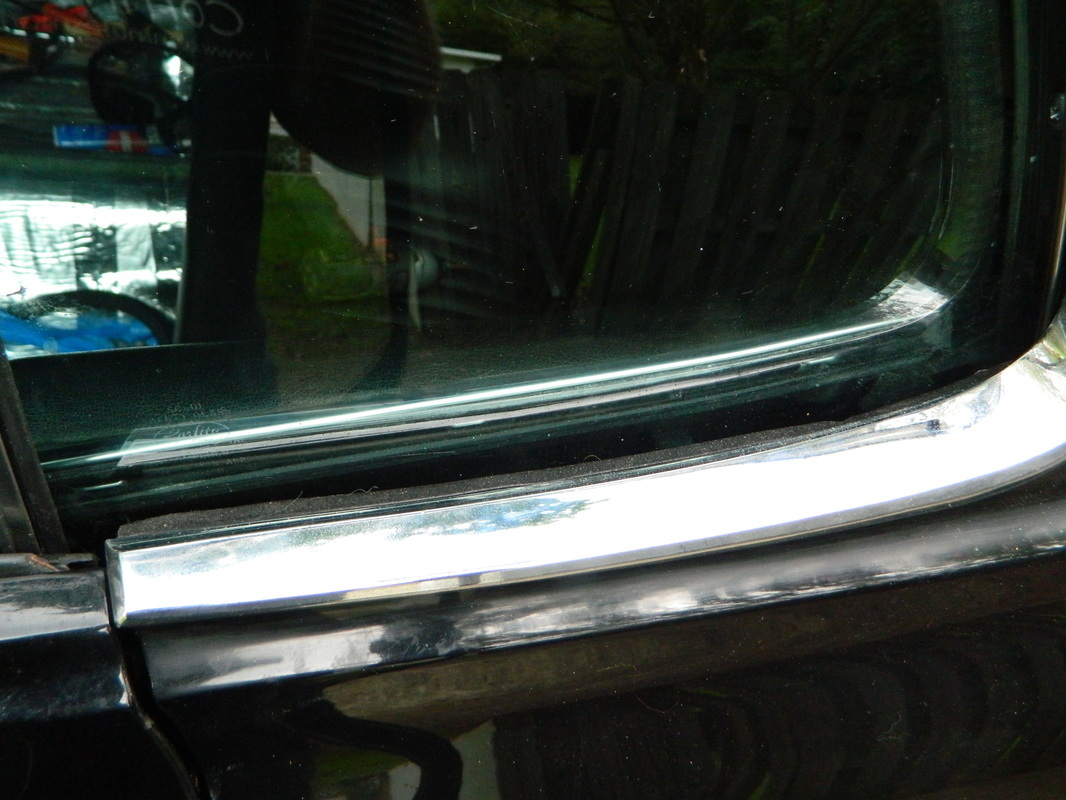
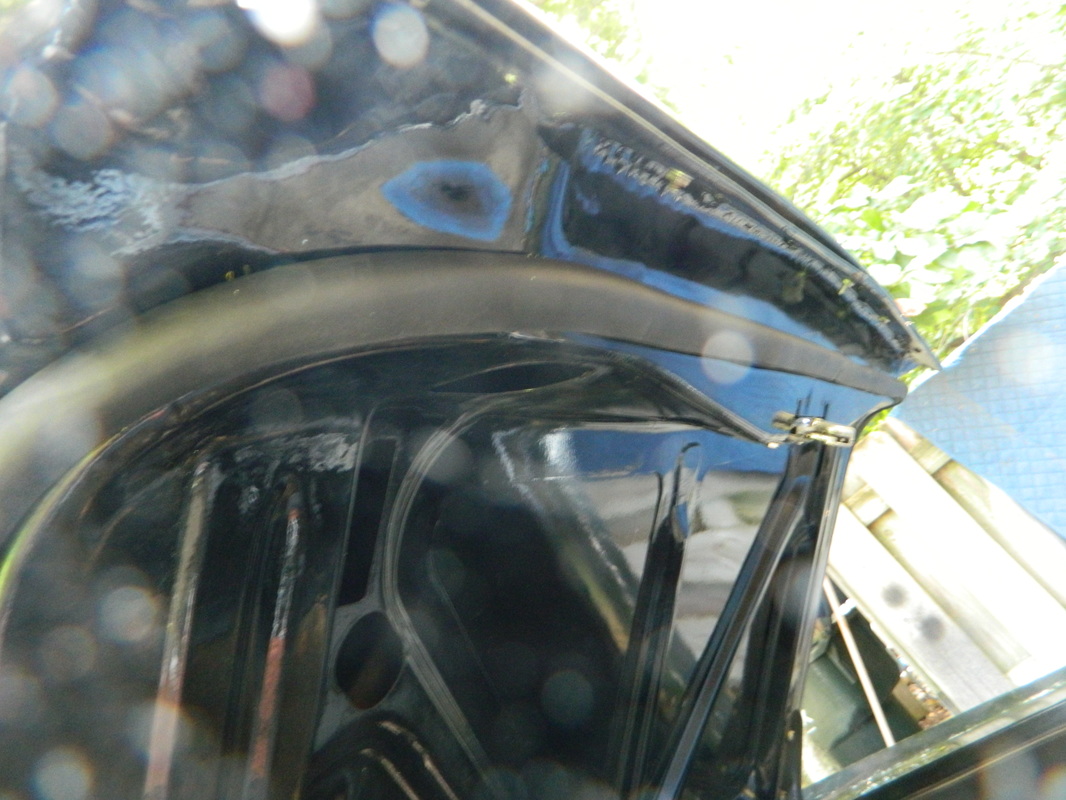
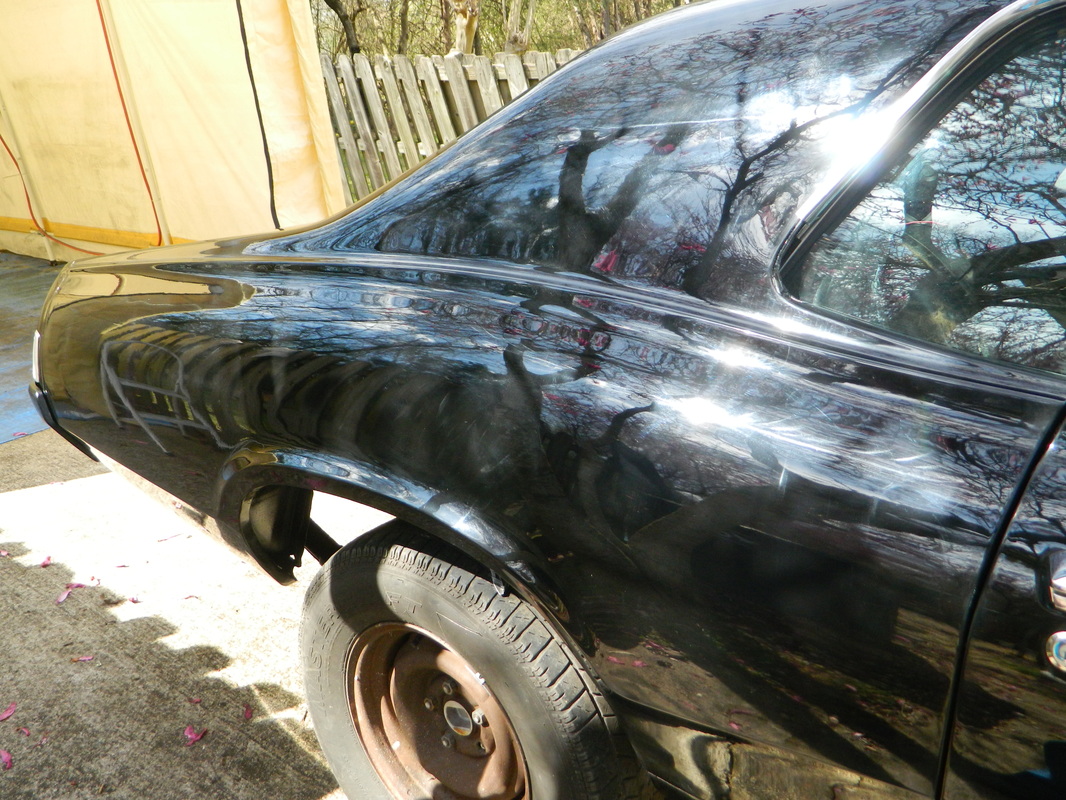
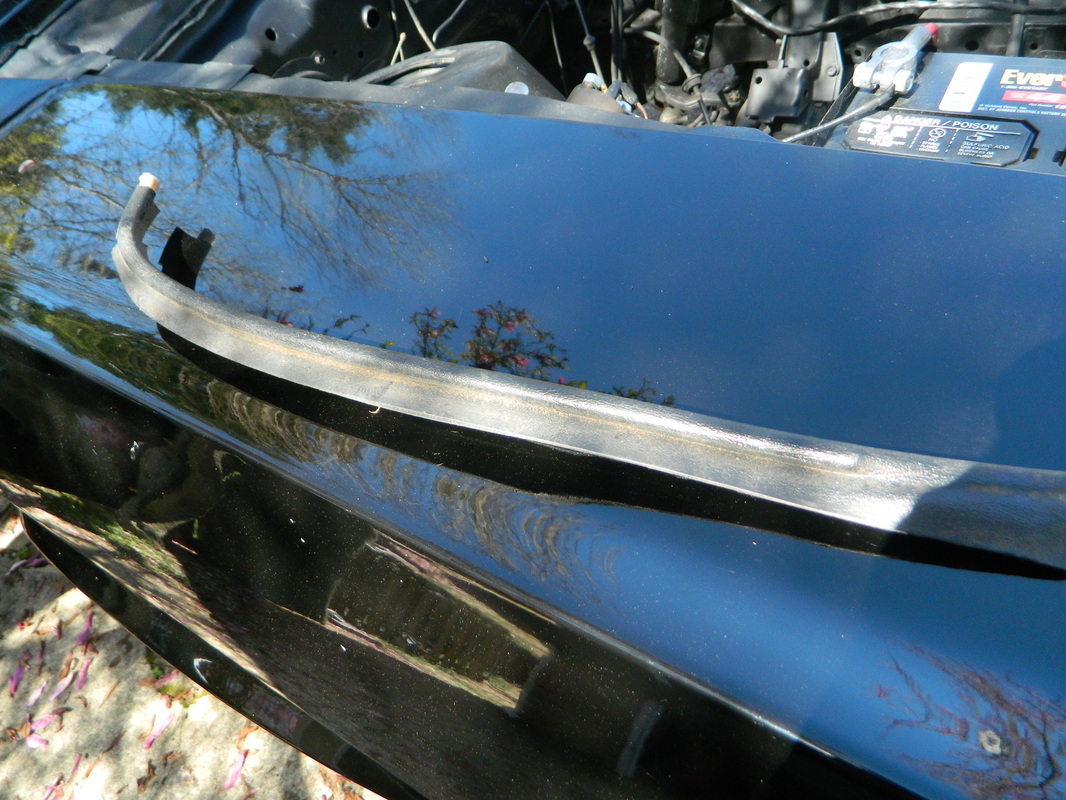
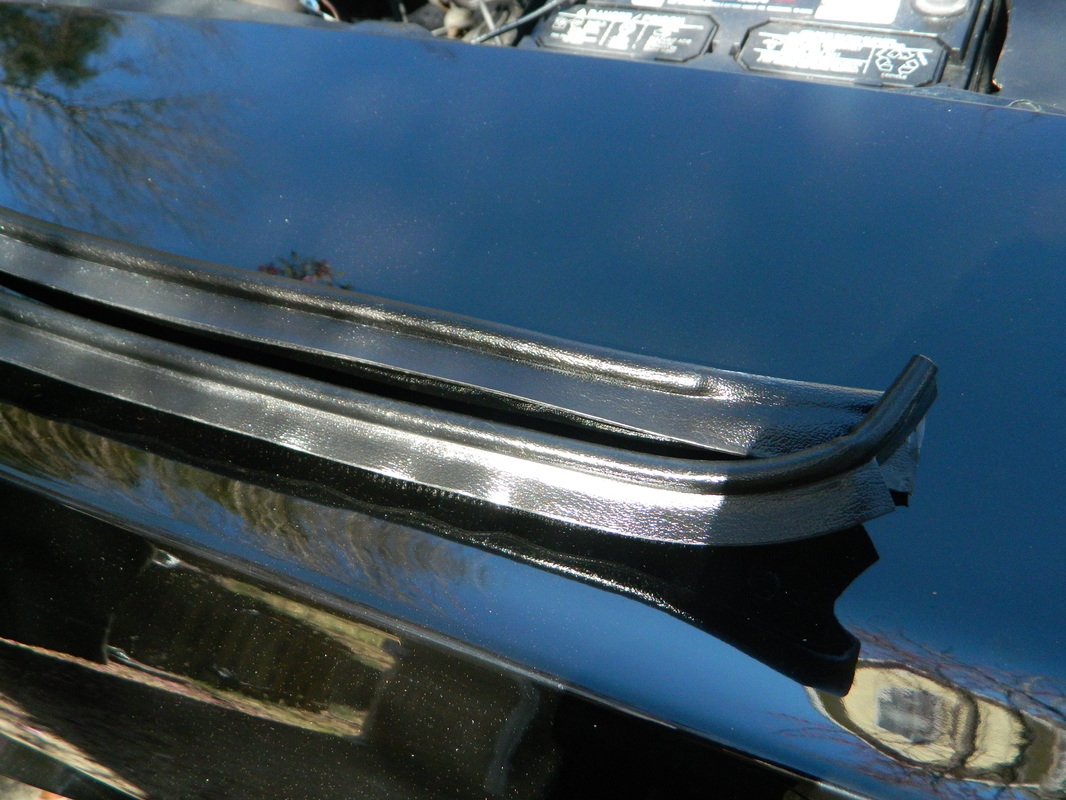
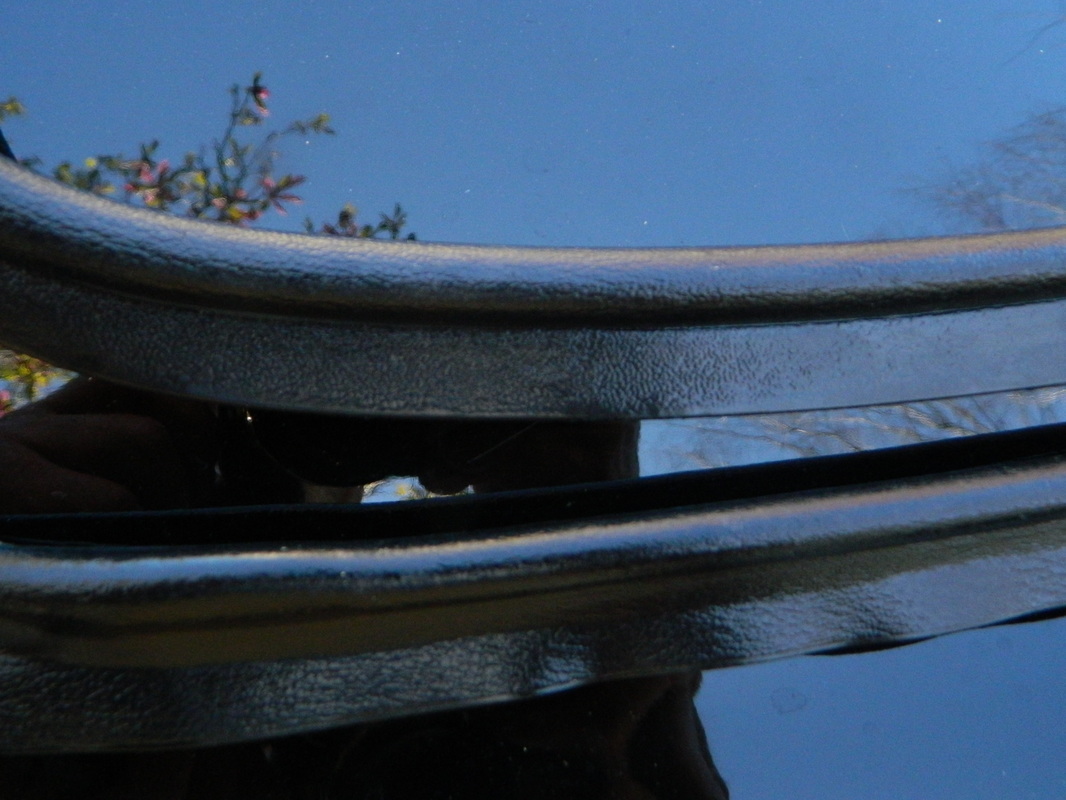
Boy, time flies...been real busy with the new job, so it's hard to find time to work on the Cougar. But today I decided I needed to find where these two stainless trim pieces fit in and...just what I thought, they were supposed to go in with the stainless roof trim that the weather stripping goes into. So, a little back tracking and after cleaning both pieces up, I installed them on both sides. Next, the drip rail mouldings needed some little dents and scratches taken out and then buffed out. And then I installed them too. As usual it doesn't seem like much, but it took 3 hrs. Keep coming back I'm not going to give up yet!


Sept. 6, 2015
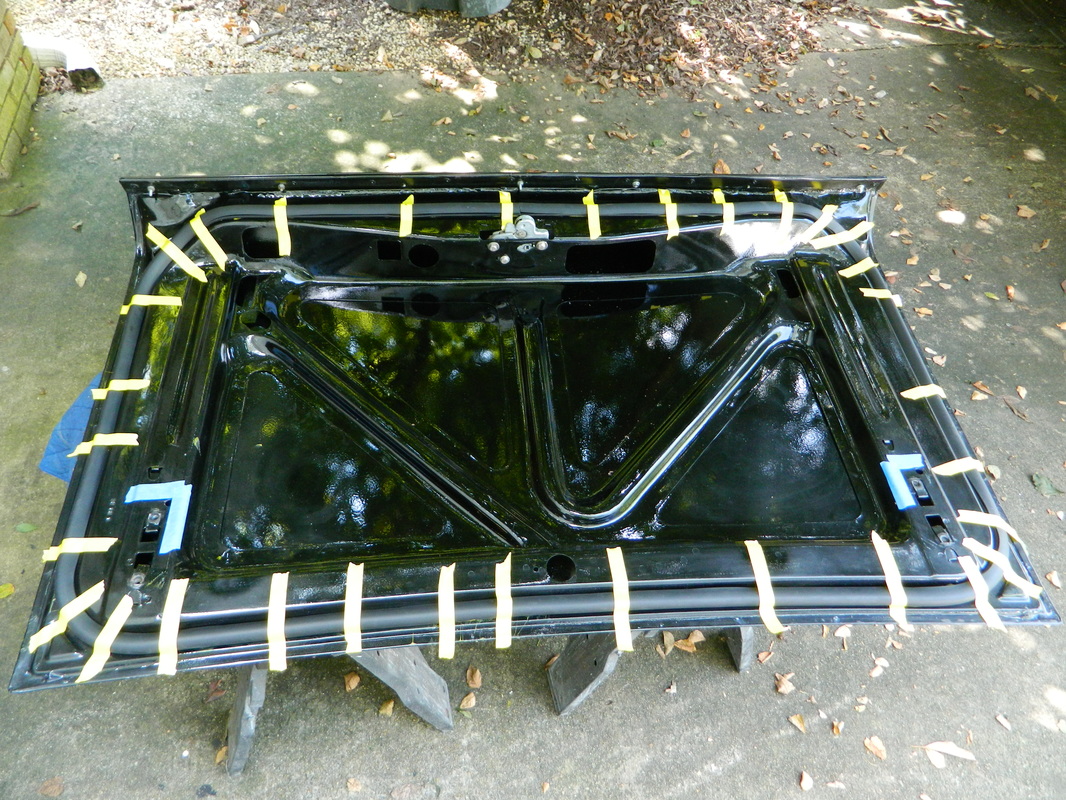
It's been almost a month since i did anything on the Cougar. But since I have 4 days in a row off, I took a half a day to finish up the weather stripping. I glued in the roof rail strip, the lower door strip and the trunk strip too. I did get some help this time, from my wife getting the trunk lid off and then back on and adjusted. She was amazing! total time 2 hrs.


Sept 28, 2015
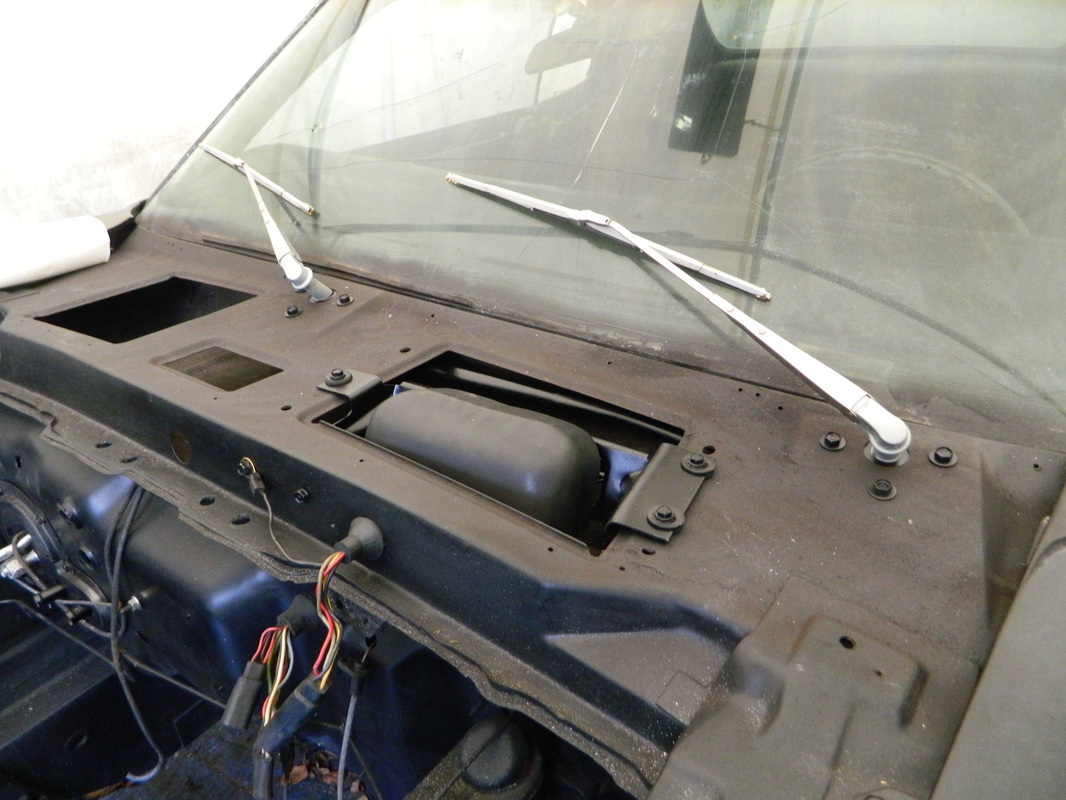
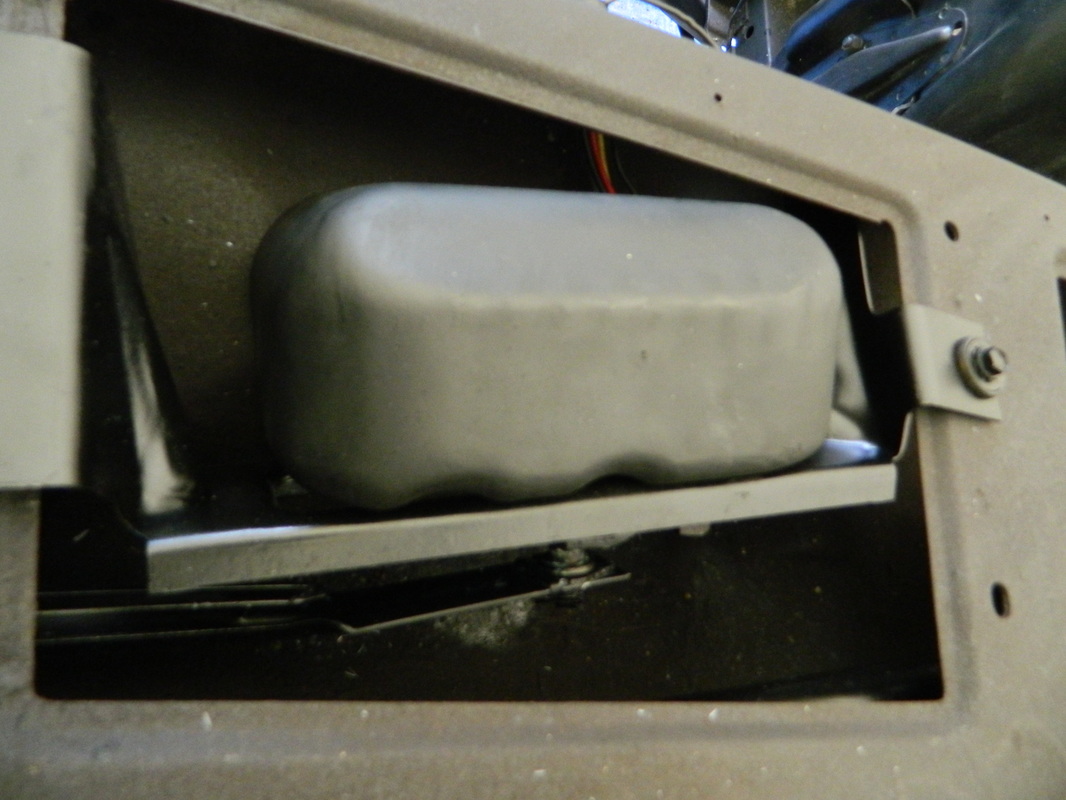
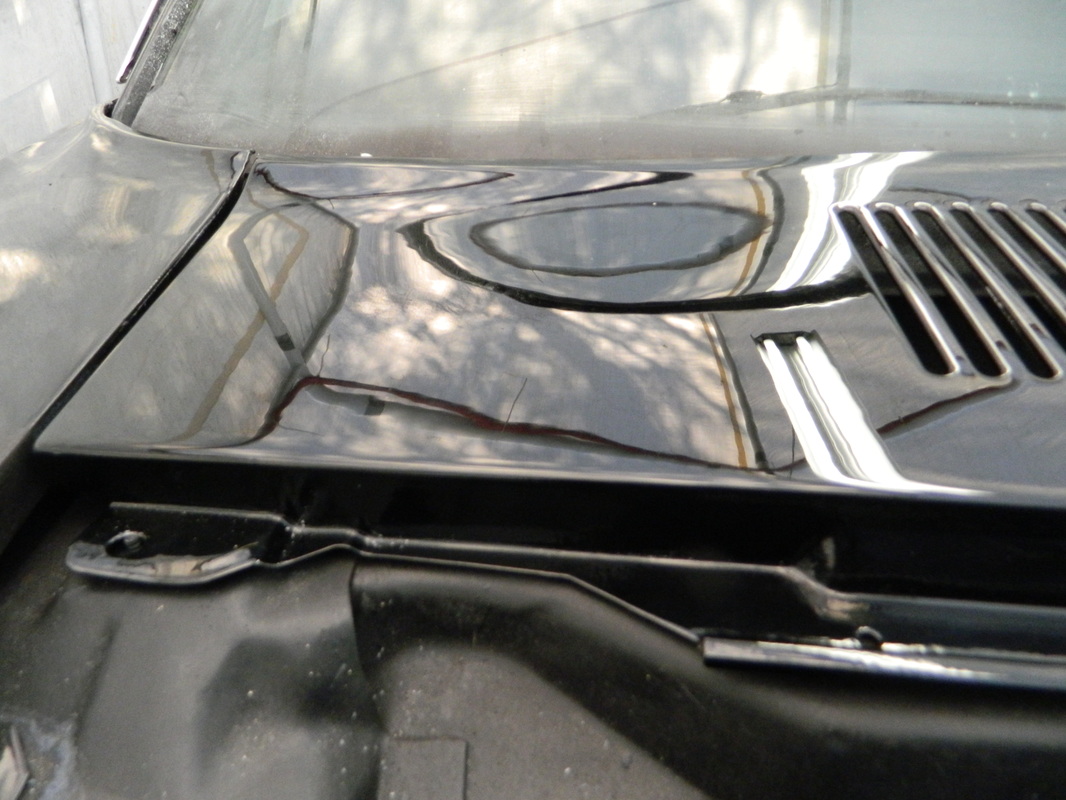
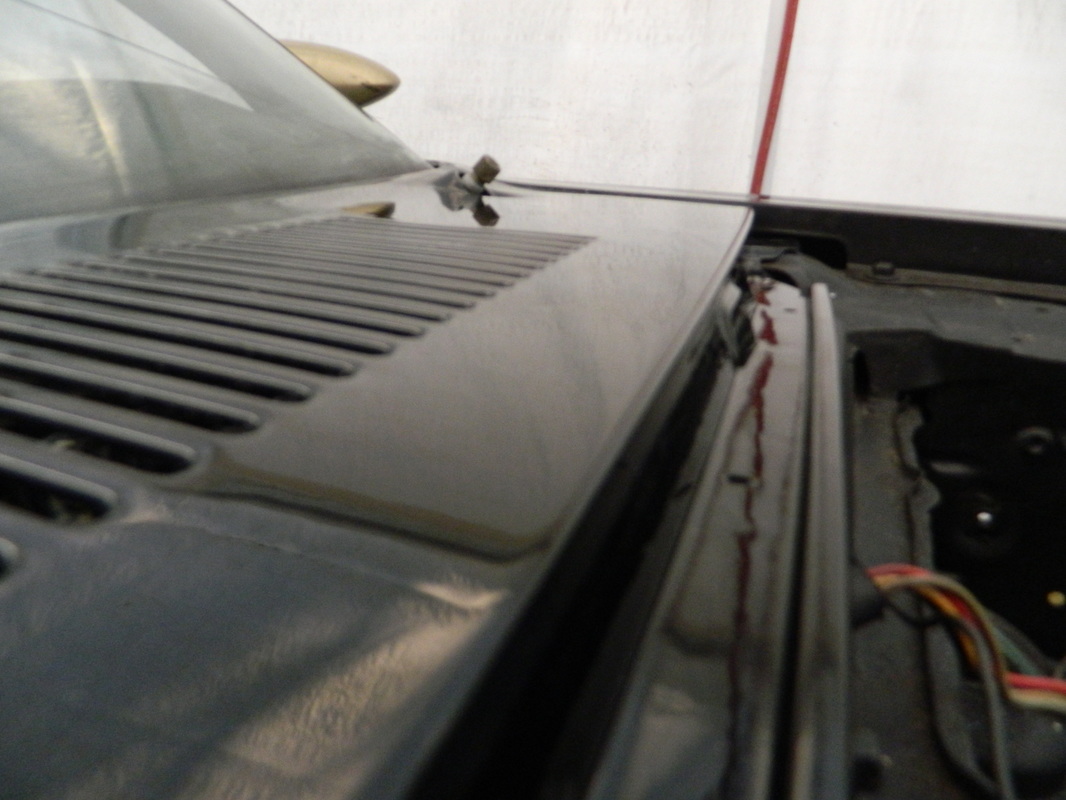
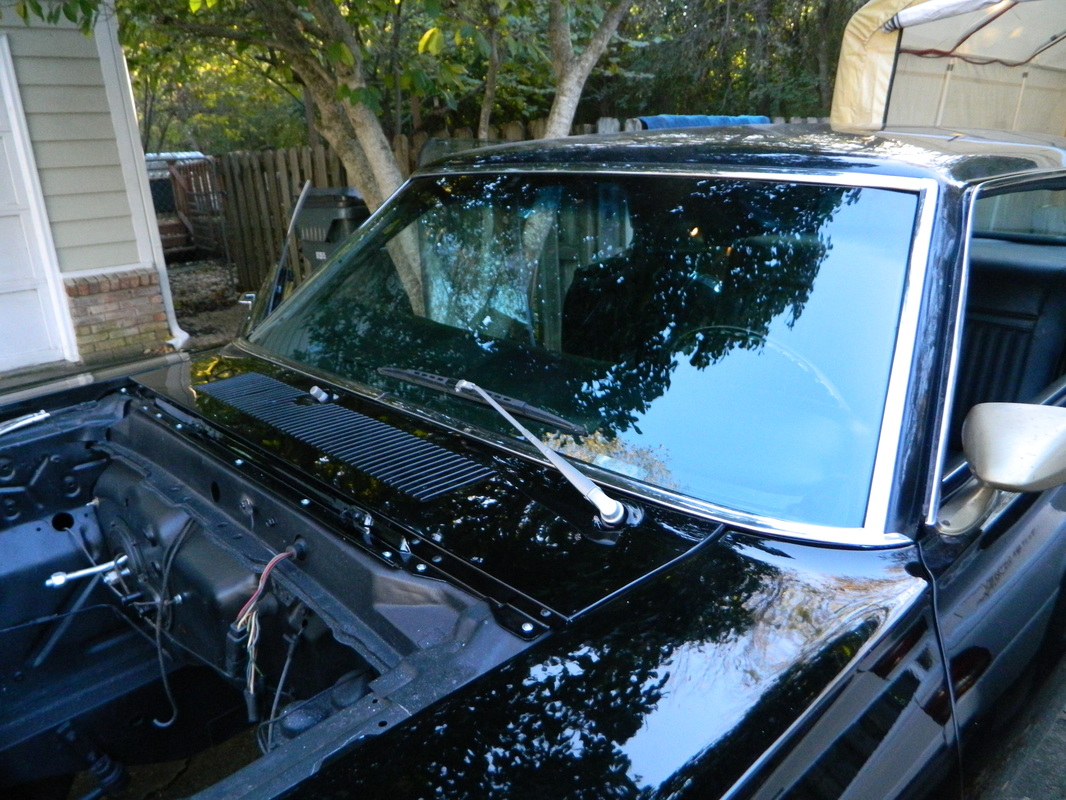
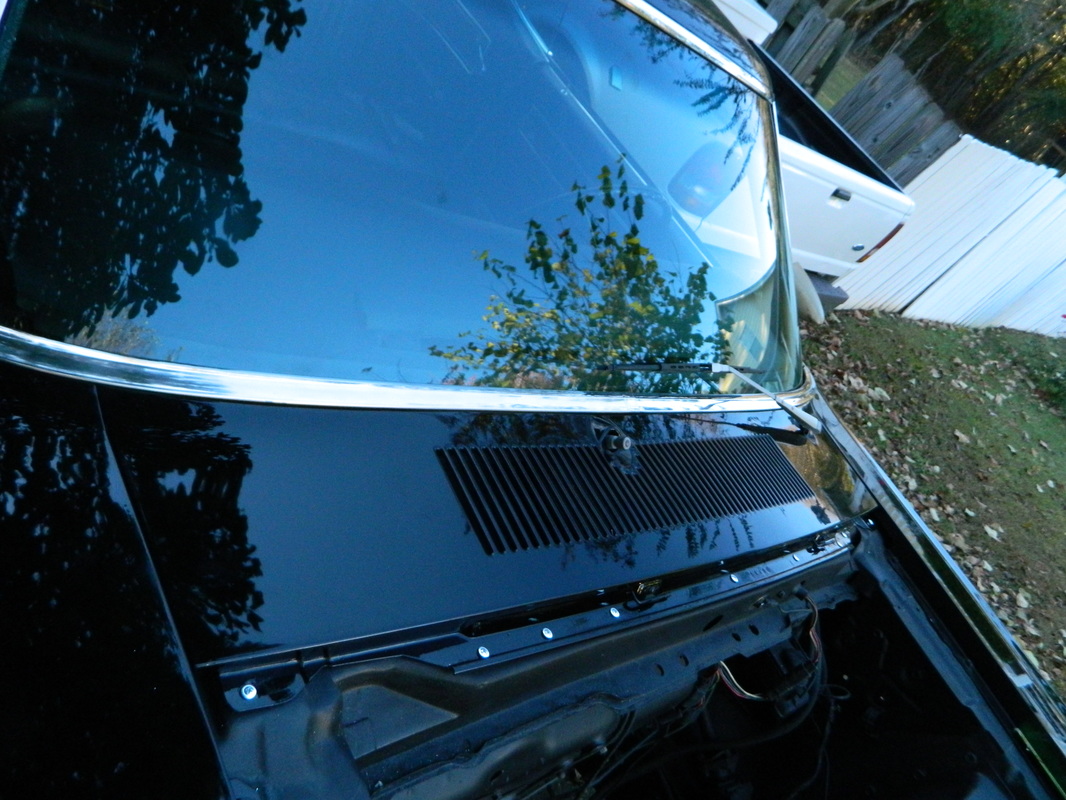
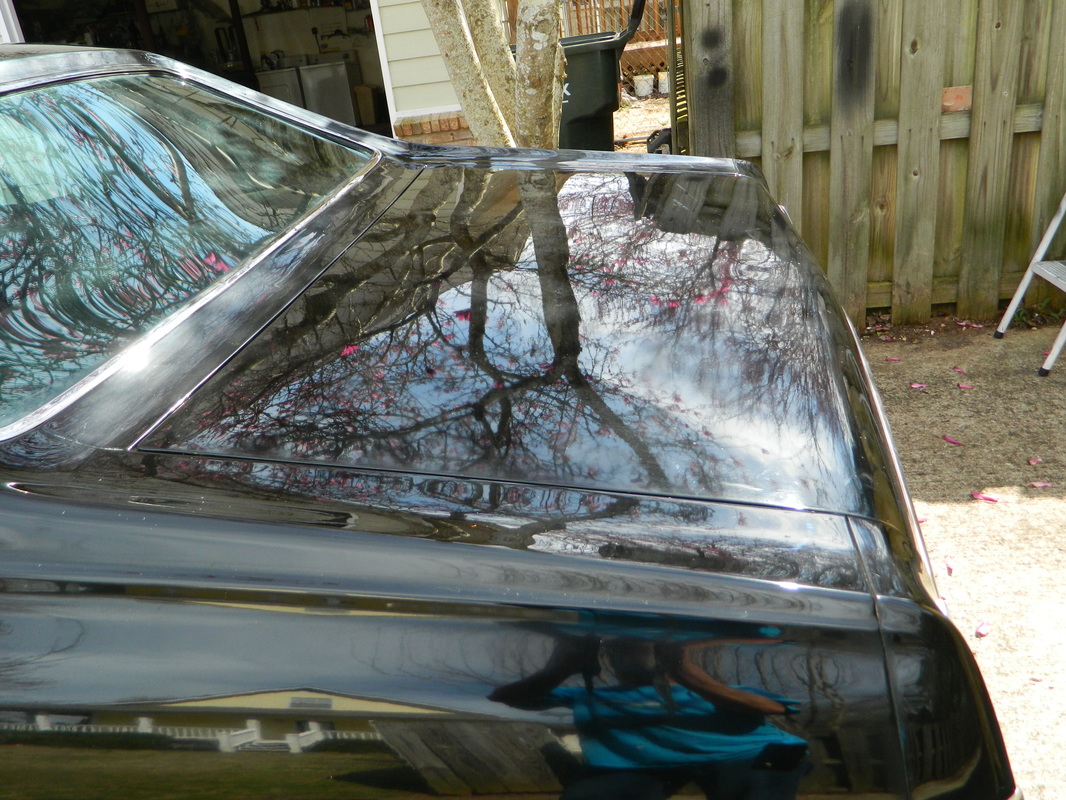
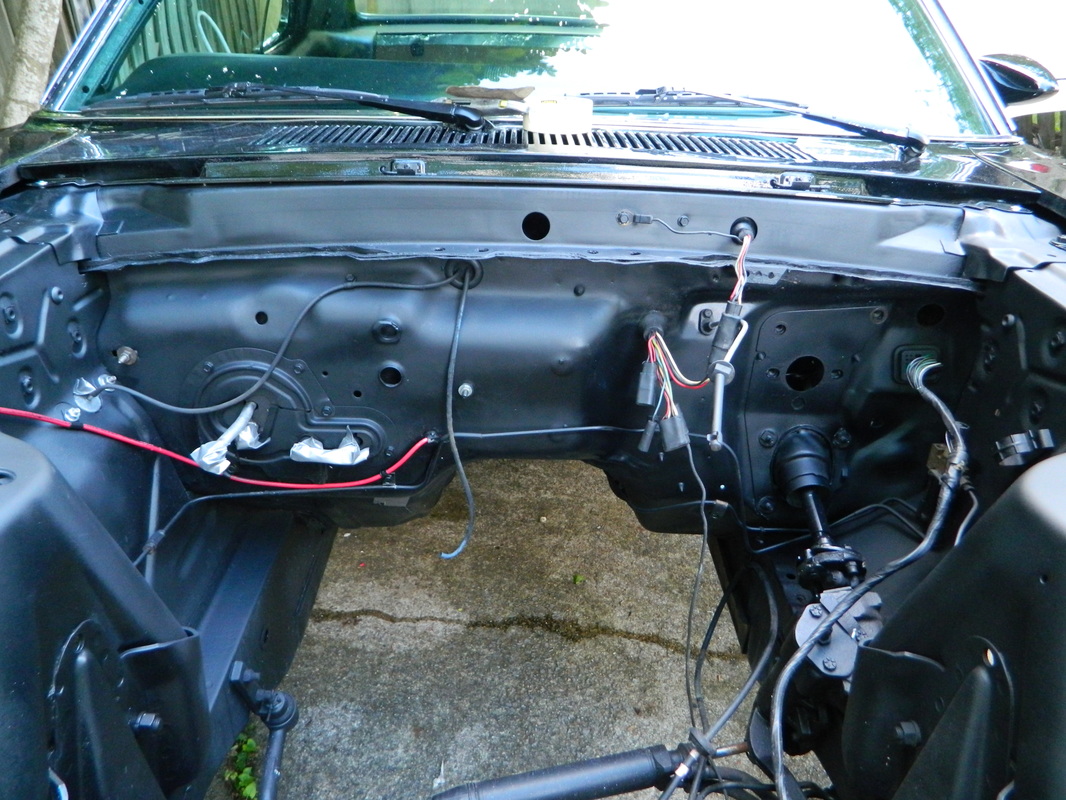
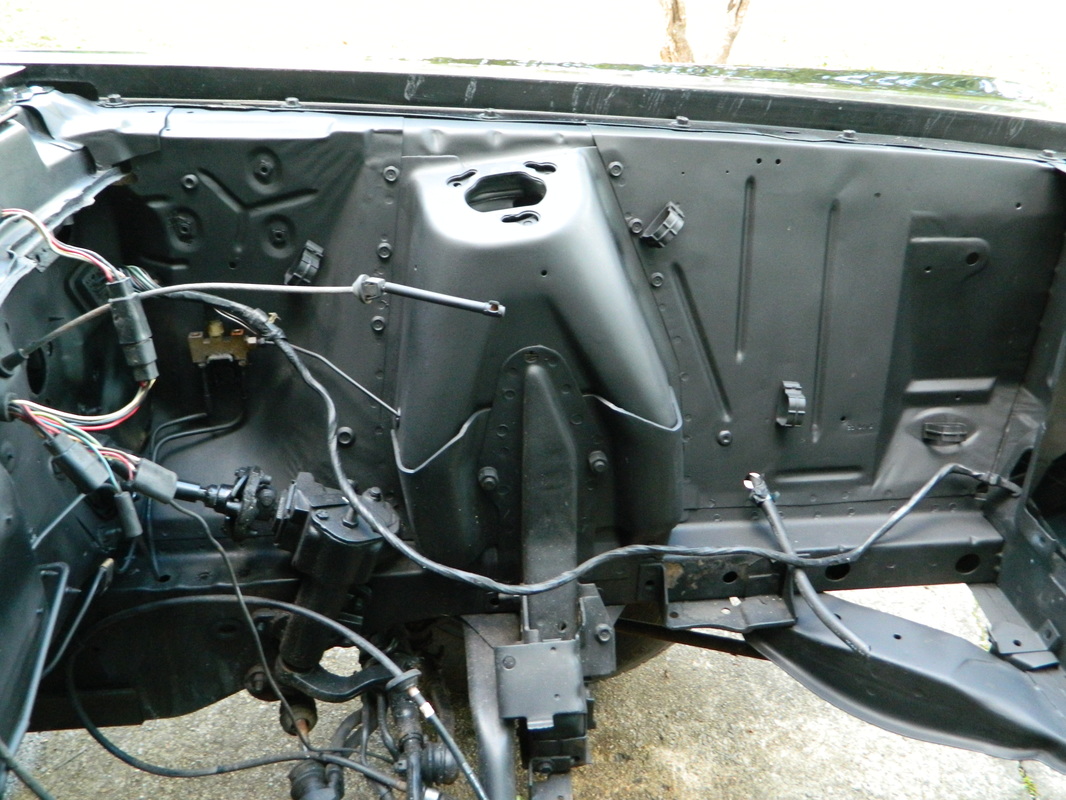
Again..it's been a while since I posted on here. I have a set work schedule now, so I will be able to do more work on the Cougar. I waterproofed the cowl area beneath the wiper assembly a couple of days ago, and today I installed the entire wiper assembly, including the 20 or 30 yr old wiper blades. I would have replaced the blade inserts, but I will probably upgrade them to late model style wipers and that's not a bolt on upgrade. There will be some "engineering" necessary. I think my next to do will be the windshield glass. 2 hrs
oct 12, 2015
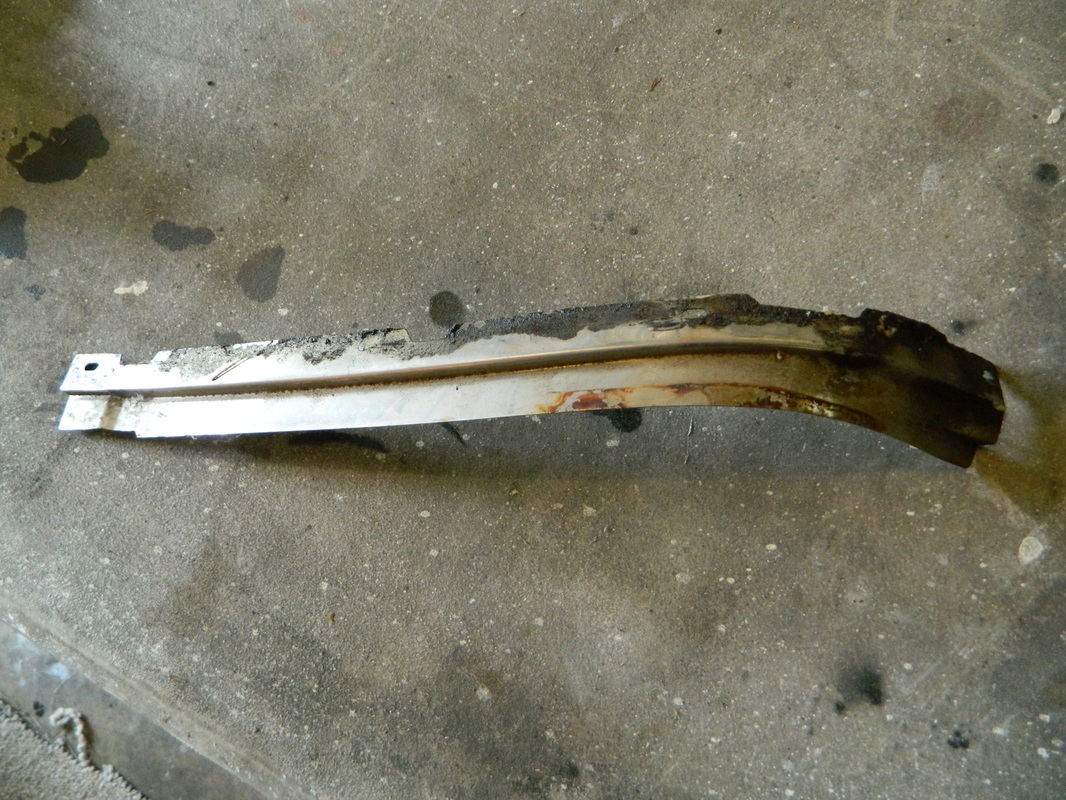
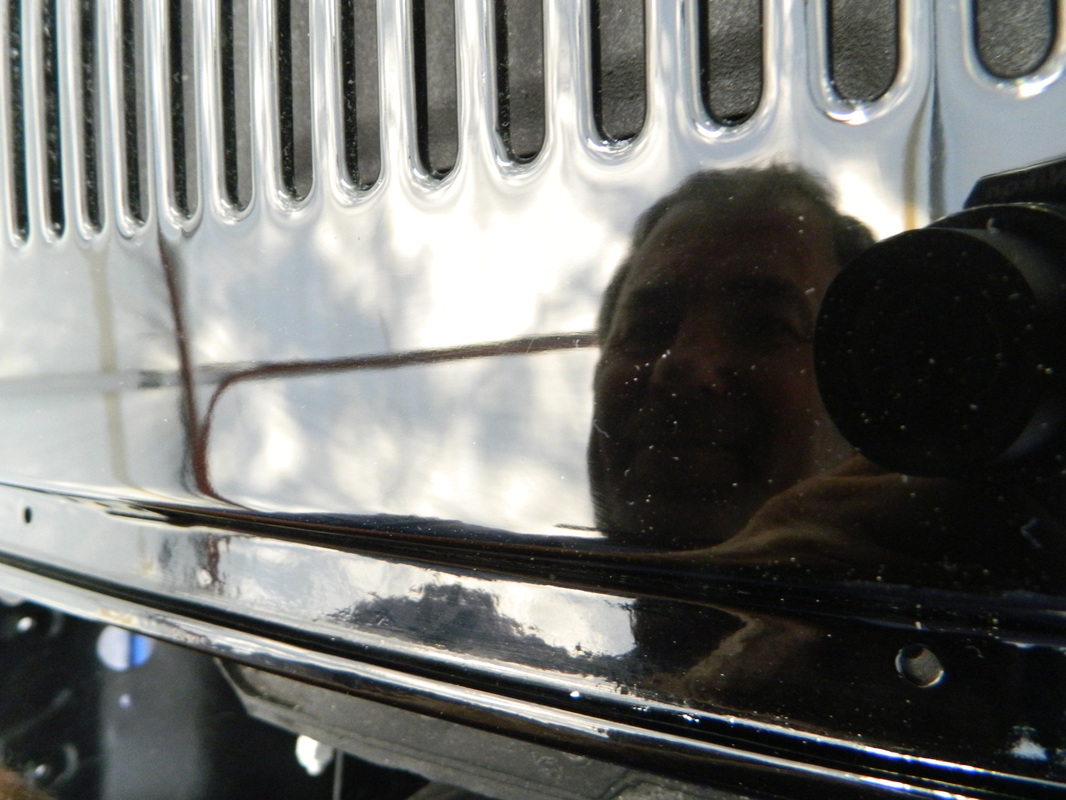
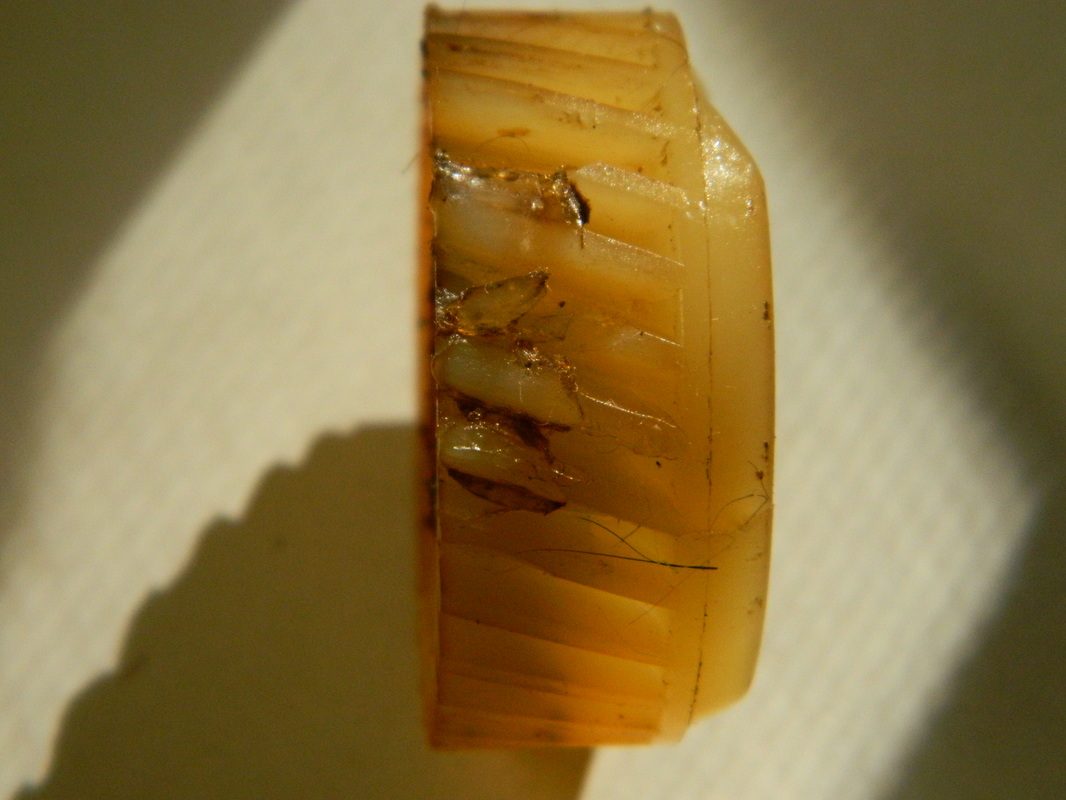
After installing the wiper motor assembly, I hooked up the wires and turned on the wipers. They started working for a couple swipes and then stopped and were making a bad sound. I took it all apart and found that the nylon drive gear in the transmission had stripped. I feel the reason this happened was two fold, the windshield is cracked and very dirty along with the 40 year old hard wiper blades, causing a lot of friction. So, today I went to the pick a part and found a similar wiper motor on an Explorer, but since the connector was different, I opted to "simply" replace the damaged gear, as my motor was working fine. So, after taking the new motor all apart, I finally got the new gear out. It was a dead ringer for the one on mine, EXCEPT the inside diameter of the steel gear,, which is molded into the nylon one, is a couple thousandths of an inch too large. I decided I would try to swap the gear from the old one rather than pay $55 for a rebuilt one. Of course you can't just buy the gear..that would be too easy! So, I first, used a punch to drive the old one out of the nylon gear, kinda cracking the nylon gear in the process. Then, I used a propane torch to heat up the steel gear and extract the steel gear from it, then heated up the old steel gear and melted it into the good nylon gear. After reassembling the motor, it works just fine! After that, I waxed up the cowl and set it in place to see what it would look like. That's nice! In the pics you can see the damaged nylon gear and the steel gear I removed. 4 hrs.


Oct 19, 2015
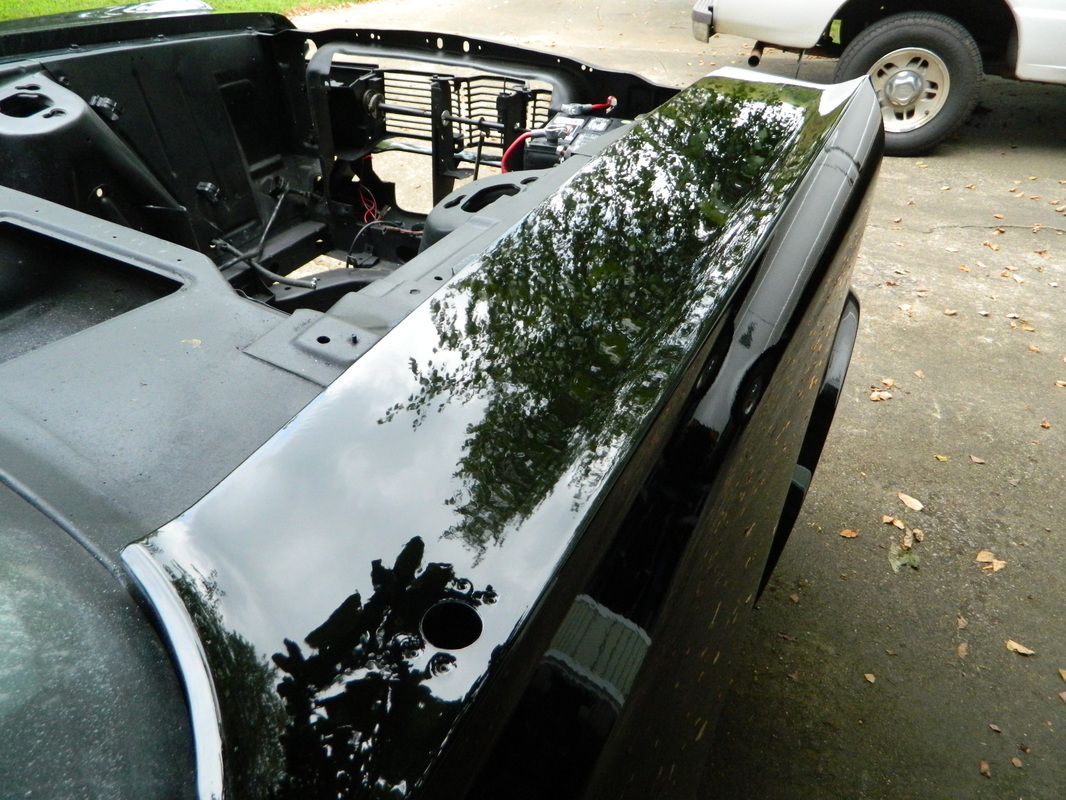
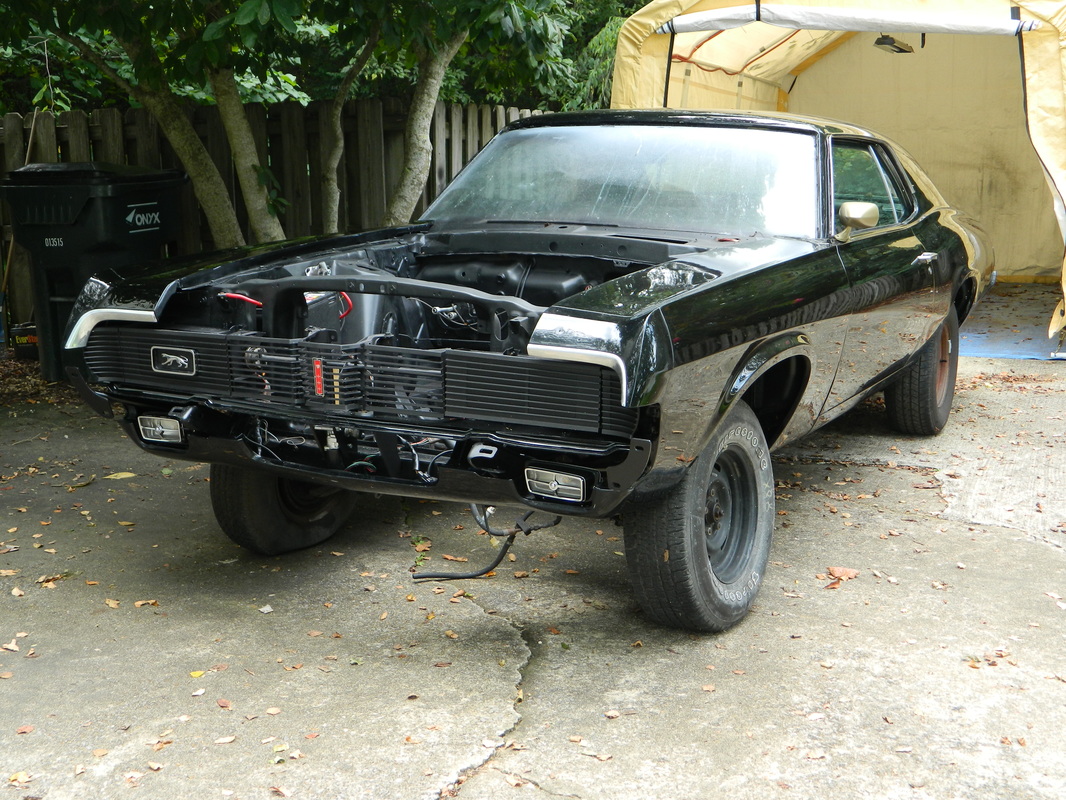
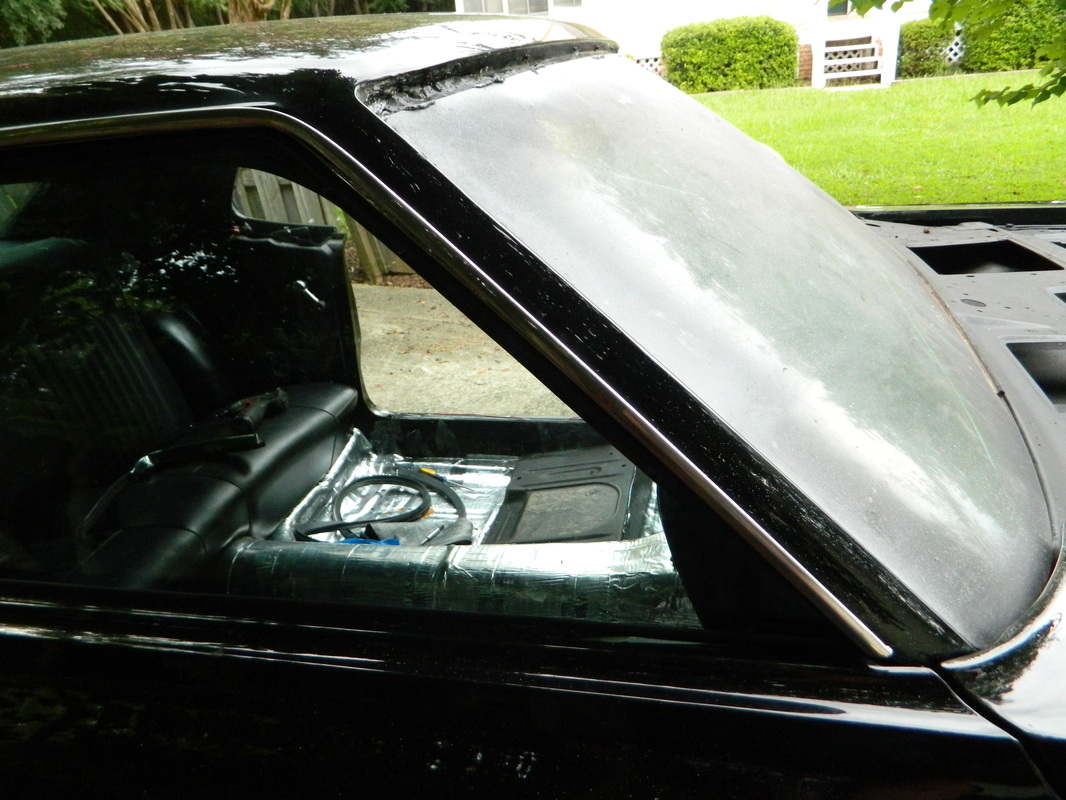
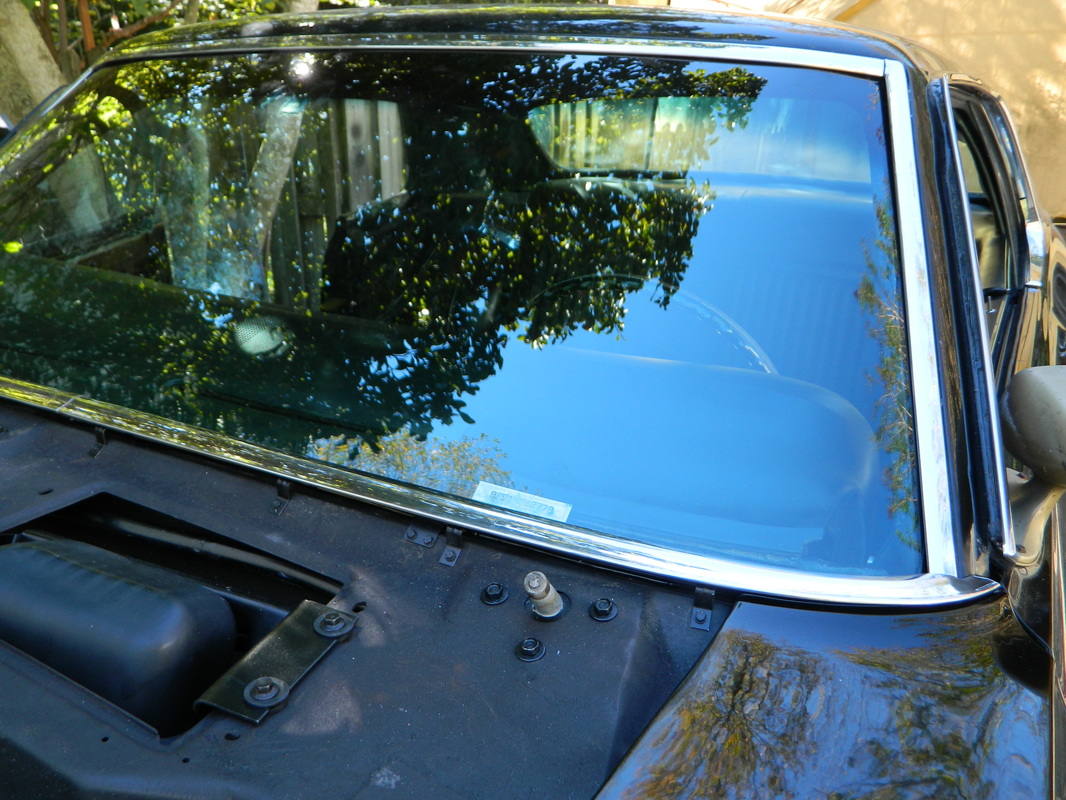
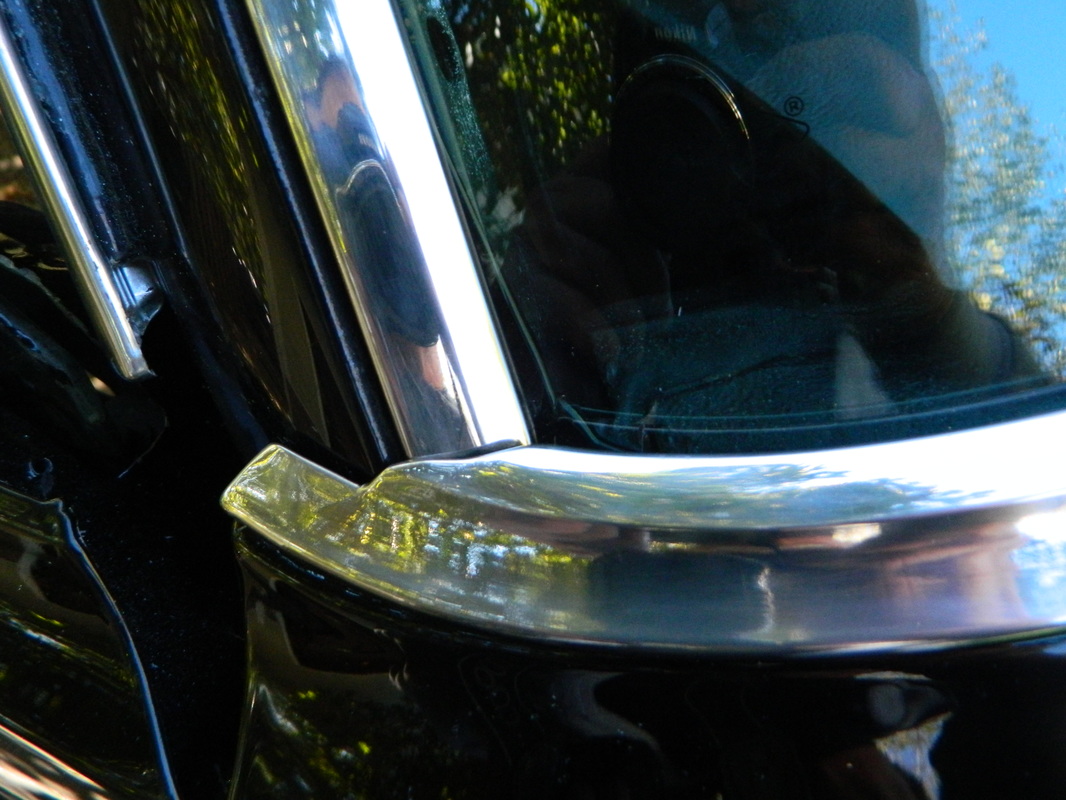
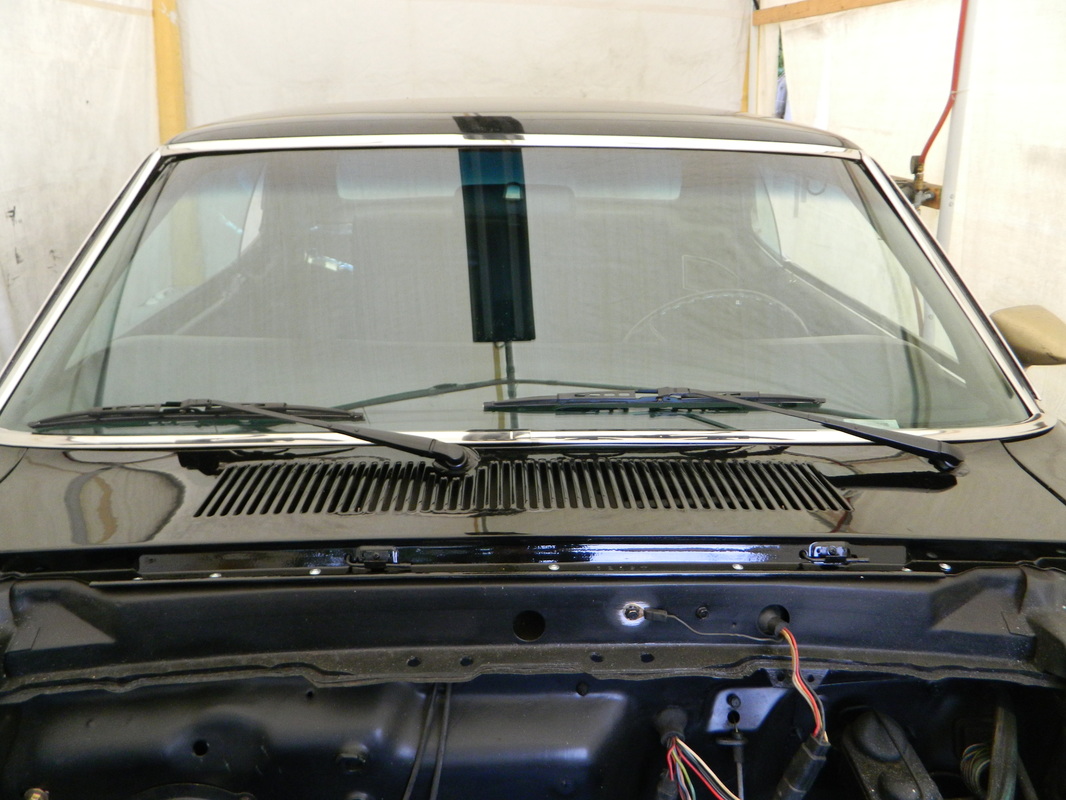
I finally did something that really feels like im getting somewhere with this build...I had a windshield installed today and it looks great!
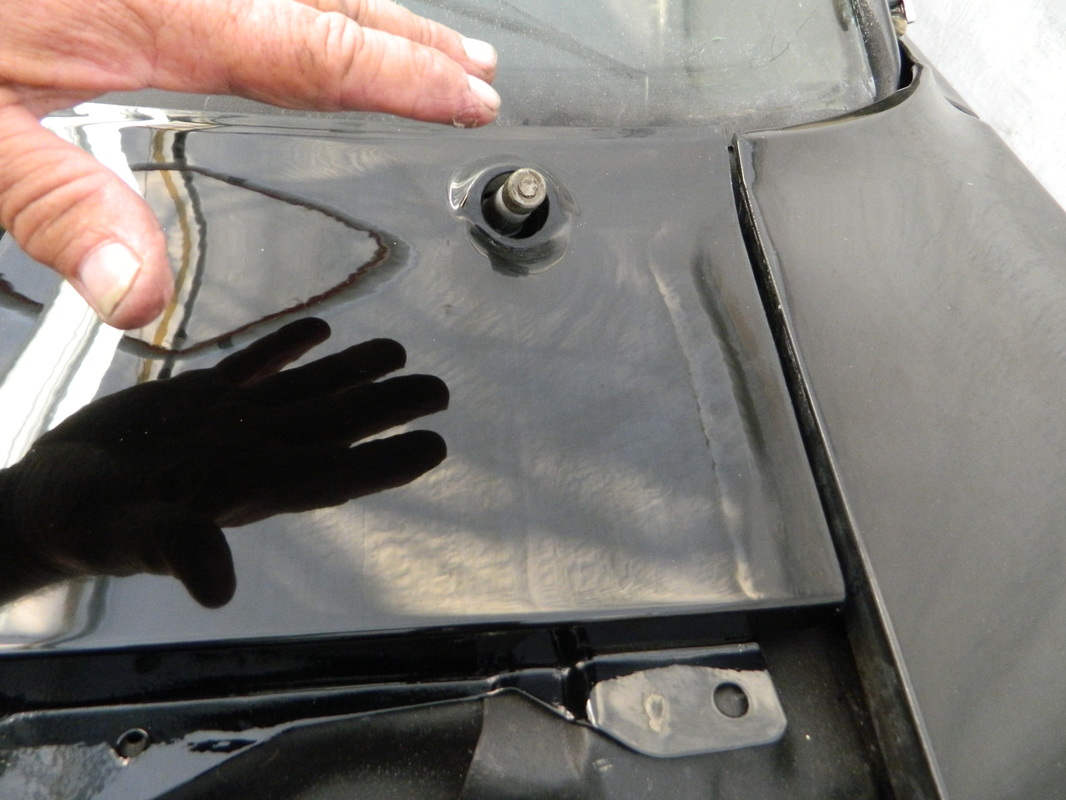
I also polished up the windshield trim and installed it and the cowl. I experimented with a wiper blade from my Ranger it's an 18" and the hook style. I drilled out the pivot pin on the Anco wiper that was on the car and with a little tweaking and a small machine screw as a pivot, it works great. I'm getting fired up to get this Cougar on the road! 4 hrs
I also polished up the windshield trim and installed it and the cowl. I experimented with a wiper blade from my Ranger it's an 18" and the hook style. I drilled out the pivot pin on the Anco wiper that was on the car and with a little tweaking and a small machine screw as a pivot, it works great. I'm getting fired up to get this Cougar on the road! 4 hrs

Oct 31, 2015
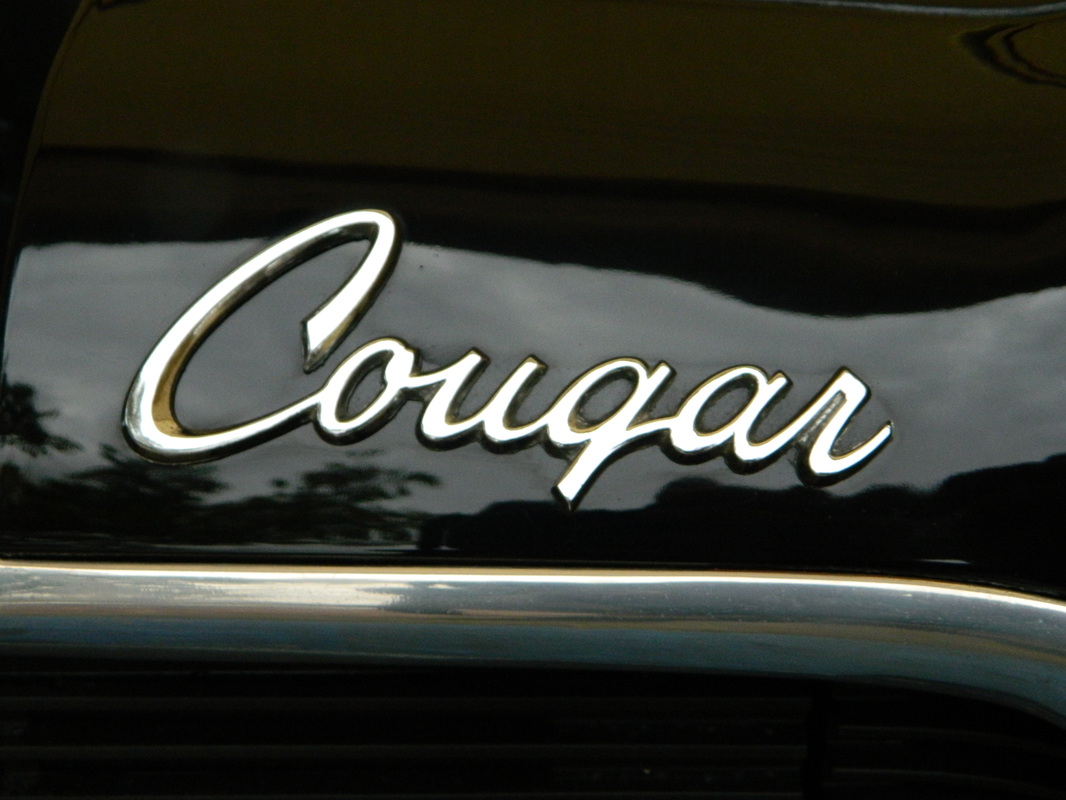
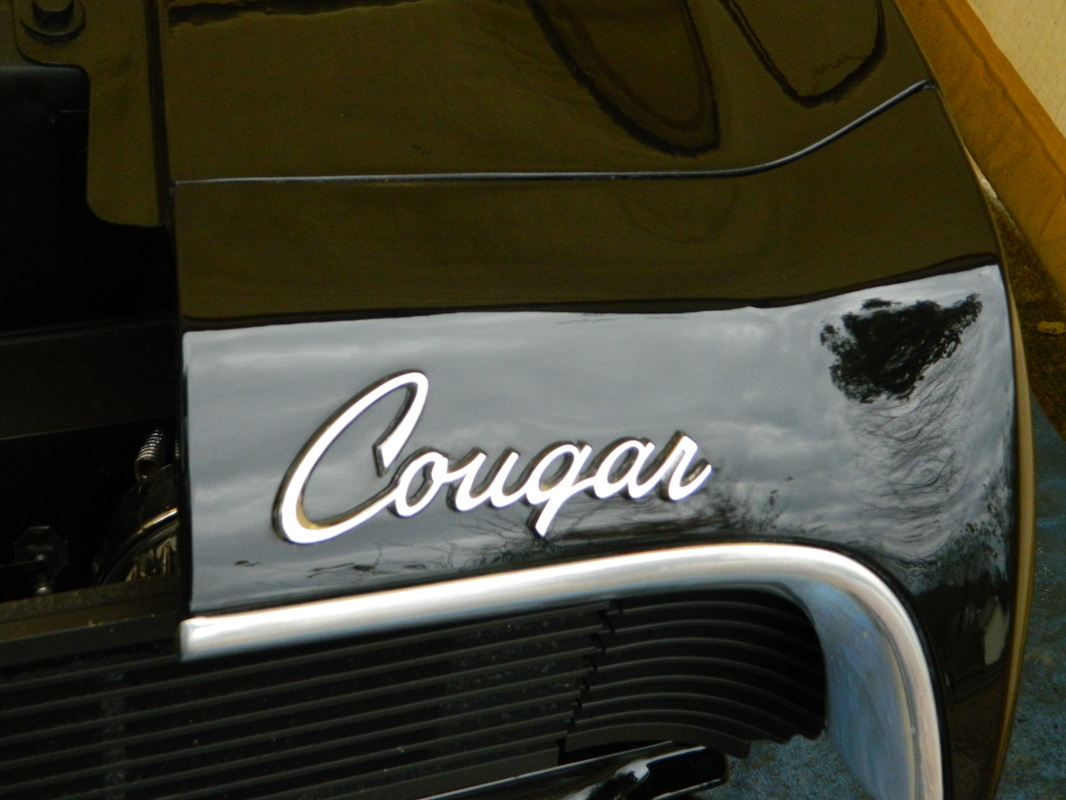
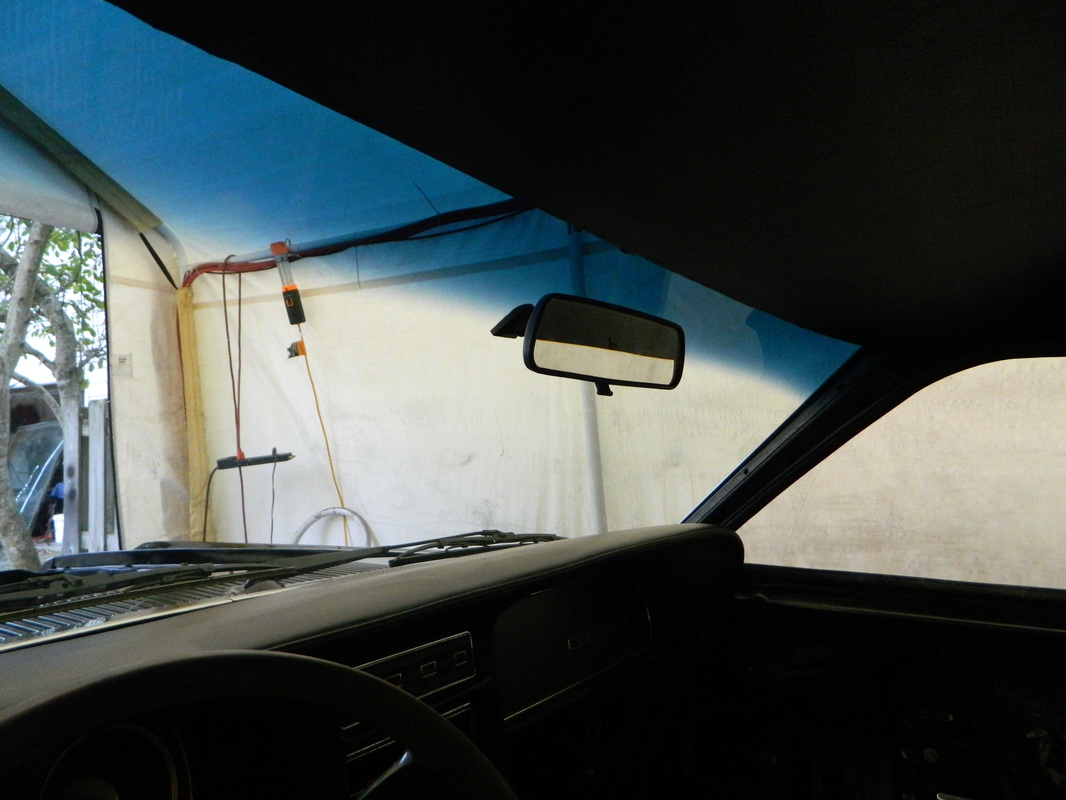
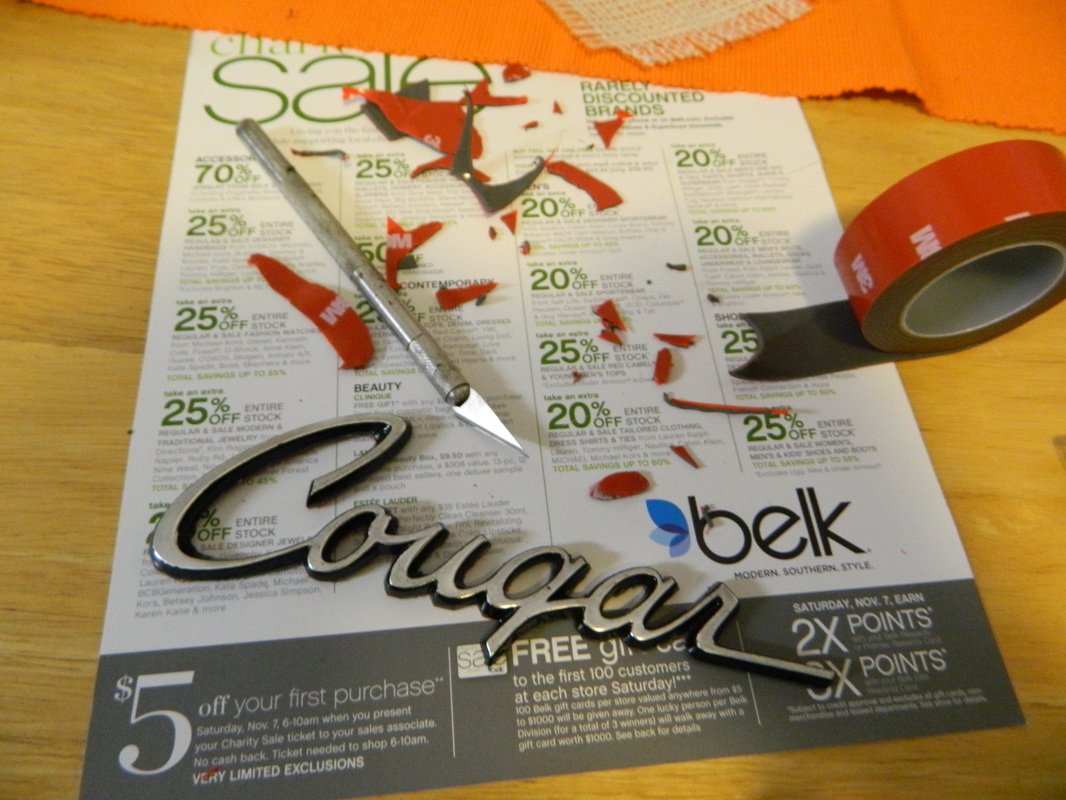
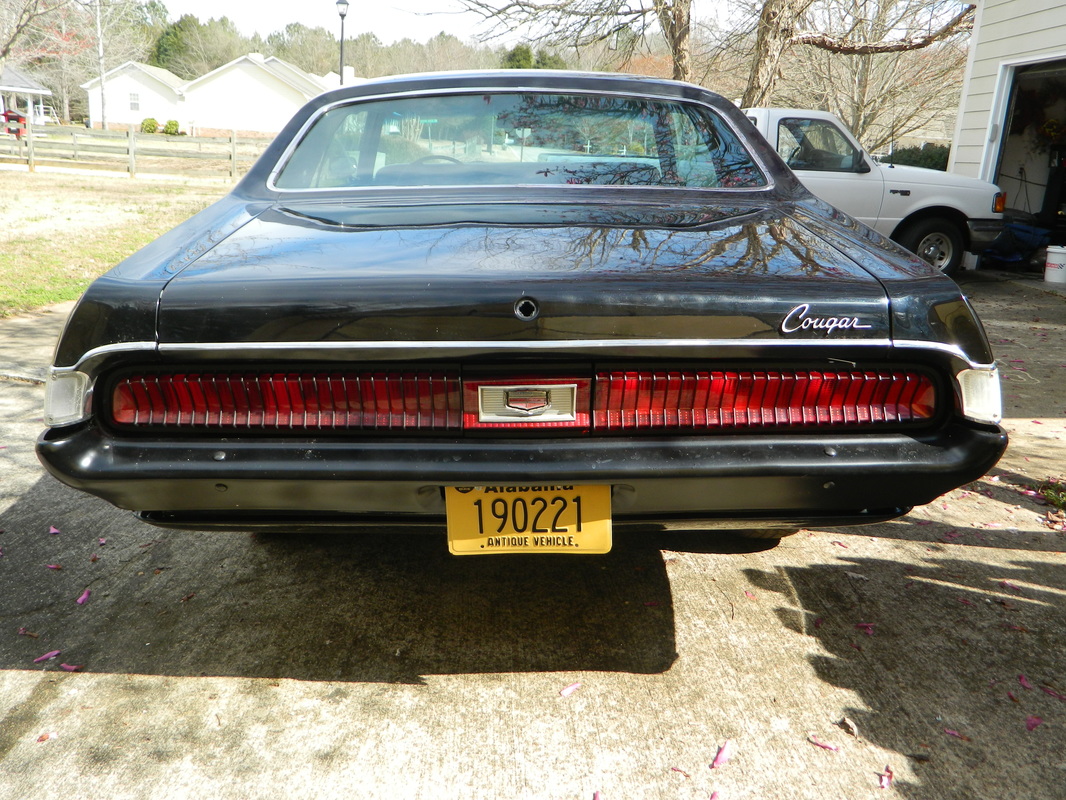
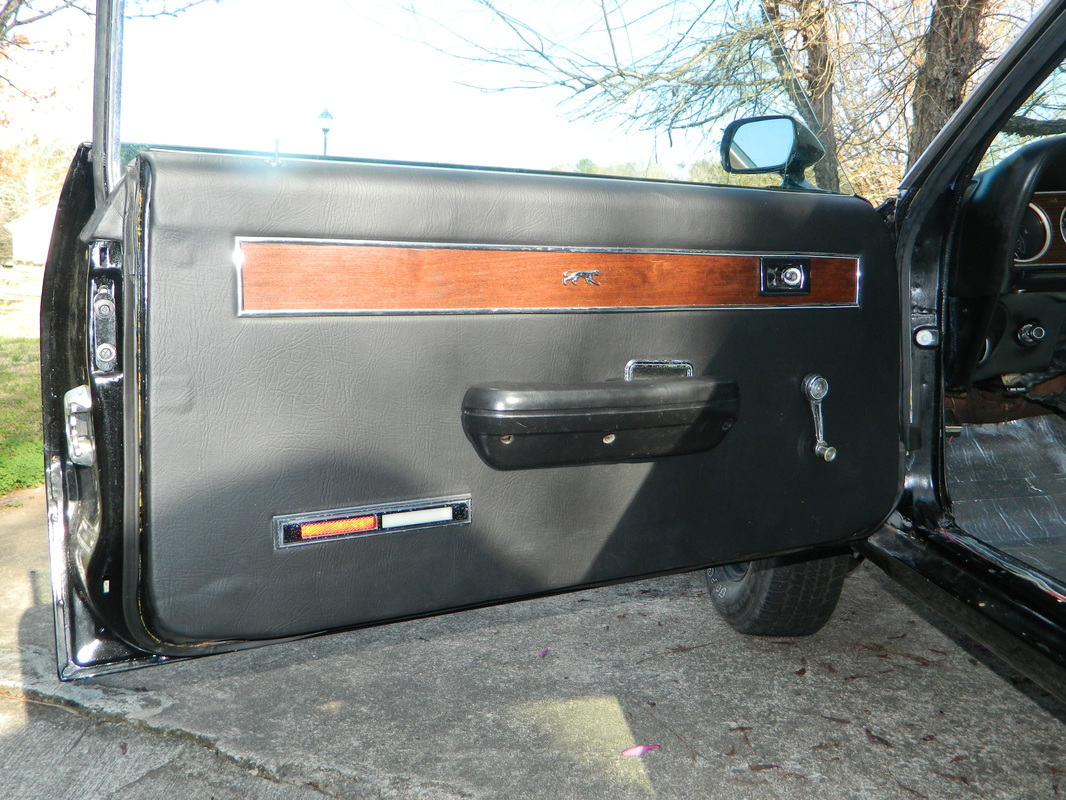
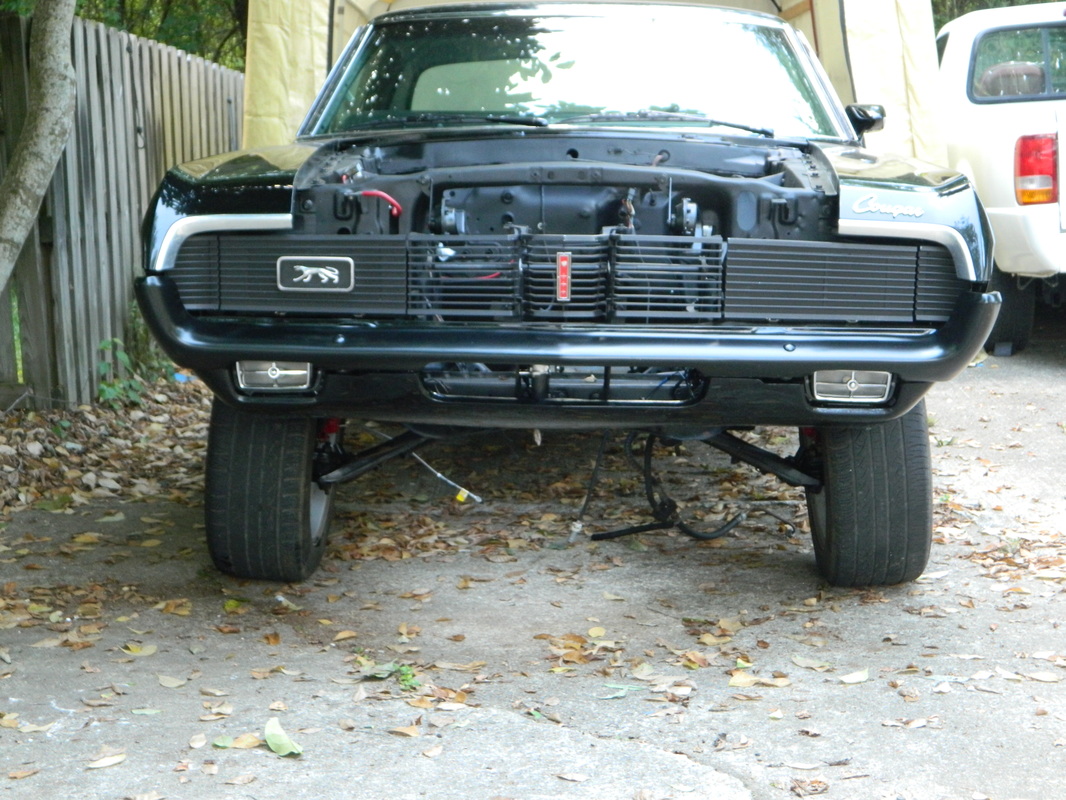
Happy Halloween! I accomplished 3 things today. First, I bought a very nice front Cougar script emblem, which was missing when I bought the car and installed it. Next, I finished the other wiper conversion, and then painted both wiper arms satin black to match the blades. Then, I installed a newer late model style rear view mirror on the new windshield. 2 hrs.


Nov 1, 2015
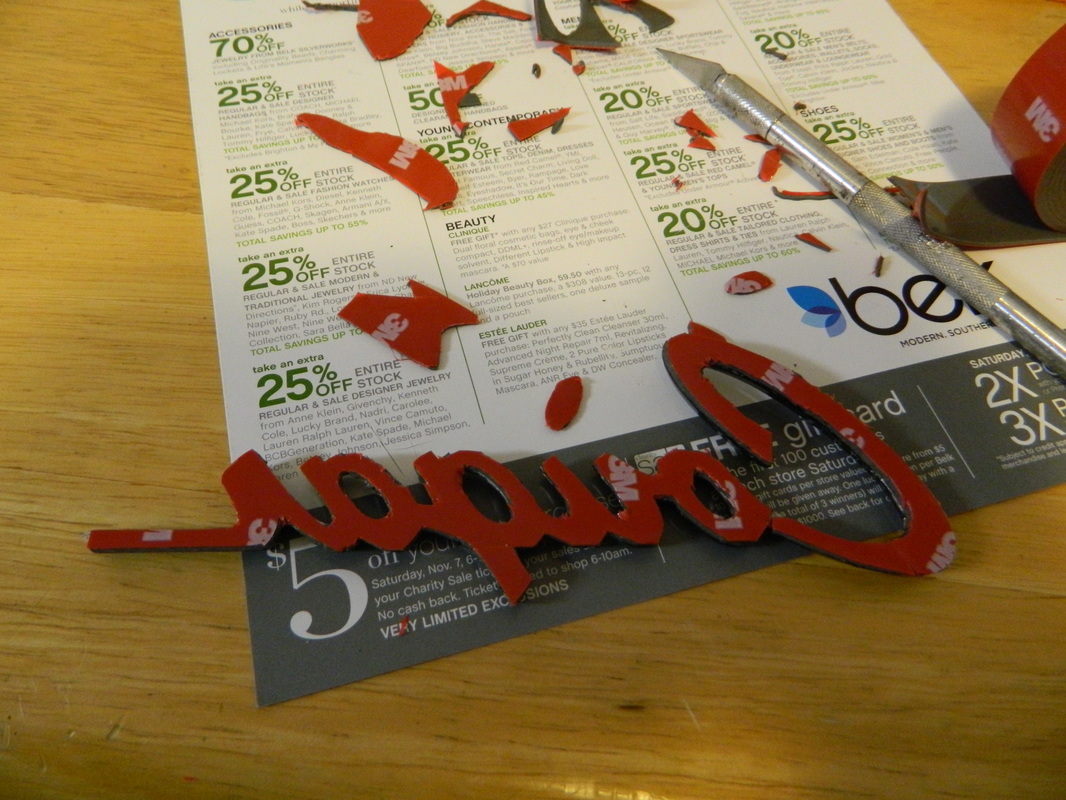
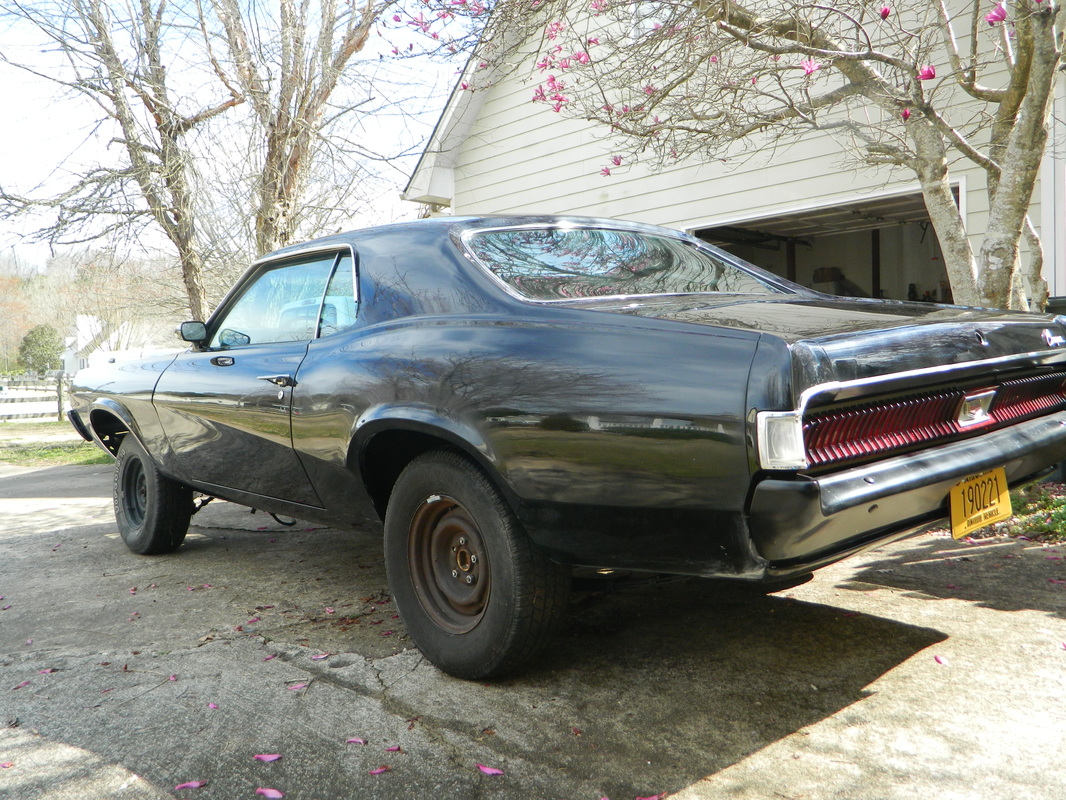
Today, after putting the front Cougar script on, I got some 3M trim tape and installed it on the trunk lid. After looking at many pictures, including the ones I took when I first bought the car, I found that the location that mine was in originally was too far from the edge of the lid. I also found that a LOT of cougars didn't have the emblem at all. I know XR-7's didn't, but some standards and Eliminators, and convertibles didn't either. All of the one's I did see were about 2-3 inches from the edge and mine was more like 6". I think it looks better closer. 1 hr
Nov 29, 2015
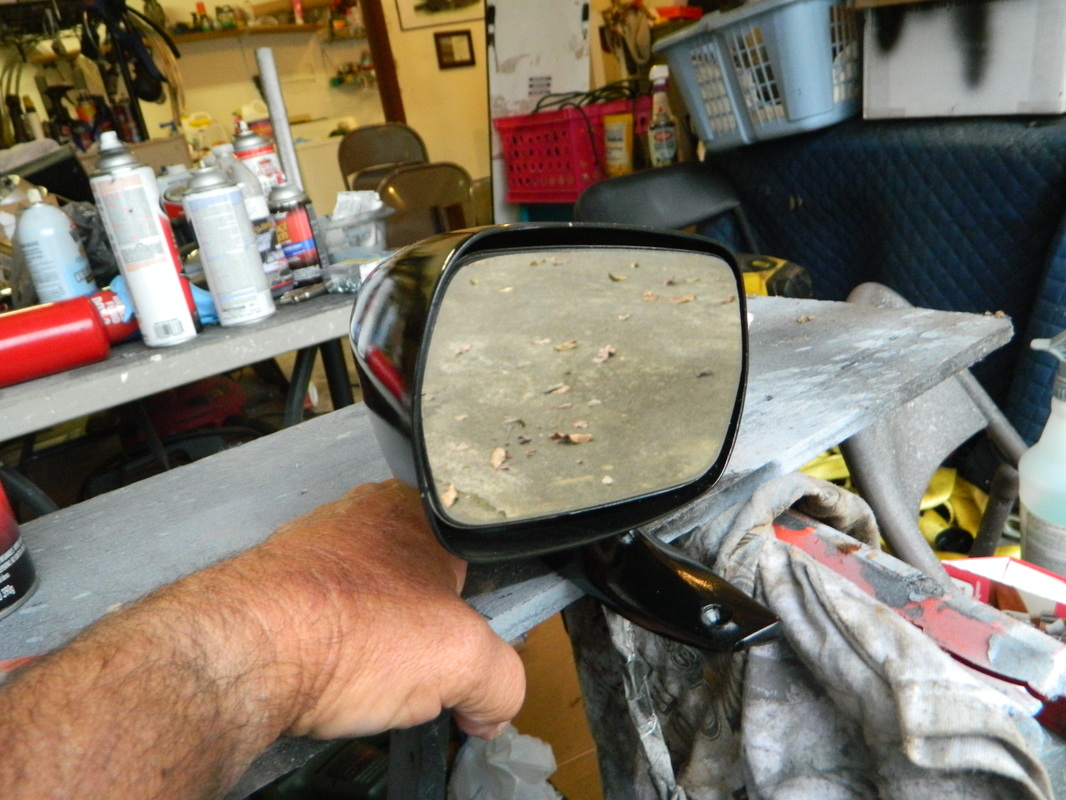
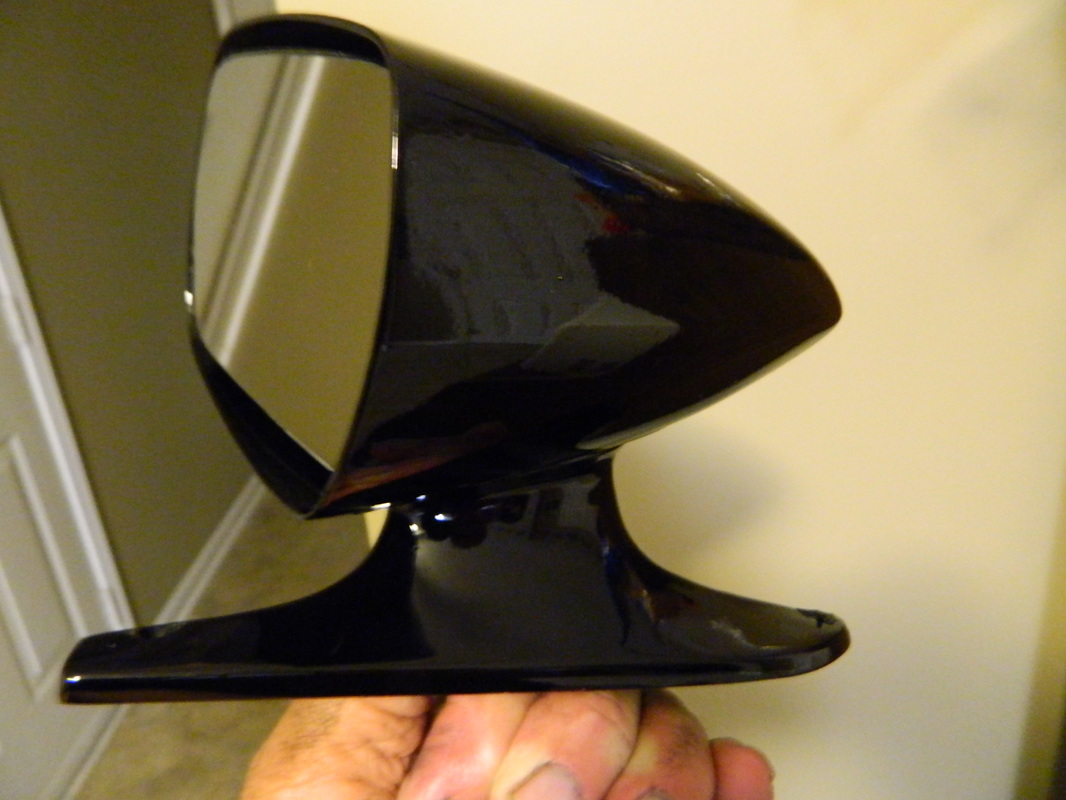
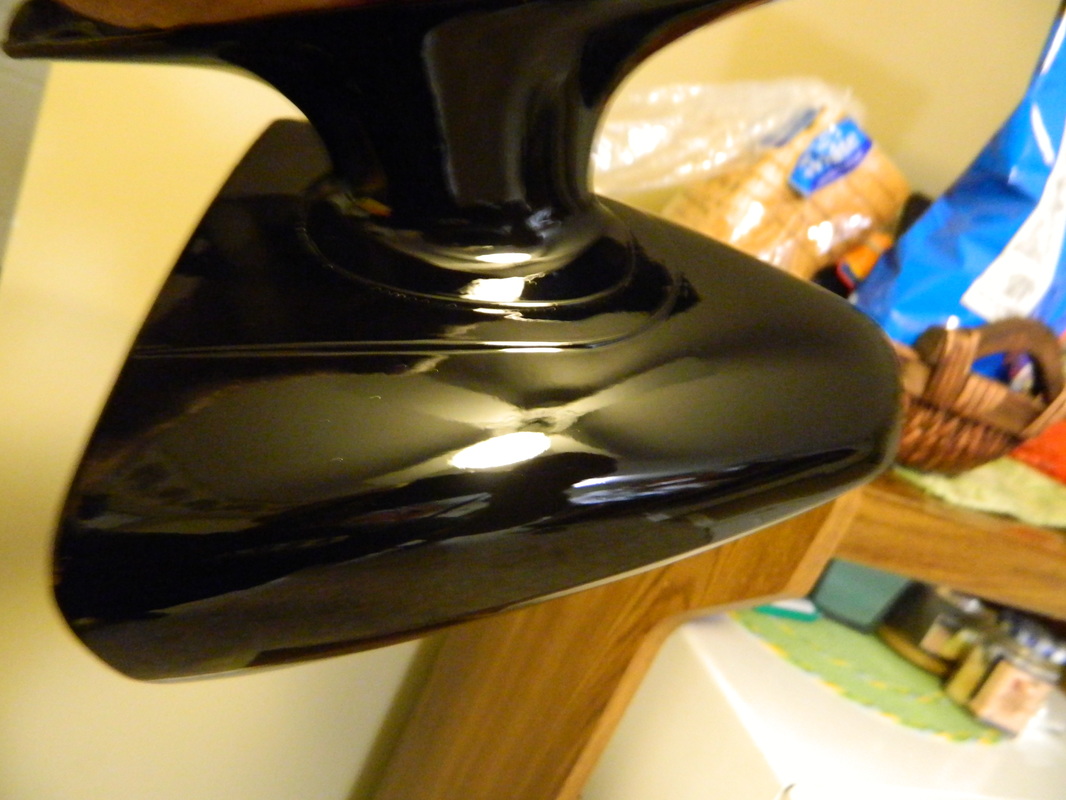
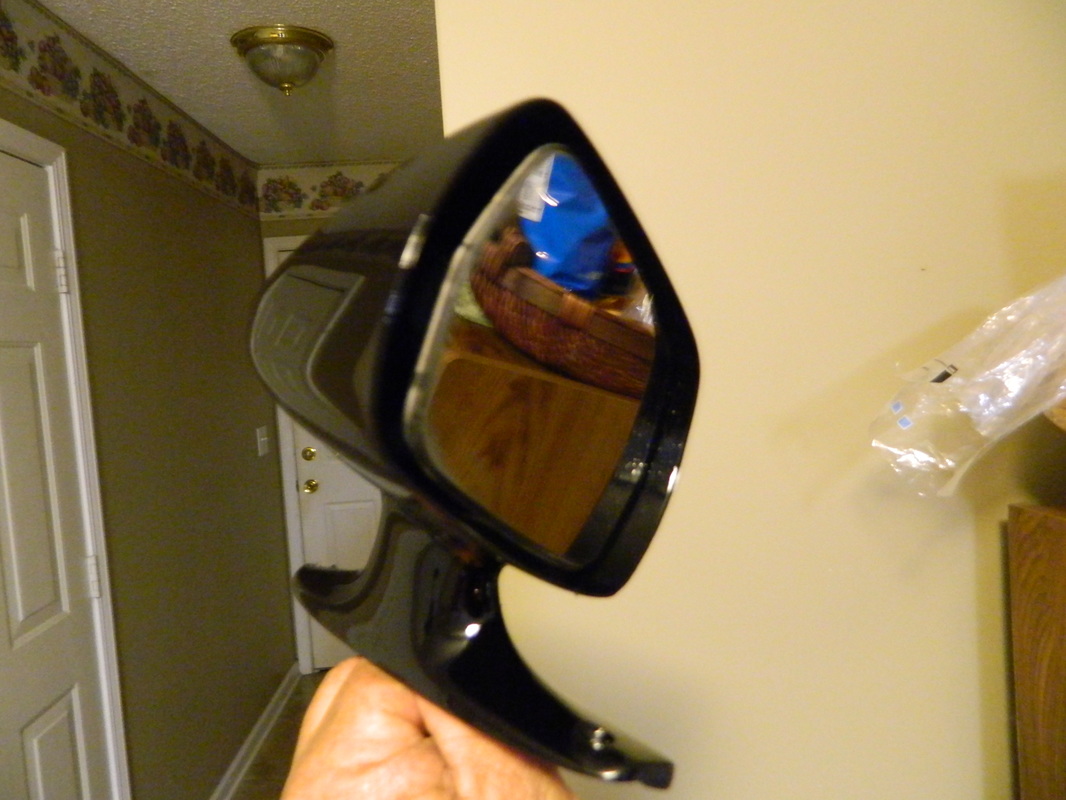
It's been kinda busy lately so not much done on the Cougar. But yesterday, after all the kinfolk left, I started working on the outside sport rear view mirror. Got it painted but still need to color sand and buff it out. 4hrs
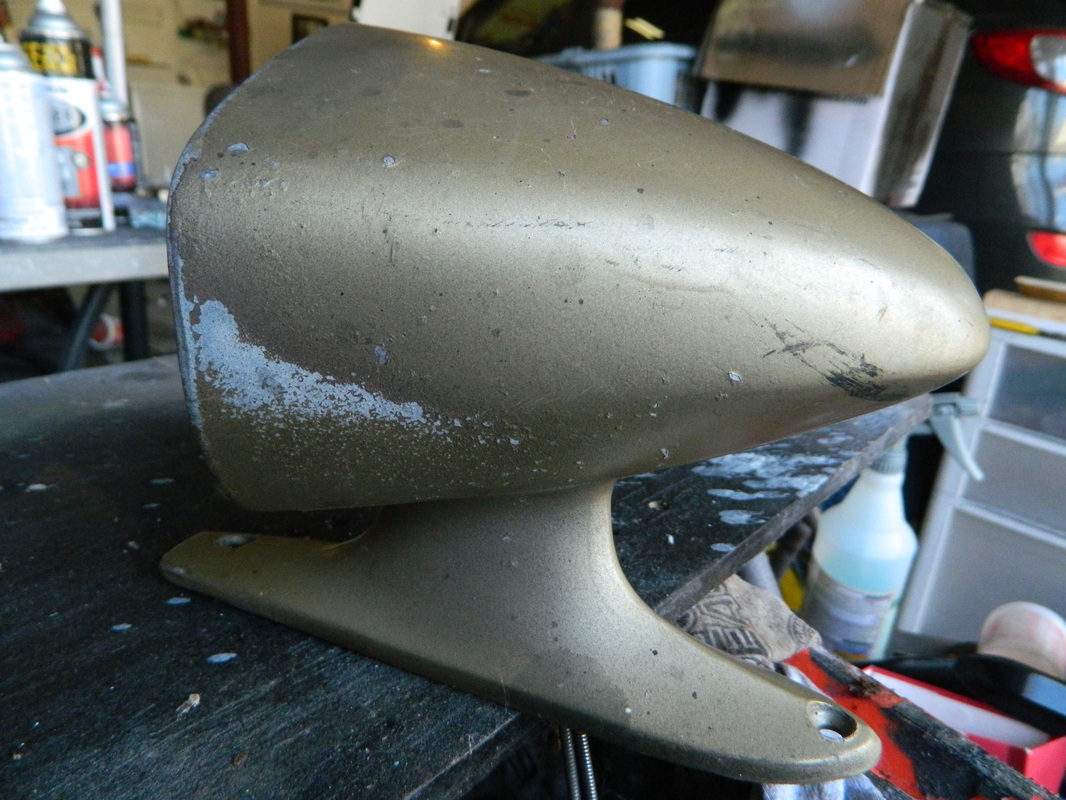
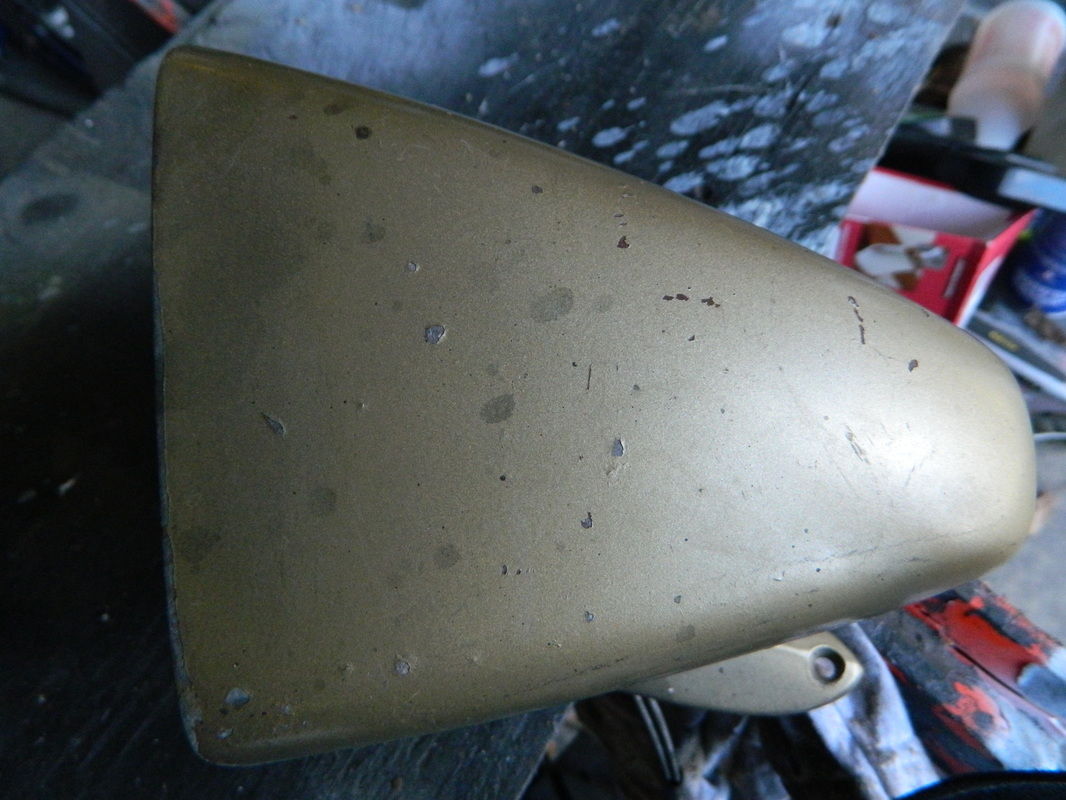

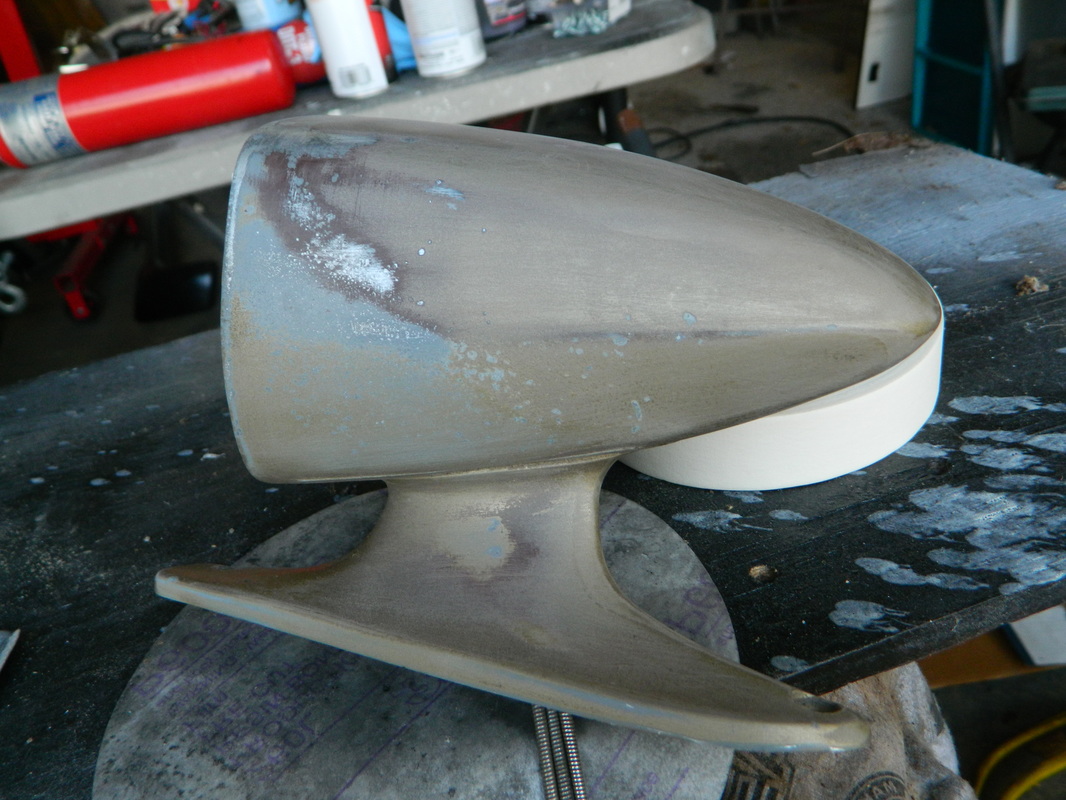
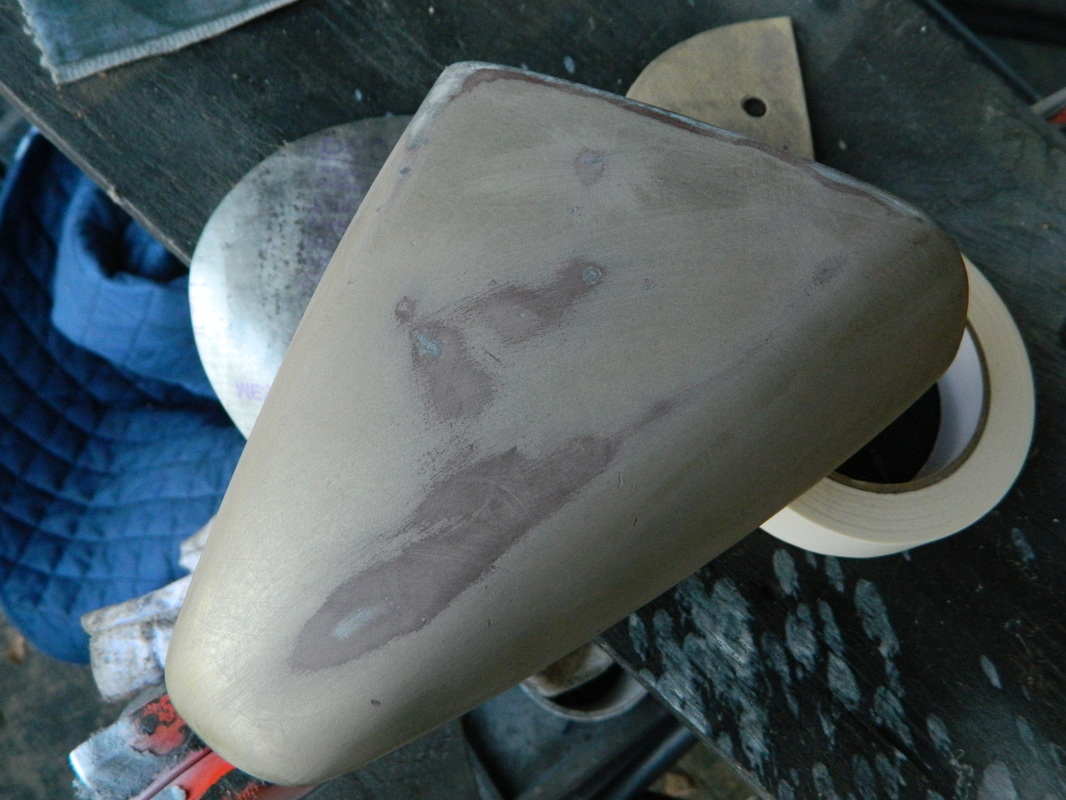
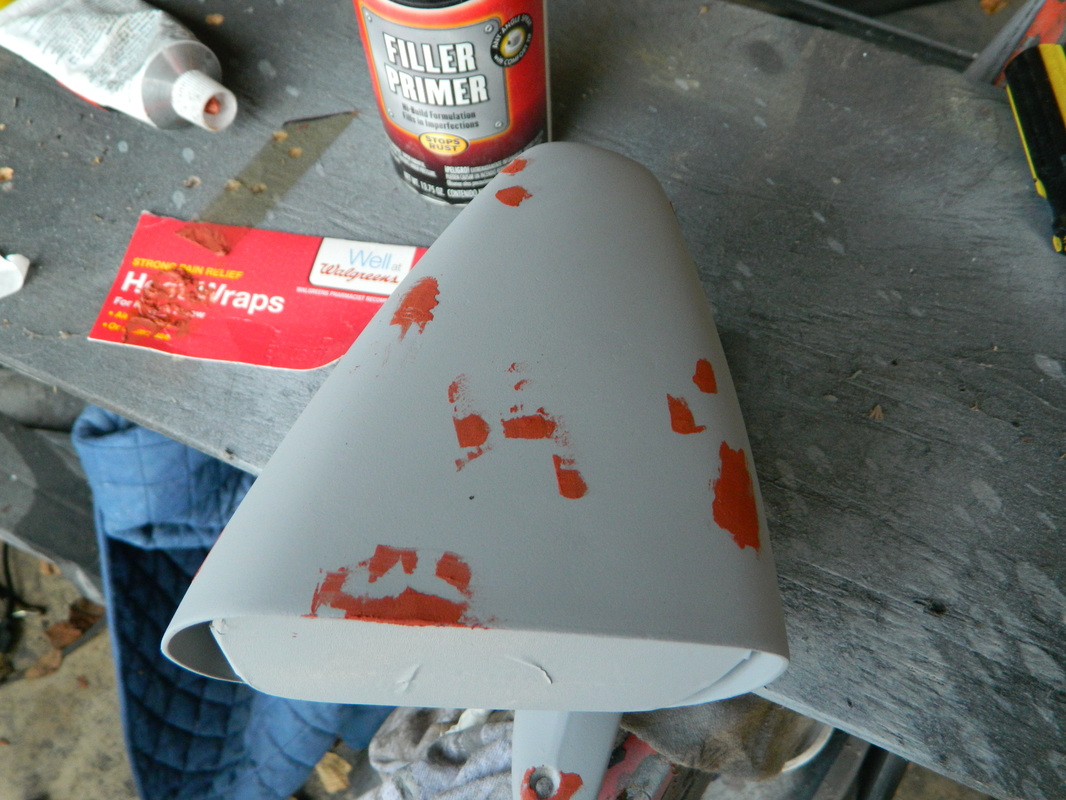

Dec 1, 2015
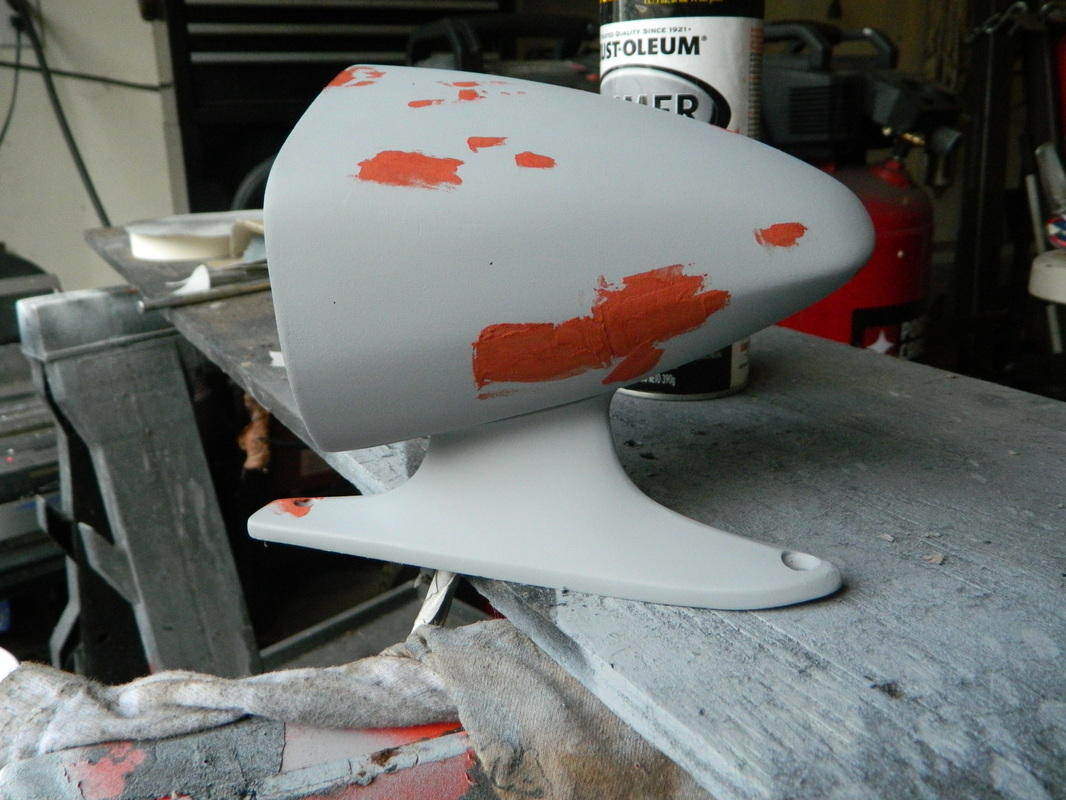
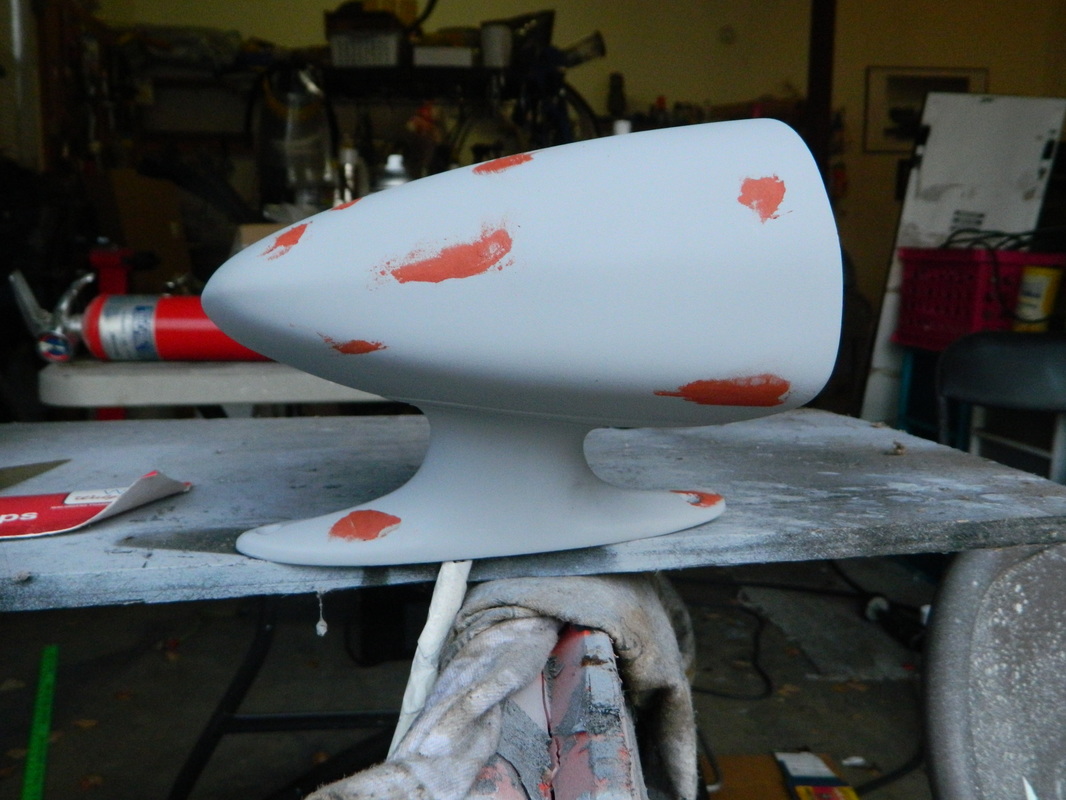
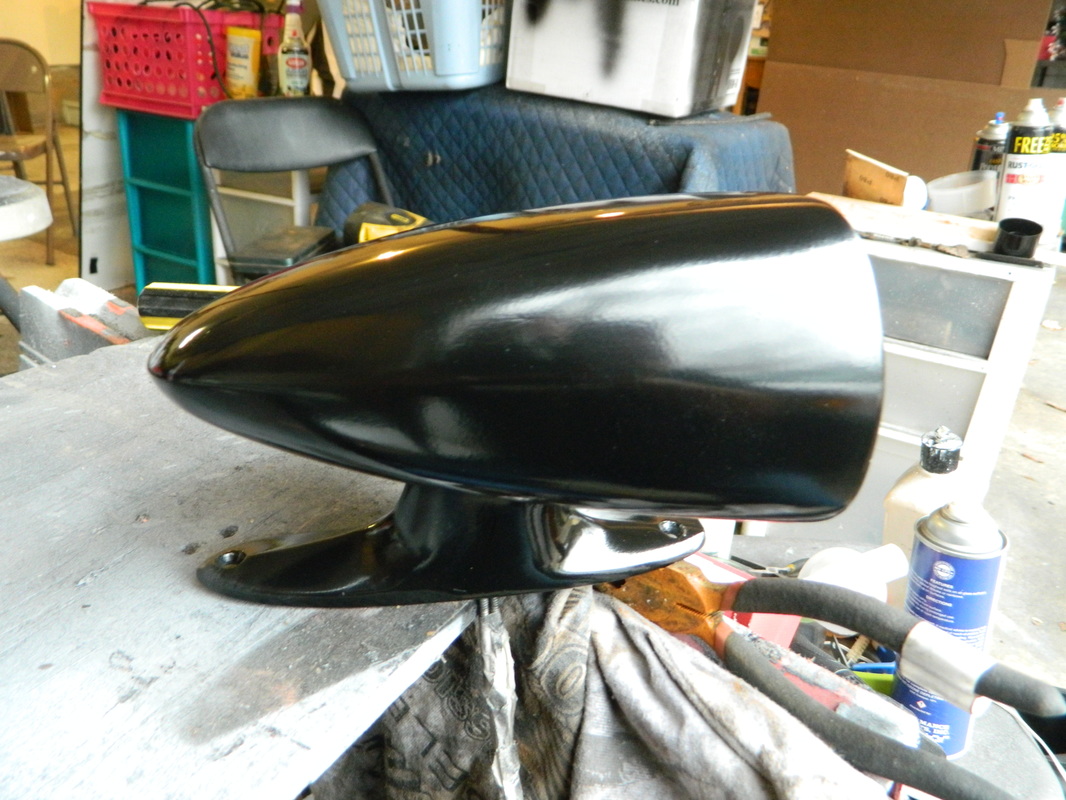
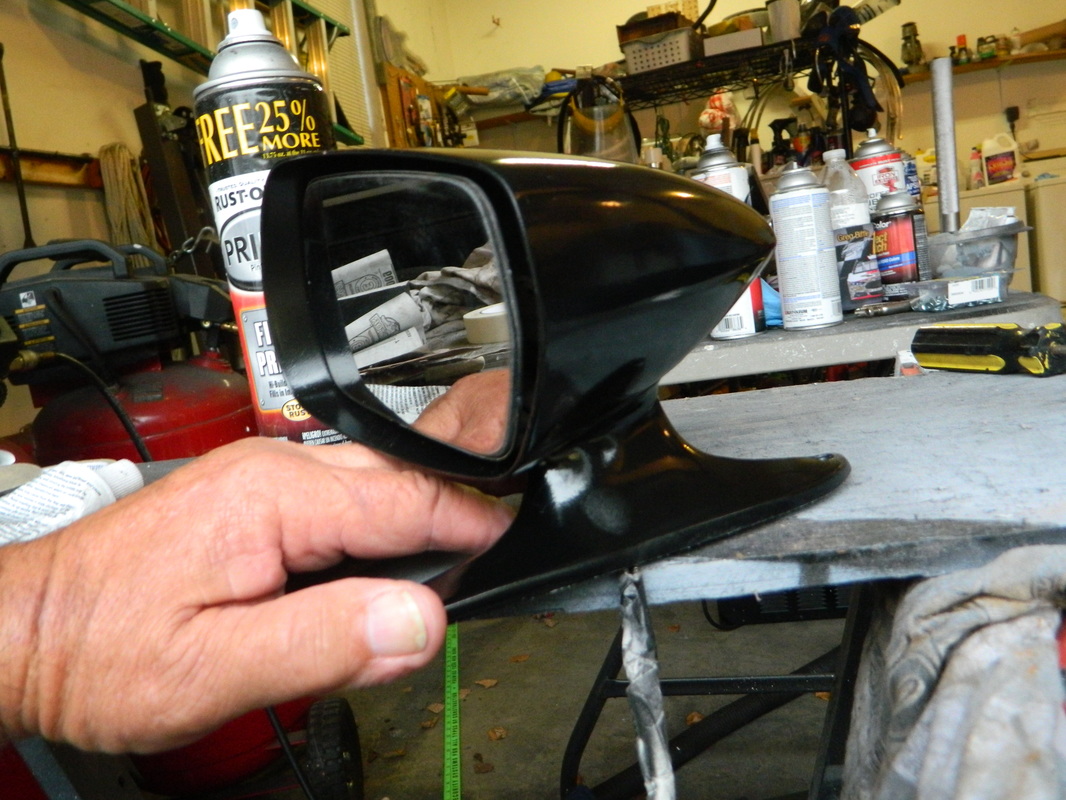
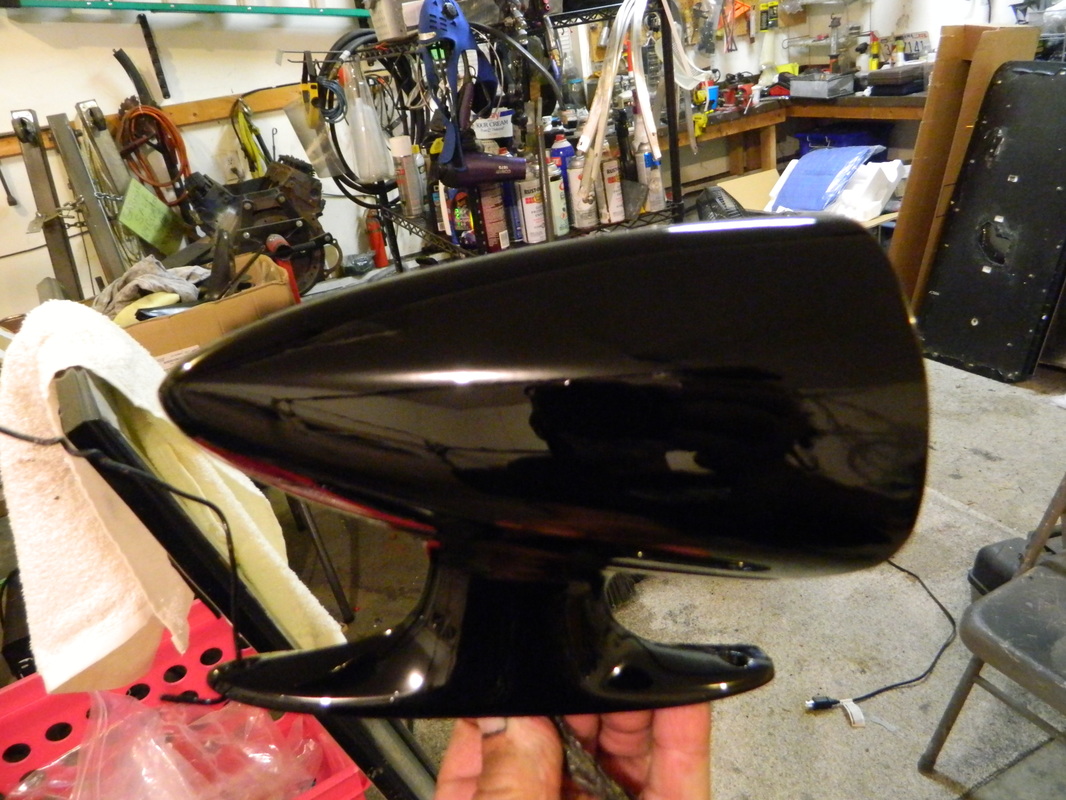
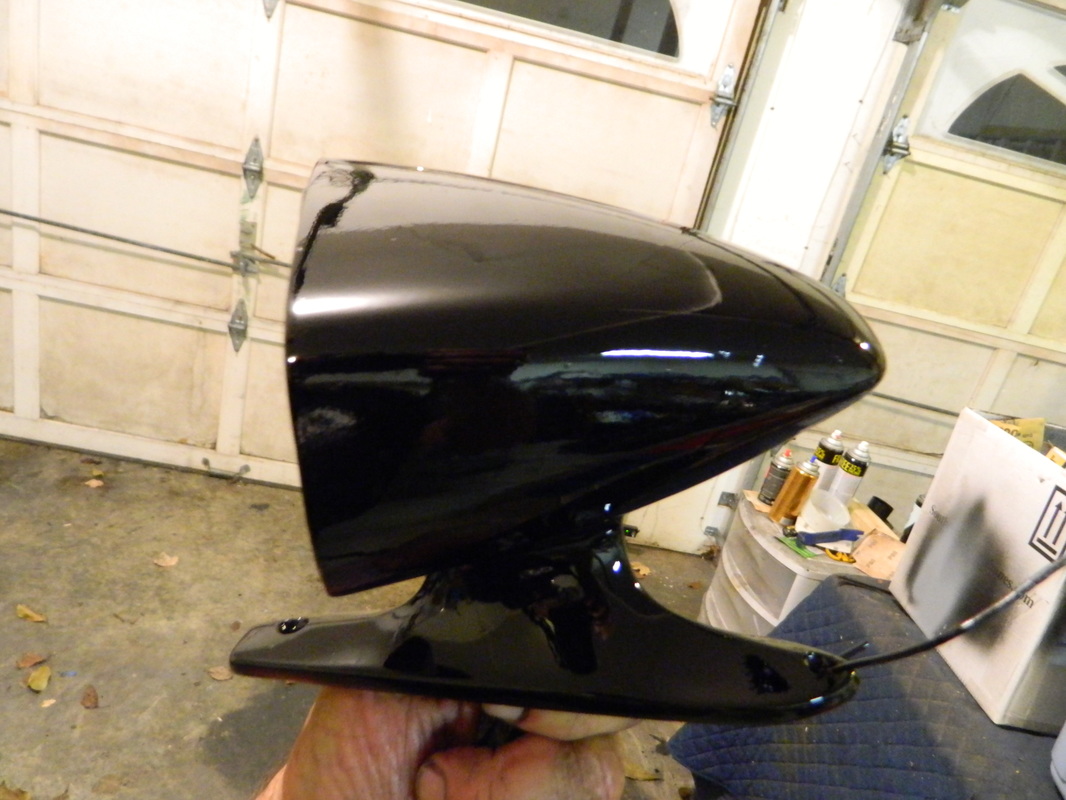
Well...the mirror wasn't as shiny as I would have liked. It looked more like semi-gloss. So, I color sanded it down to 2000 grit and then started buffing it, and it burned thru to the primer. Bummer! It was raining today so, I didn't go to work, so I sanded it all down again. What I didn't mention on the last post was that I decided to paint the mirror with Krylon instead of the Polyurethane Black that I used on the rest of the car. That was my undoing! So, today I fired up the compressor and mixed up some paint and did it the RIGHT way. It turned out so well that I'm not going to buff it out. If you compare the above images with the below, you can see the difference. You be the judge. another 4 hrs!
Jan 14, 2016
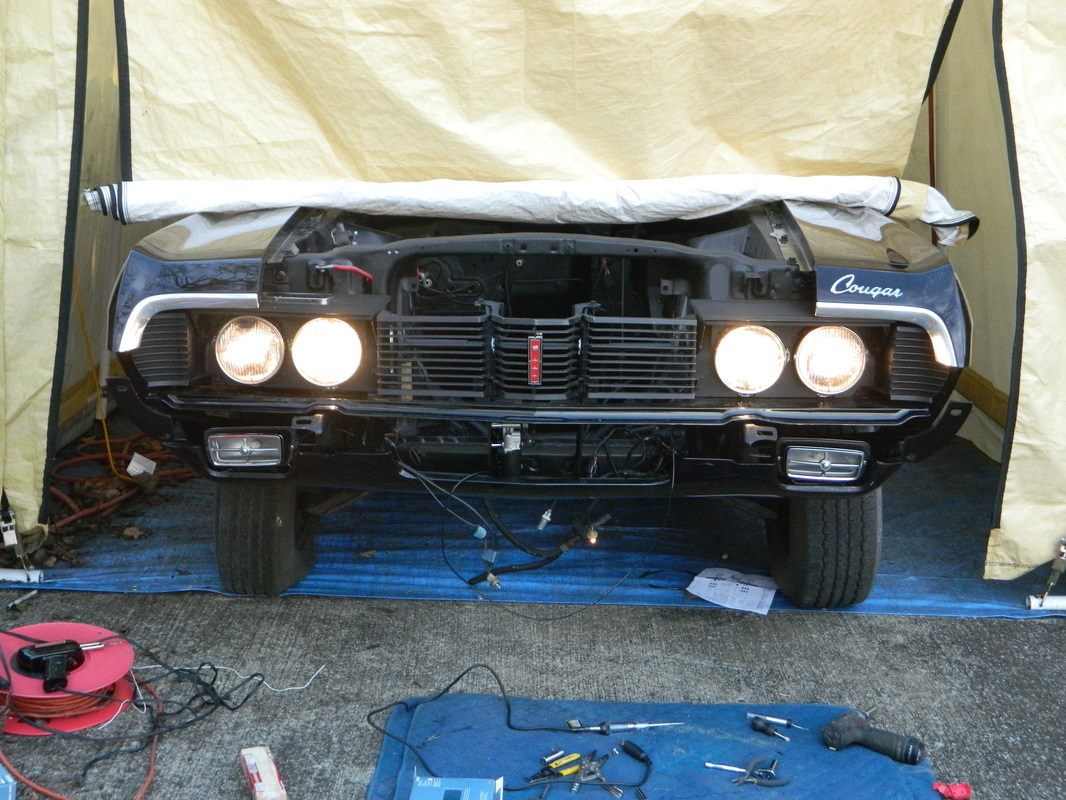
Well, its a new year, and I'm really going to try to finish this car by the end of this year! I ordered a head light and electric headlight motor control kit. I installed it today, but apparently there are a couple of different Probe head light motors and looks like the two I got are the wrong ones. The company that makes the relay kits is going to try to figure it out, but I may just go to the pick a part and get the right one. On a happy note the head light relay works fine and I now have 4 head lights working. With the relays I can upgrade to halogen seal beams if I want. 4 hours
JAN 16, 2016
I got the electric headlight controller working today and finished cleaning up the wiring for it. I'm really pleased with the whole setup
now. Thanks to Rocketman's Classic Cougar Innovations for the quality harness and relays. 3 hrs.
now. Thanks to Rocketman's Classic Cougar Innovations for the quality harness and relays. 3 hrs.
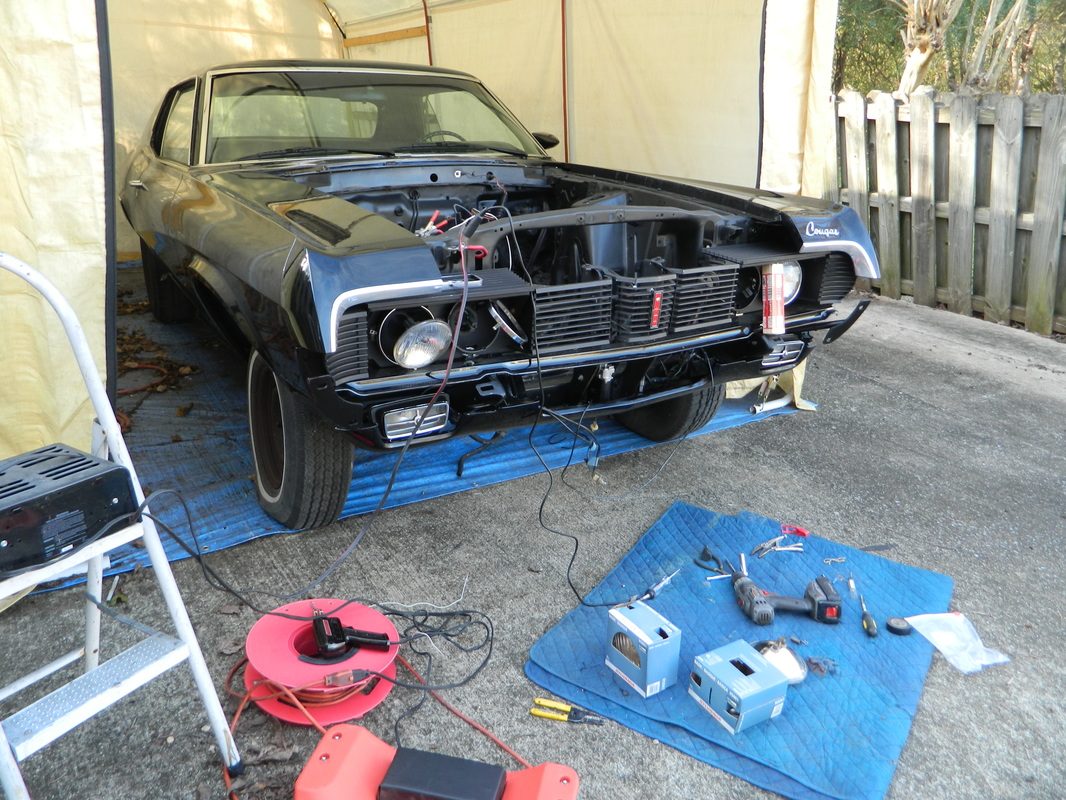
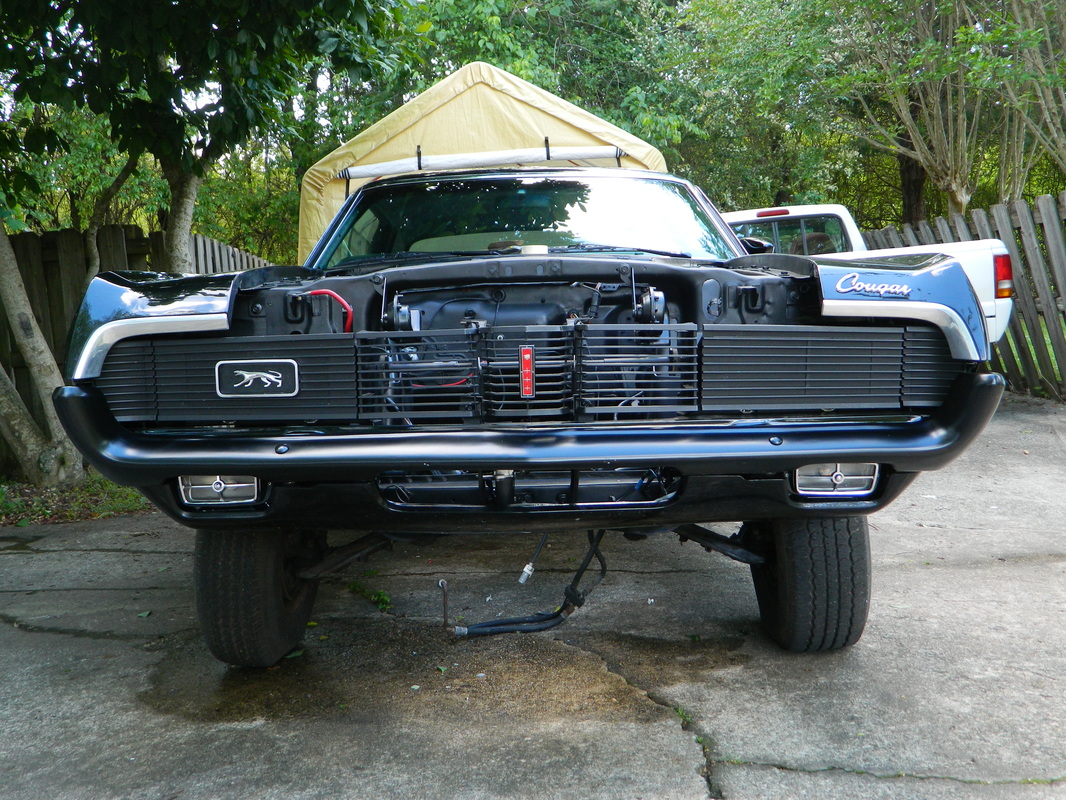
Jan 28, 2016
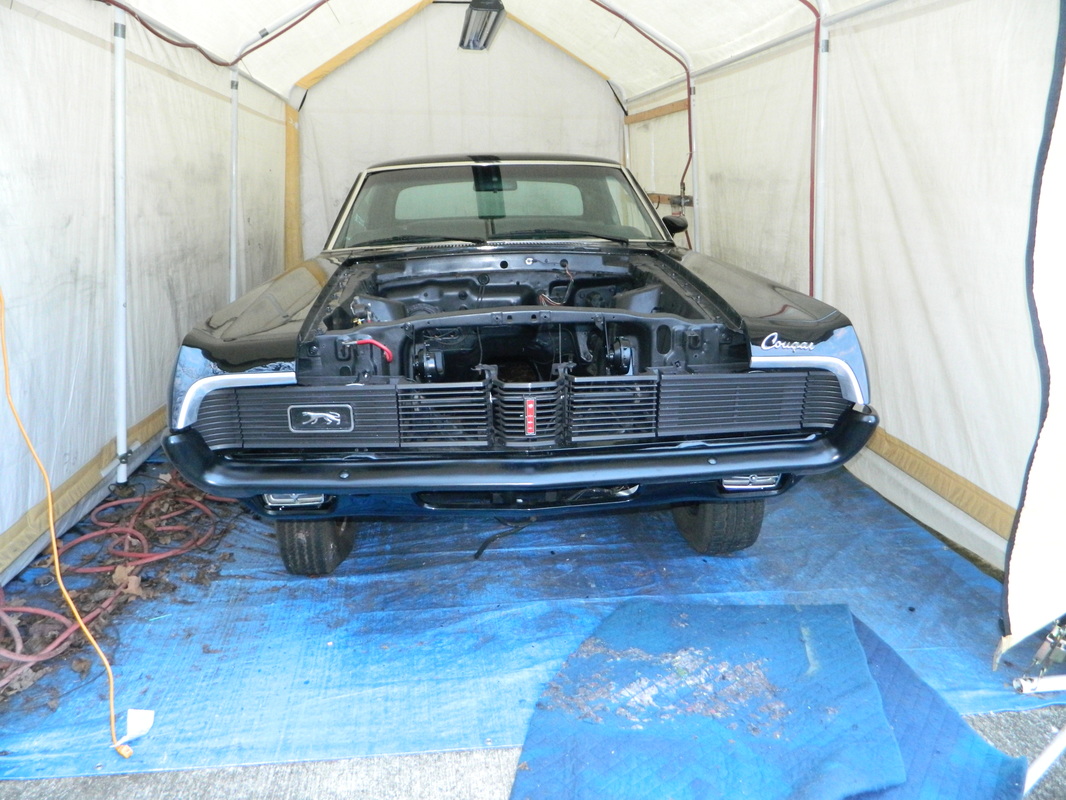
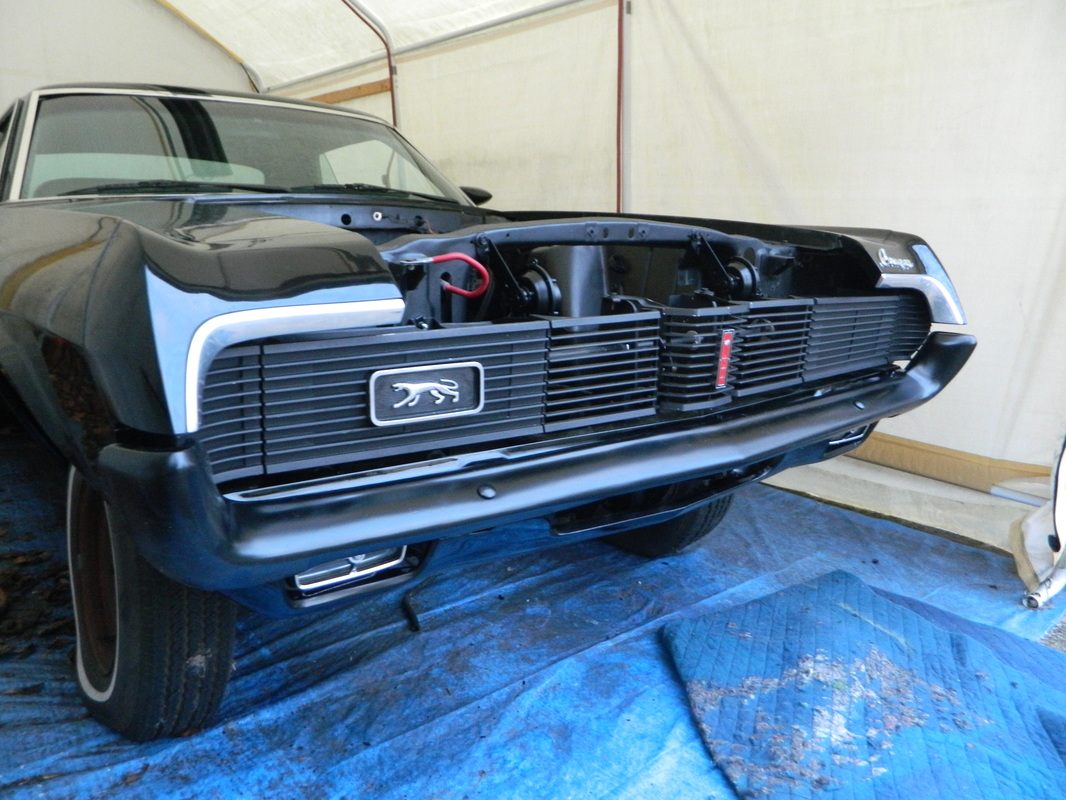
Today I took off from work; it was a really nice day in the high 50's and sunny. So I worked on the Cougar some, getting the front bumper bolted down tight. Then, I had to add a couple of screws to the lower valance, the head light assembly, and also the inner fender splash panels. Then I discovered that the horns weren't working, because they have been sitting for so long without being used. I thought I might have to buy some new ones, as these are riveted together and can't be taken apart (very easily). I figured I would try some WD40 down the trumpet and see if that would free things up, and after banging on them with a rubber mallet a few times, they came back to life LOUD and clear! So, all in all it was a great day. 3 hrs There's nothing to see, but here's some pics anyway.


Mar 2, 2016
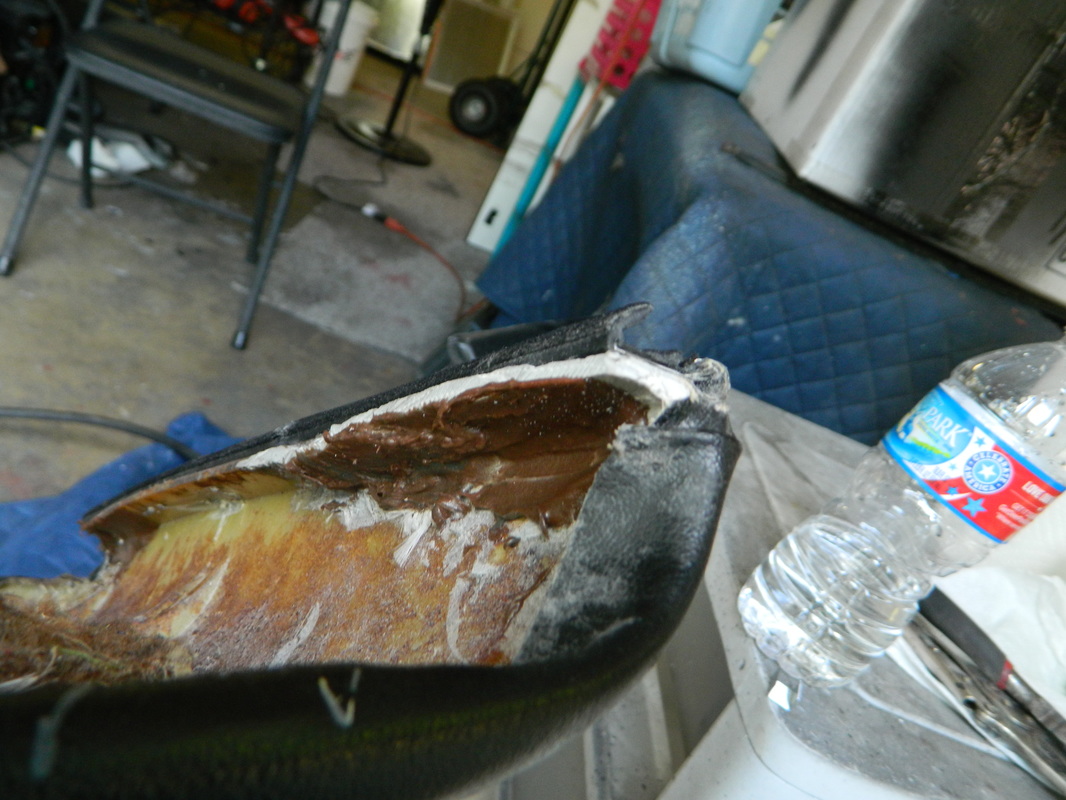
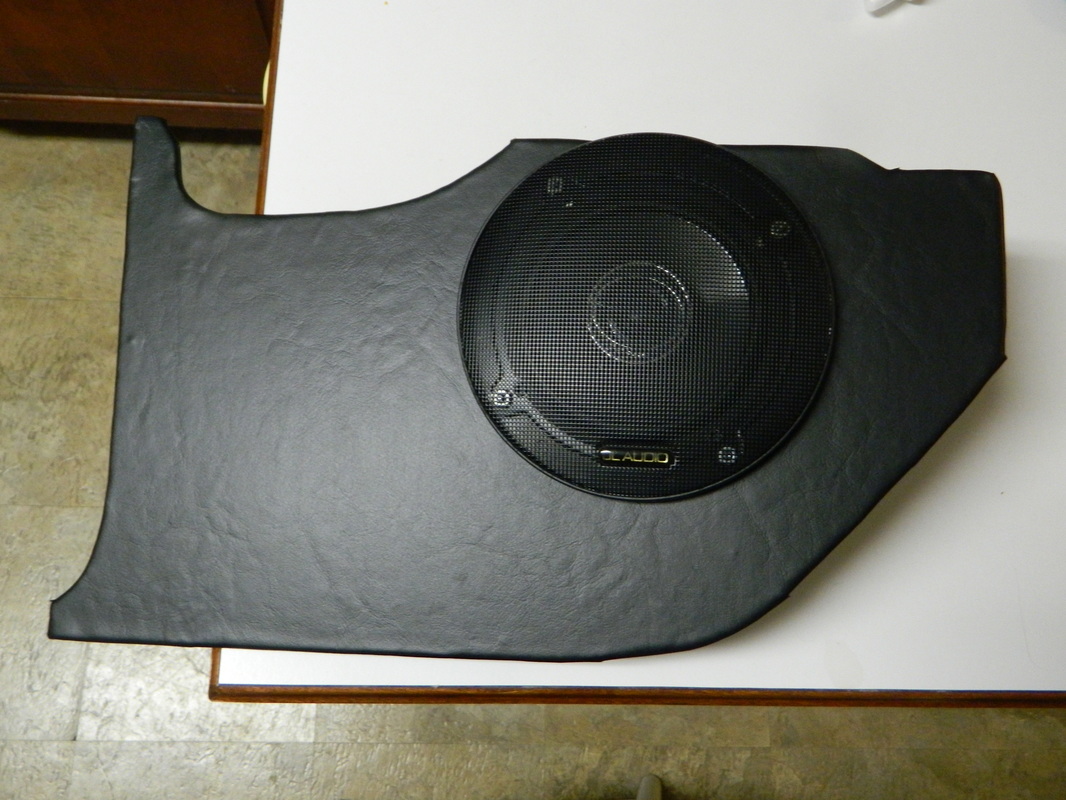
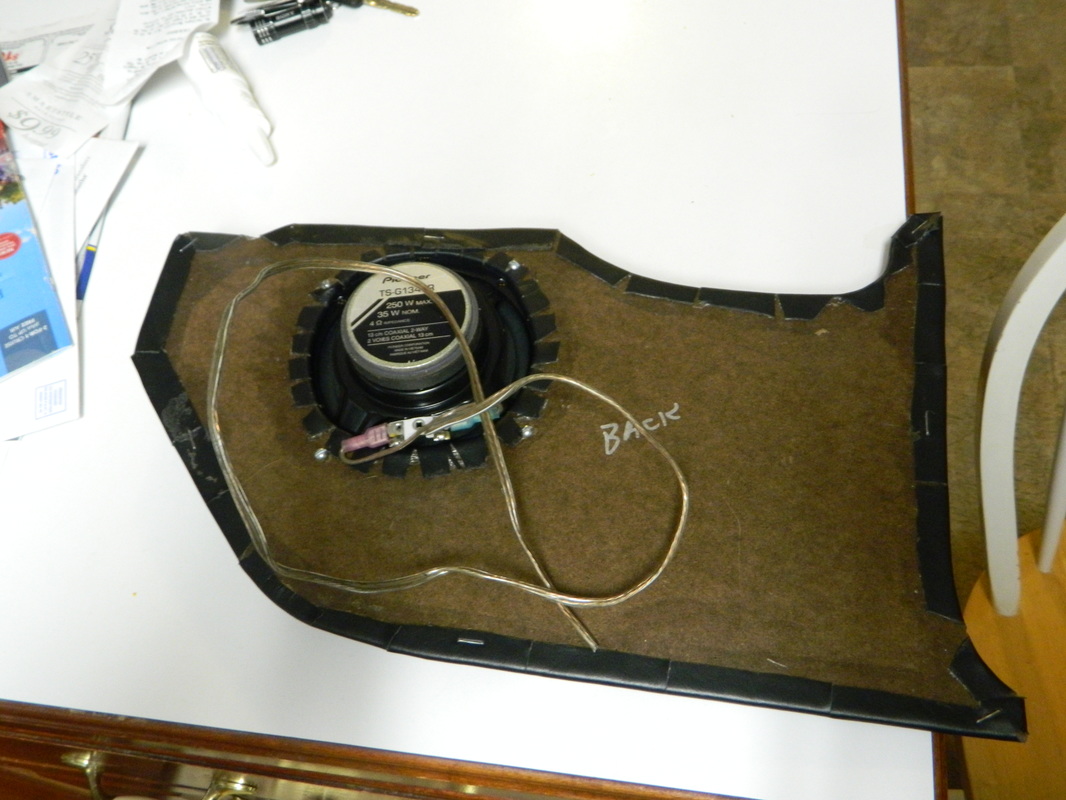
It's been a while, mostly due to winter weather. But I got the Cougar out yesterday and found that the front kick panels I made about 9 months ago were coming apart and warping. I had made them with foam poster board which was 1/8" thick, and also put an 1/8" of high density foam to add some "luxury" to it. Well, it was all a bad idea. So, I ripped them apart and remade the boards with masonite fiber board and ditched the foam idea. Part of the problem was the the spray vinyl adhesive didn't "adhere"! I used contact cement this time and then on the back side stapled the edges. They are much stronger. Here's a couple pics of one of them.
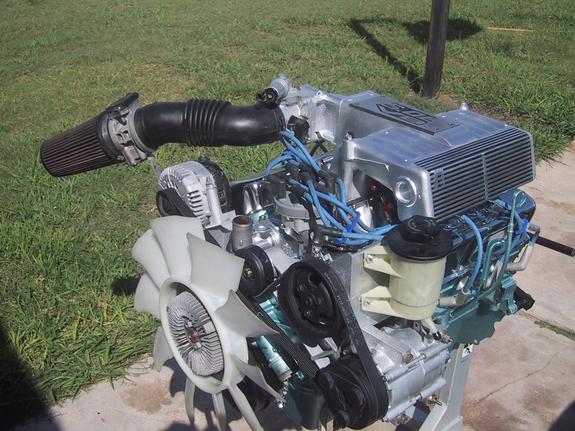
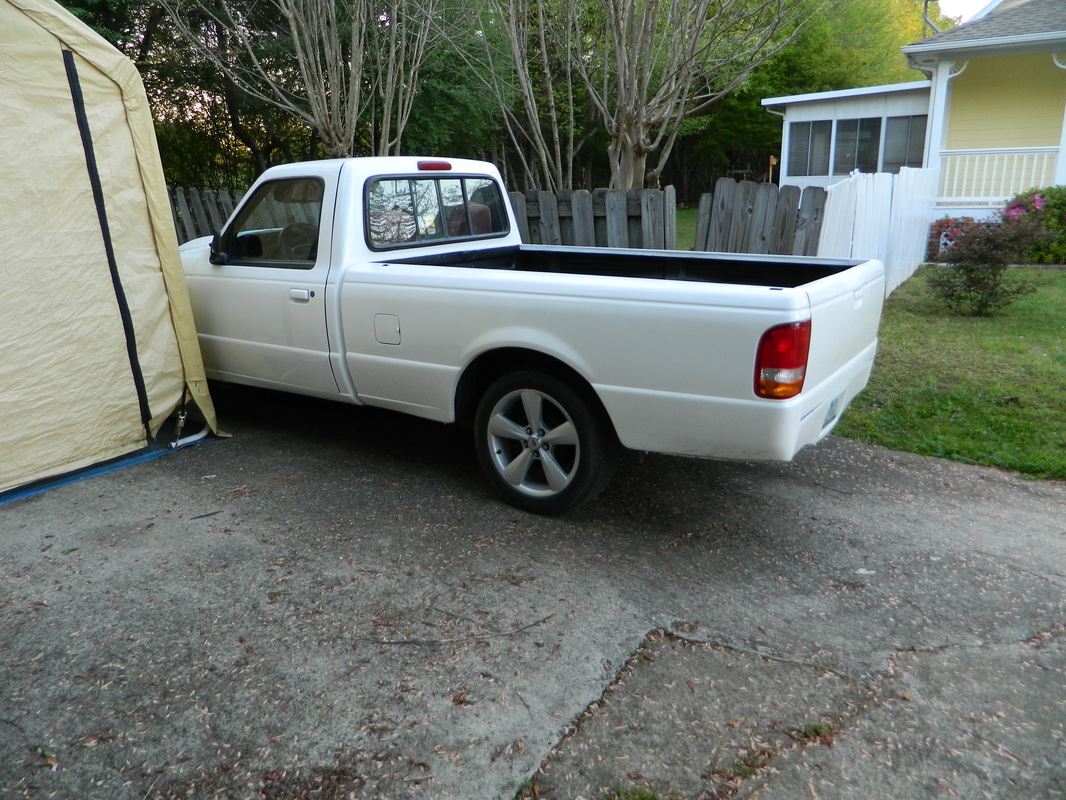
More news..I am going to buy back my V8 Ranger from my brother in Texas and use the engine, drive train, radiator, A/C system, and the 2013 Mustang GT wheels and tires. I will be going to Texas to tow it back in a few weeks. This will mean that I don't have to rebuild the 351 right now, only bolt on a new carb and intake and a conventional ignition system. It will also mean that I will have a T5 manual transmission, which was recently rebuilt, all I will have to do is hang a clutch pedal. I believe I can also use the aluminum radiator, and the new A/C condenser and hoses. I might even be able to use the Pioneer stereo from it too, as well as the Flowmaster mufflers.
Here's some pics of the Ranger and the engine.
Here's some pics of the Ranger and the engine.
Mar 8, 2016
Well, its good that you get to do "do overs" in restorations. I already told you about the kick panel do over. Now, I found that the same thing happened with the sail panels and the package tray. So, I tore them apart and re-upholstered them as well. The pack tray was already made out of the fiberboard, so all I did was re-glue the perimeter and then staple the backside. But, I also found that I have a mouse in my Cougar. No real damage but he left some fragrant remains, so I left him a tasty decon treat. I did some buffing and general clean up, call it "spring cleanup". So, here's some new pics.

Mar 12, 2016
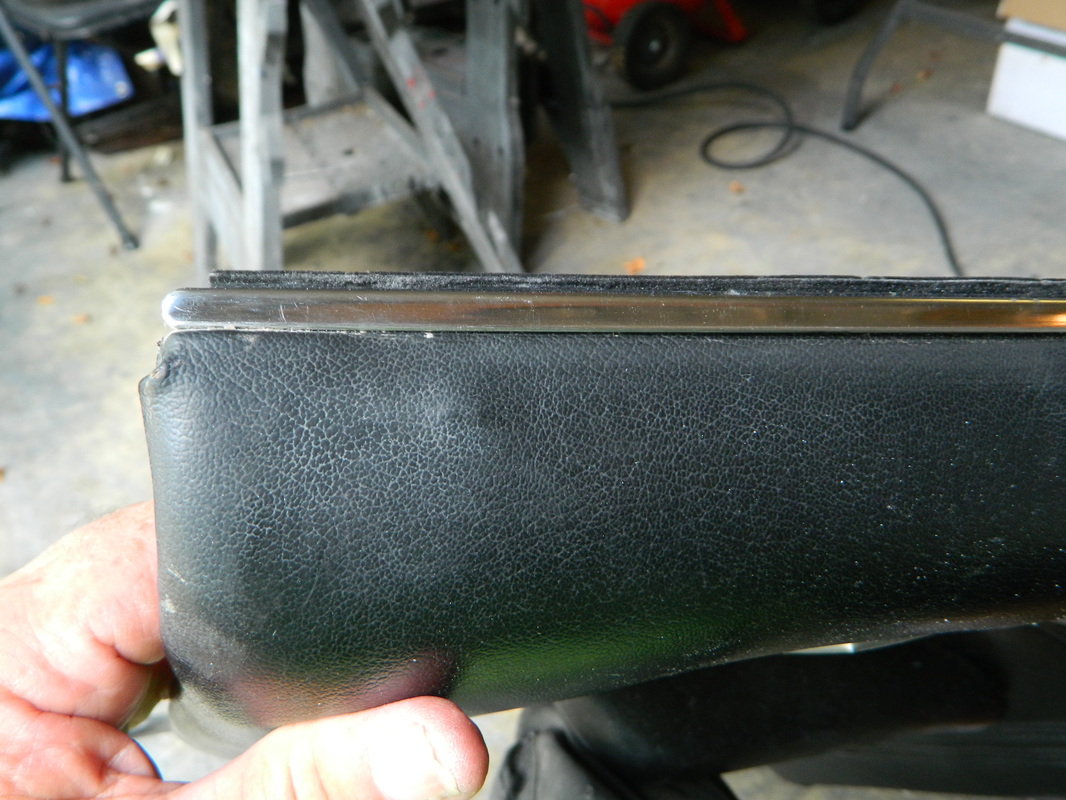
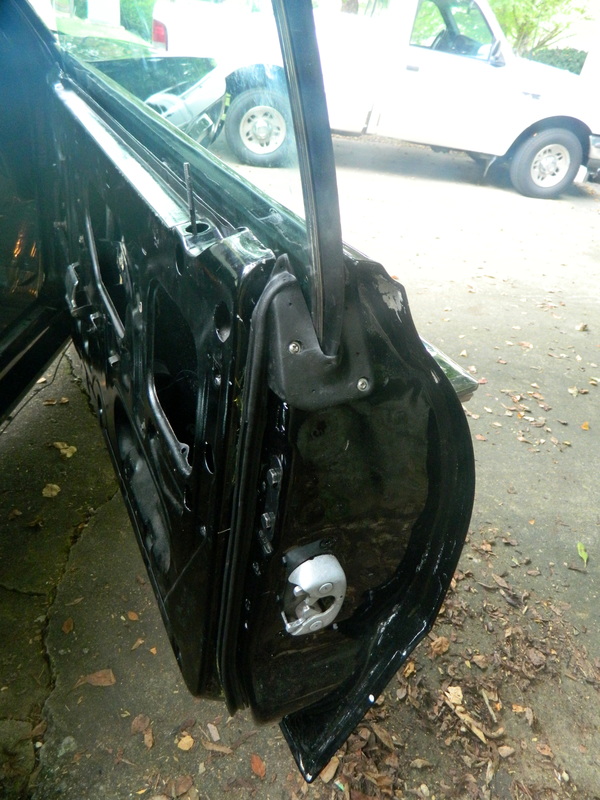
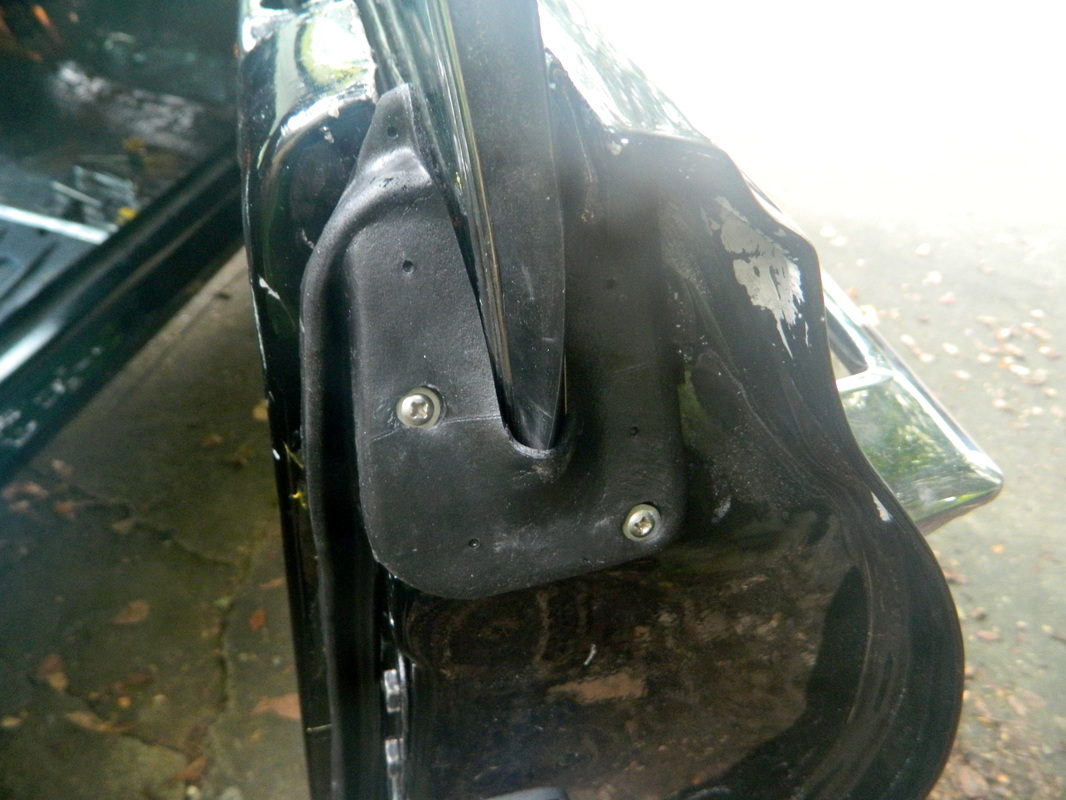
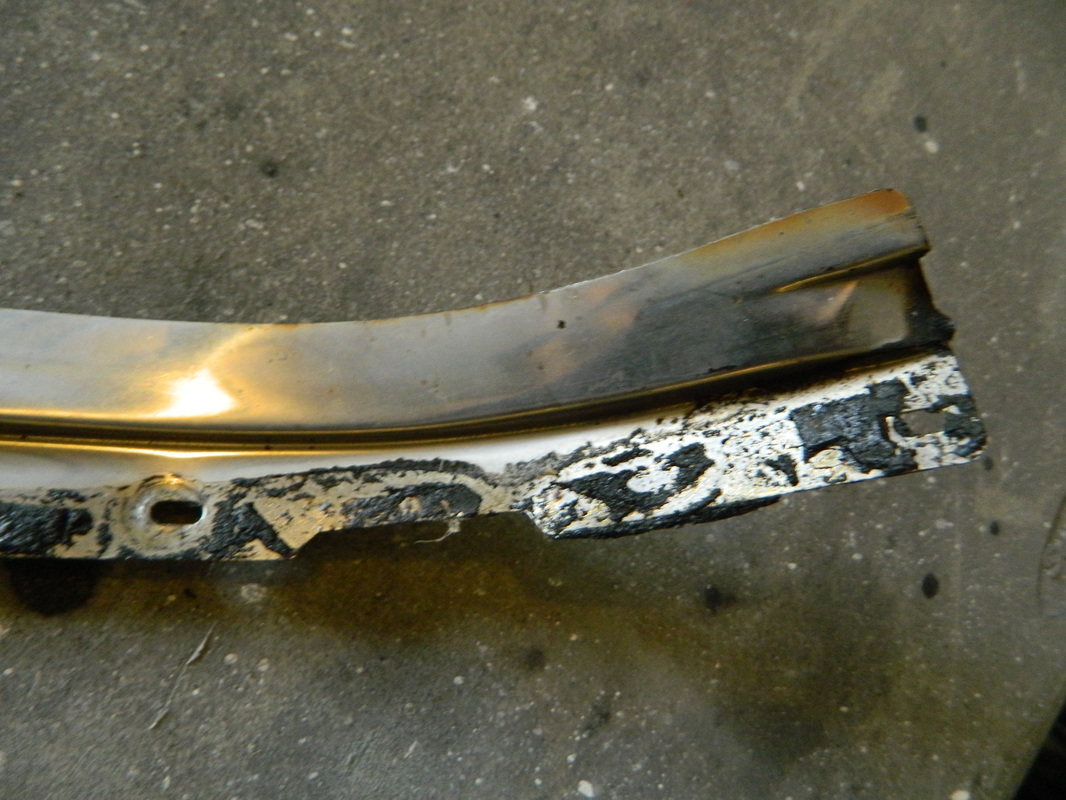
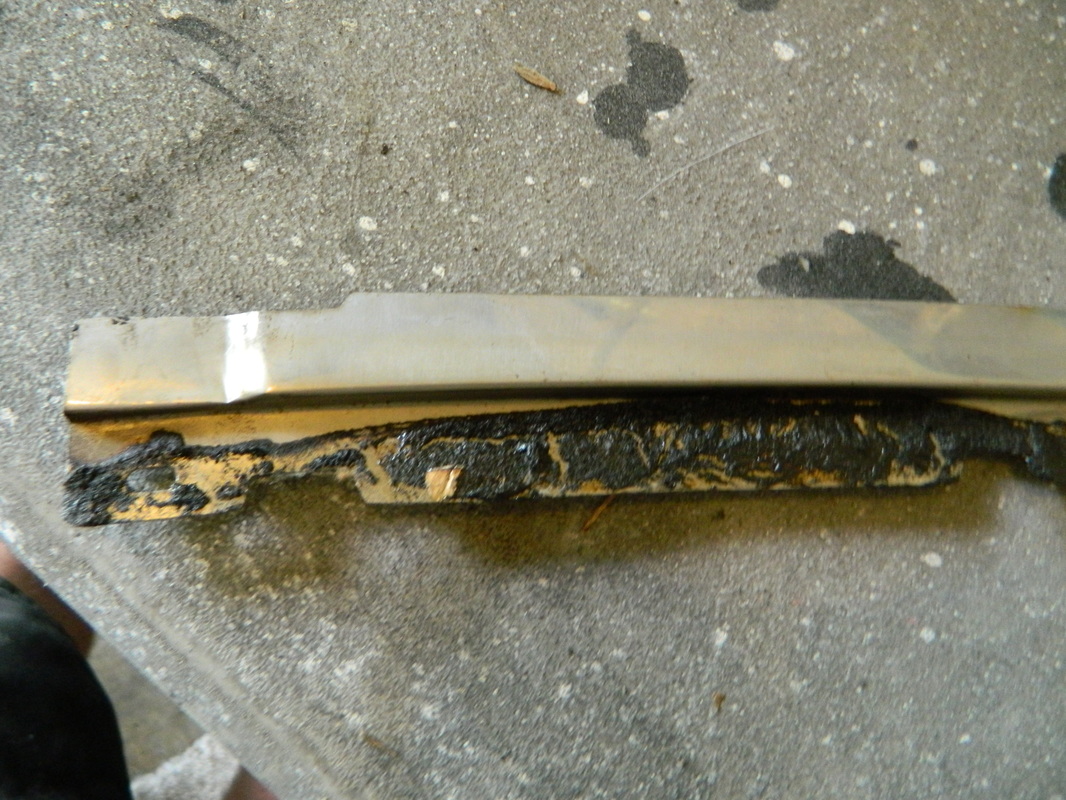
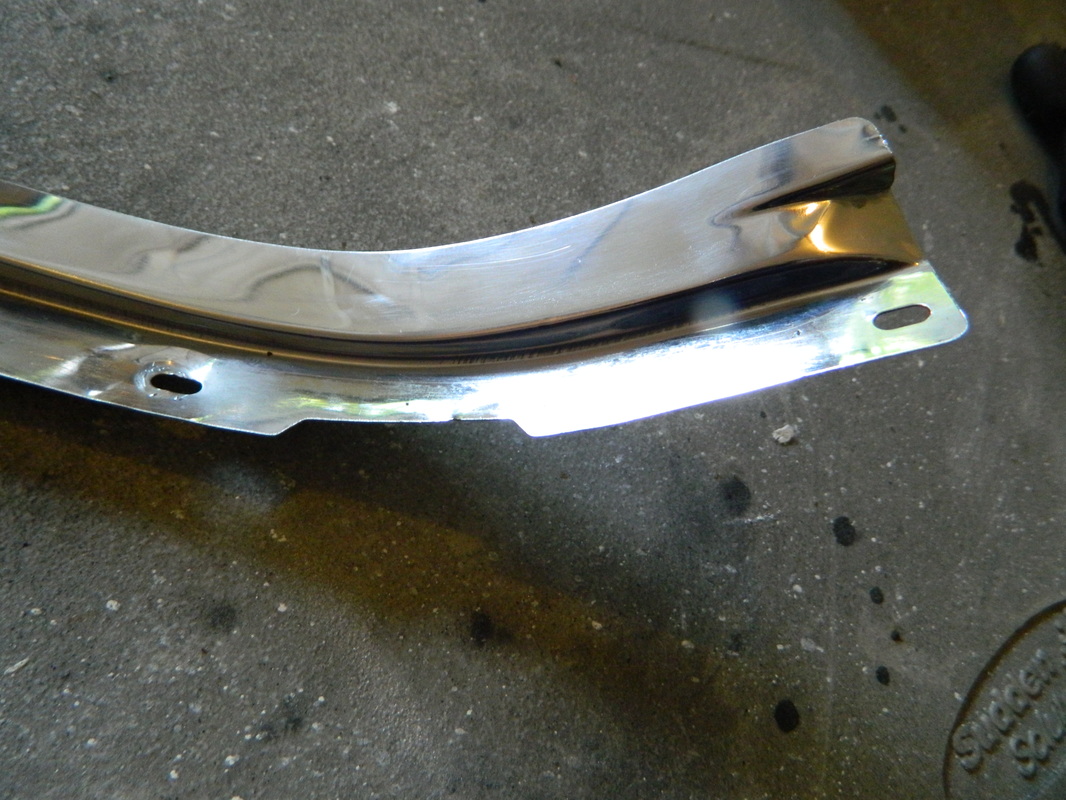
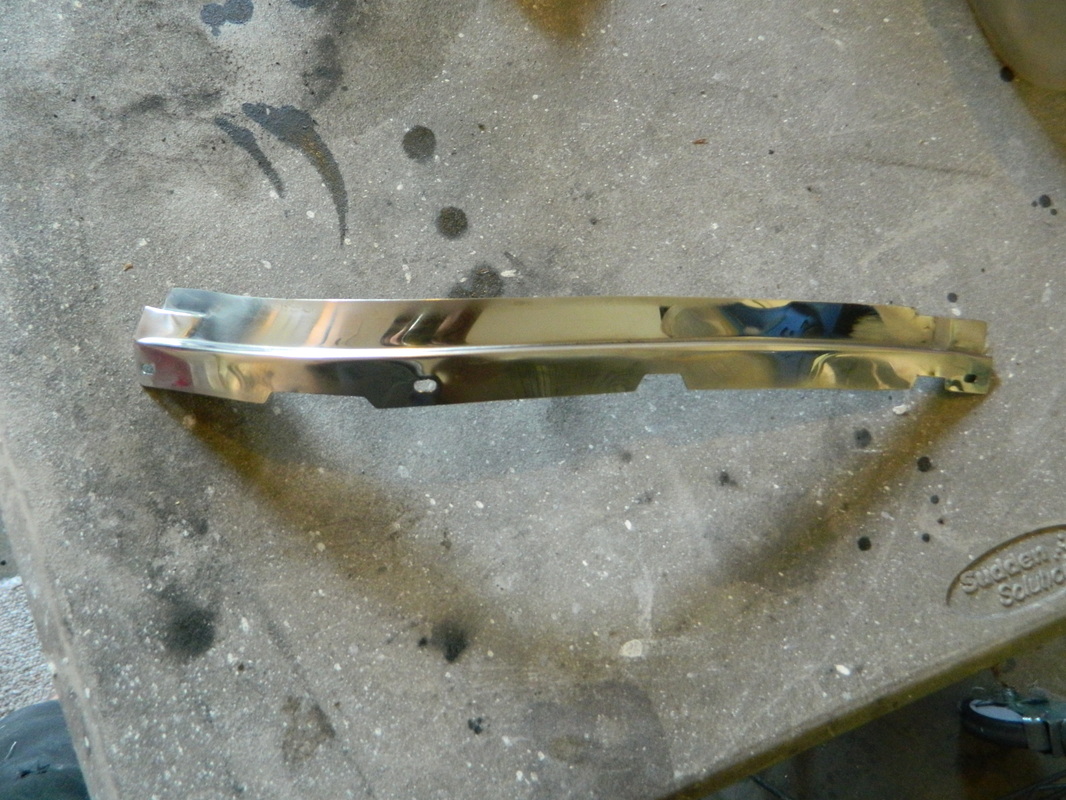
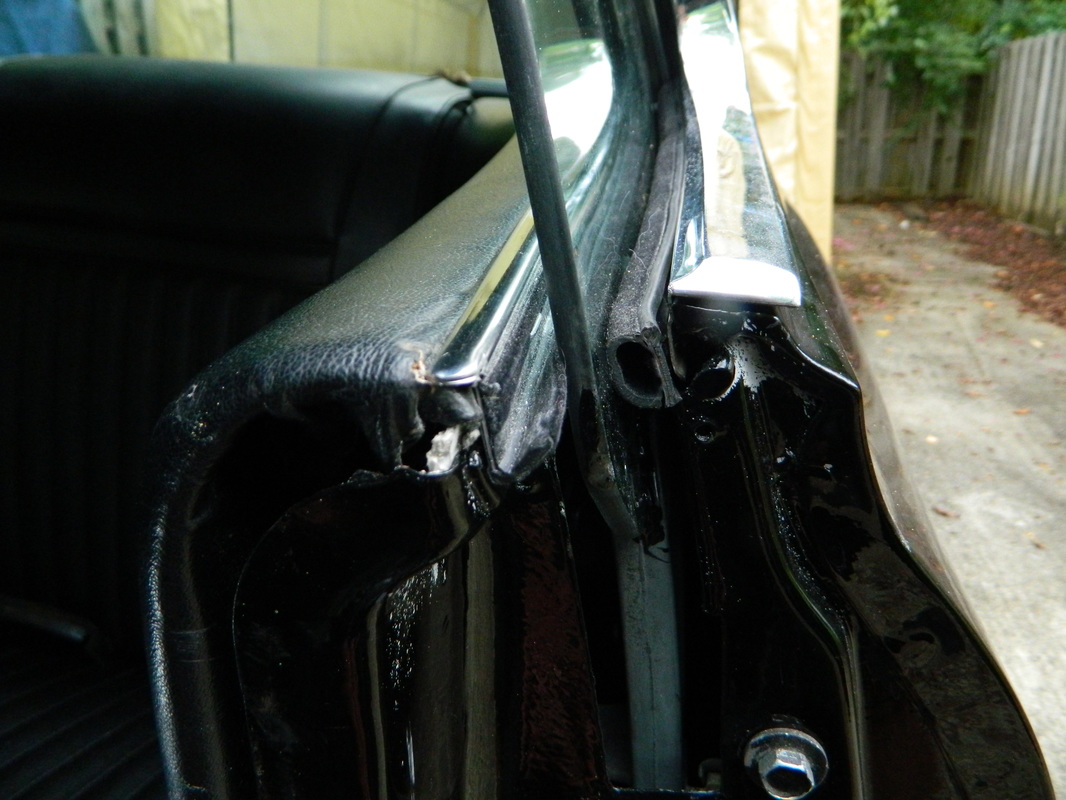
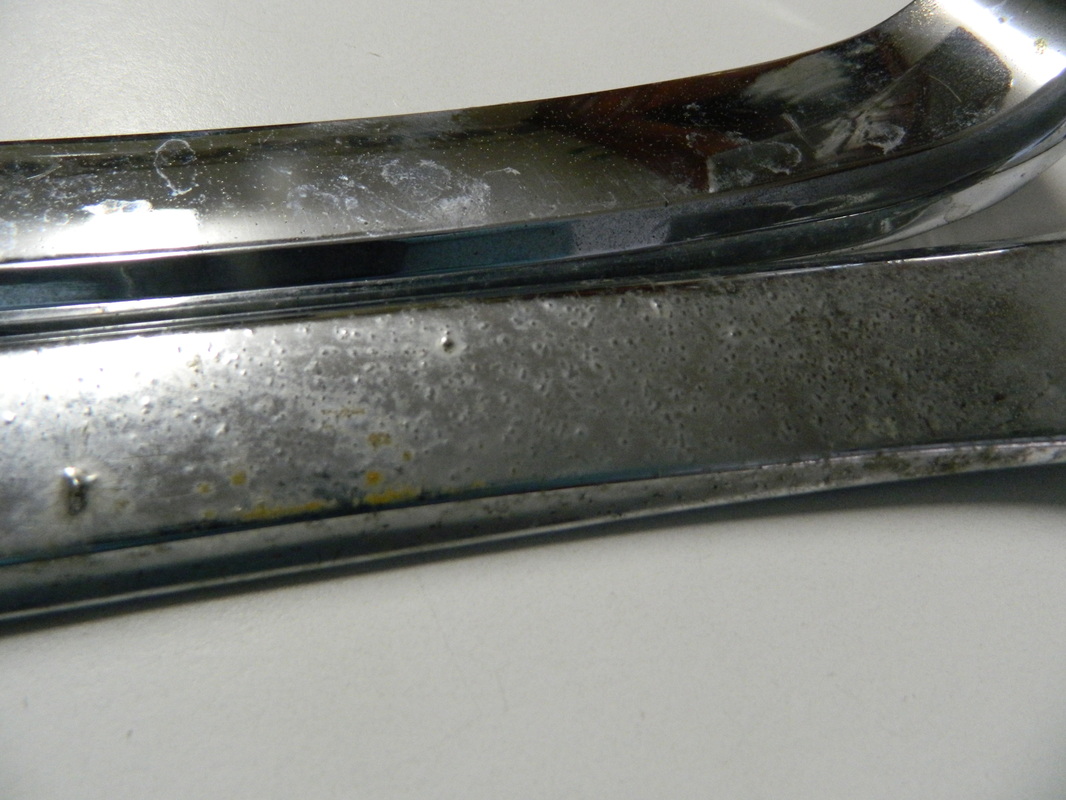
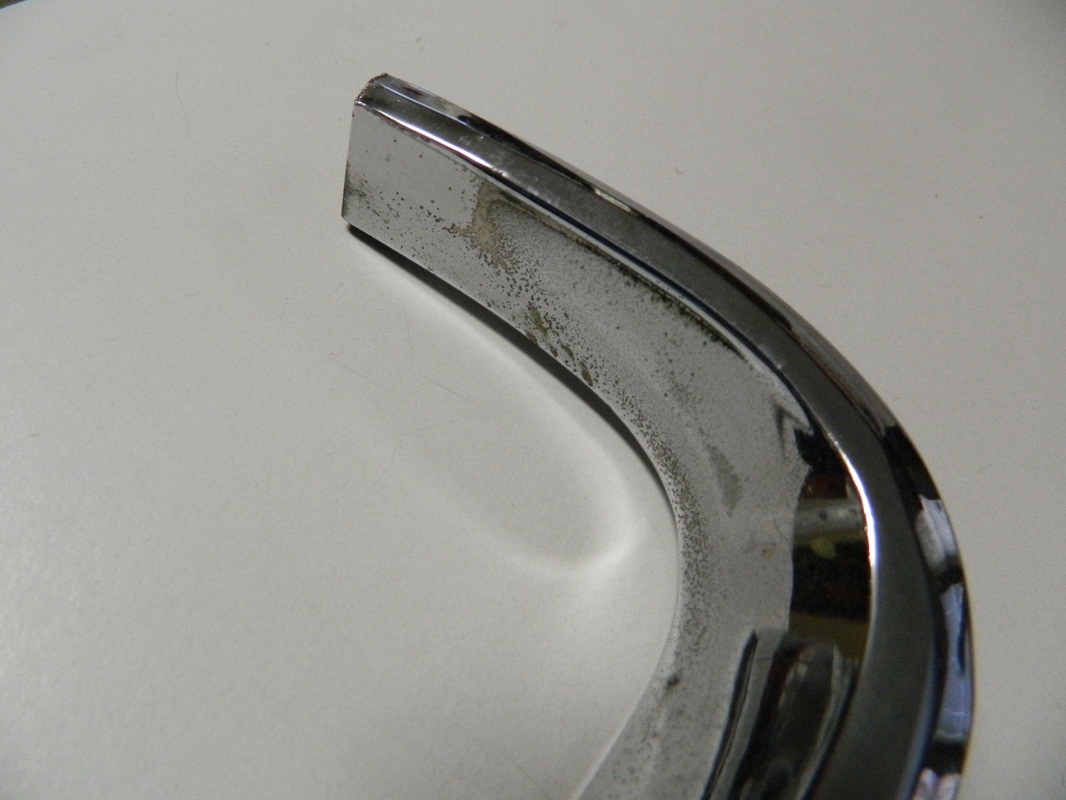
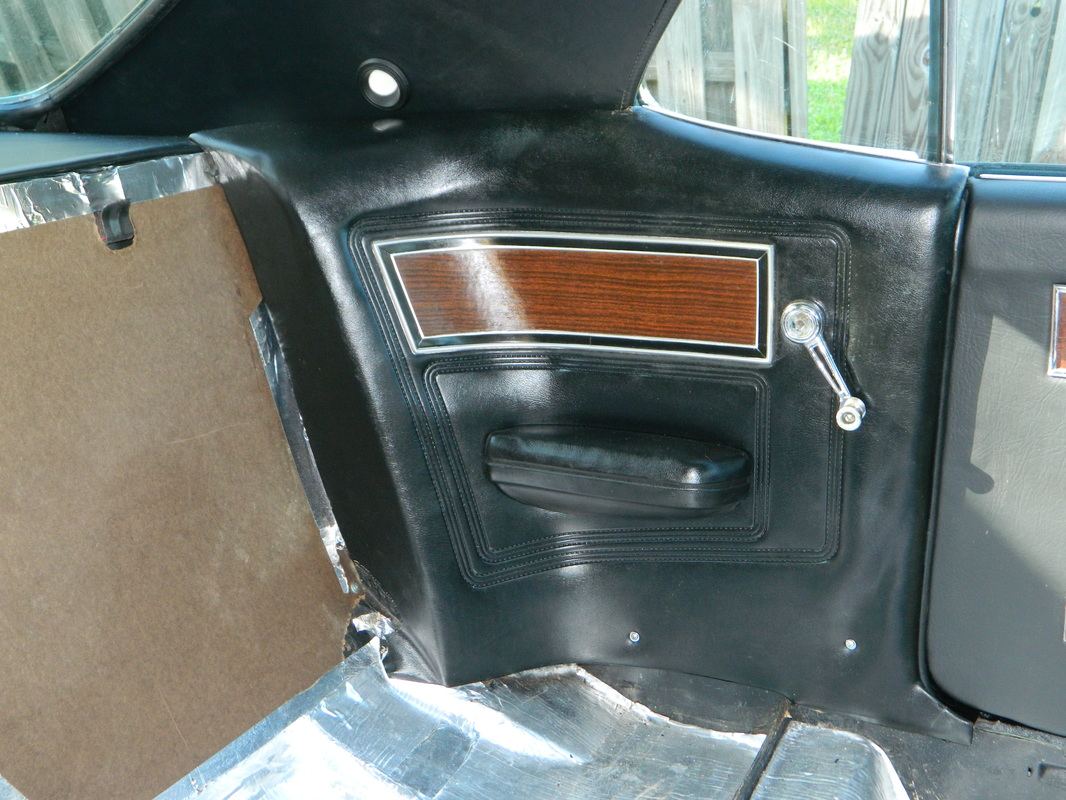
I haven't bought many parts for the Cougar, mostly paint supplies and such and a couple of pieces of glass. But, a couple days ago I ordered the two j shaped quarter window trim pieces. The original pieces were pitted and pretty tacky looking. They came in today and I installed them. For those not familiar with 69-70 Cougars these trim pieces also have the window felt and bracket riveted to them. The reproduction ones i bought from WestCoastClassicCougar have the pins to locate the pieces but not attach them, so I used 3M panel adhesive to glue them together. They fit perfectly and look really great! The first pic is of the new pieces the others are the old ones and the last two are the new ones installed.
2 hrs.
2 hrs.


Mar 15, 2016
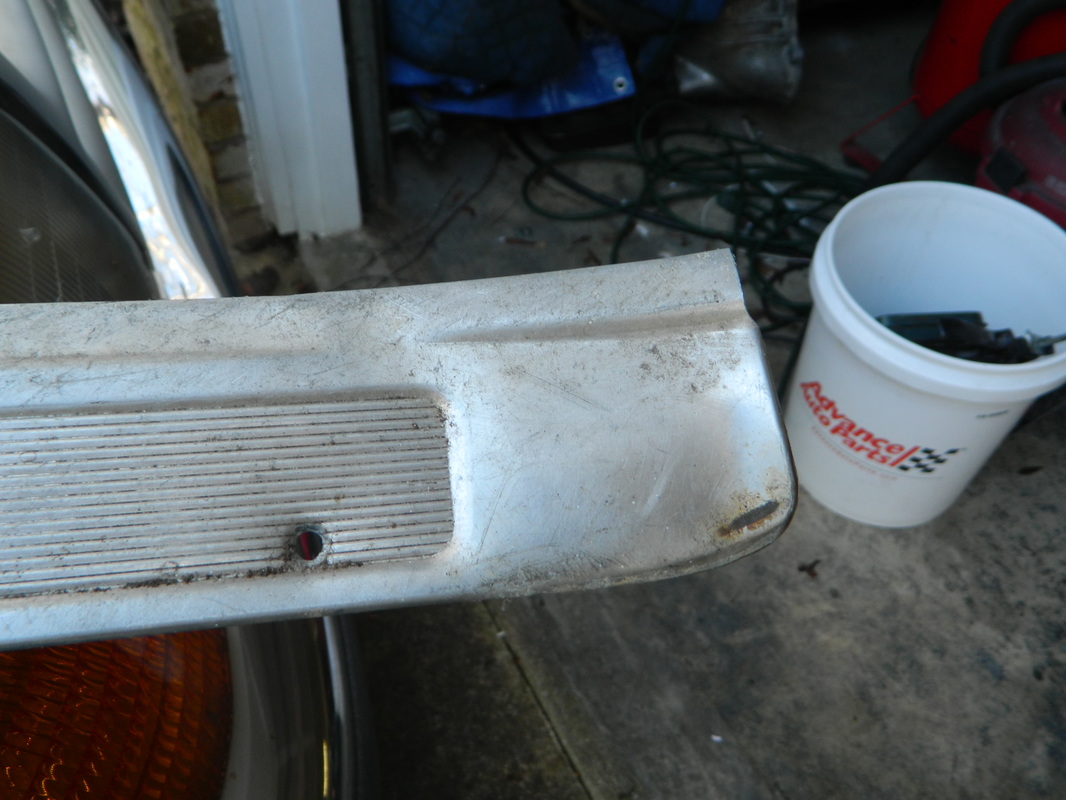
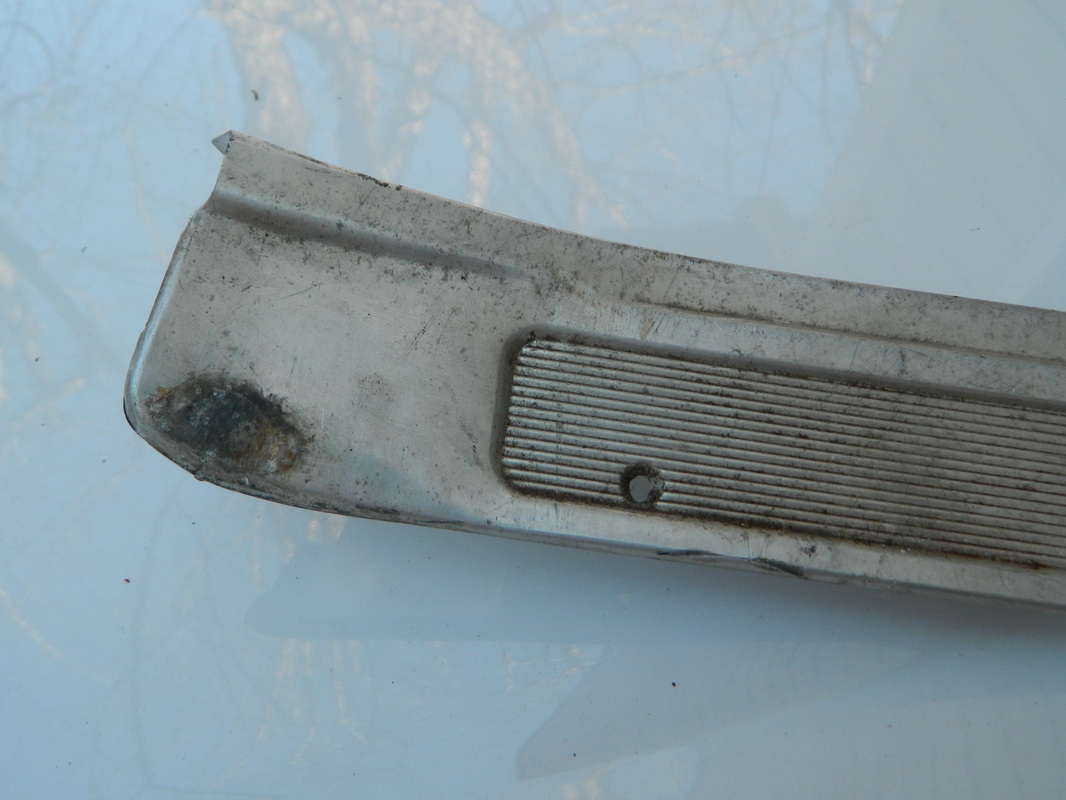
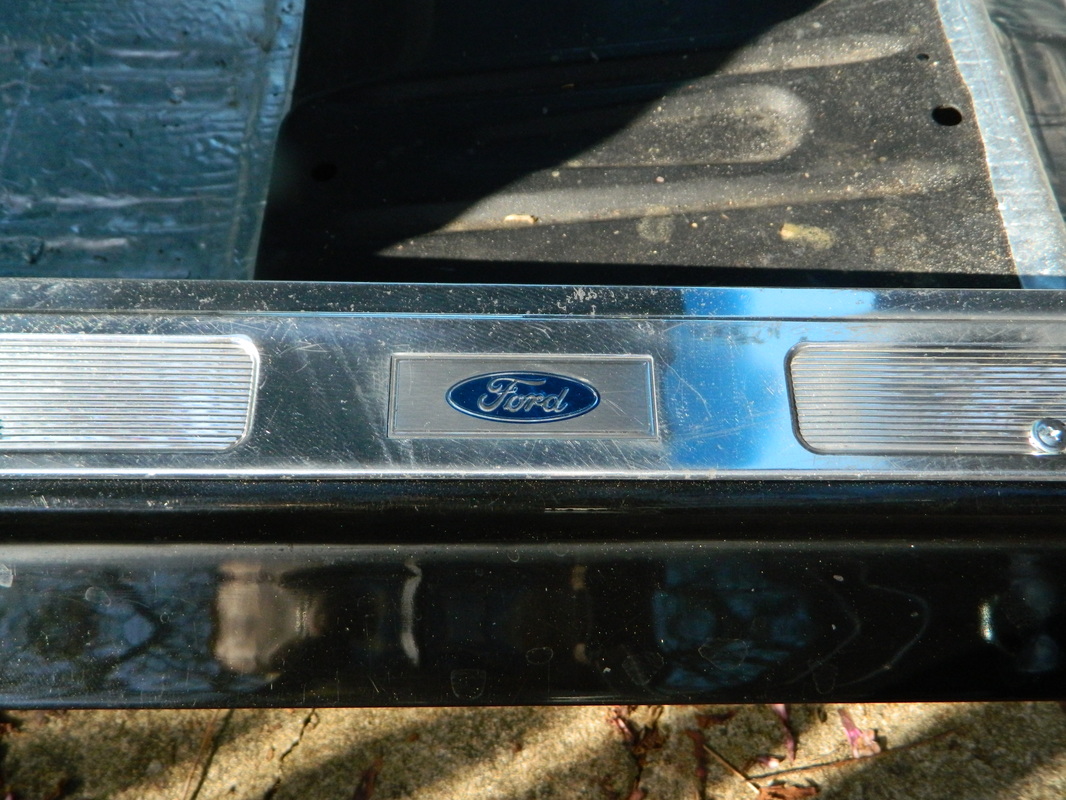
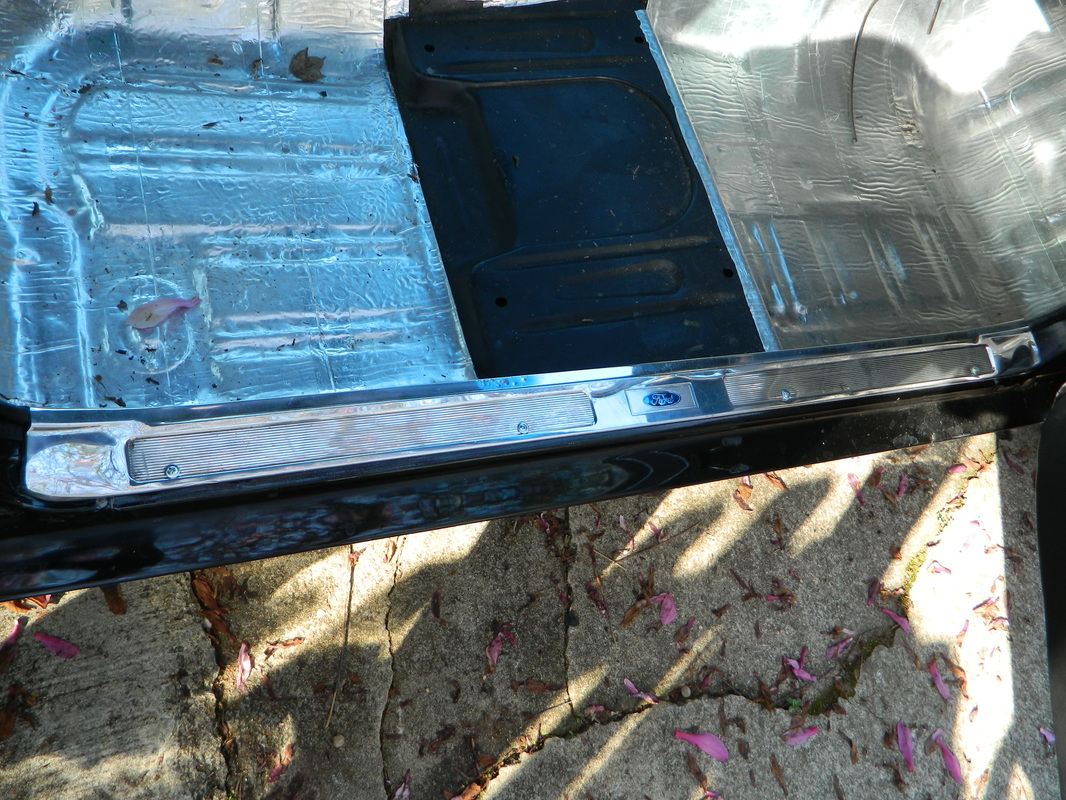
Nice day and i'm off! I went to the upholstery shop and bought some pinch windlace for the edge of the kick panel where it meets the door. Only got one side done, but it looks good. I also put the rear quarter panels in, maybe for the last time. Just for fun I cleaned up one of the sill plates and polished it somewhat. I am going to buy new reproduction plates, later after the carpet is in. I spent about 3 hrs working on the Cougar today. Here's some before and after pics.


Mar 29, 2016
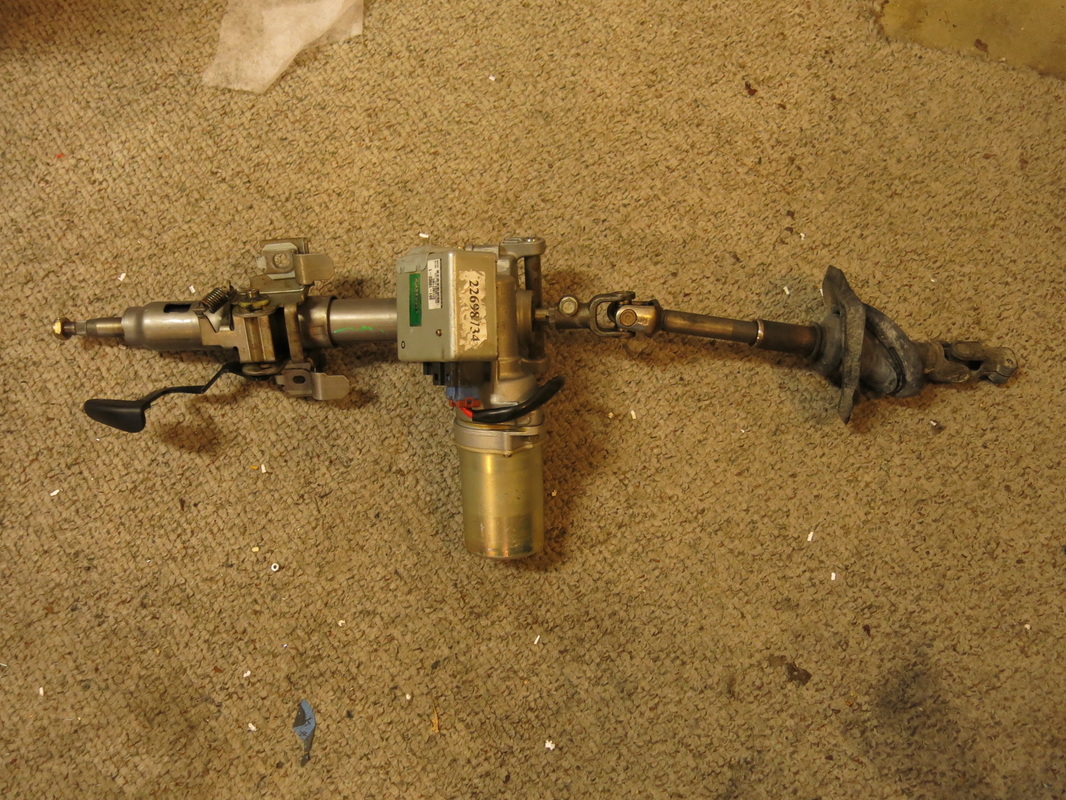
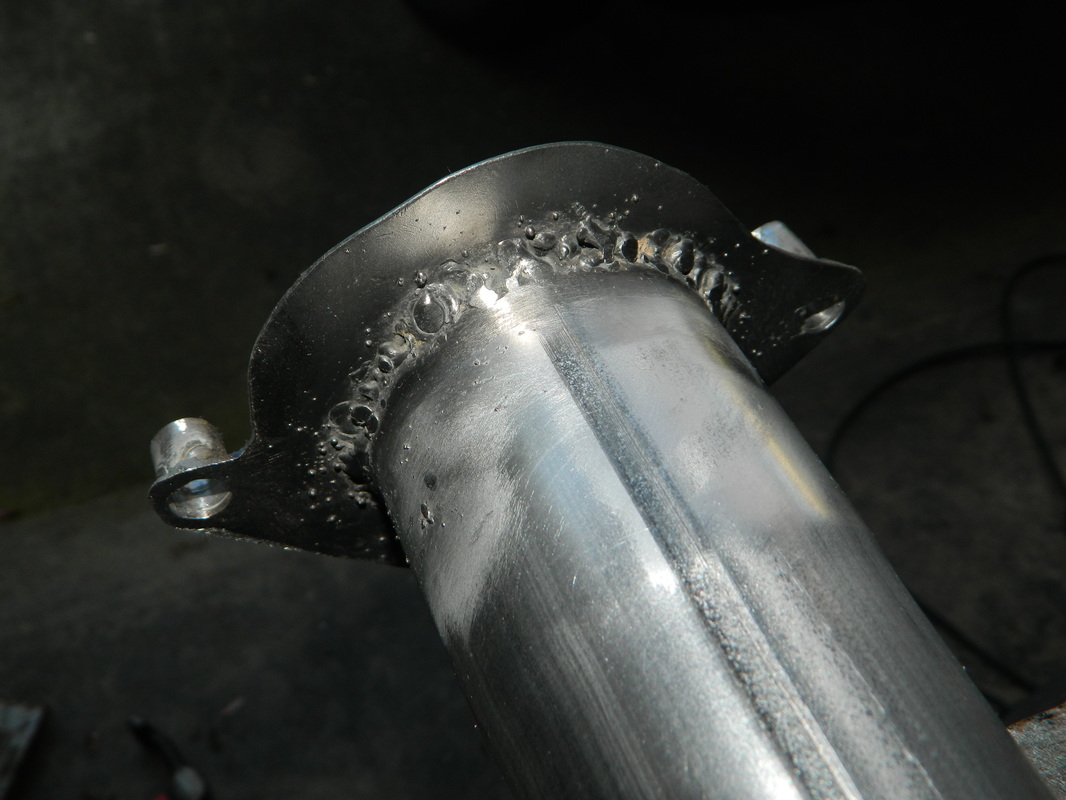
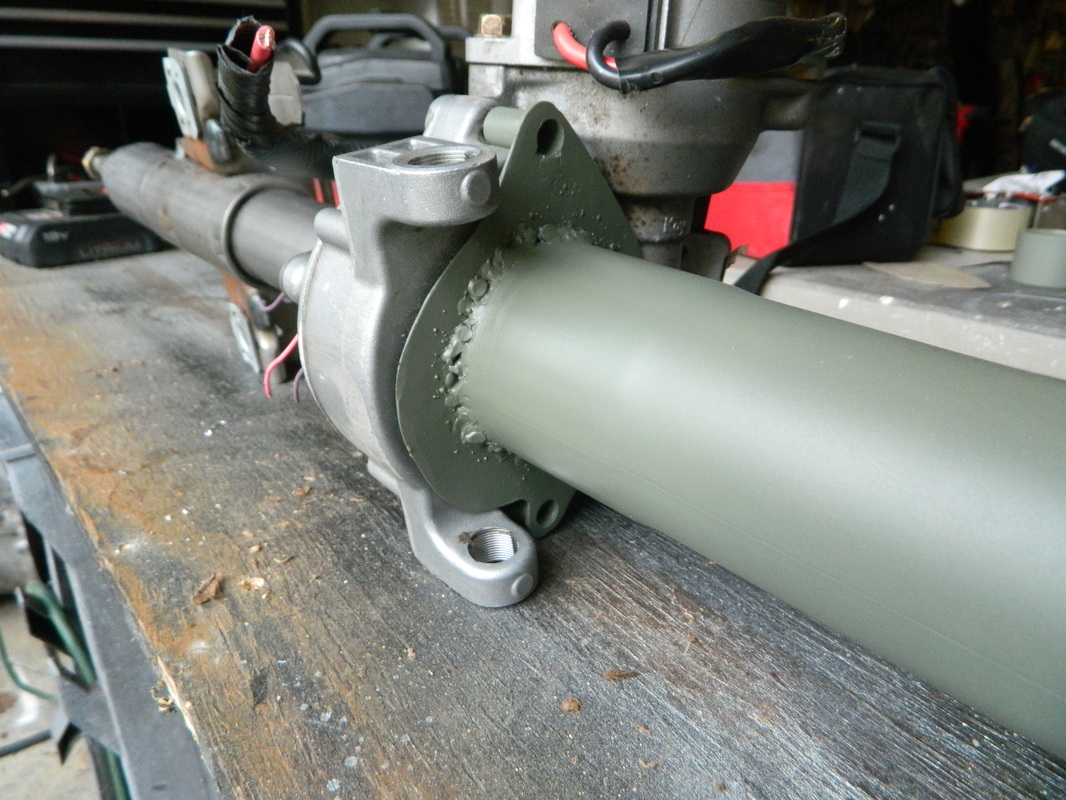
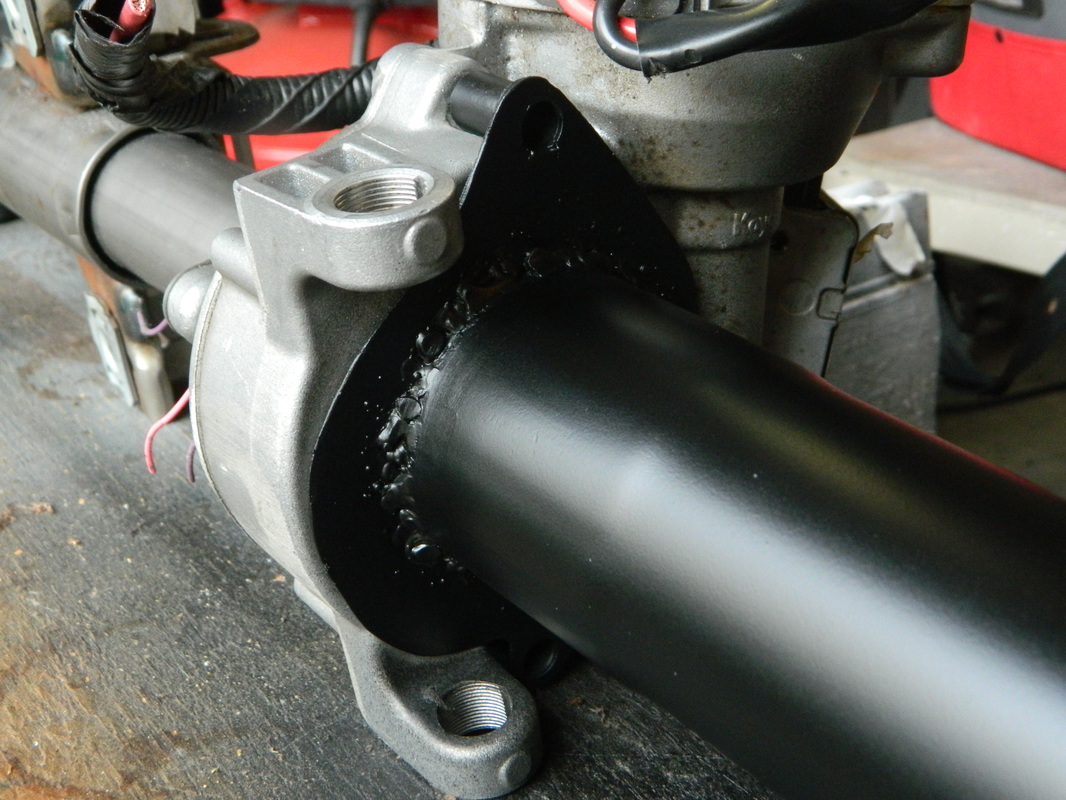
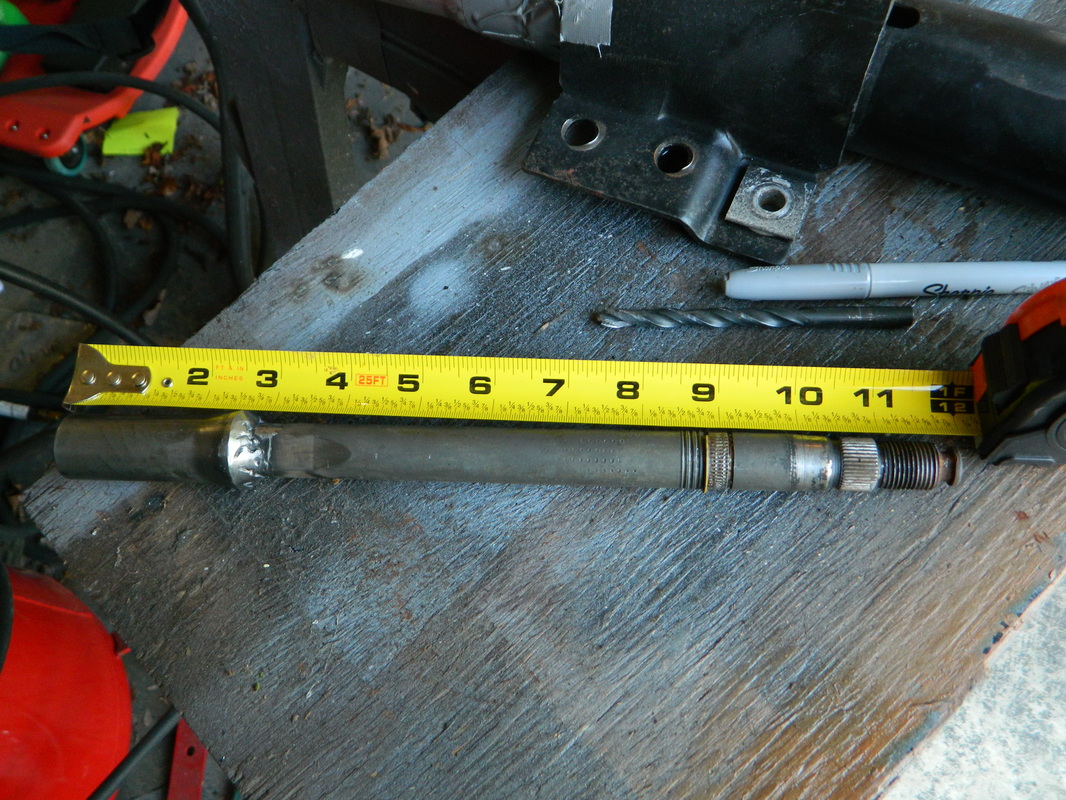
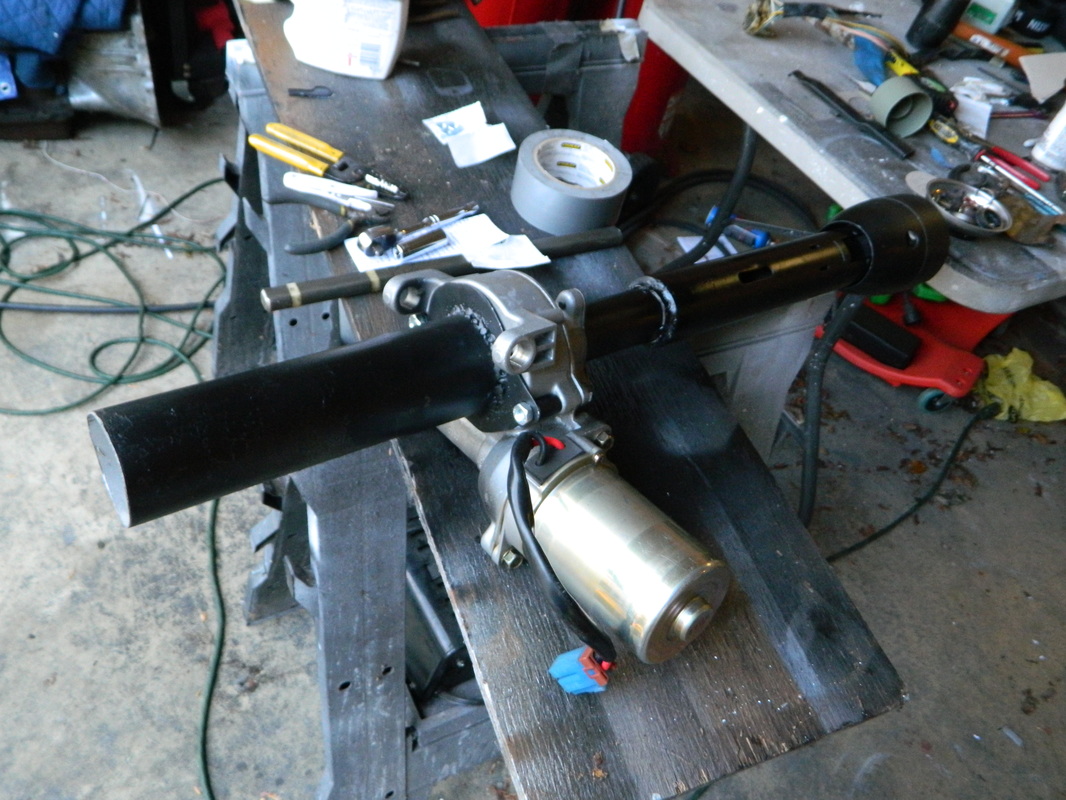
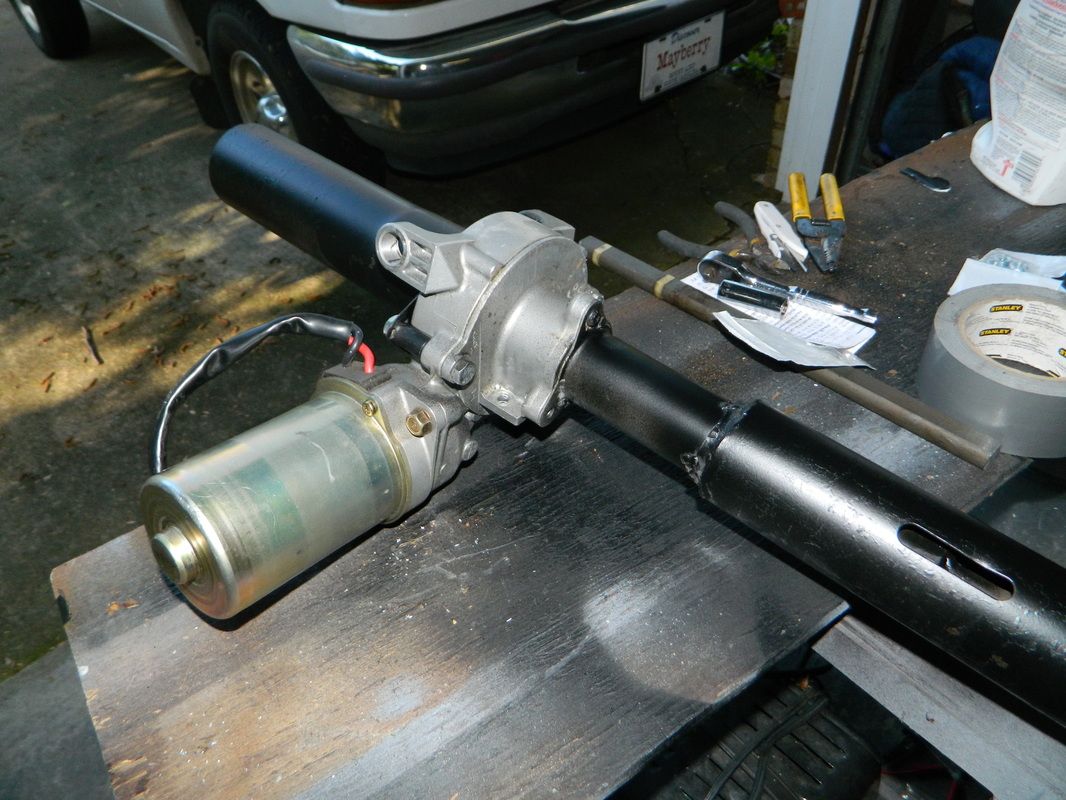
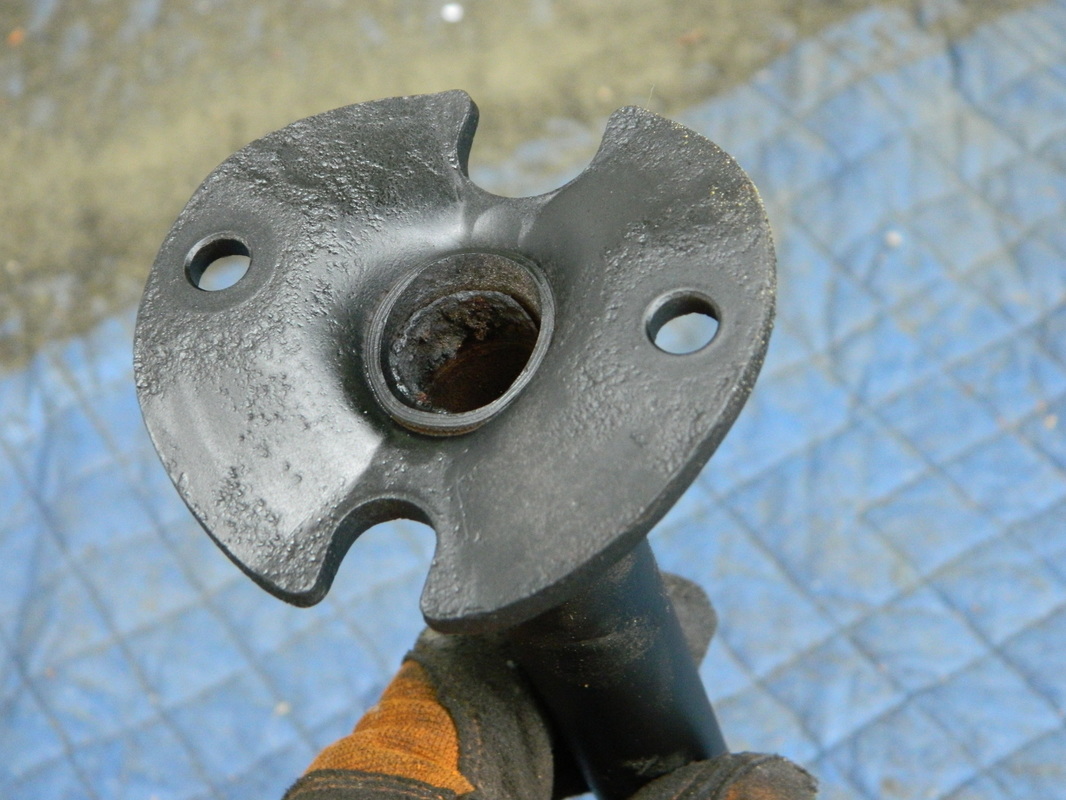
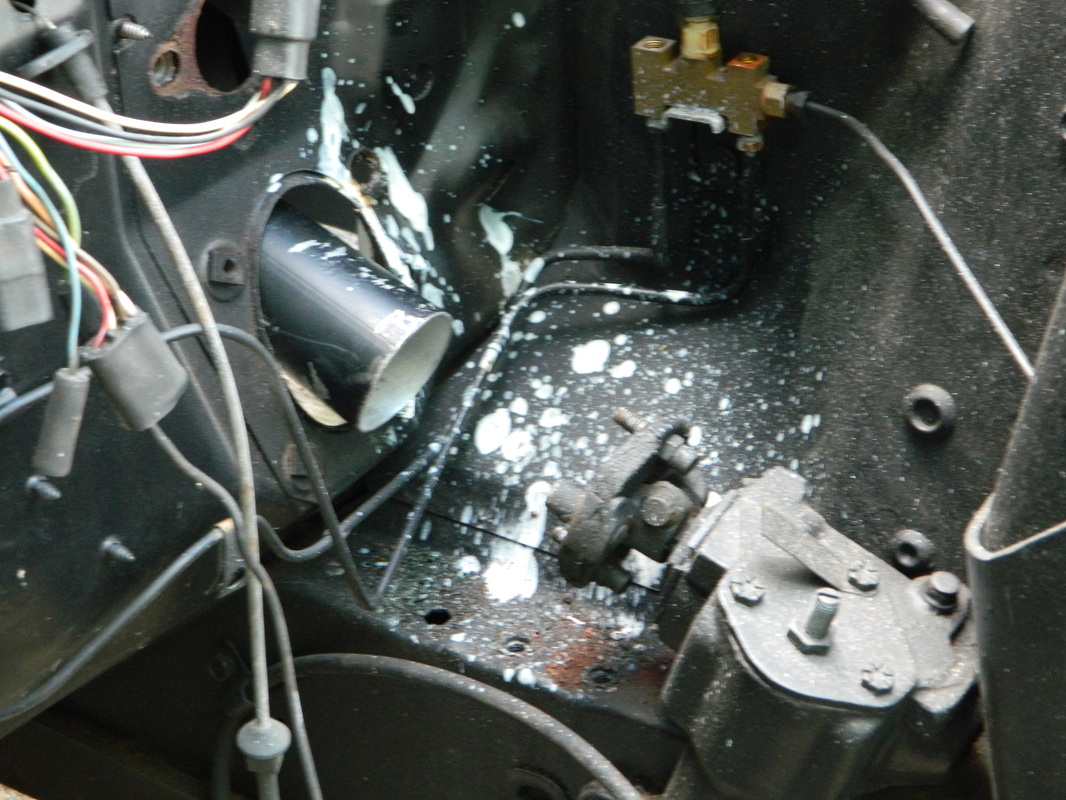
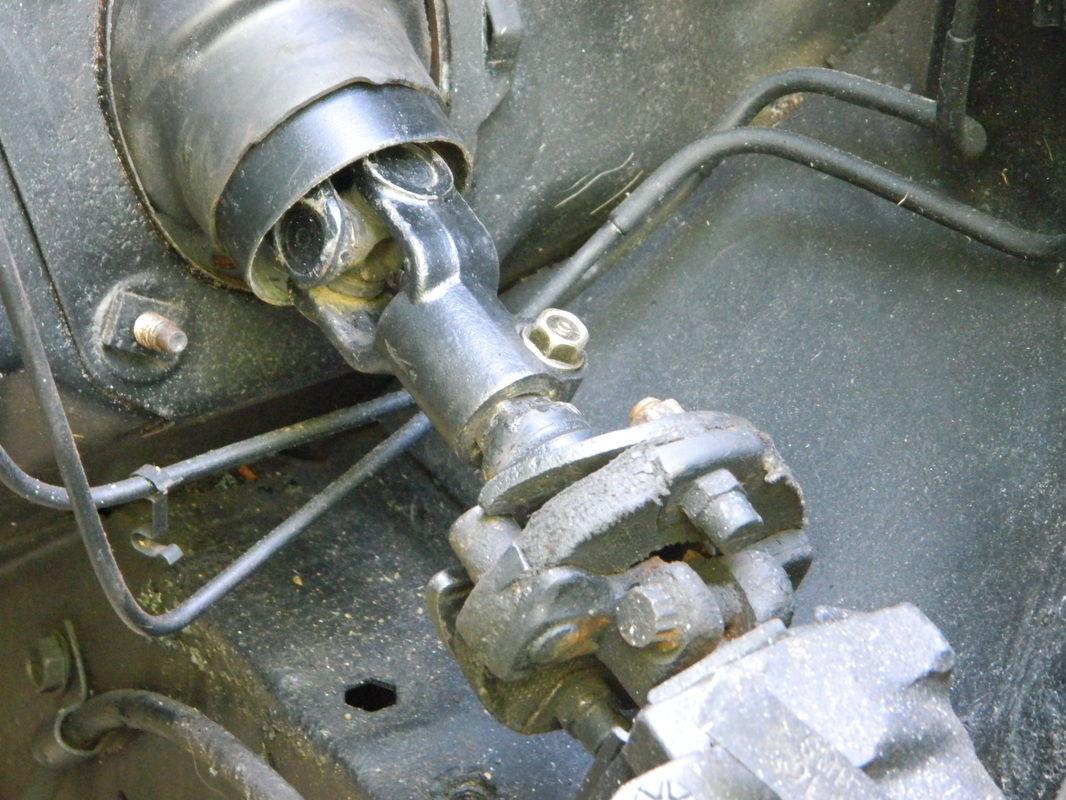
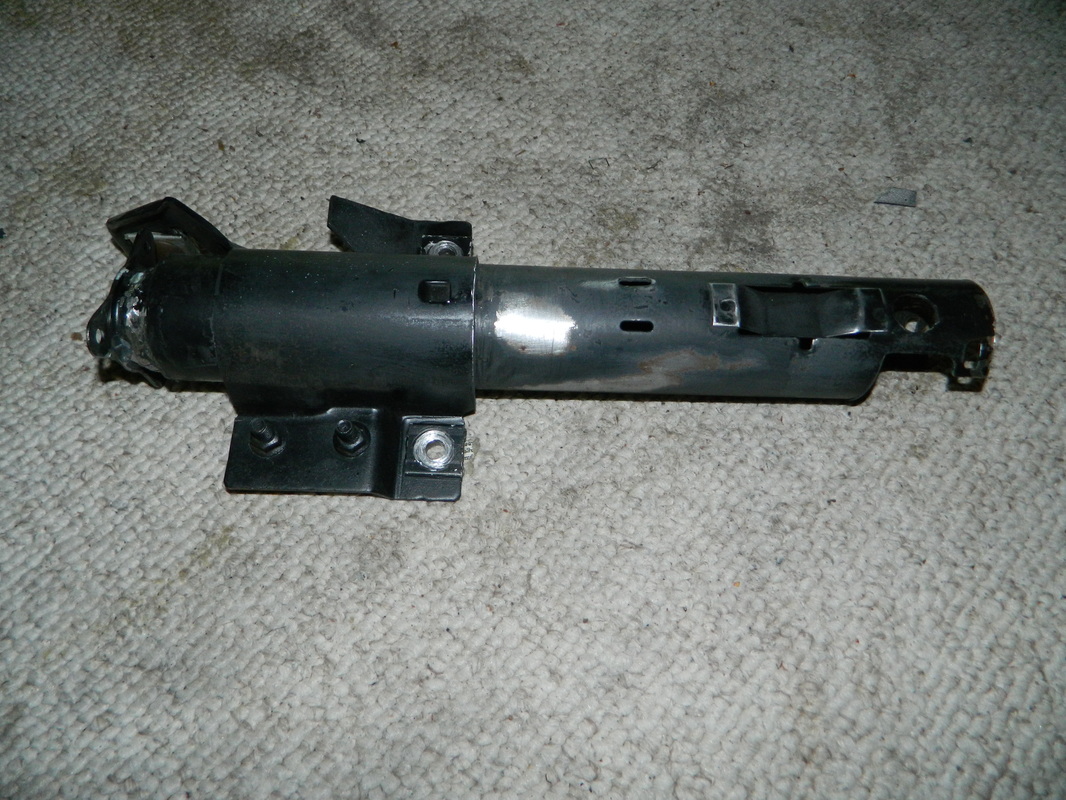
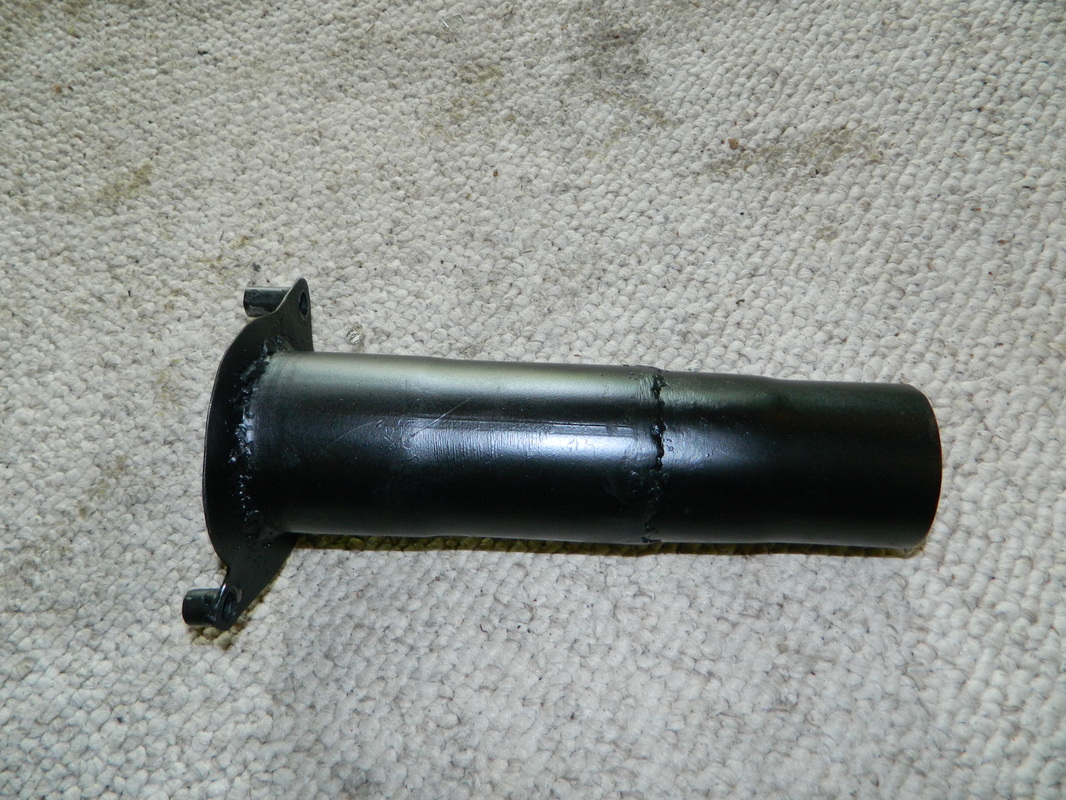
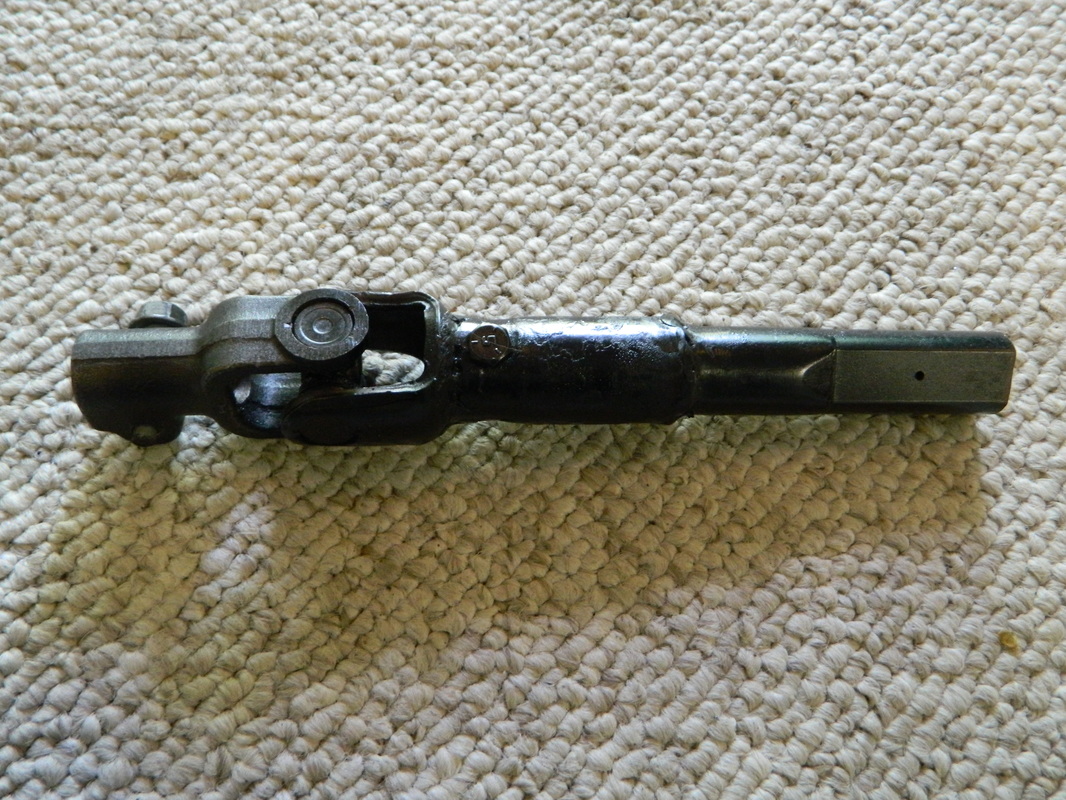
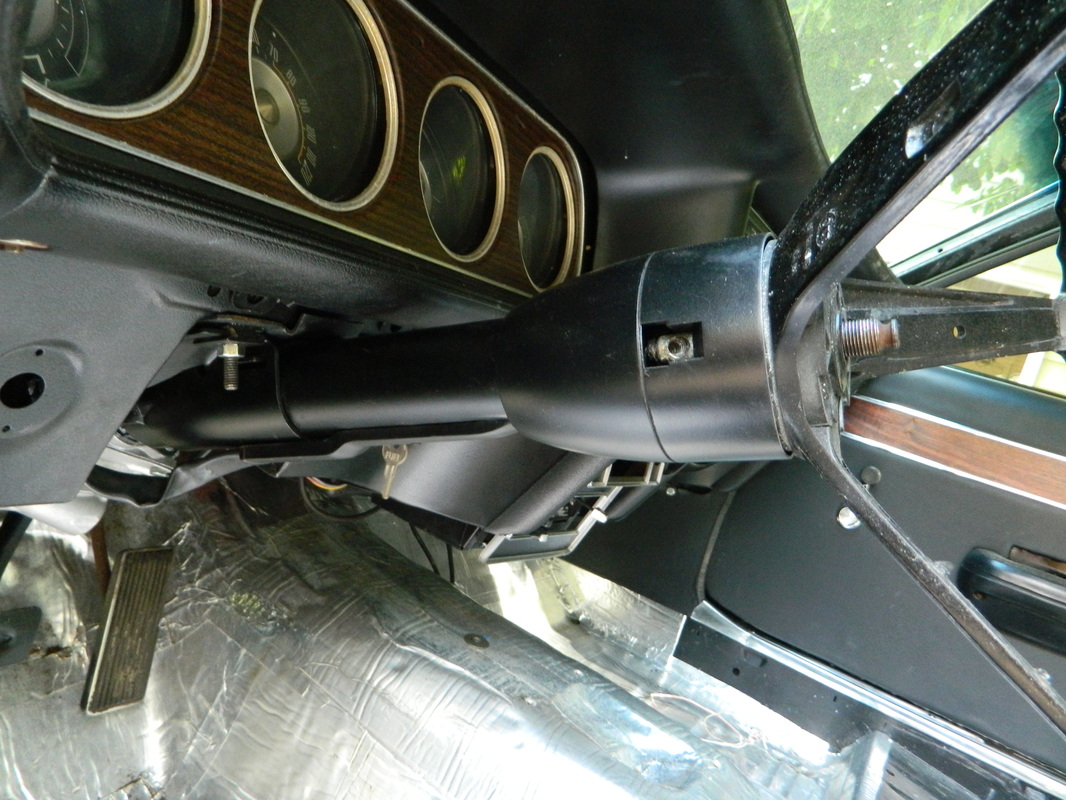
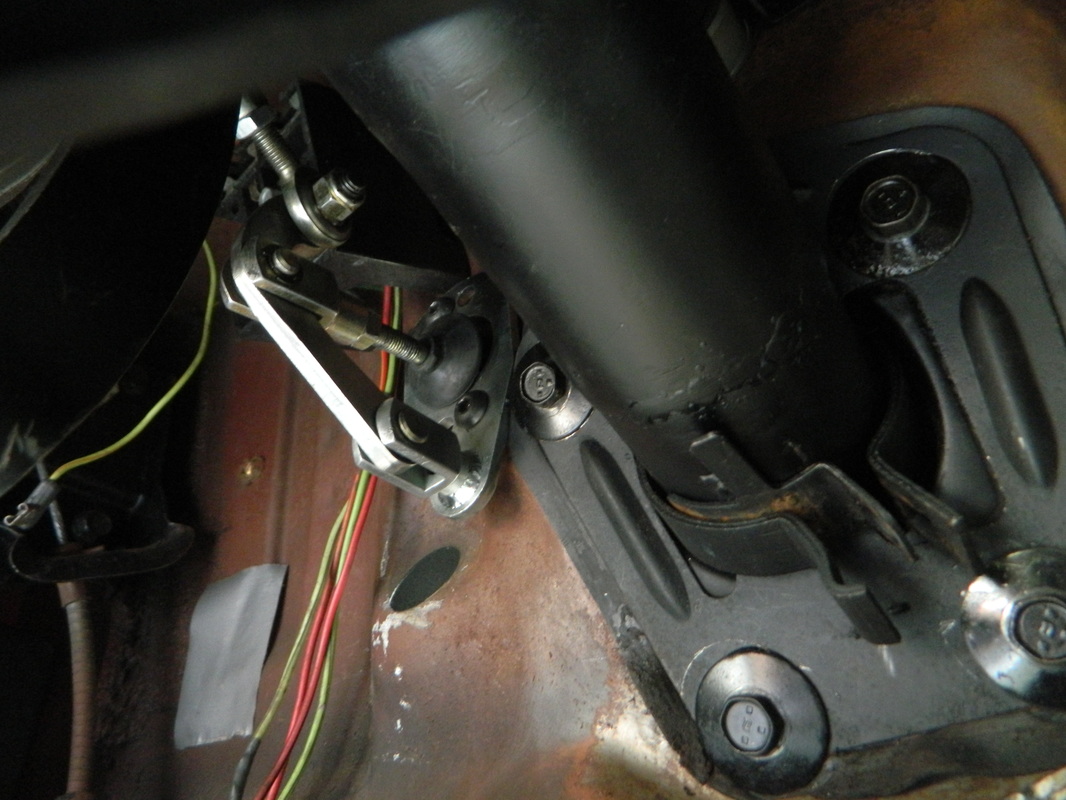
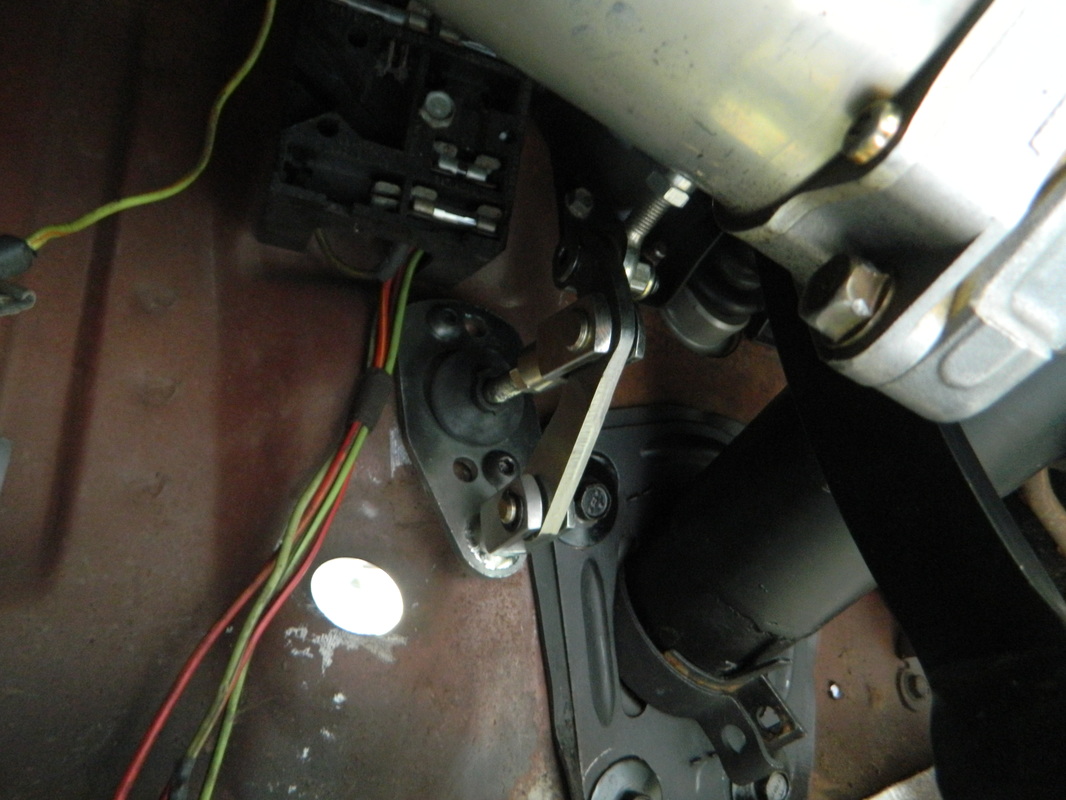
I'm starting a major upgrade on the Cougar. A couple days ago I went to the Pull-a-part salvage yard and removed and bought an electric power steering column out of a 2004 Saturn Vue to install in the Cougar. Sounds crazy I know, but the factory steering system is very old school and doesn't do a very good job and leaks too. So..I found on a Mustang forum several guys had already done the swap and were very happy with it. The column cost me $70 and the controller, which has a knob to add assist from nothing to one finger turning, will cost $65. So, all together with misc items, I will have this working for less than $200. A company does sell the entire column ready to install for...$2000. Today, I made a new lower column tube from an exhaust pipe and a piece of metal. it will bolt on to the steering "transmission" and end up going thru the floorboards to the steering box under the hood. BTW this is going to take a couple weeks to do. Total time today 4 hrs.


April 4, 2016
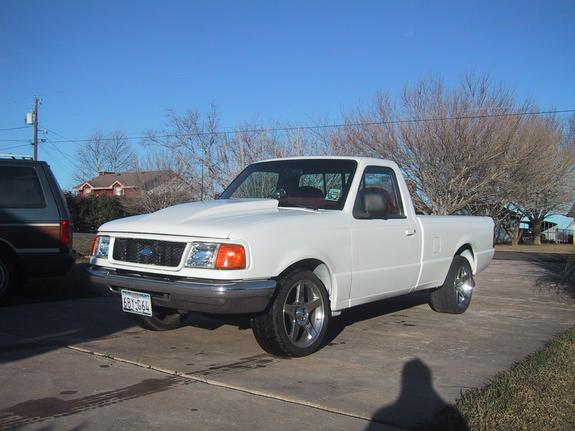
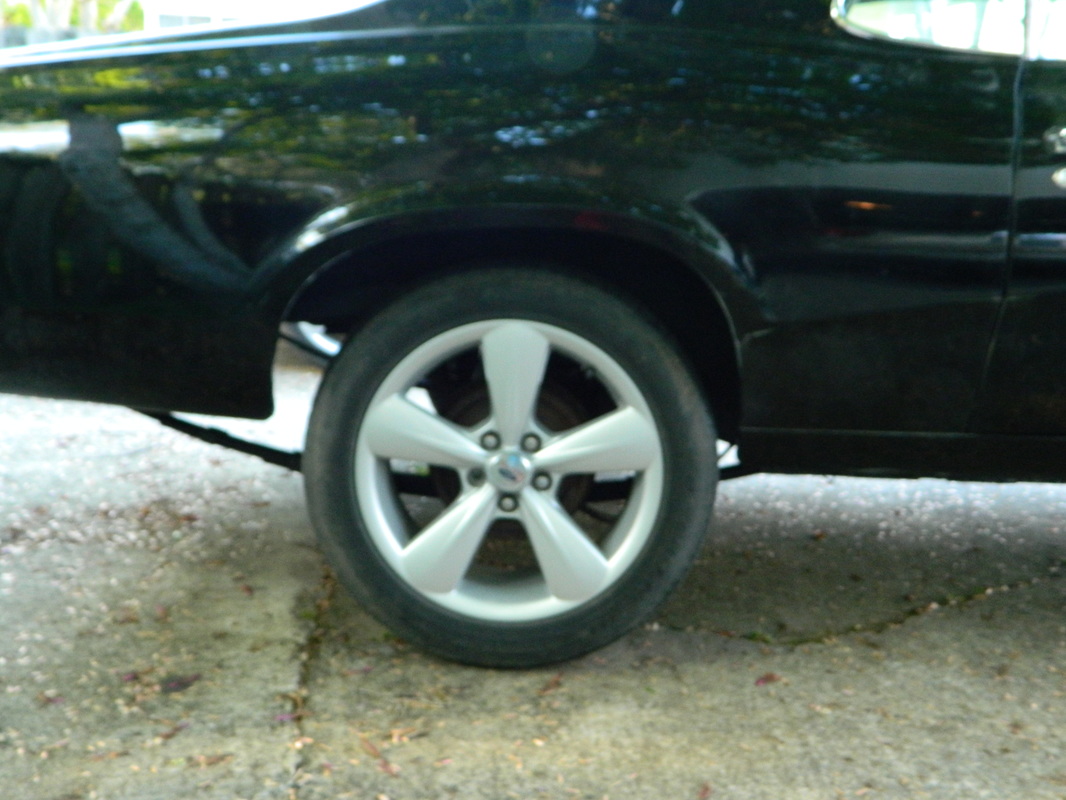
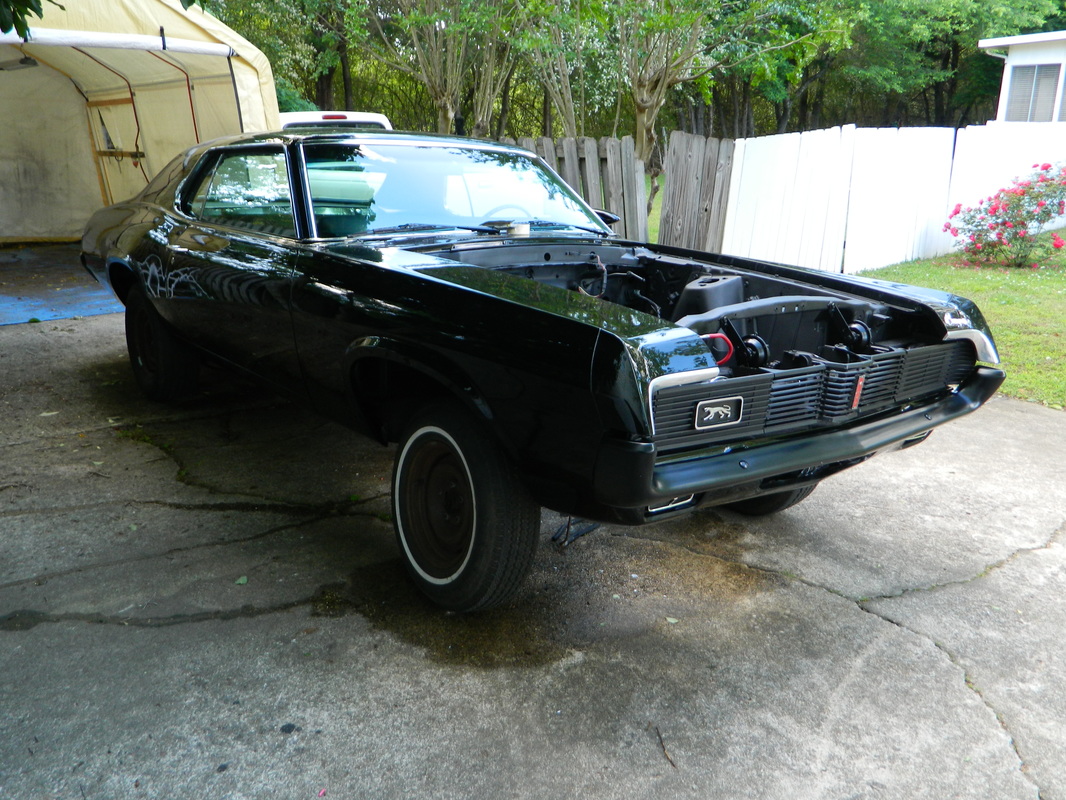
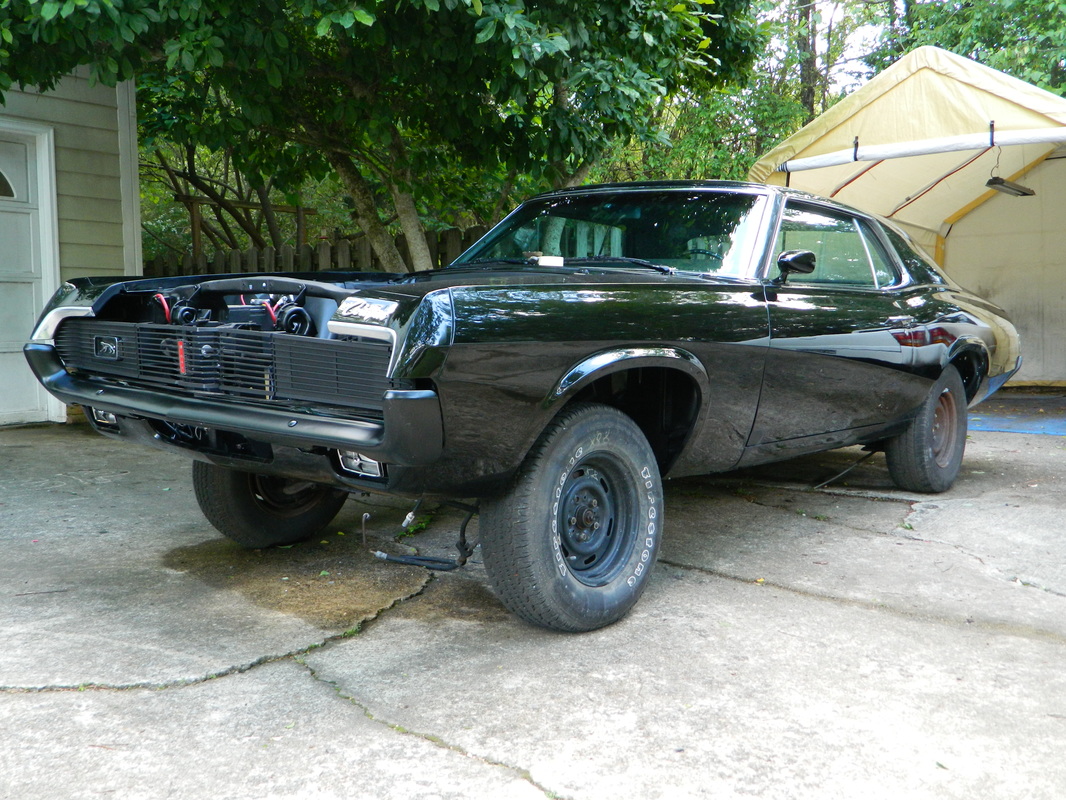
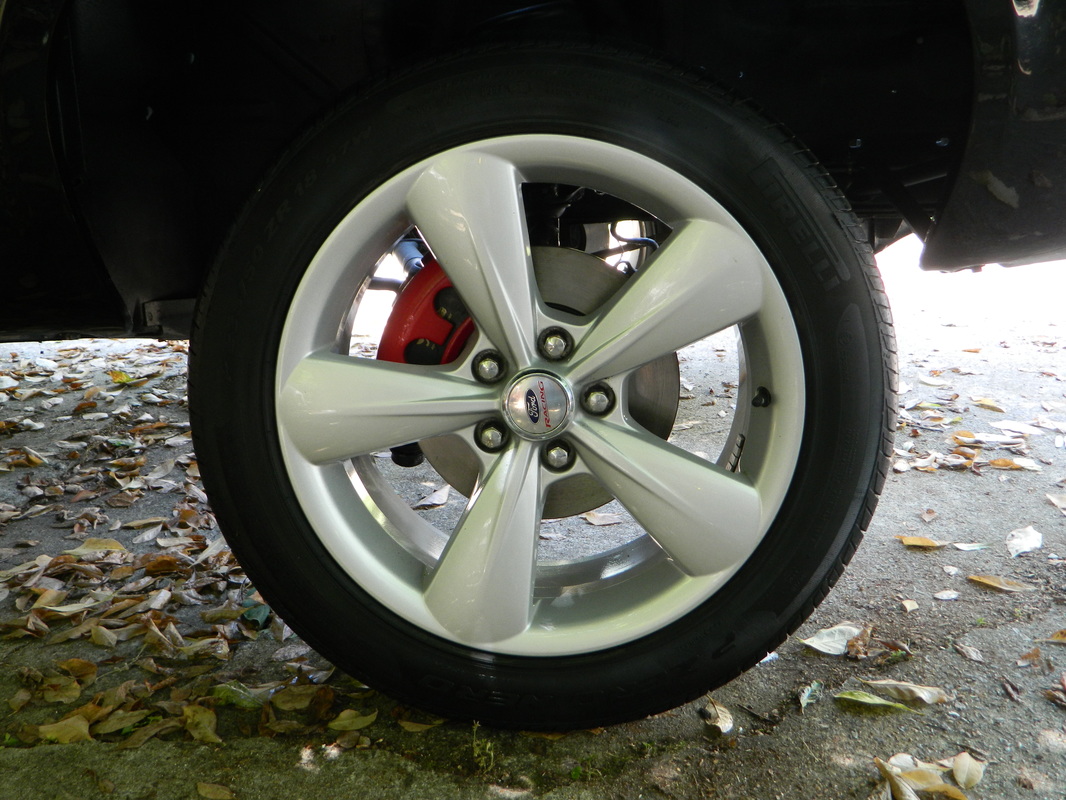
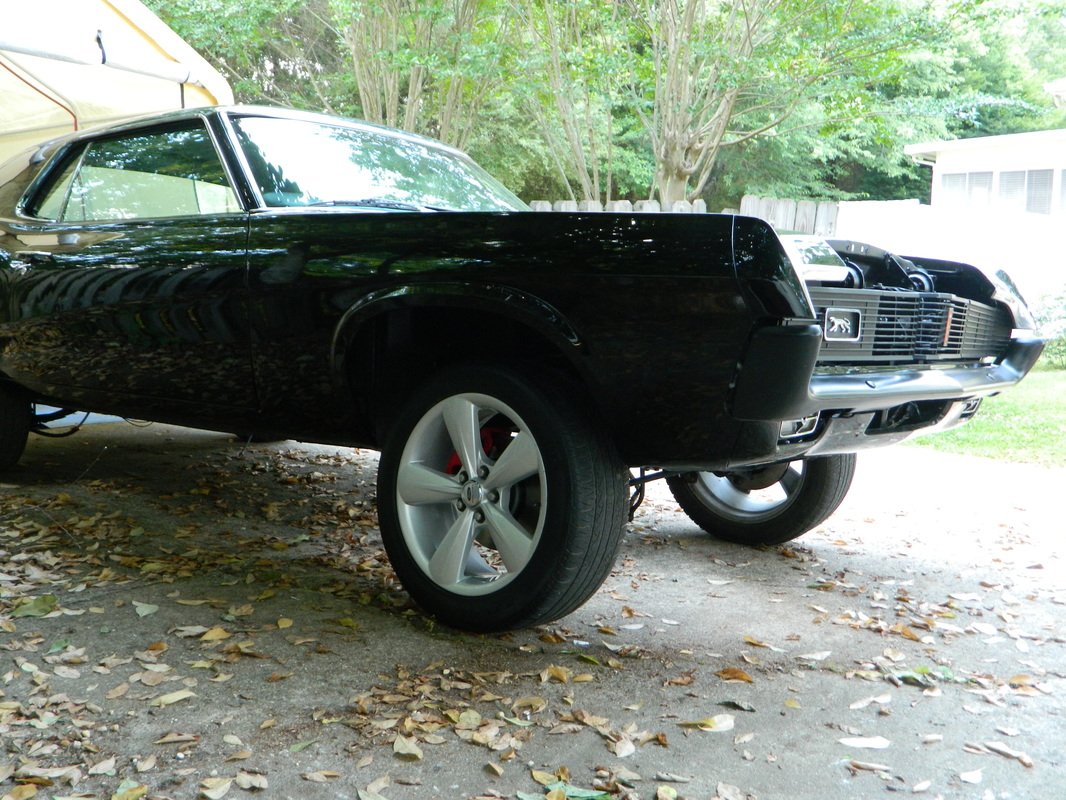
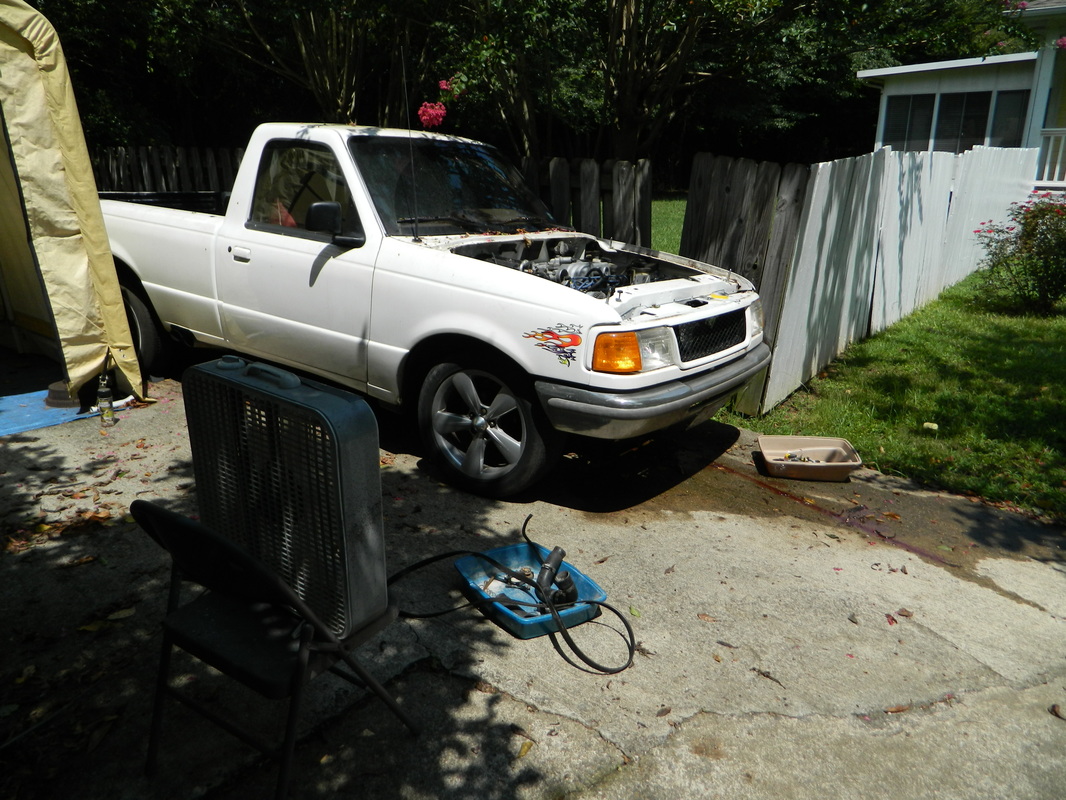
I just got back from Texas and bought back my Ranger and towed it back home, 1800 miles in 3 days! It still runs really strong, just doesn't look so good. Now I have a good running engine, recently rebuilt T5 transmission, new A/C system, 3 row aluminum radiator, set of 2013 Mustang GT wheels with usable tires, traction bars, good battery and a Pioneer stereo and speakers. Now, I have a lot of inspiration to finish up this project. After I finish the electric steering and disc brake upgrade, I will pull the engine and trans out of the Ranger and swap it in. I mounted one of the wheels on the Cougar for a tease. It's going to need a 1" spacer on all the wheels.

April 12, 2016
I have been trying to get somewhere with the electric steering install, but since there are just a few guys with 69-70 Mustangs doing this mod, only a couple have any pictures and they don't have any measurements to go with them. So, I tried to scale the pics of a couple guys and figure out the lengths from that. It apparently wasn't right and I spent most of the day trying to just engineer the measurements myself. Then to make things even worst, since I need to put a clutch pedal and master cylinder in, I don't know what interference I might run into. So, I'm going to shelve this for the meantime and open another can of worms.. I have the column all made up with the measurements I THINK will work but won't know for sure until I put the clutch pedal in. 6 hrs
April 19, 2016
I worked on the ECU wires today, extending them so I can mount the ECU on the lower column tube. I also put a 4 pin connector I ripped out of an old computer, so I can disconnect the wires when necessary. I made a cover to hold the wires securely. 2 hrs


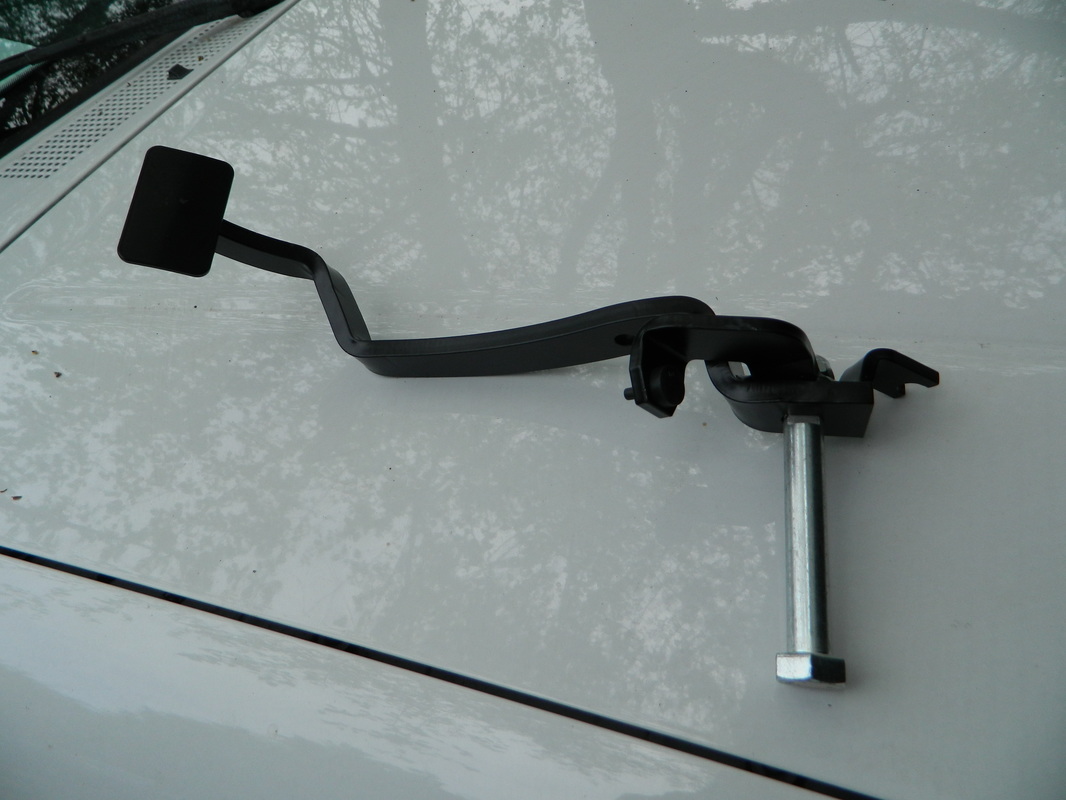
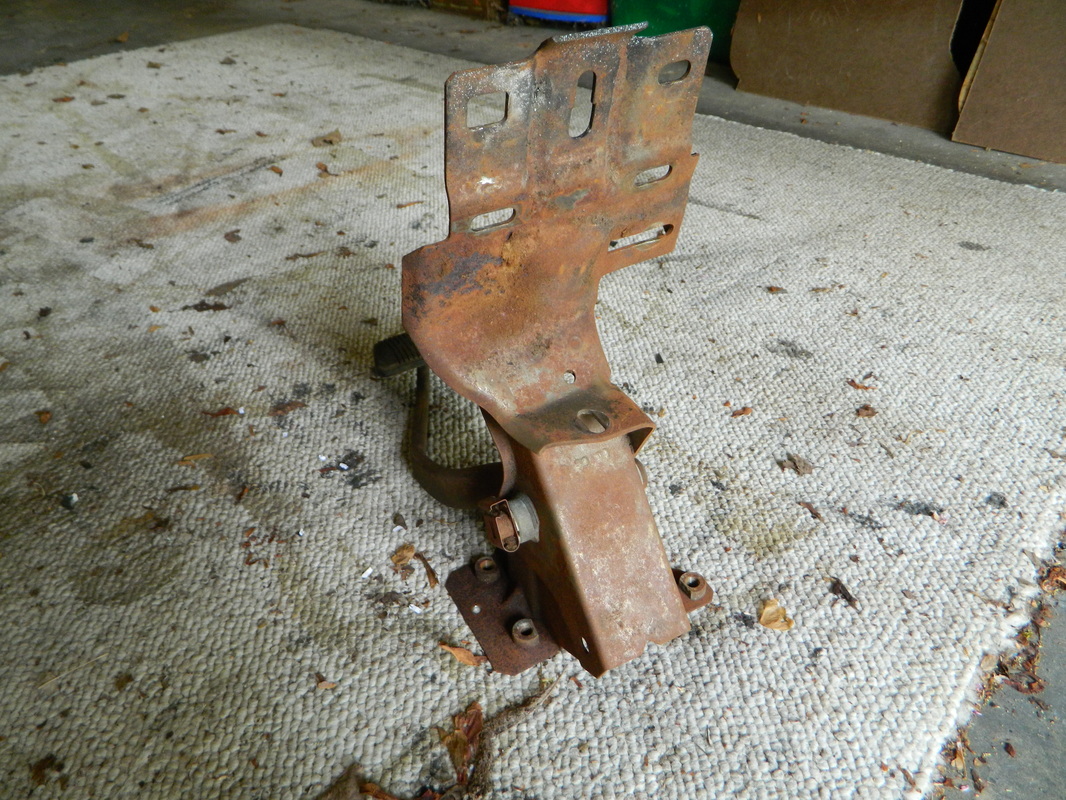
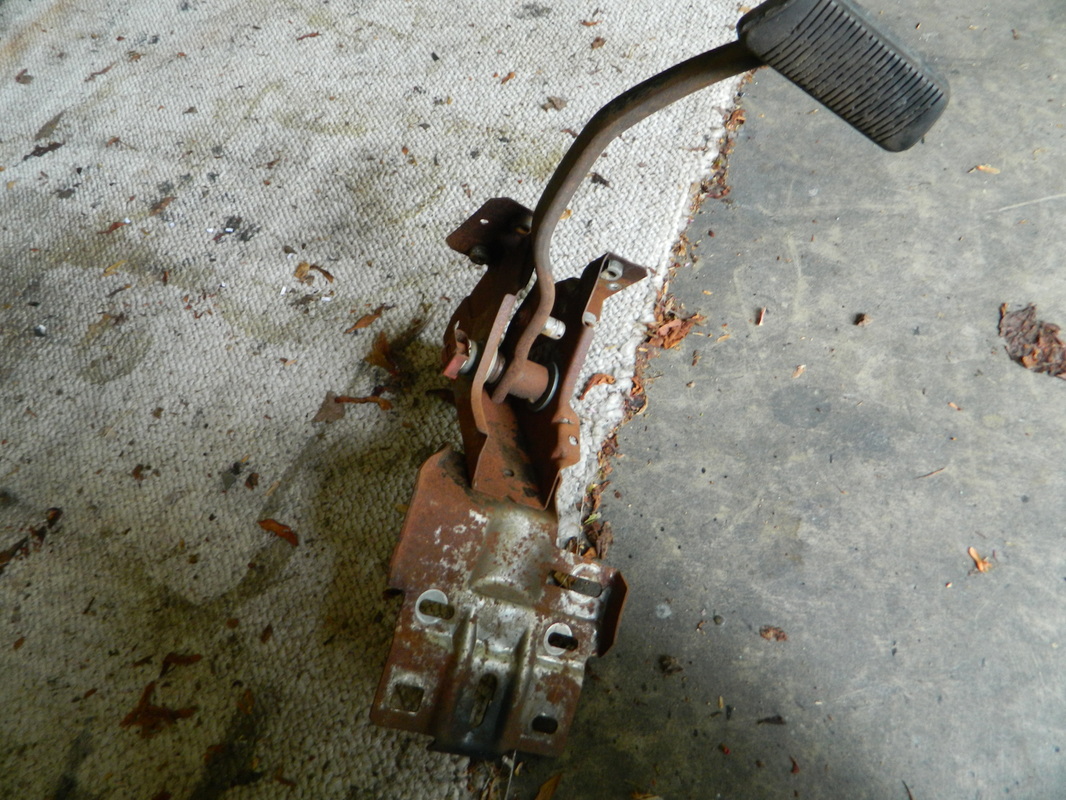
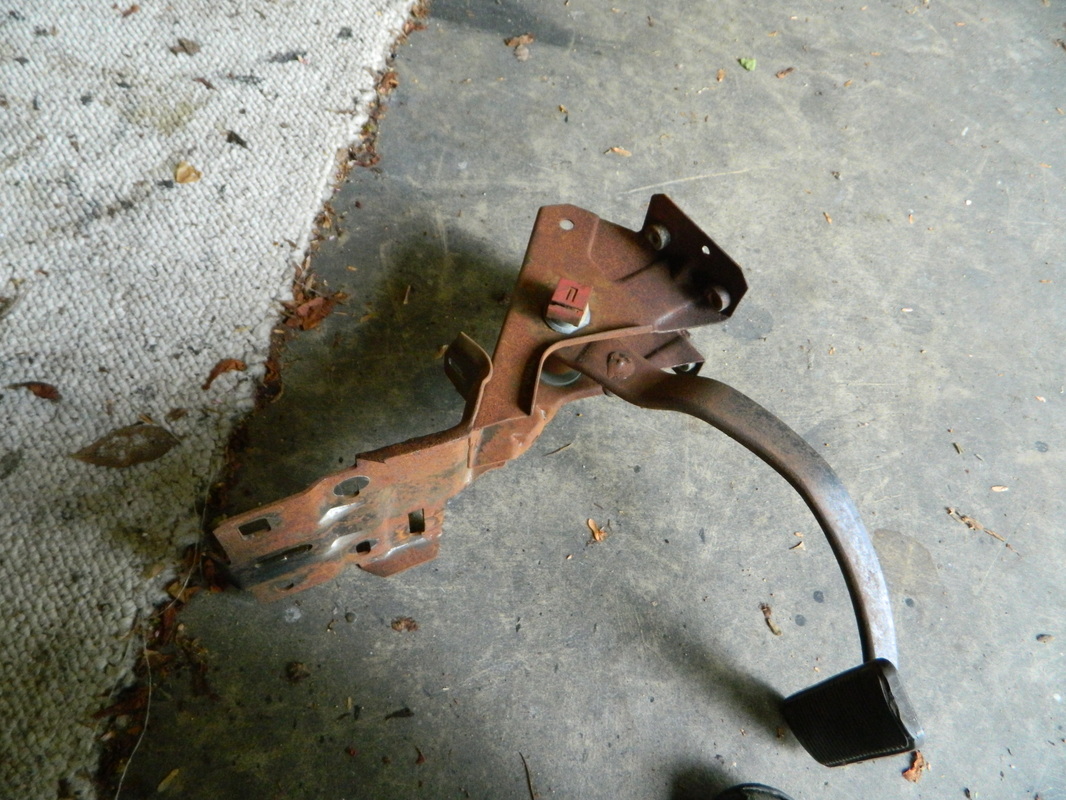
April 21, 2016
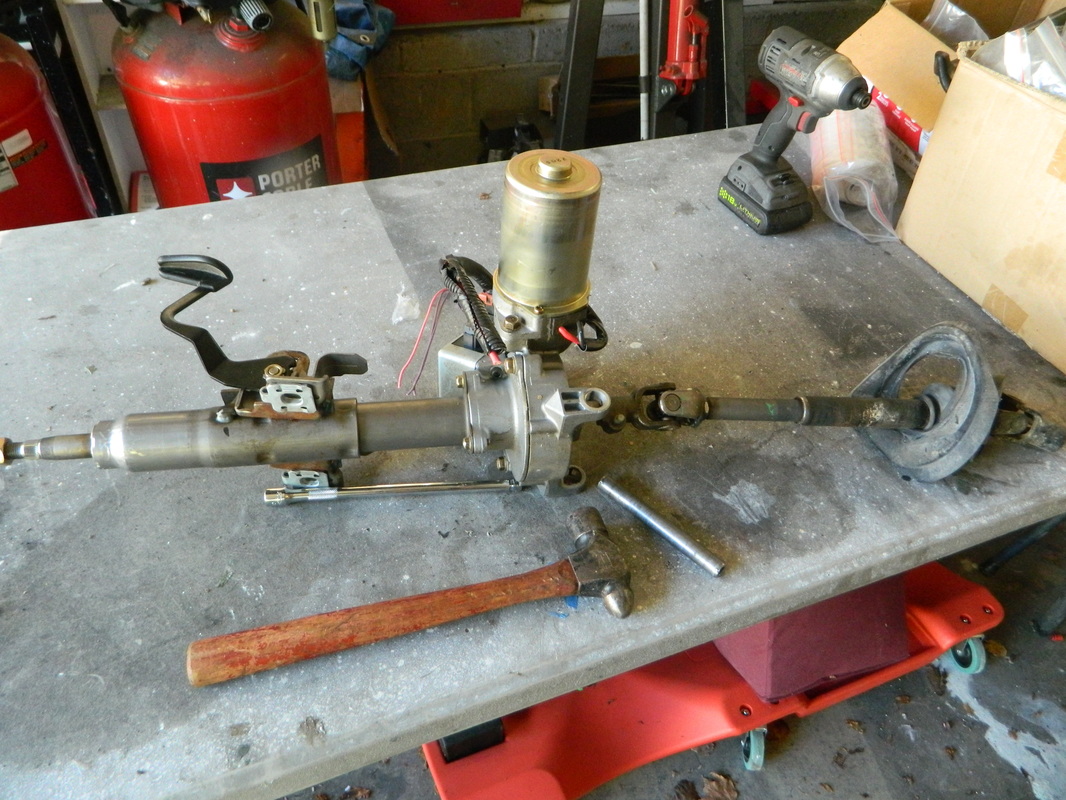
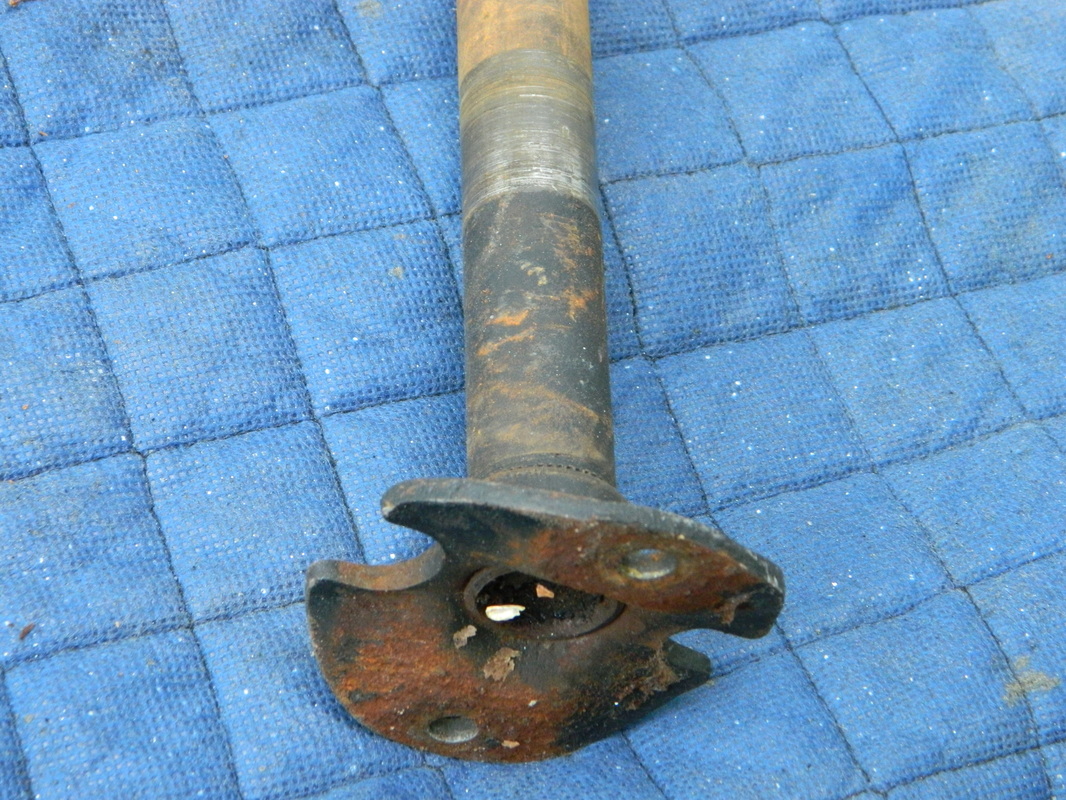
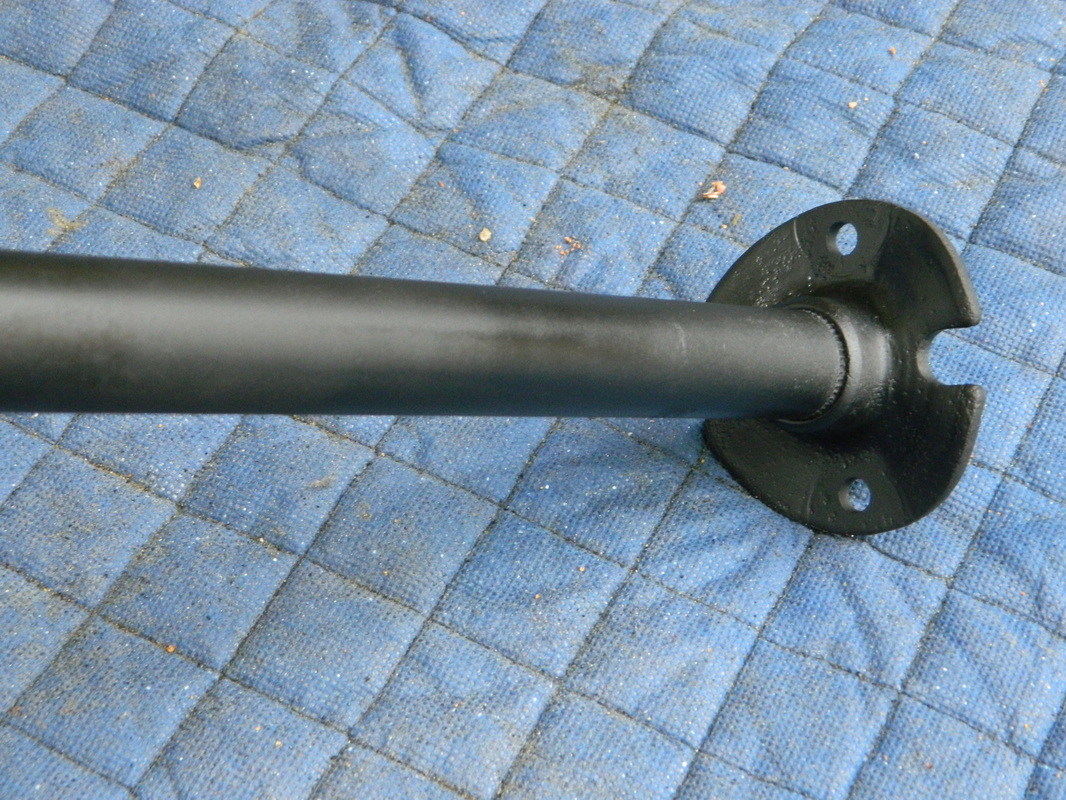
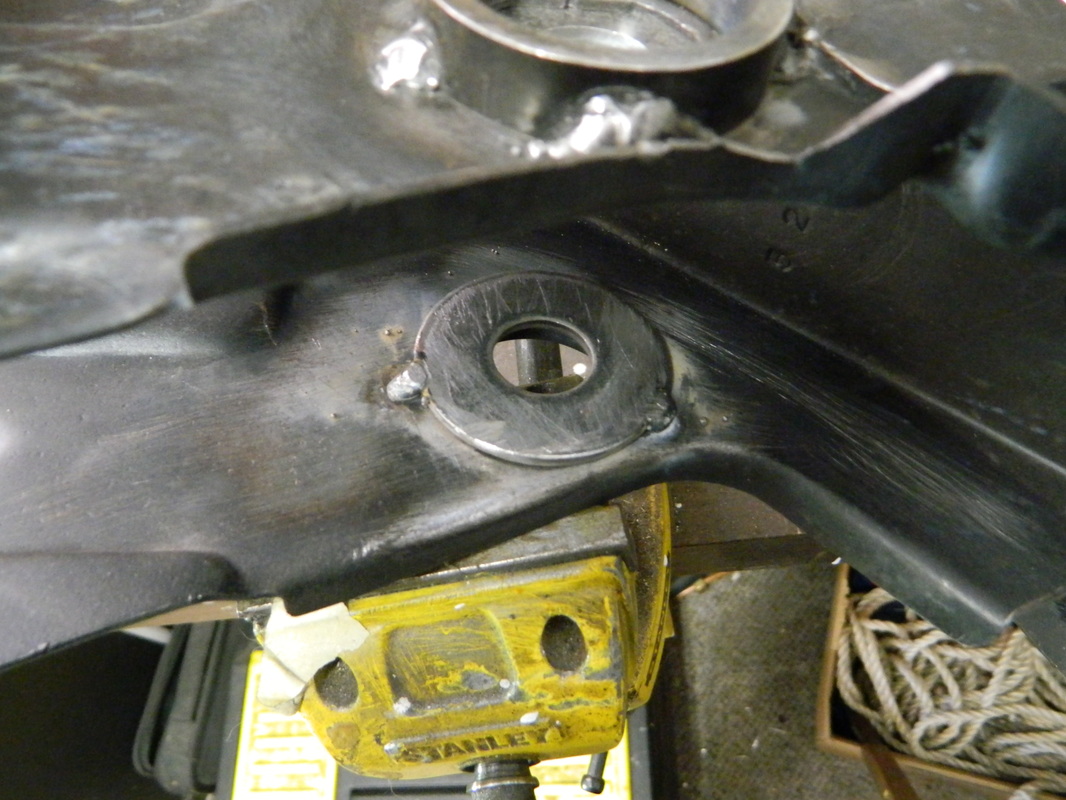
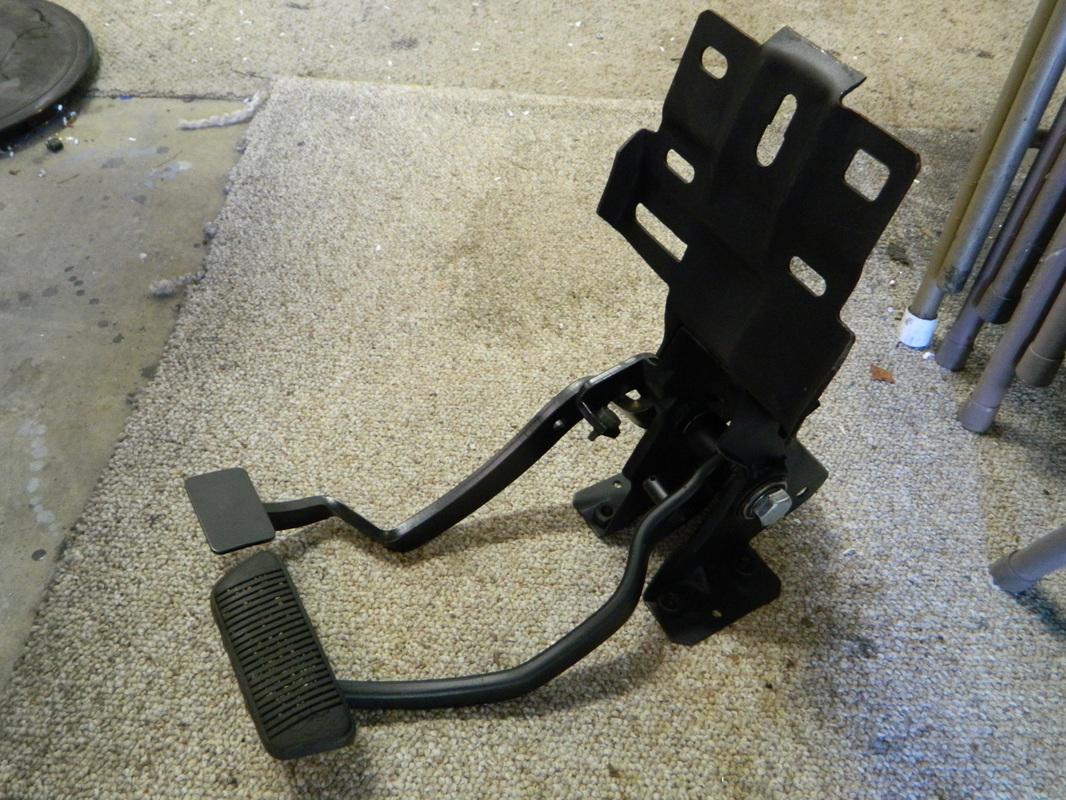
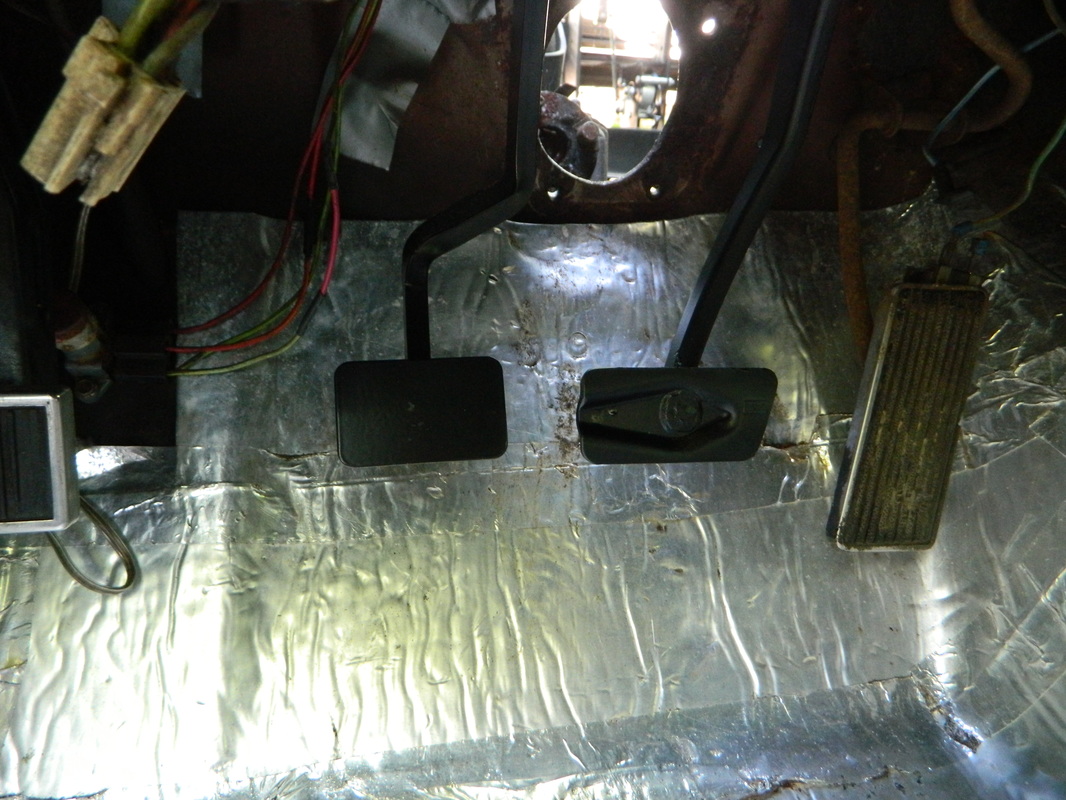
I was off today, after checking my email I discovered that my cllutch pedal was on my front porch! So, a good time to start pulling out the clutch/brake pedal assembly. Removed 9 bolts and the brake pedal and the bracket wouldn't budge. After checking the internet for a solution, and Chilton's repair manual, I crawled up under the dash once more and found a hidden bolt at the top hidden behind the A/C duct. The removal of the bracket alone took over an hour to do. Then, I disassembled everything and sand blasted and painted everything. I now have to wait until Monday when my roller bearing kit for the pedal shaft comes in. The first picture is of the new clutch pedal, the others are the old pedal, brackets and steering column parts. 6hrs


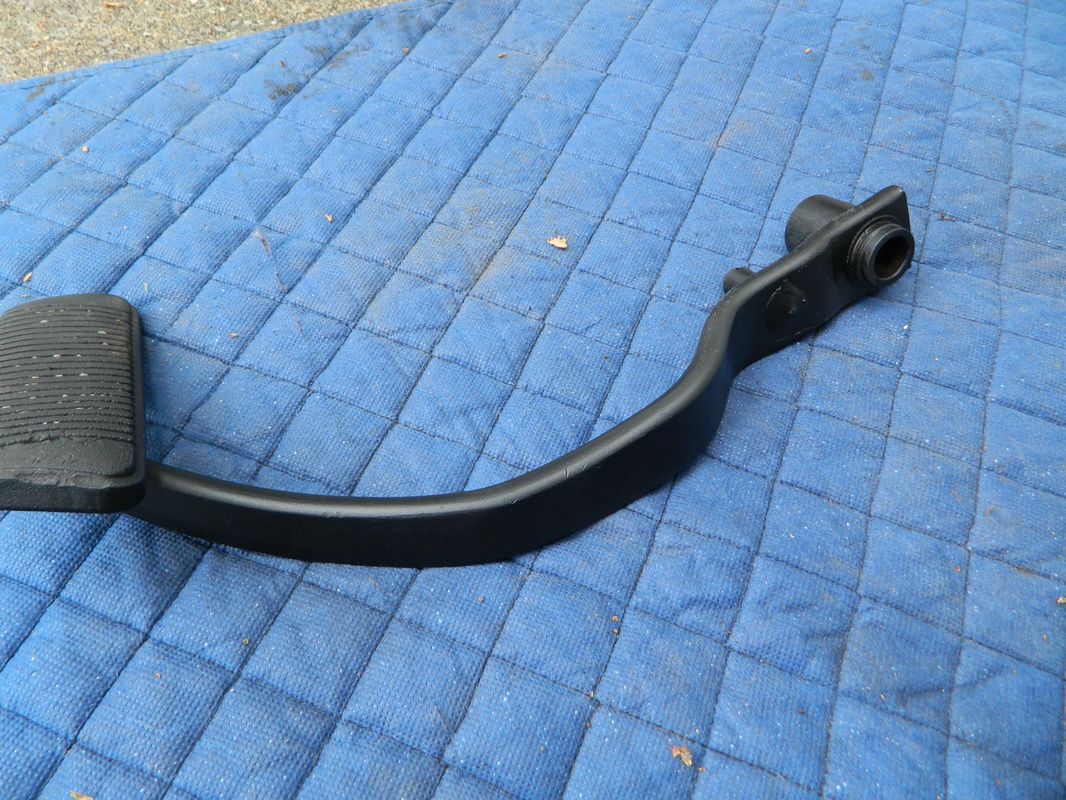

April 23, 2016
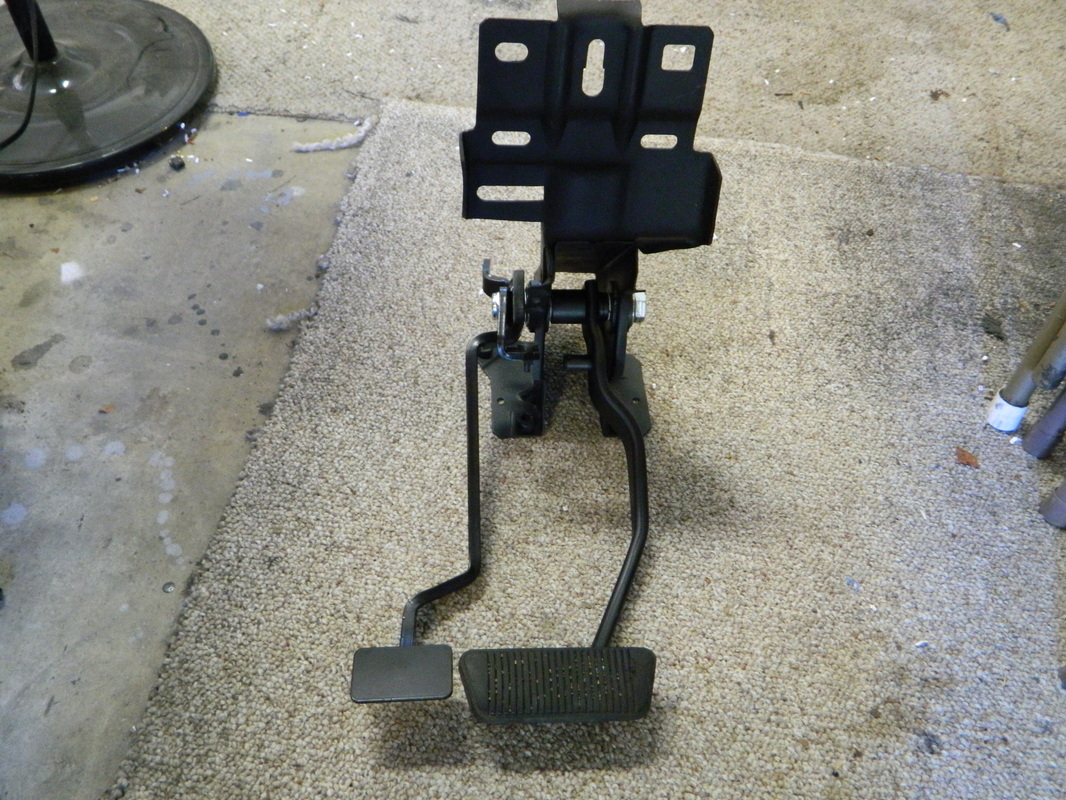
My bearing kit came in yesterday, so of course I was up at 6AM getting ready to install it. It all went text book just like the instructions, except I had to grind and sand down the clutch shaft at both ends just slightly. I next need to get the pedal pads. I will then use the new smaller brake pedal pad as a template to cut the pedal down to the correct size. Then it will all be ready to re-install in the Cougar and allow me to continue with the electric steering install. only 2 hrs today.

April 26, 2016
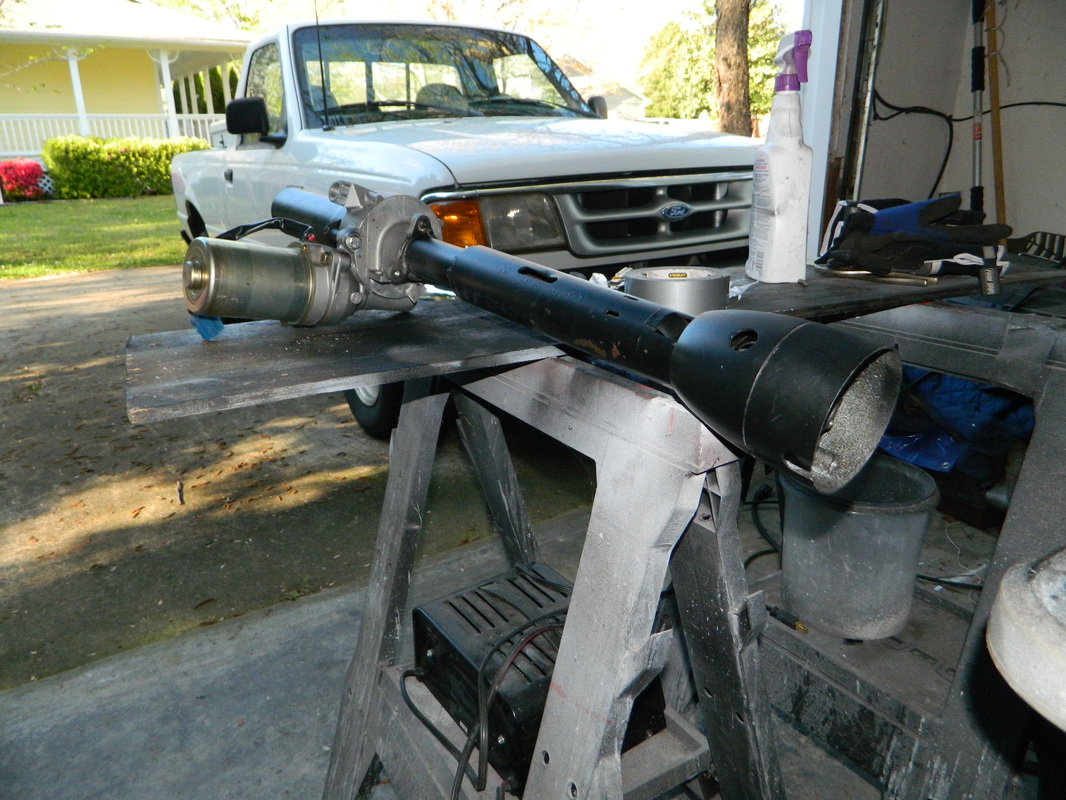
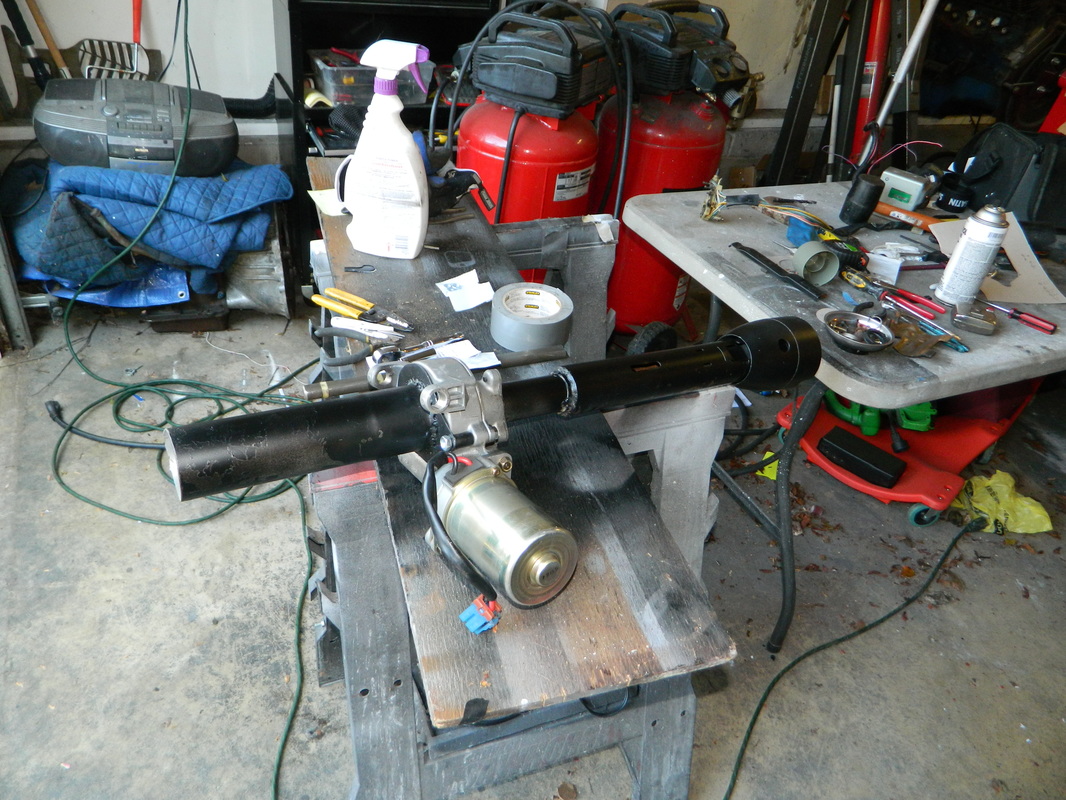
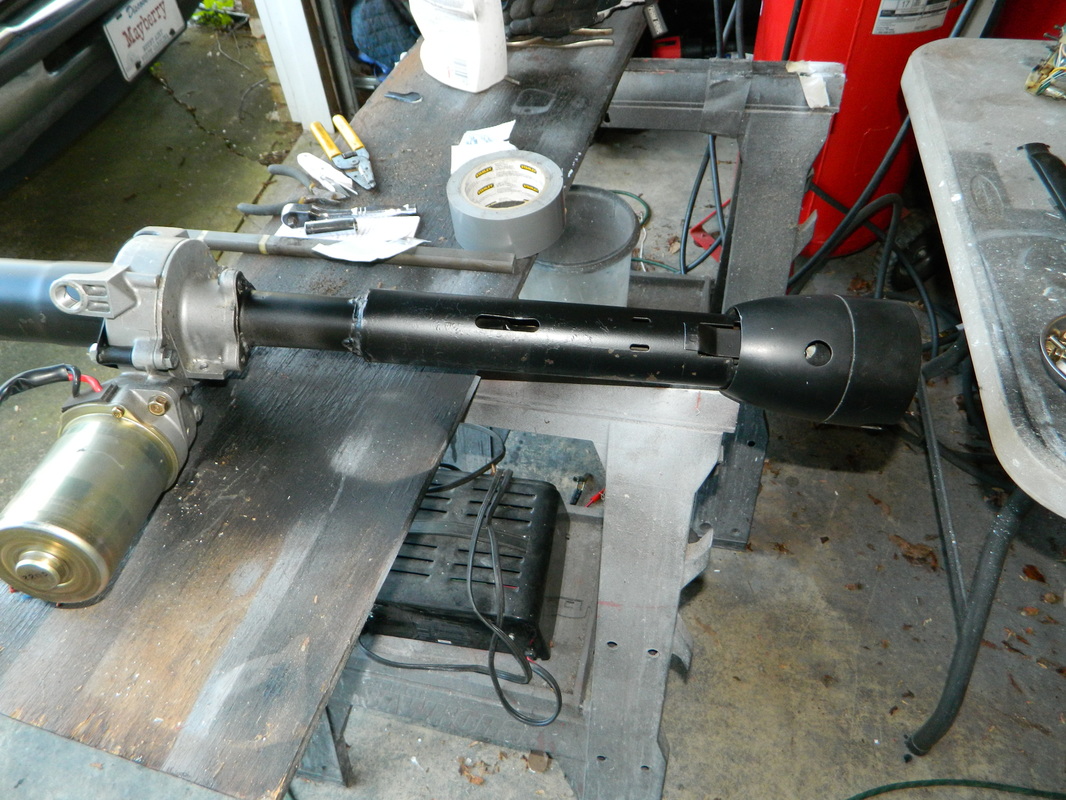
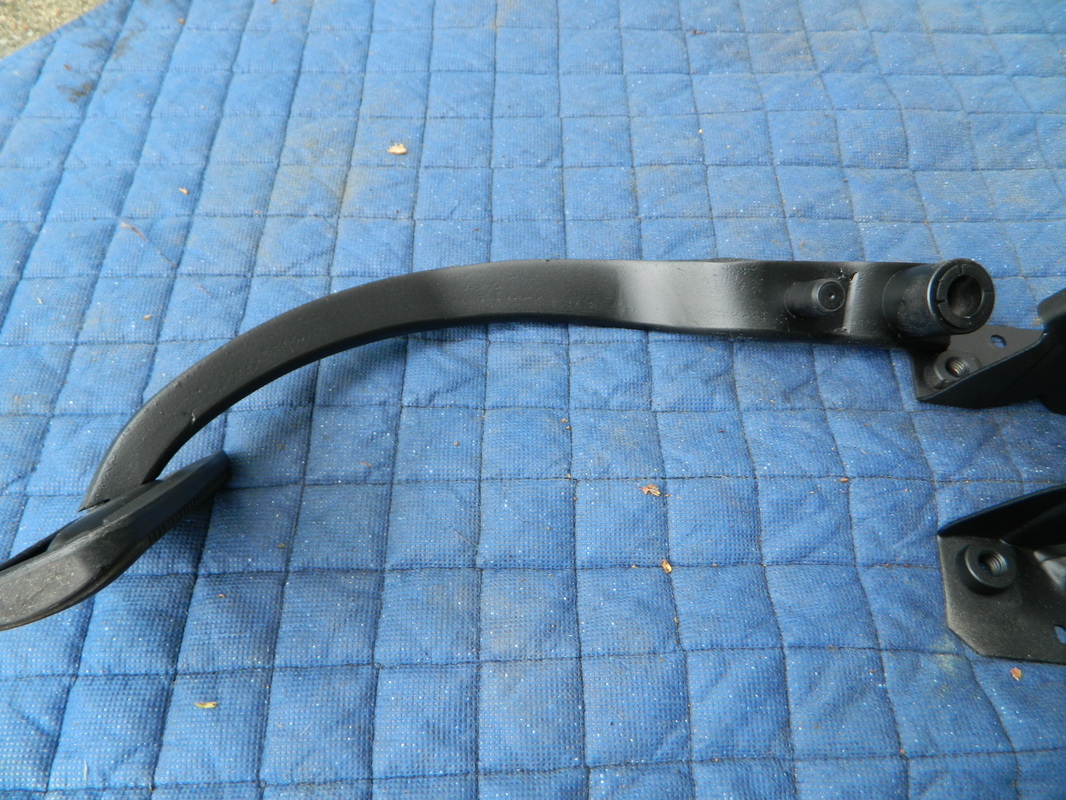
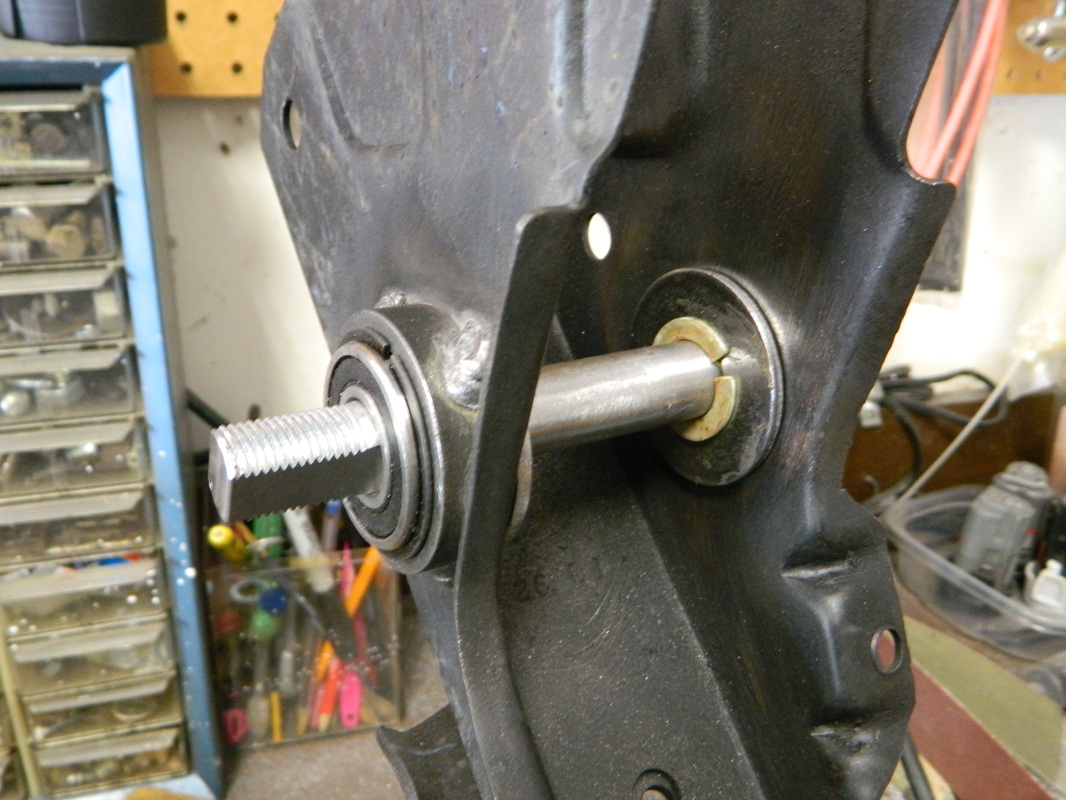
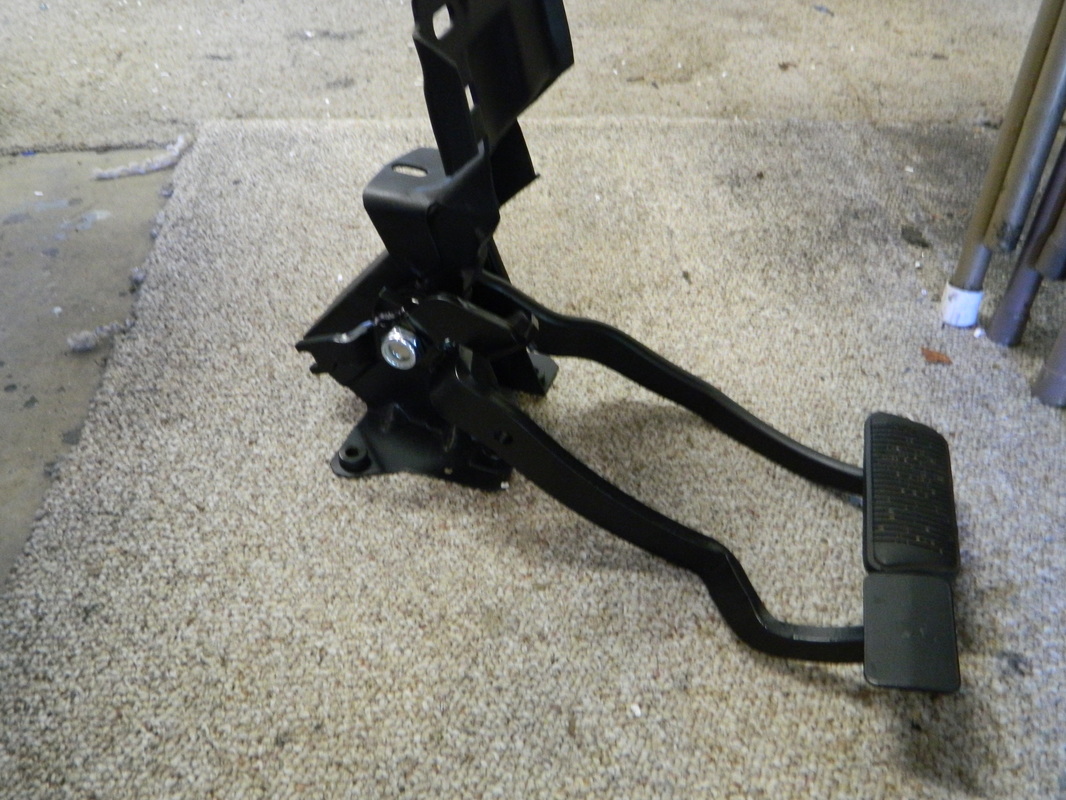
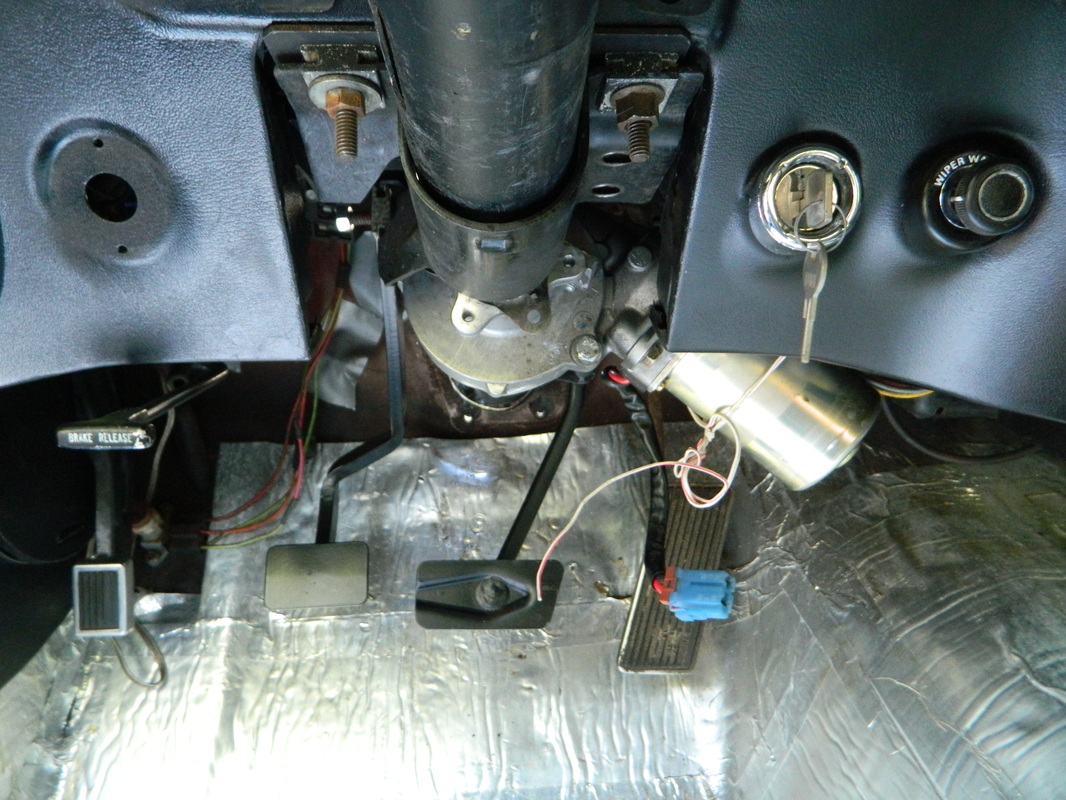
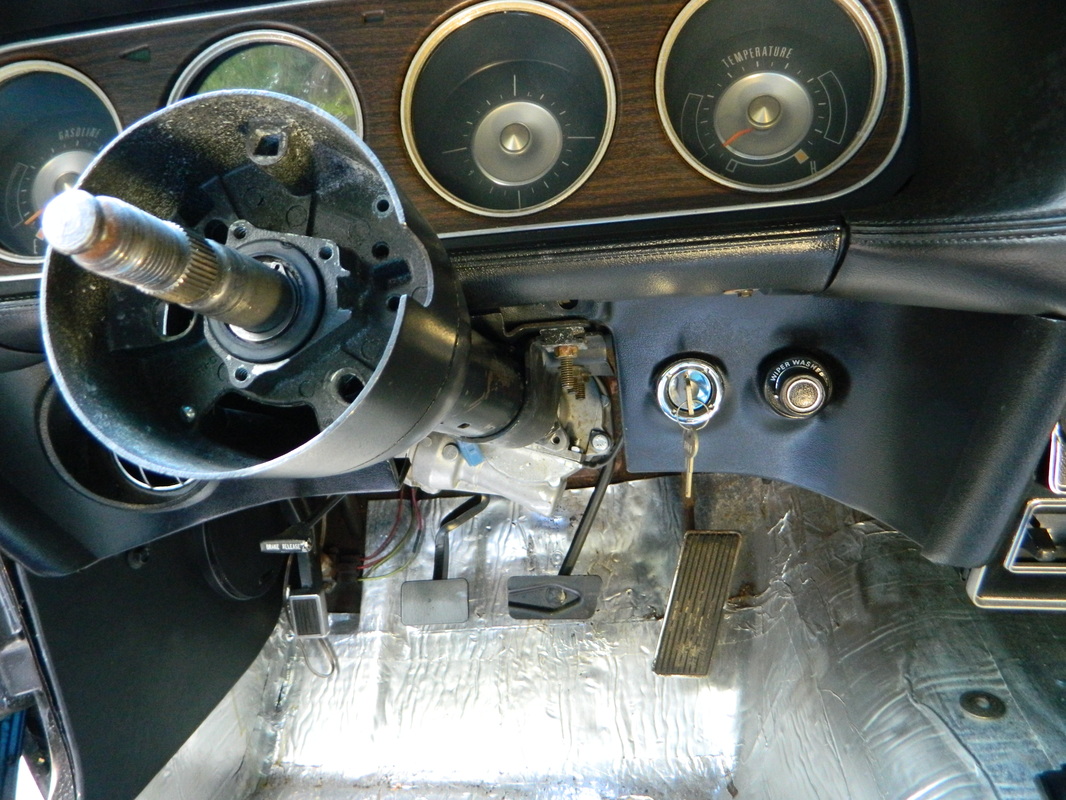
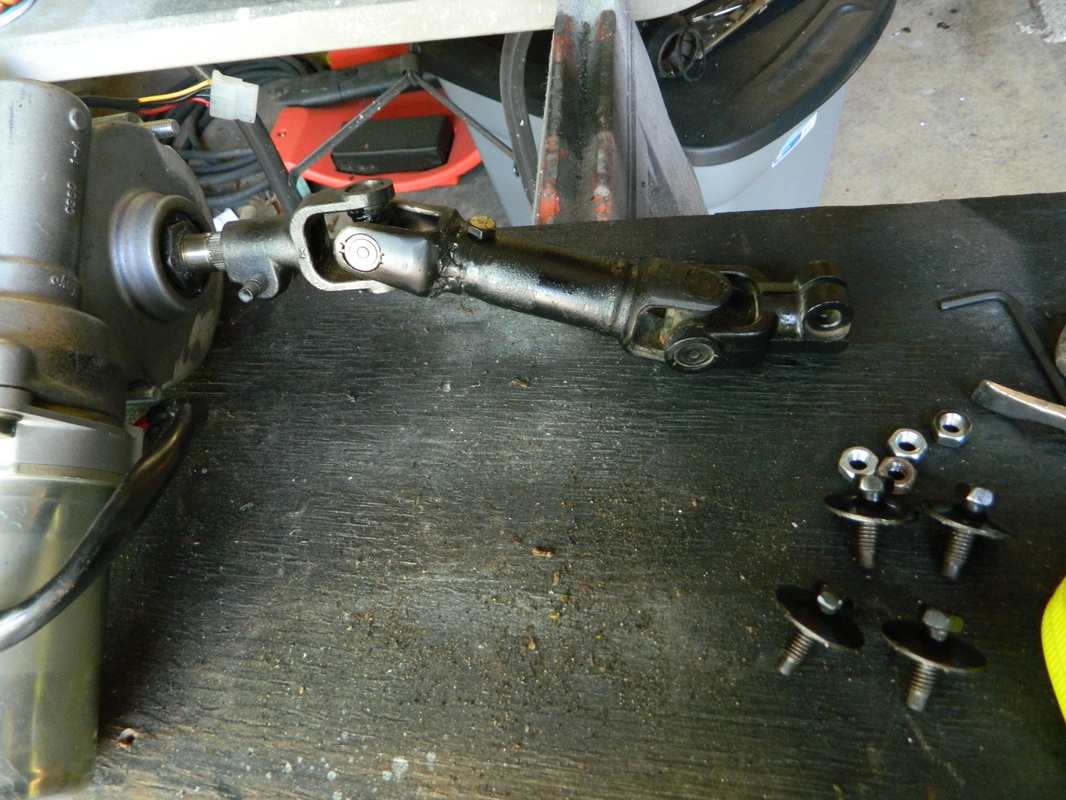
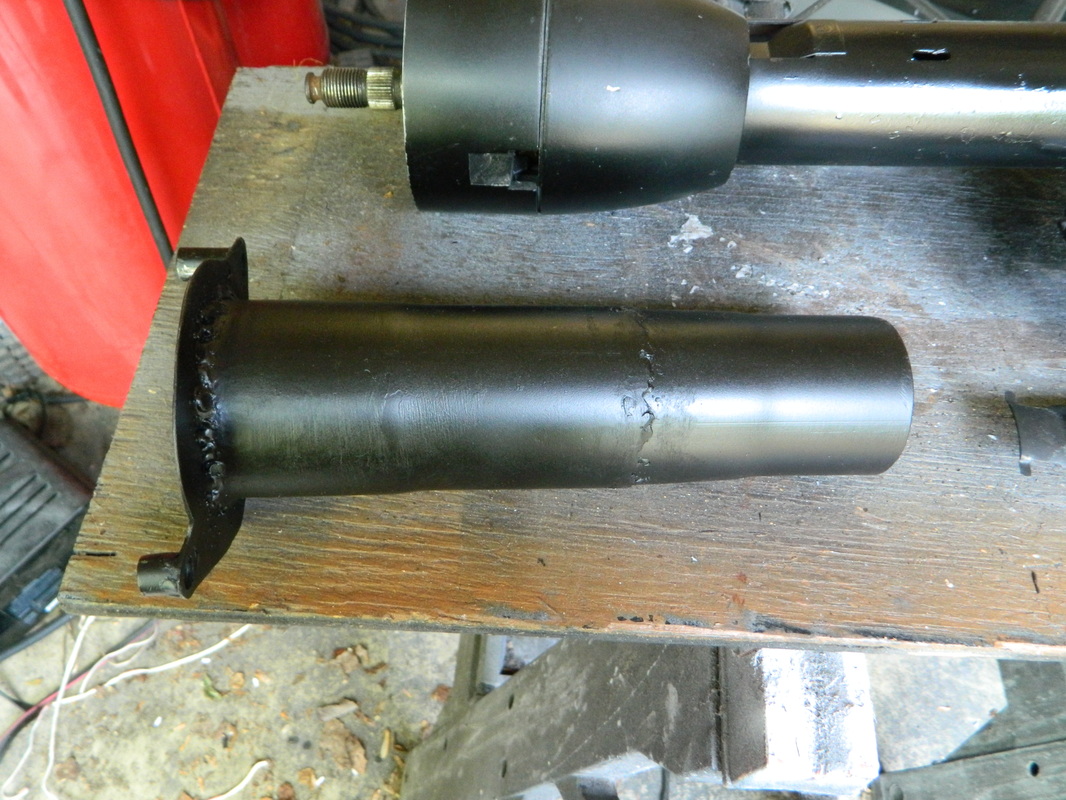
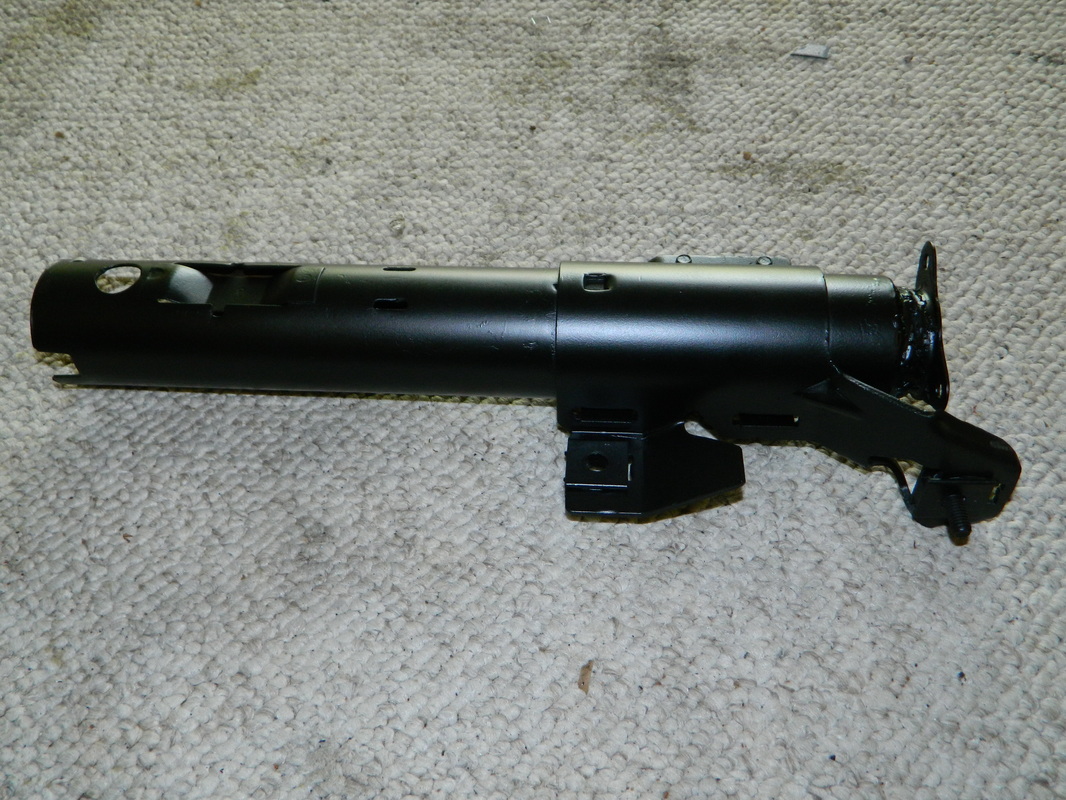
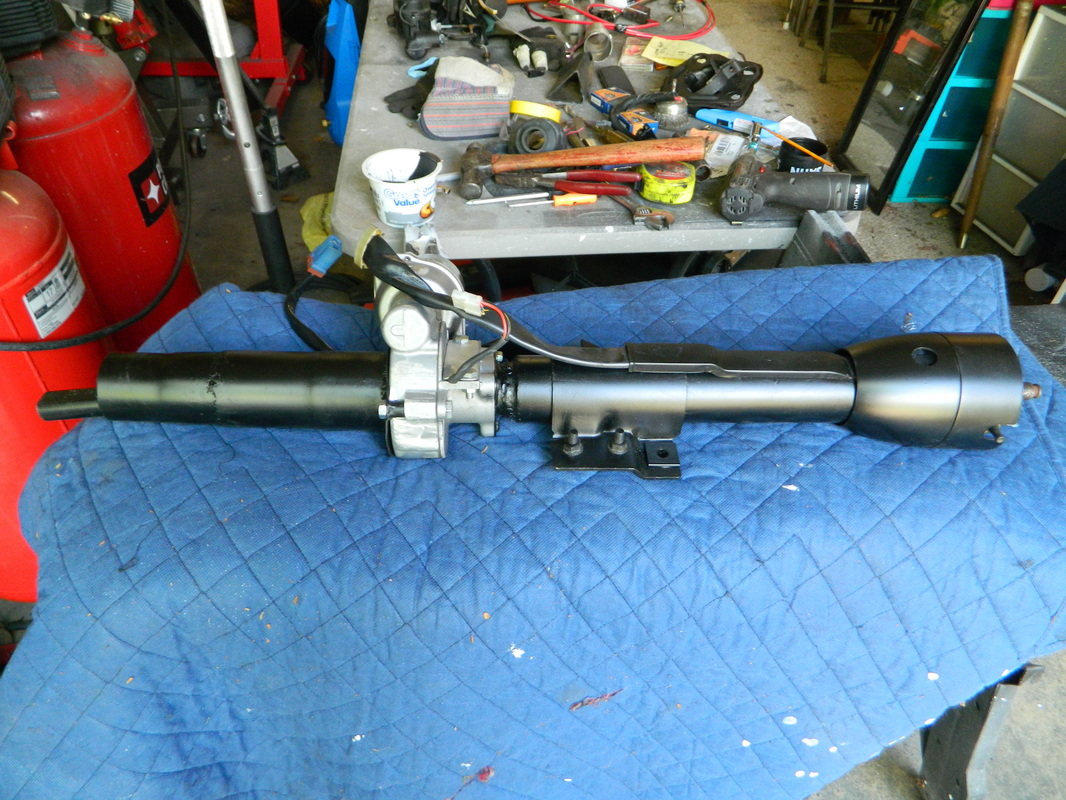
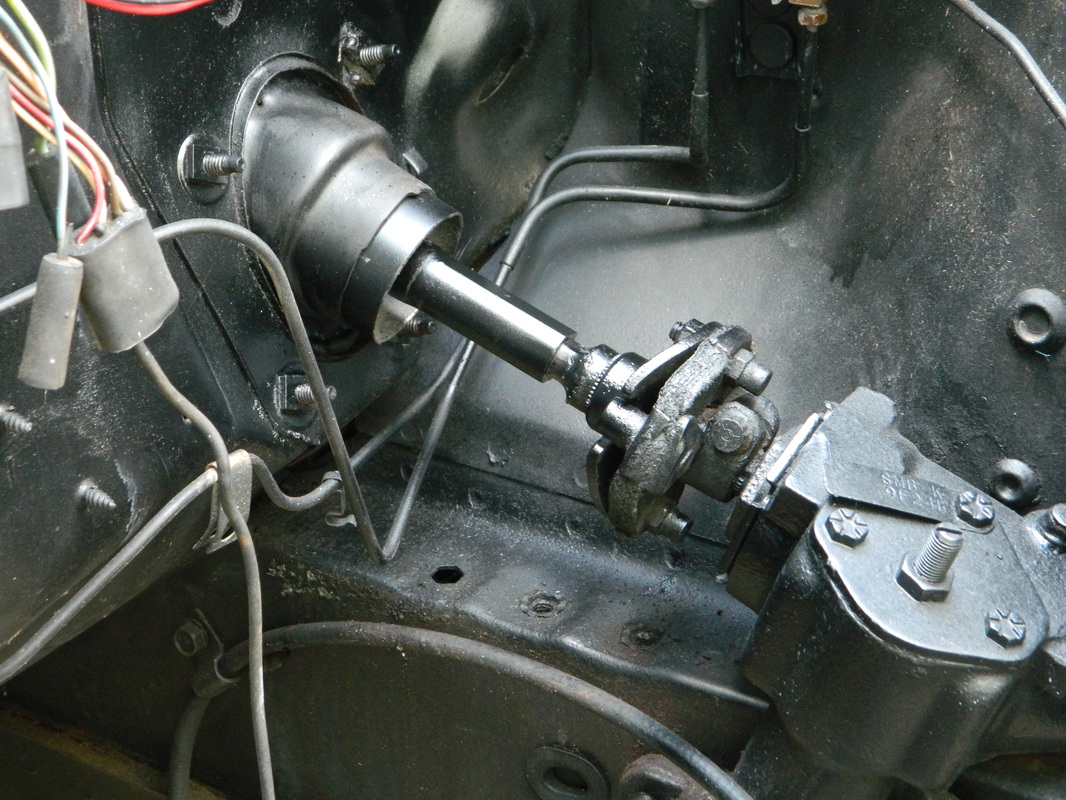
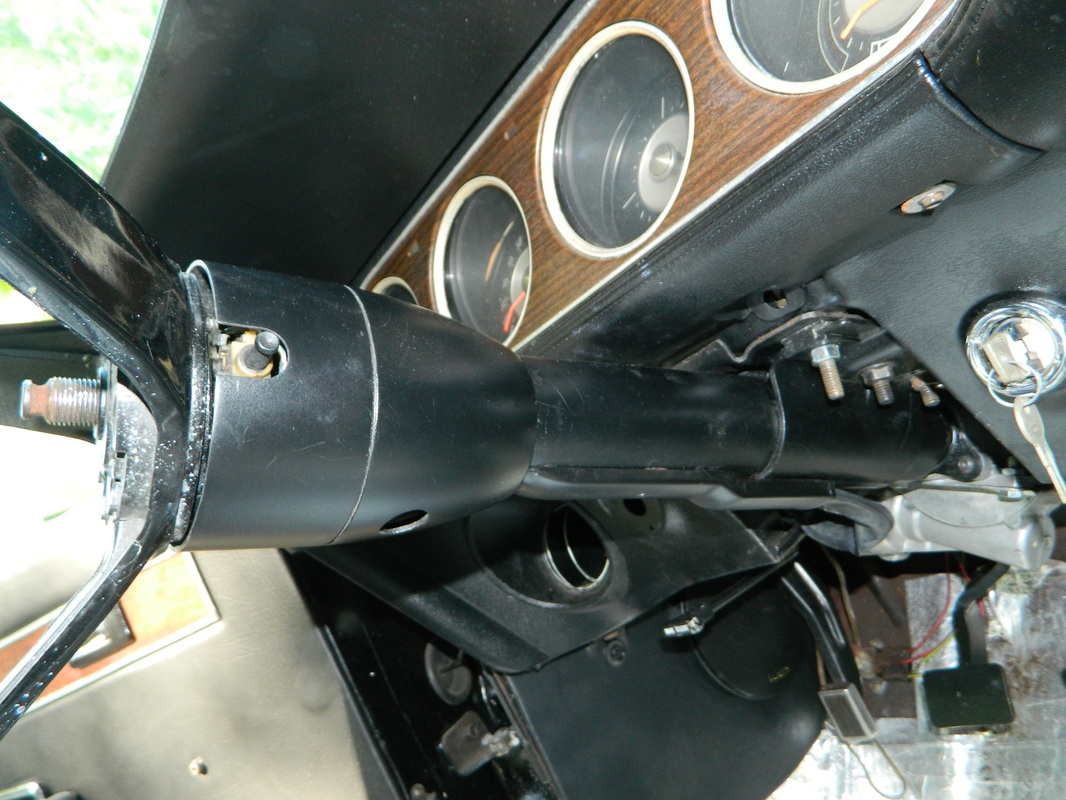
Sunday, I hung the pedal assembly back in the car and then cut off the left side of the brake pedal to clear the clutch. Next, I tried fitting the column in on the right side about 4 oclock. It fit but I wasn't thrilled with the way it hung down. I was off today, started about 8AM reworking and fitting the steering column in. Today, I tried the left side and ran into a couple snags, the vacuum switch on the back side of the headlight switch for one, and the end of a bracket which holds the column up. I took the switch out, as I already have an electric head light system and don't need it. I can just get a Mustang switch and it will clear. I just hacked off about a 1/2" of the bracket and surprisingly had all the clearance I needed. I was leery of the clutch pedal, but it just barely clears. Next I had to figure the length and clocking angle of the upper outer column tube. After about 4 times putting it in and taking it out, I had what i think was a good measurement. Next, I needed to figure the length of the upper inner steering shaft. I had already attempted this a couple weeks ago and failed profoundly. So, I remeasured it and found I need to lengthen it 1". To do that, I needed to cut the splined coupler off the upper shaft where I had previously welded it, and then, using a short piece of the DD lower shaft weld it on and a short piece of shaft to extend it. I took great care measuring it two different ways and came out with the same measurement. Then, I assembled the column and put it in. To my delight, it fit! Next, step will be adapting the lower column to the firewall bracket, and fabricating the lower shaft using half of the original and half of the Vue's shafts. The first pics show the pedals and the attempt to mount the column on the right side. The rest show the current location and the last shows the column end at the steering box in the engine compartment. Today 8 hours.


April 28, 2016
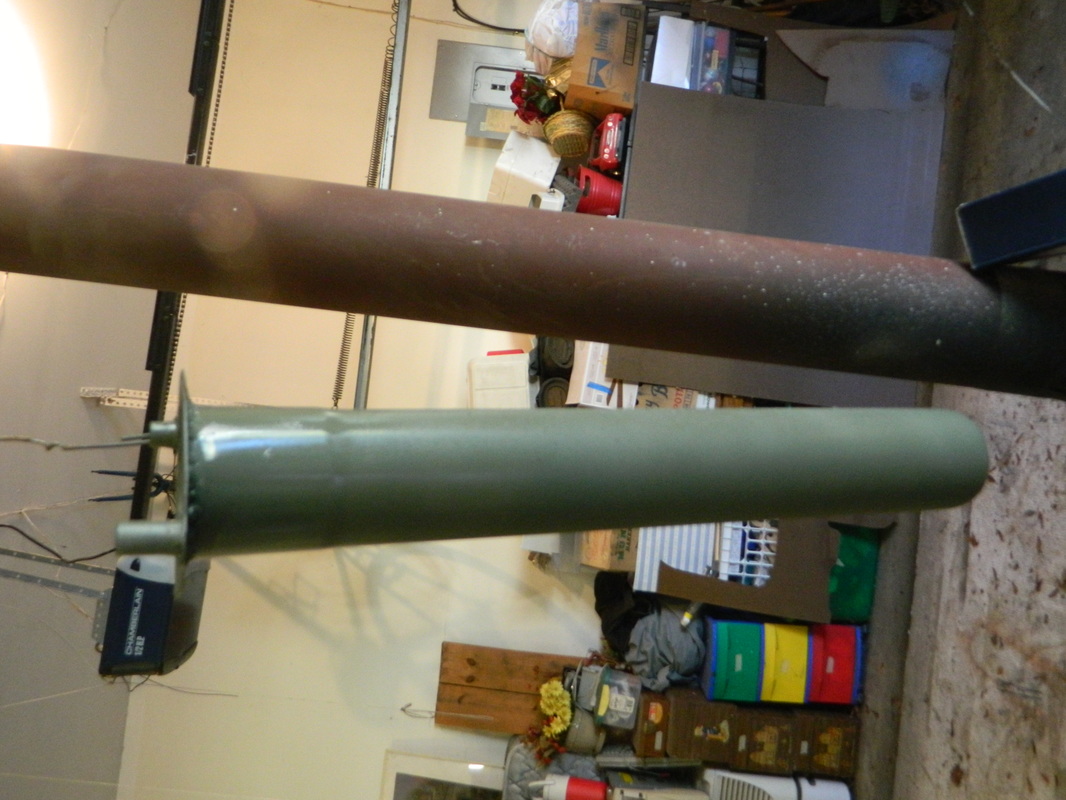
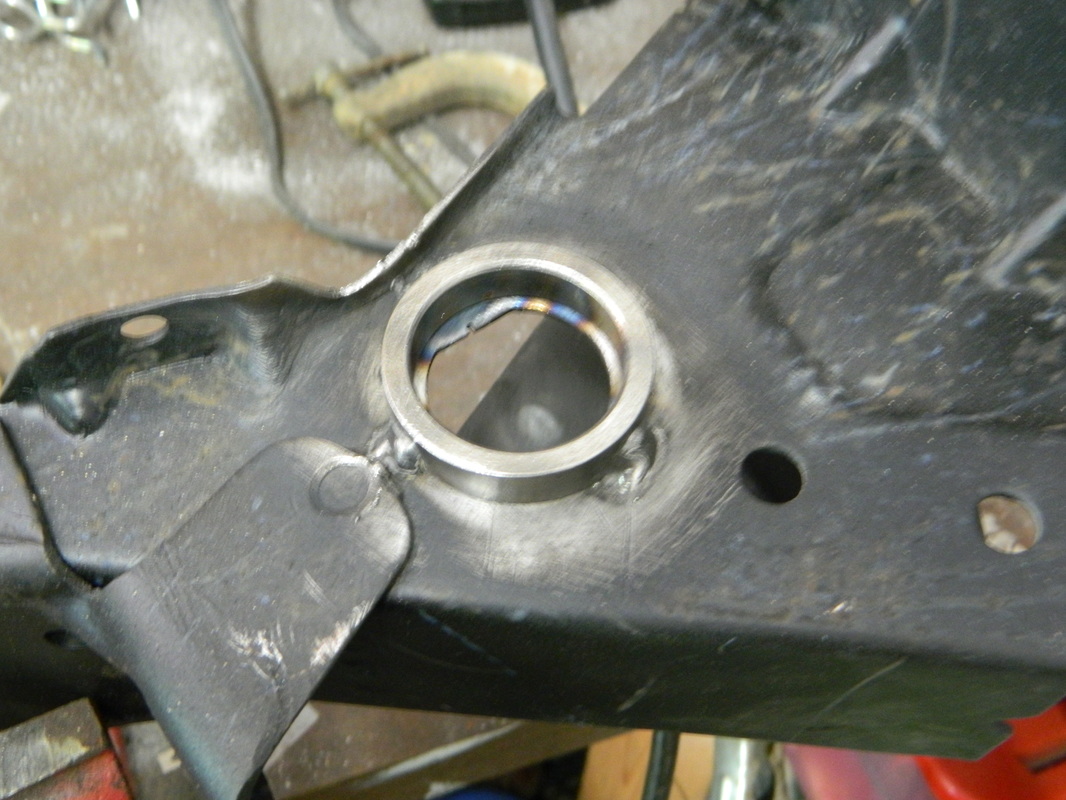
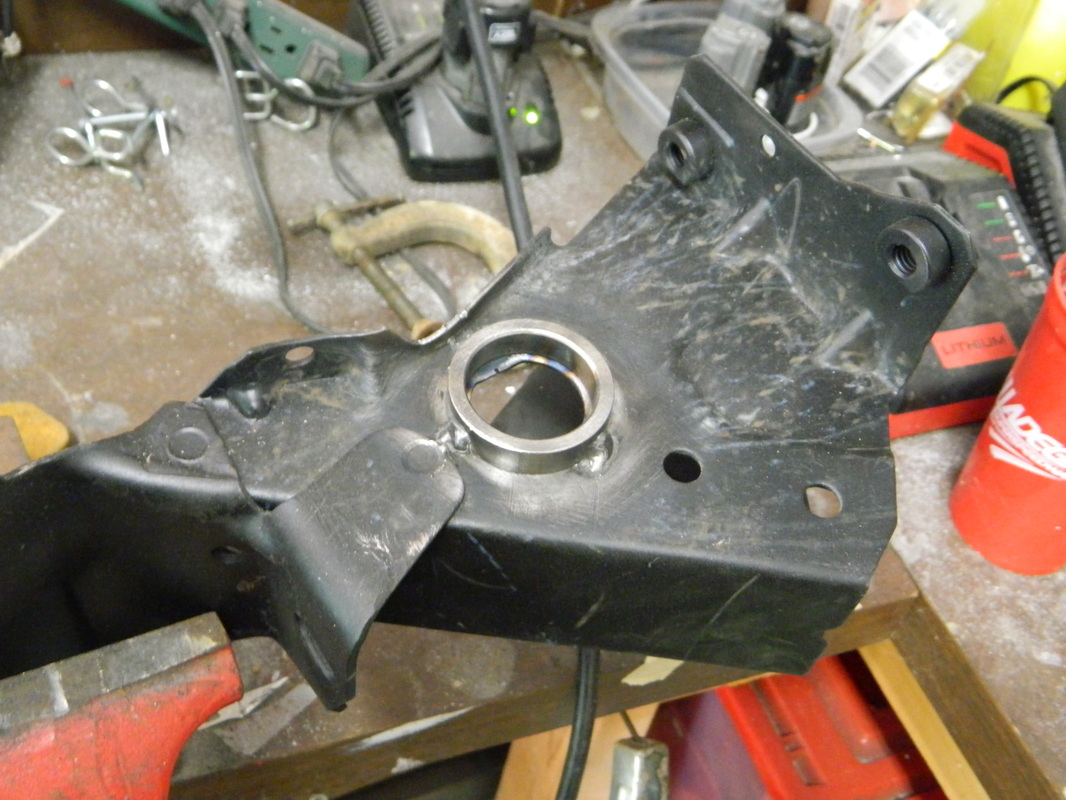
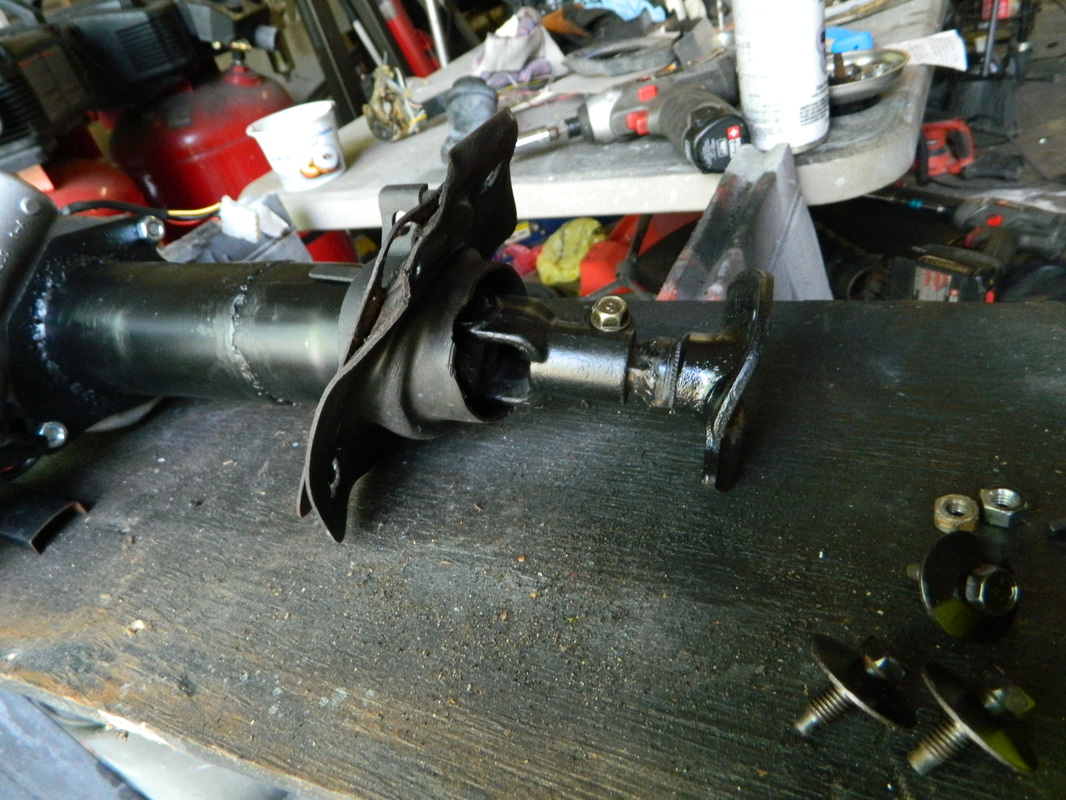
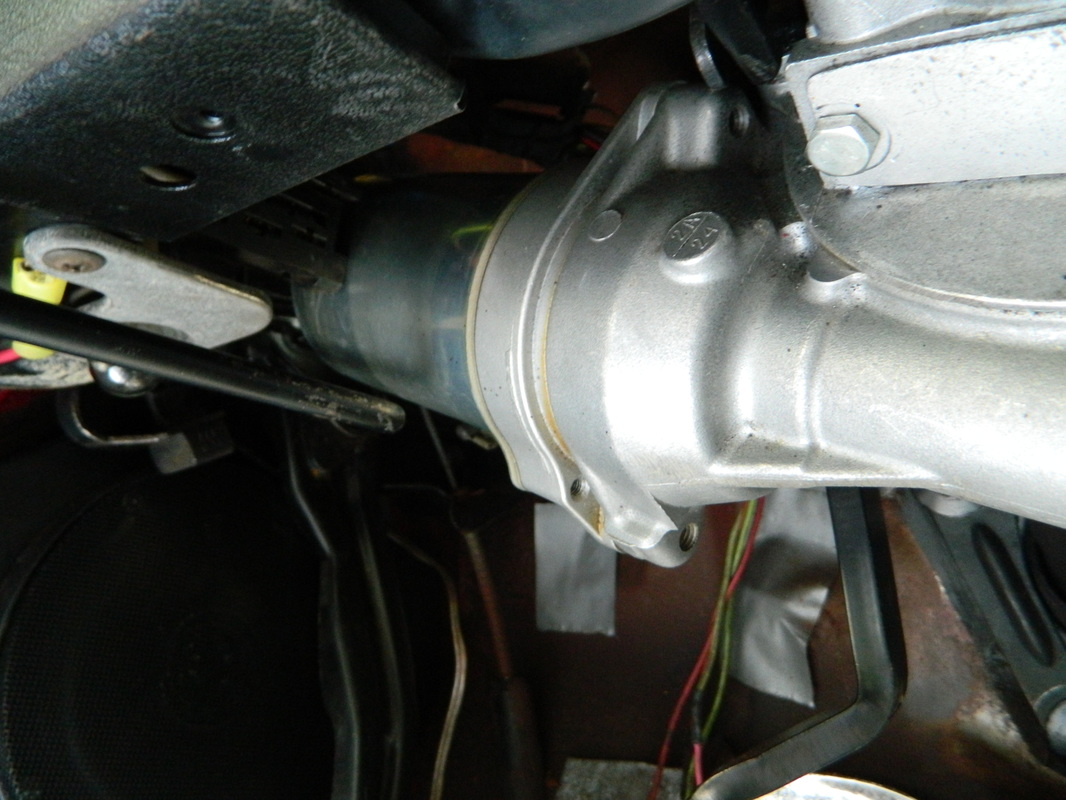
Another day off, so I jumped right back into the steering saga. Today, I welded a reducer on the end of the steering column to reduce the size to 2 1/4 so that it would fit inside the firewall clamp/seal. I also made up the lower shaft, but ended up using both u-joints instead of just the upper. That would end up being a problem, because the big end of the u-joint was right at the end of the column and would rub slightly when the steering was turned. It can be trimmed back next time I work on it and take it back out. I must have had this column in and out of the car 20 times now! But, the length is right and everything is good. I will be glad to get finished with this up grade and move on to the brakes. 8 hrs.


May 3, 2016
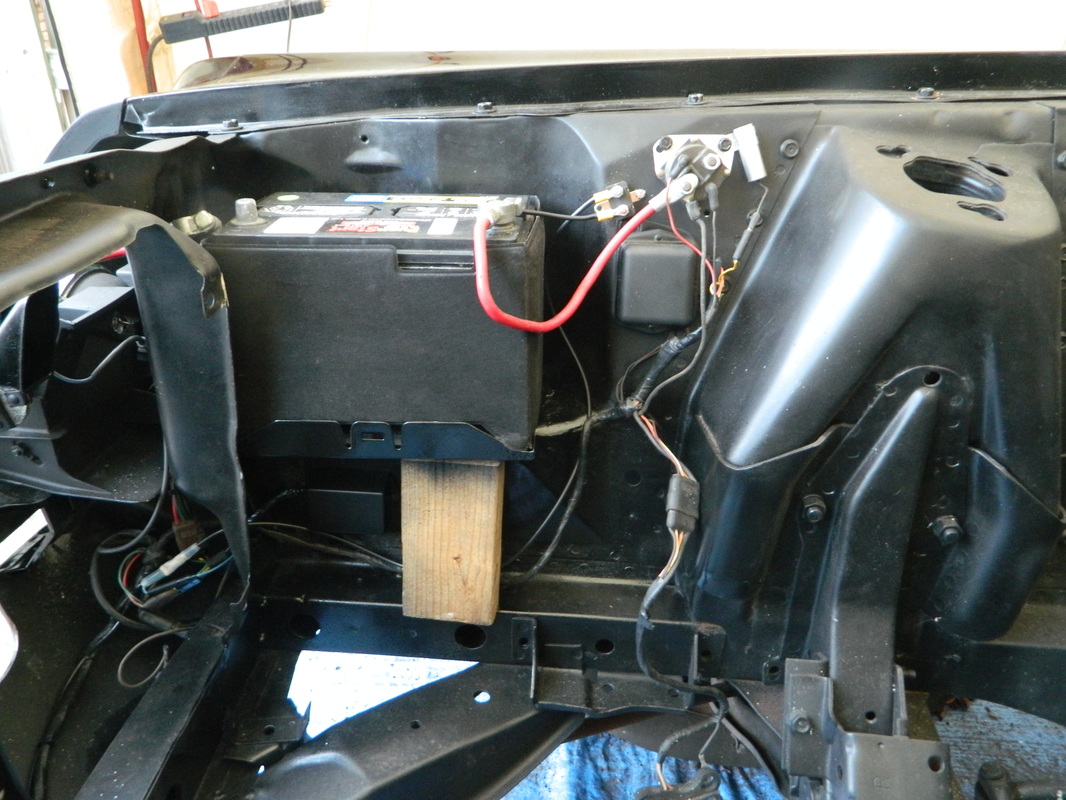
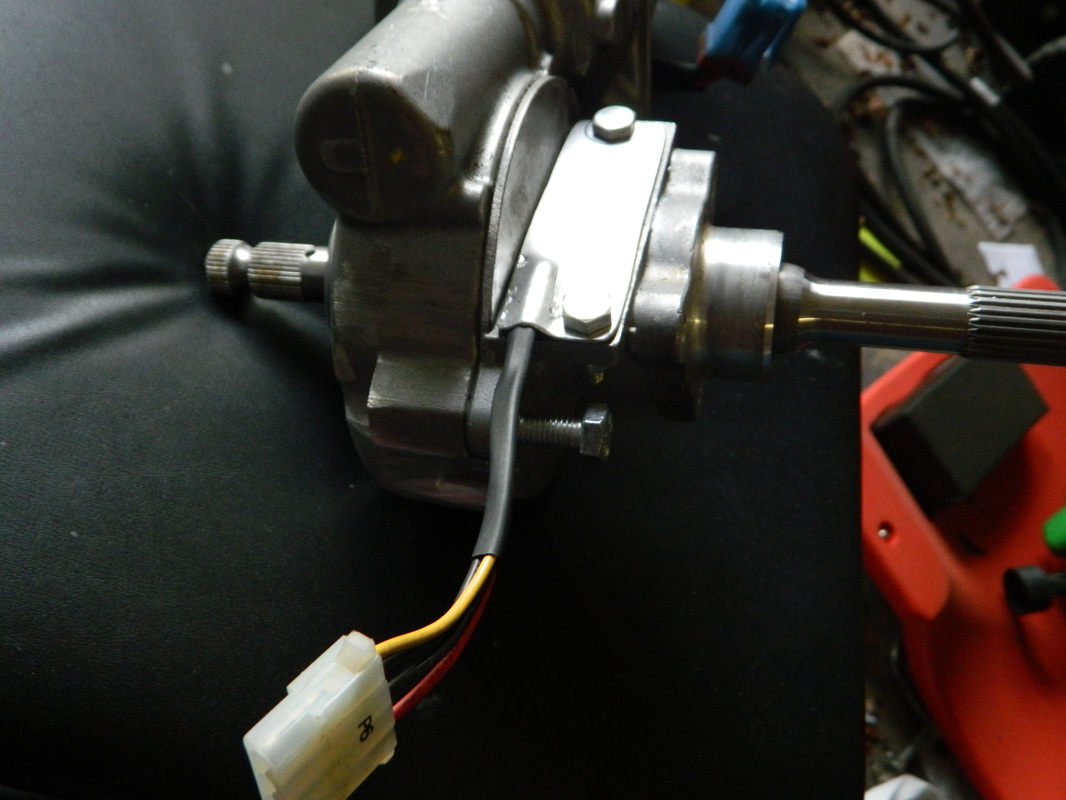
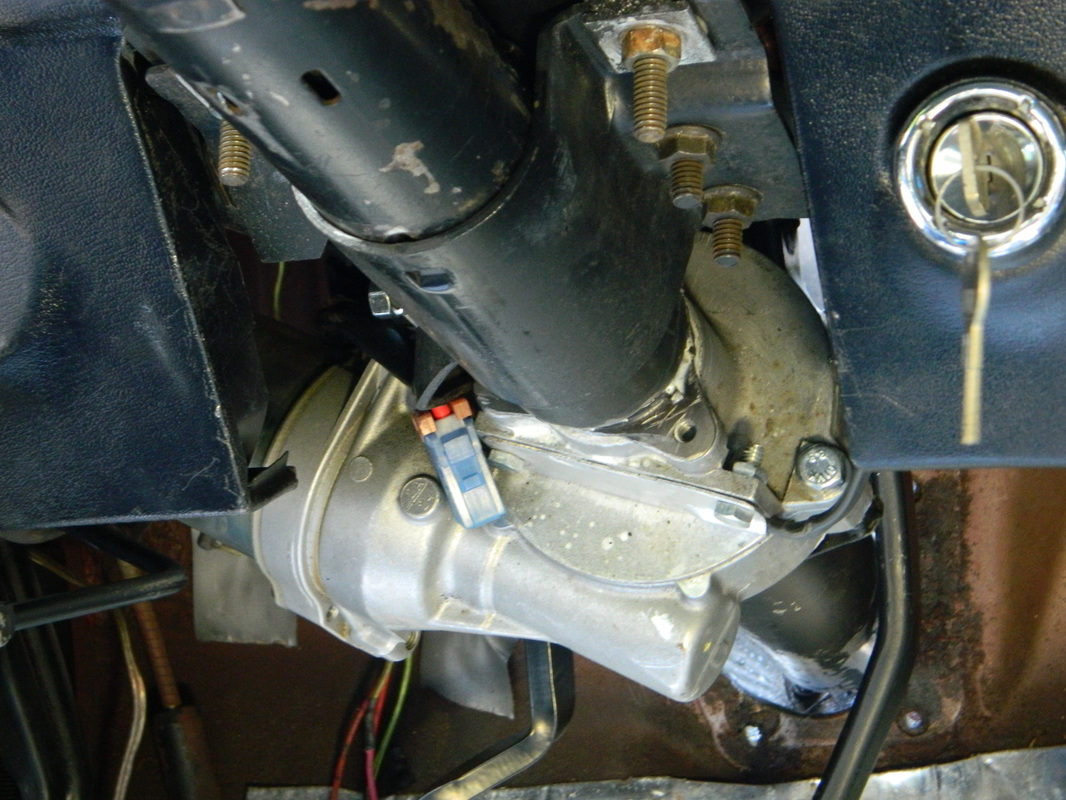
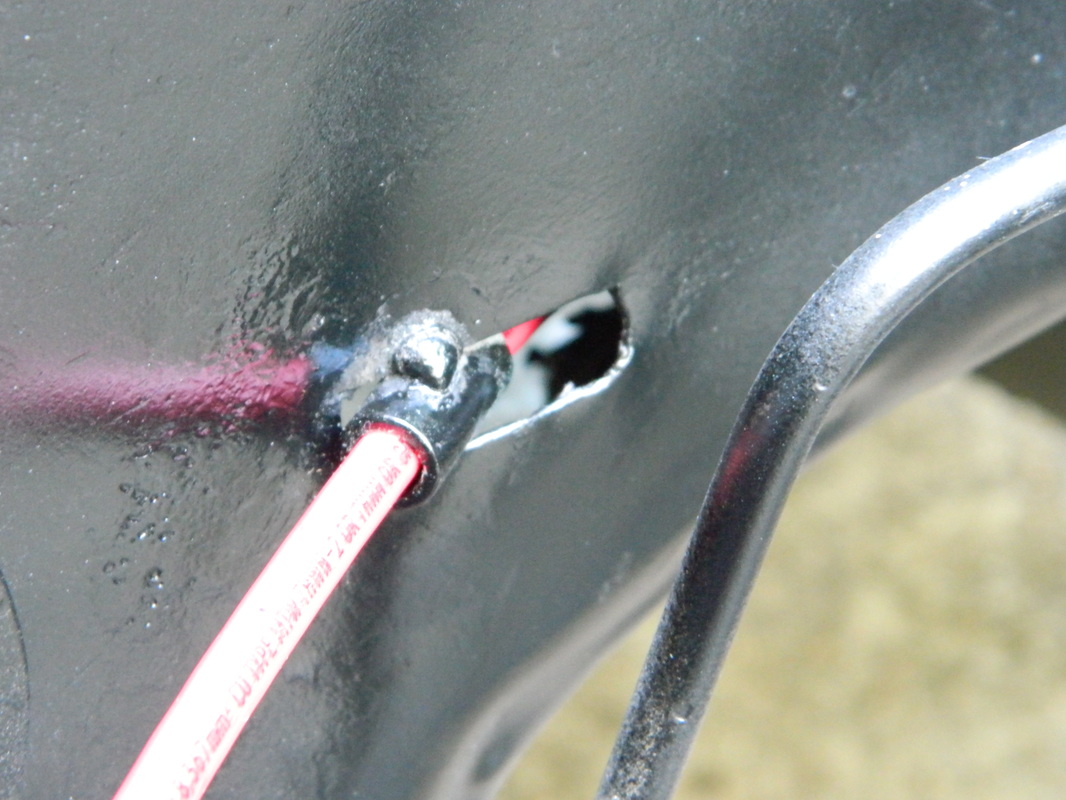
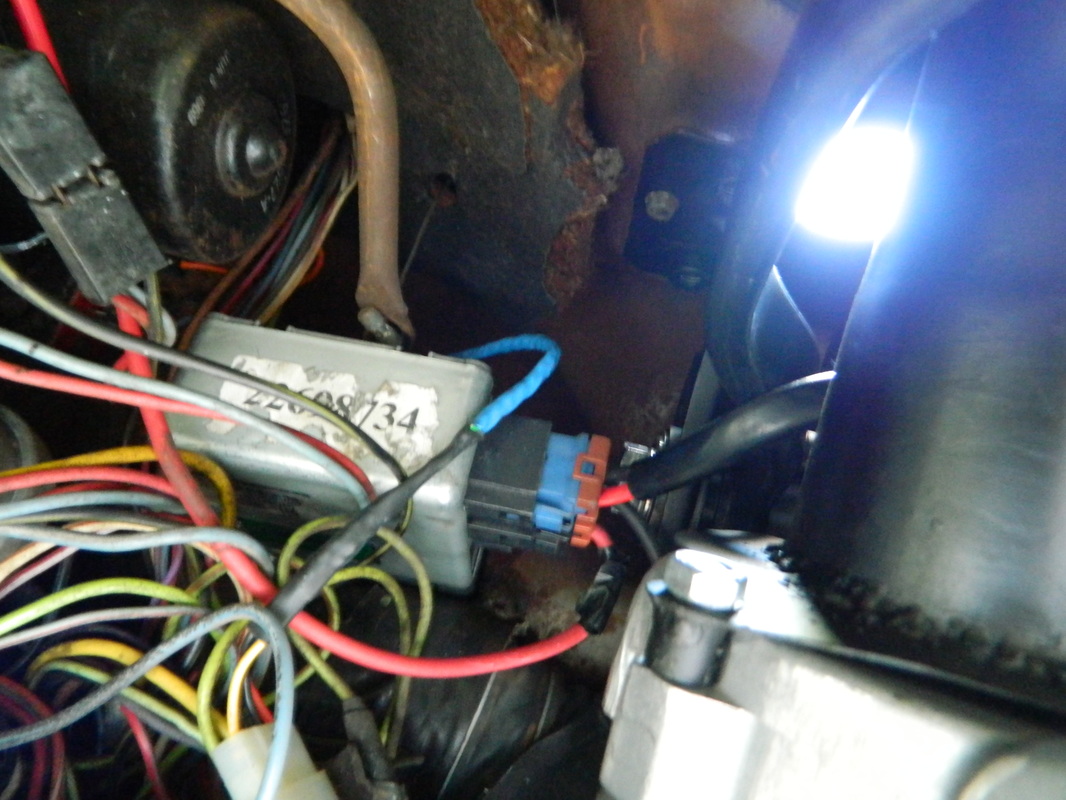
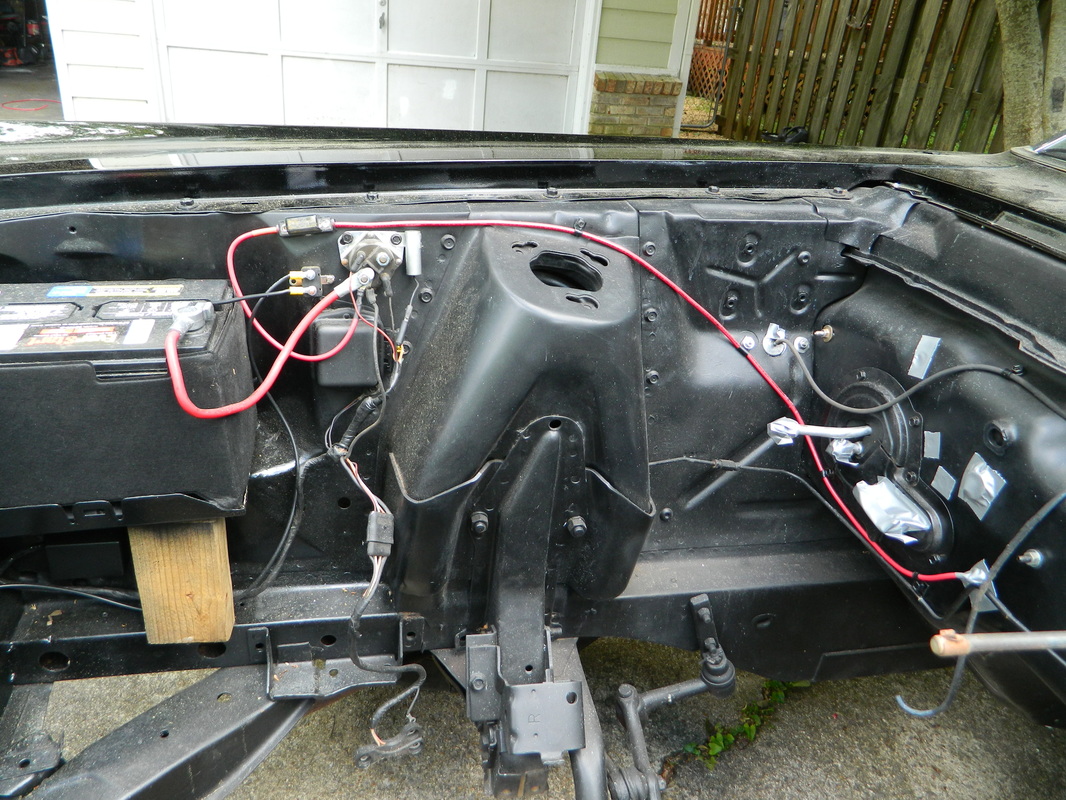
Today, I re-engineered the lower shaft and it works much better. The lower u-joint was hitting the end of the column while turning, and it really wasn't necessary to have that u-joint, it was just easier to do it that way. While I had the column out, I sanded and painted it, i also connected the main feed and ground wire to the ECU. I found a slotted hole in the fire wall to run the hot lead to the solenoid and welded a steel sleeve at an angle to provide a smooth channel for the #8 wire to go through. I still have to hook up the fuse block and make the connection at the solenoid. I am going to order the Bruno controller tonight, so it should be here by next Tues. for the final item to install before testing it. 6 hrs

May 5, 2016
Happy Cinco de Mayo! In celebration, I took the day off and worked on my Puma (Spanish for cougar). I finished up the 8 gage wiring and fuse installation. and then cleaned up the Cougar outside and under the ( non-existent) hood. I sanded a few rough areas in the engine compartment and shot them with some semi-gloss black. I managed to drag that little chore out to about 6 hrs.


May 19, 2016
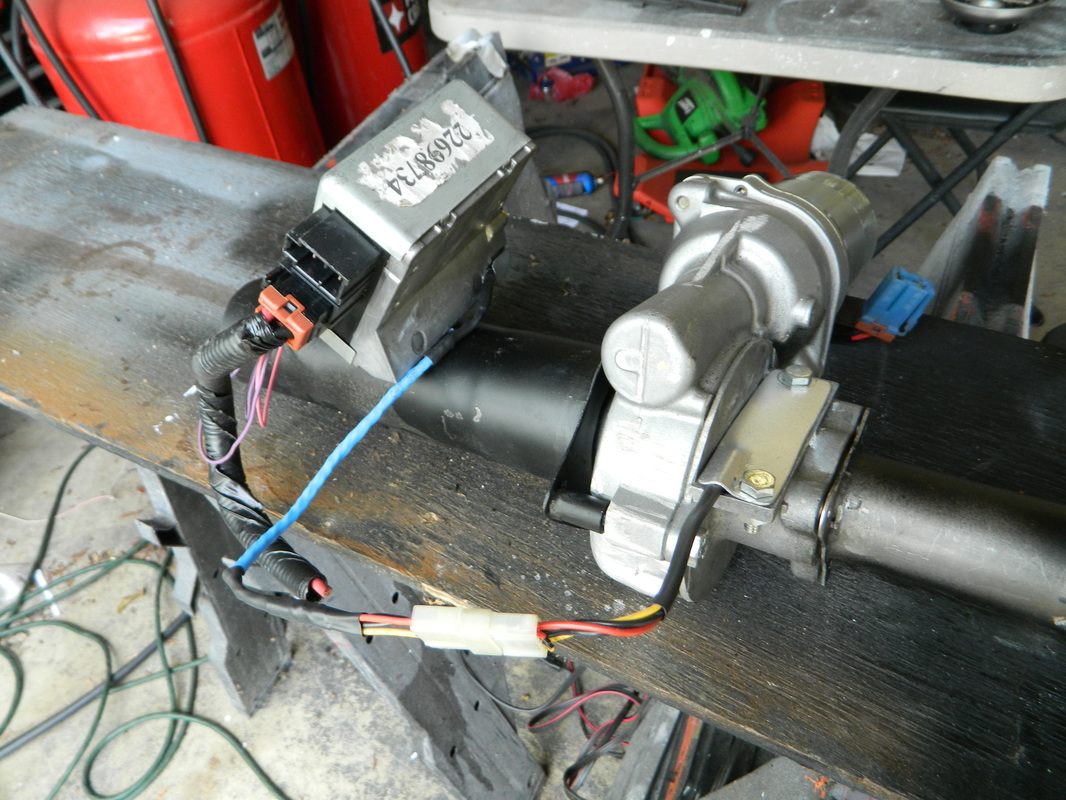
I took the day off today, because I was sick with a cold. BUT, not to sick to work on the Cougar. So, I went to work finishing the electric power steering. I had to fabricate a mounting bracket for the rheostat and solder about 10 wires together. Once, finished I turned it on and....NOTHING!! I expected as much, so I went back over the wiring diagram/instructions and found that a ground wasn't making contact. I was SO relieved after working on this for 2 months I finally have it working. It seems to be perfect, no flexing at the mount positions and very little noise other than a couple of clicks from the solenoid when you turn it on or change the knob setting.4 hrs.
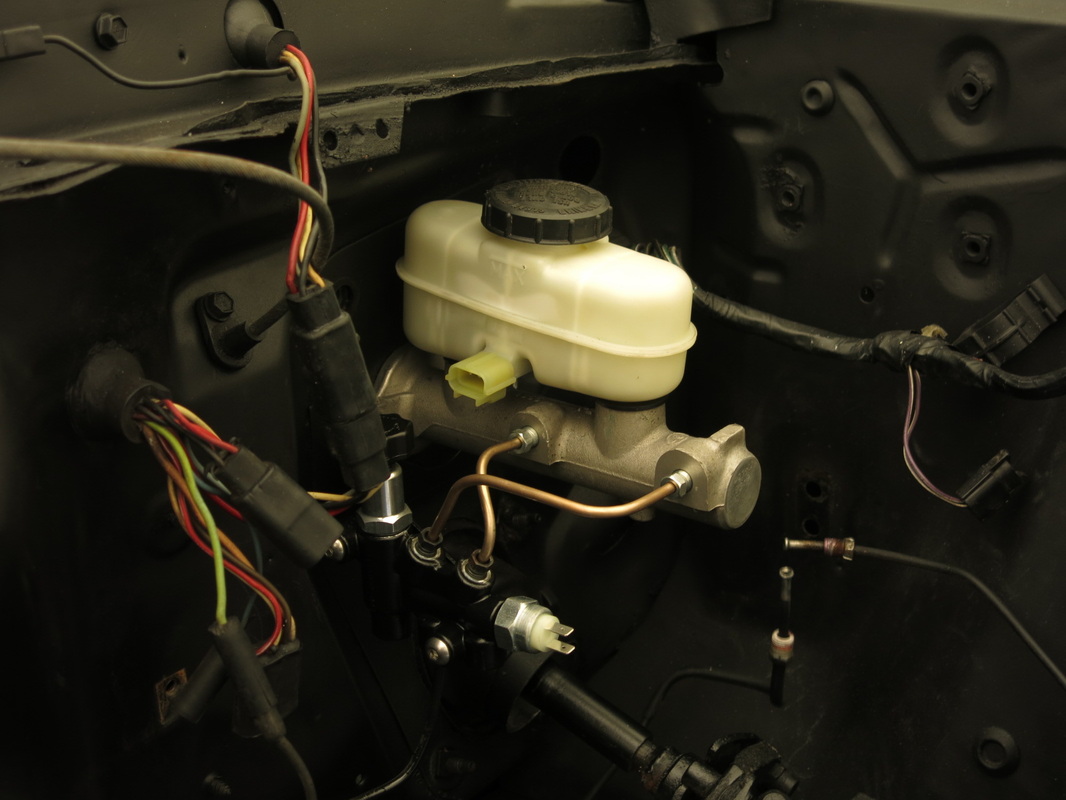
May 26, 2016
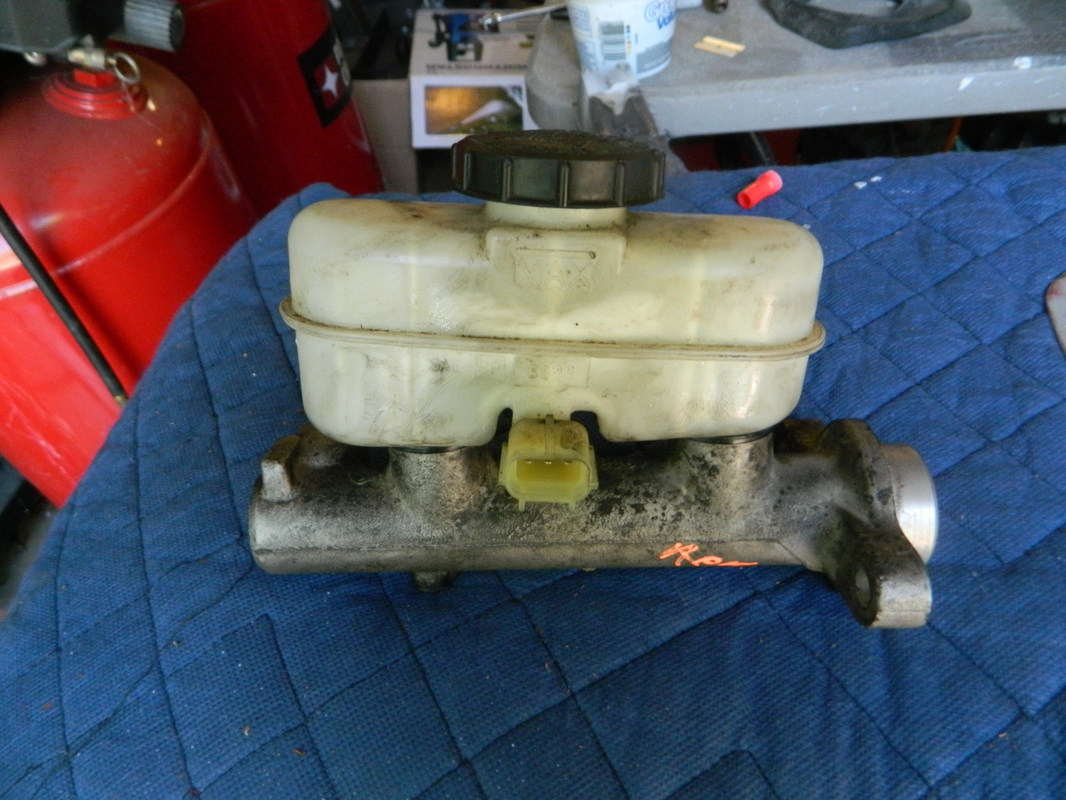
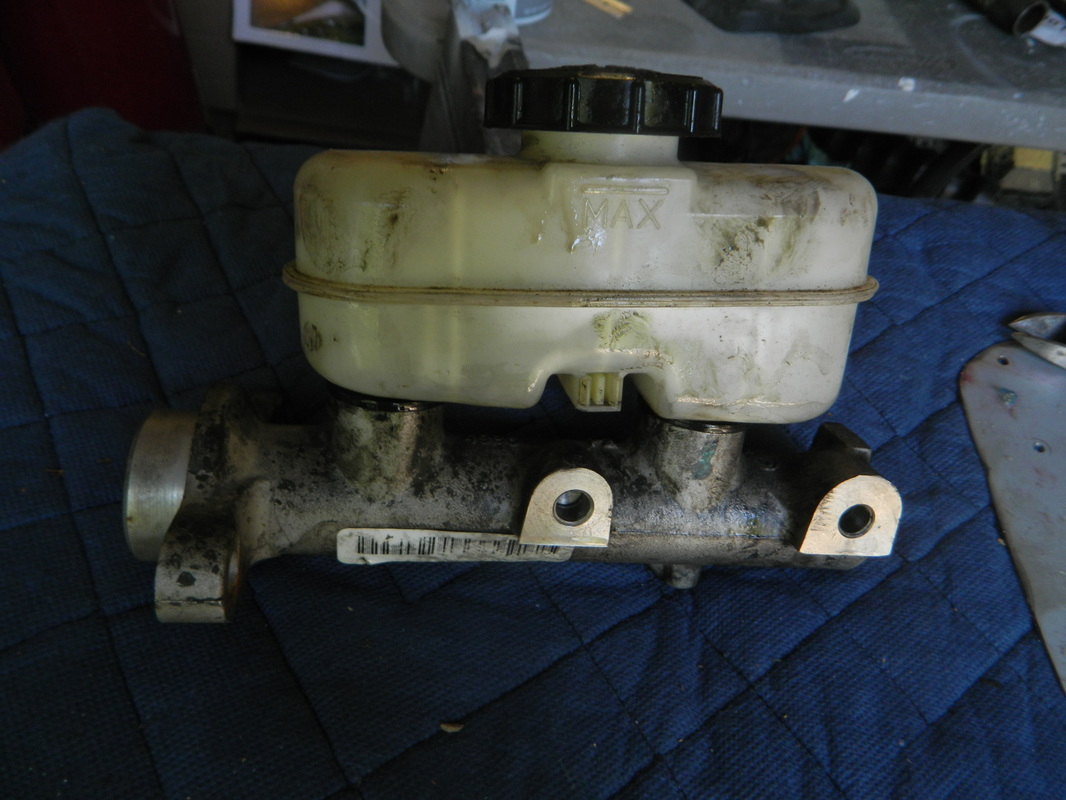
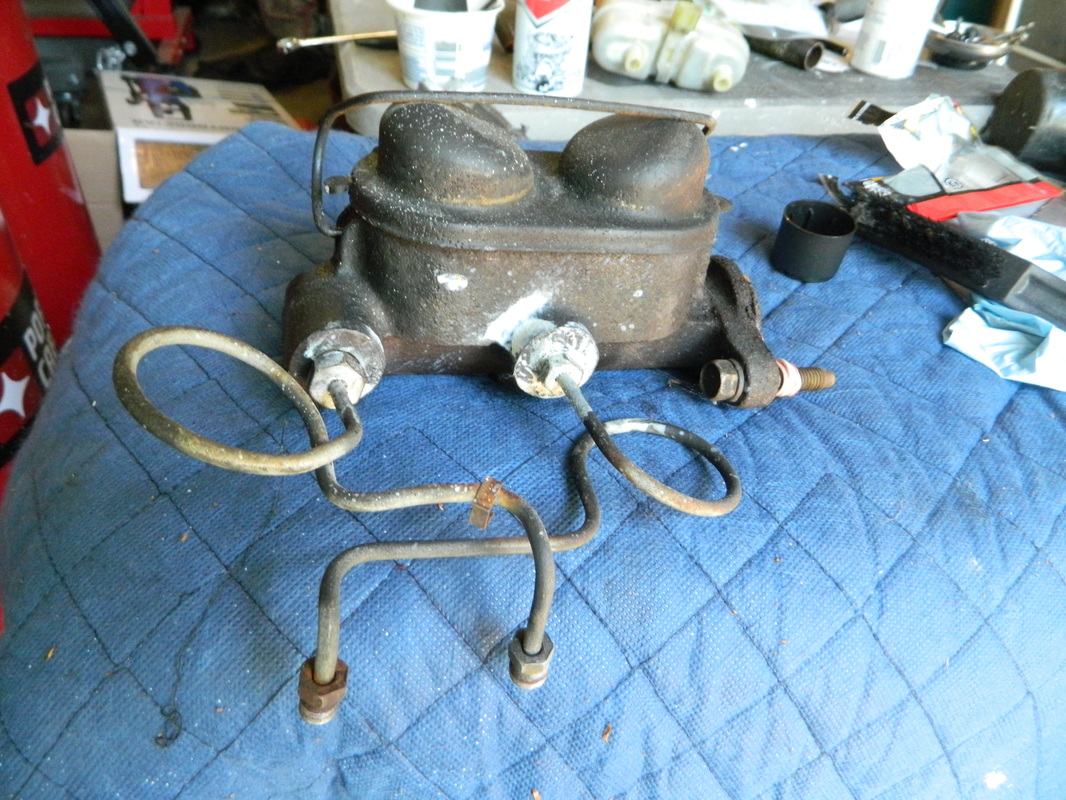
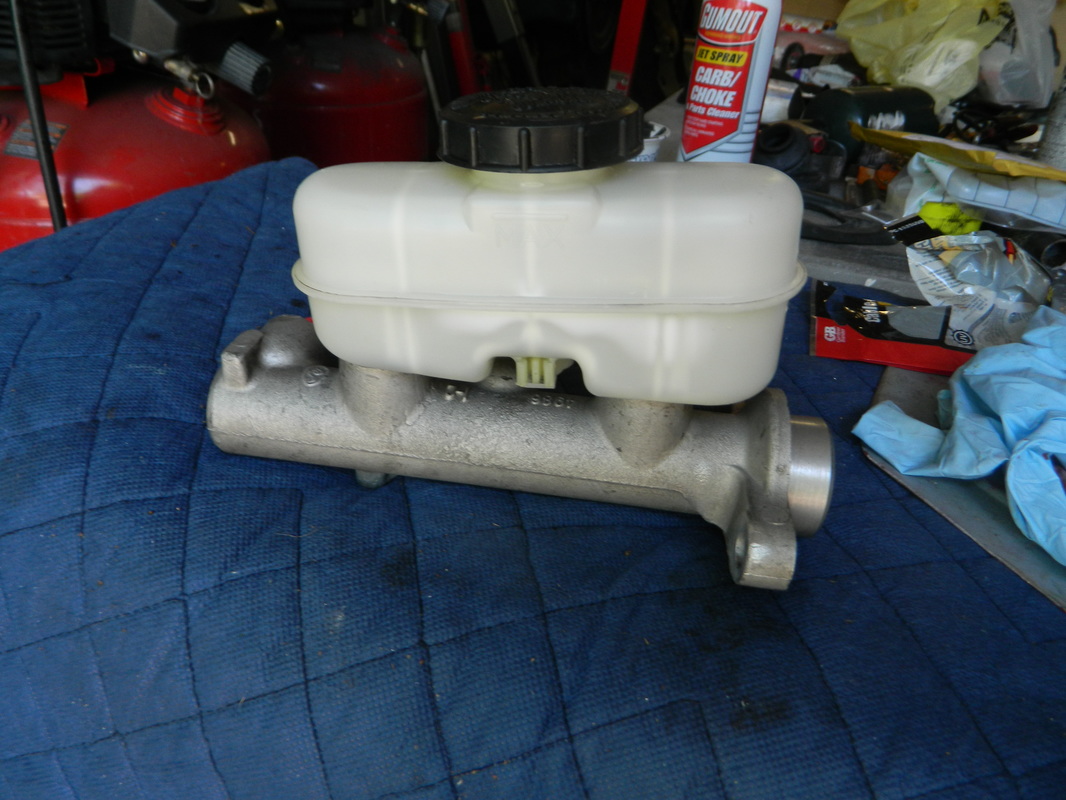
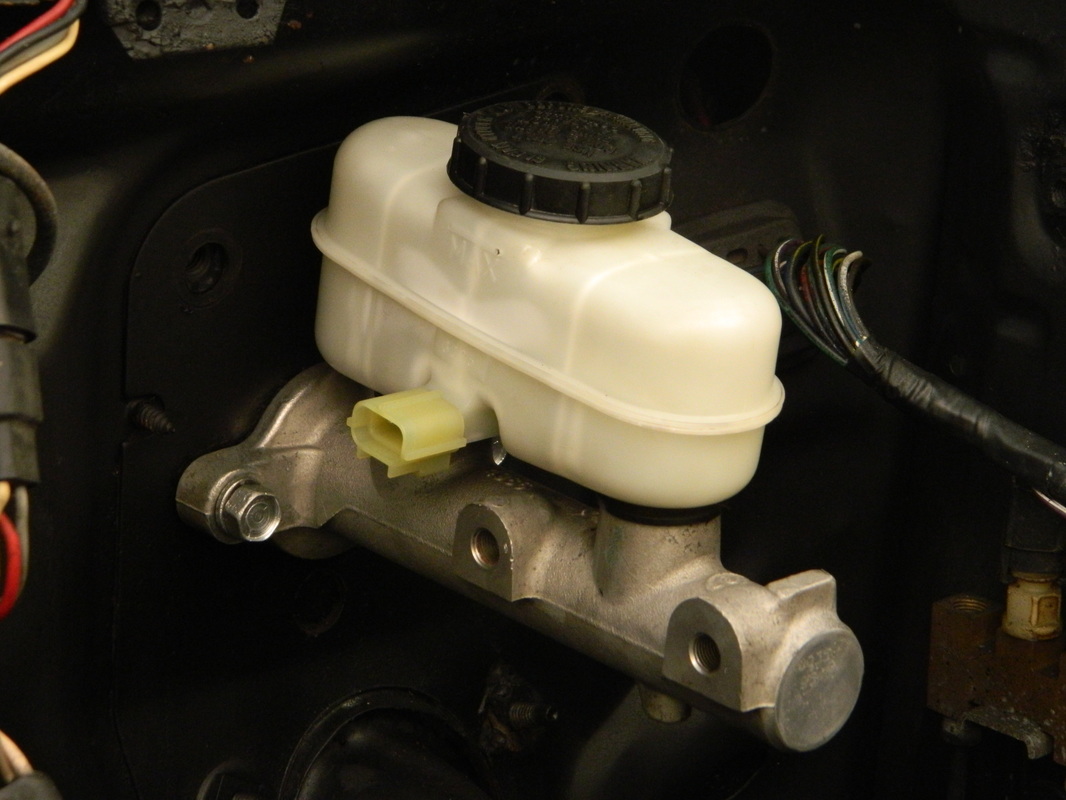
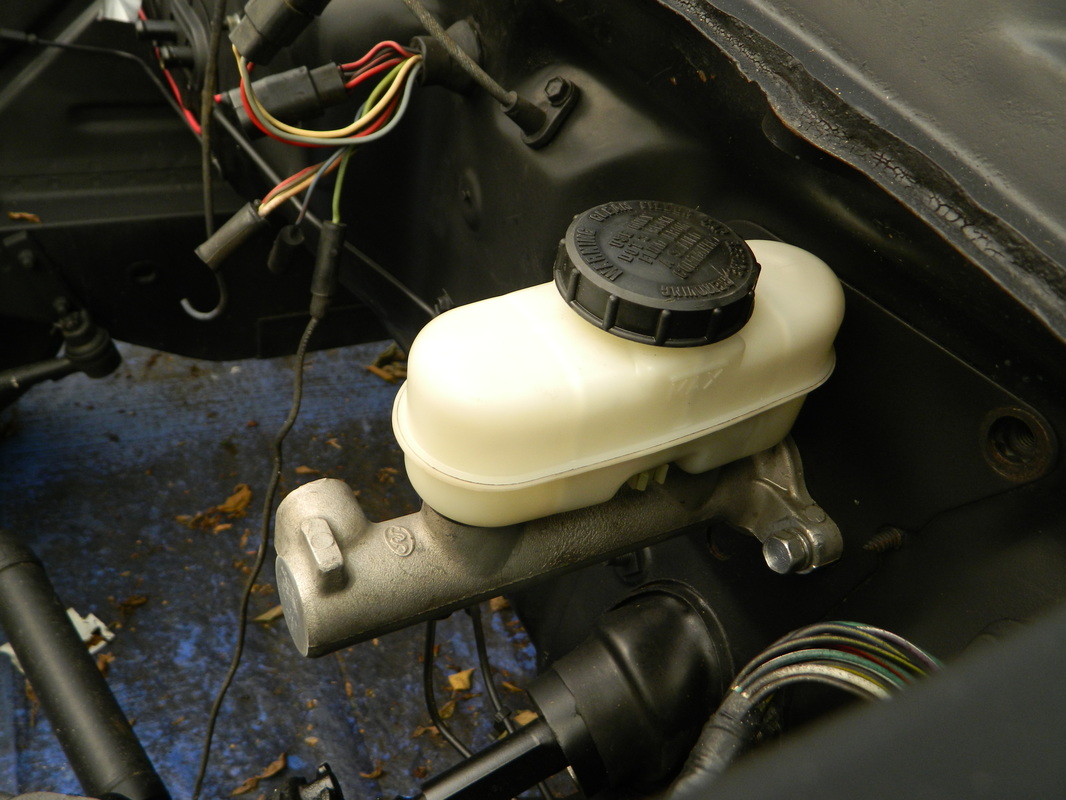
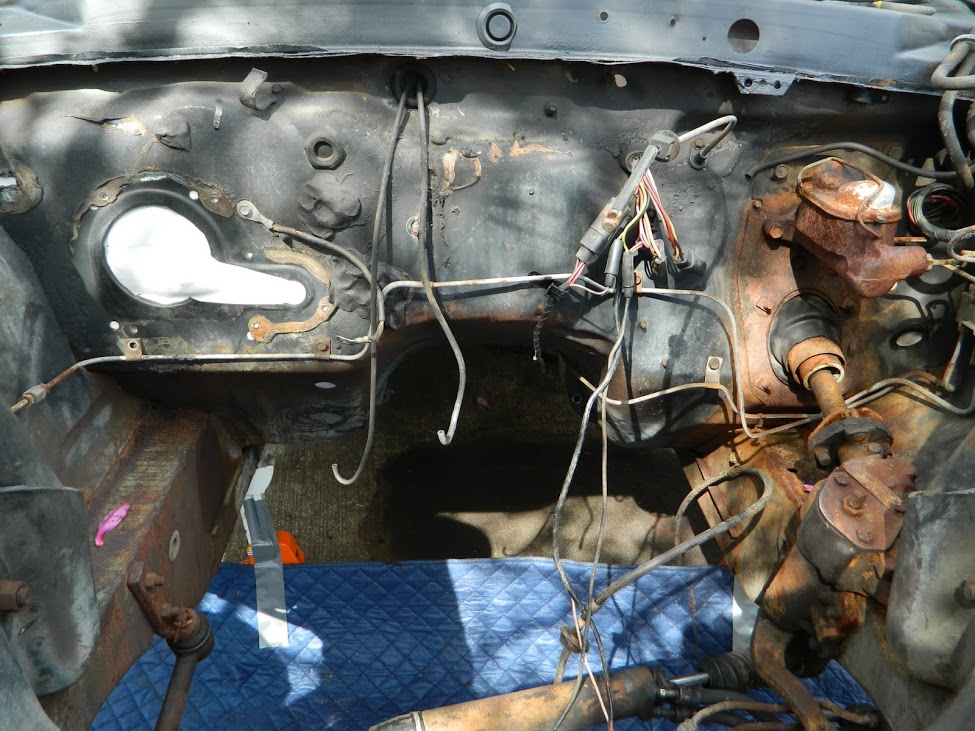
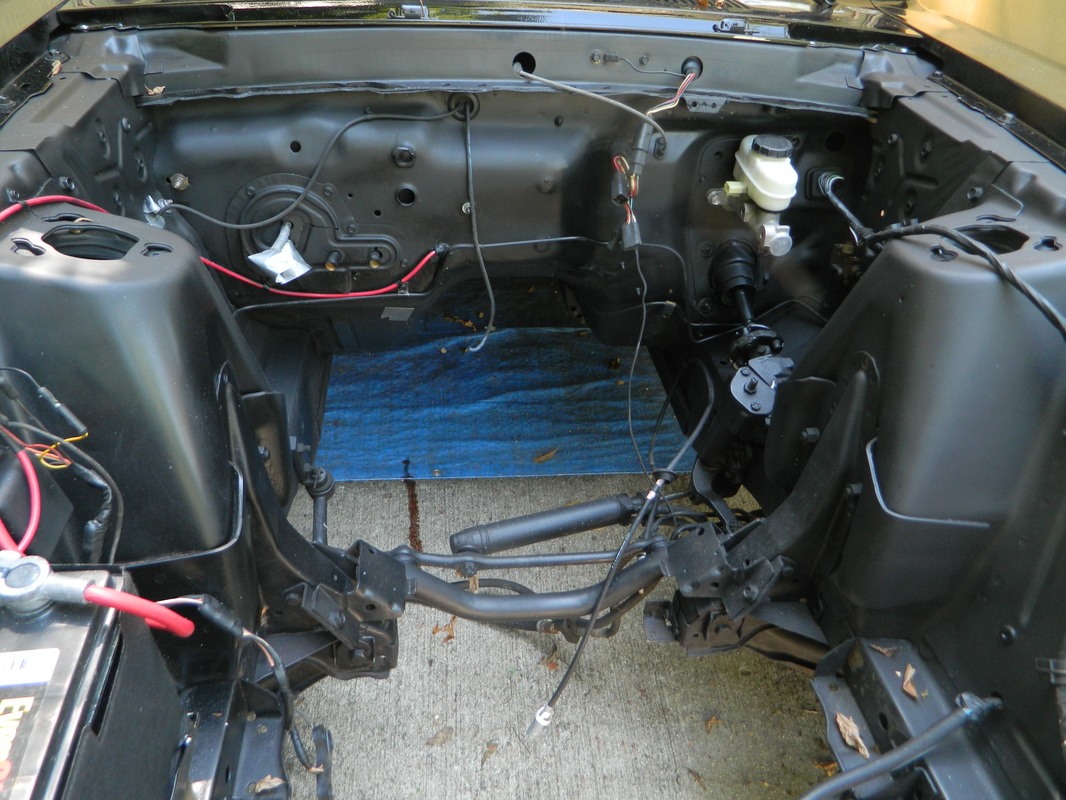
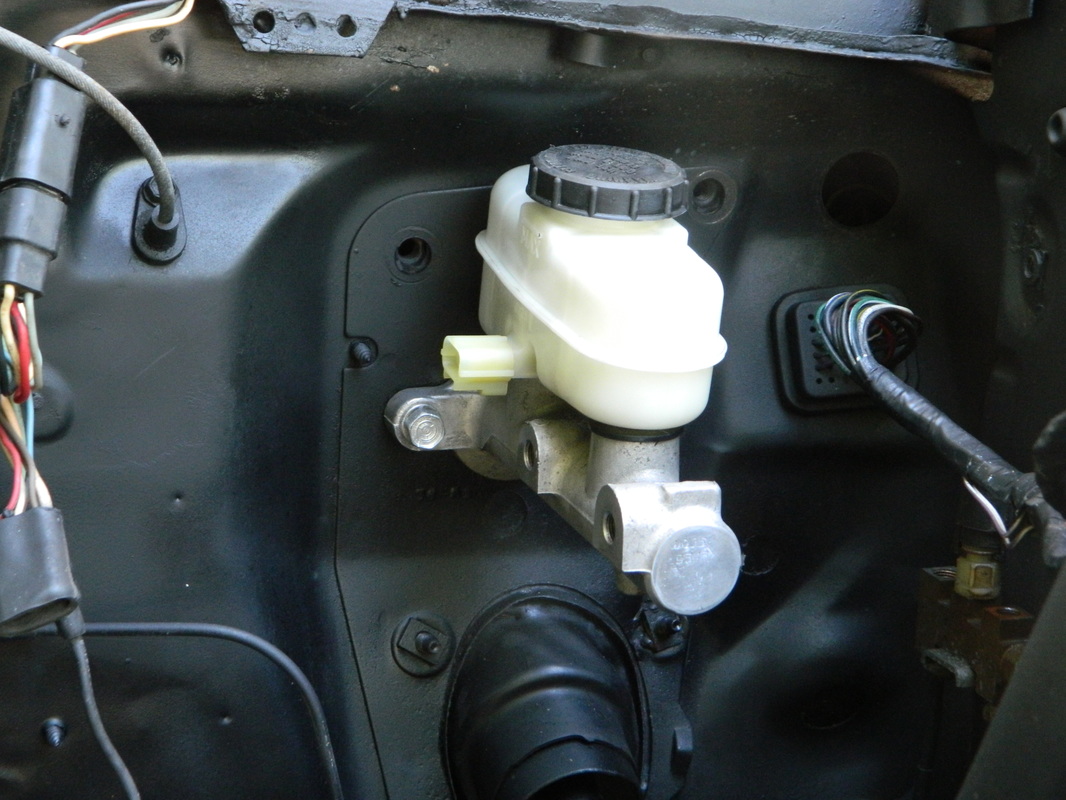
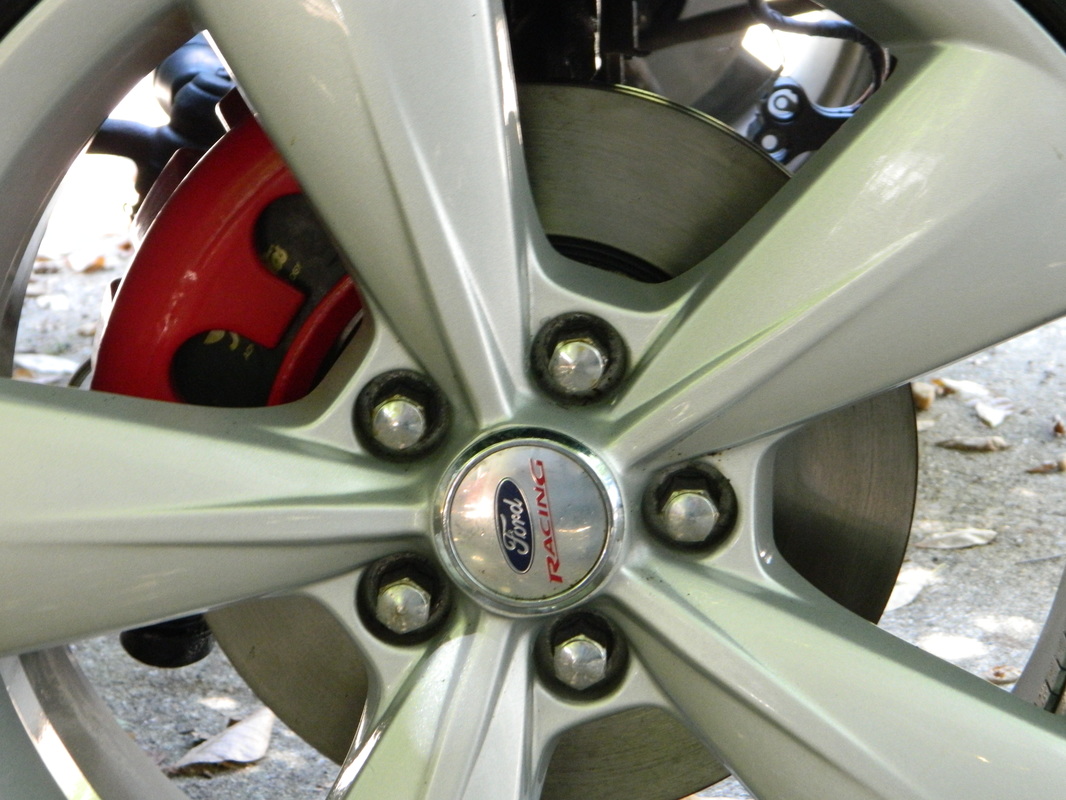
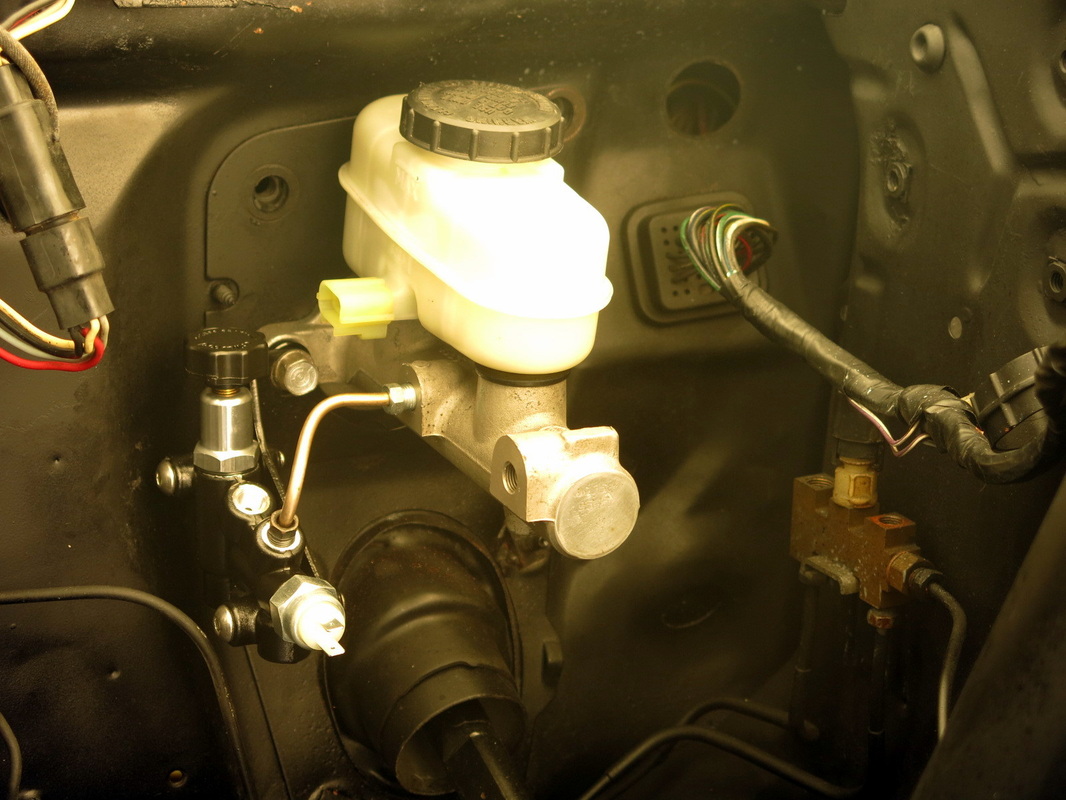
Phase 1 of the disc brake upgrade. I went to pull-a-part today and pulled a 2000 Mustang brake master cylinder. It's aluminum and plastic, weighs about a quarter of what the original cast iron one does, and looks better too. Next, will be a proportional valve and some new lines to it. I found an old picture of the engine compartment with the original master cylinder as it was when I bought it. Next picture is engine compartment today. 3 hrs.
May 29, 2016
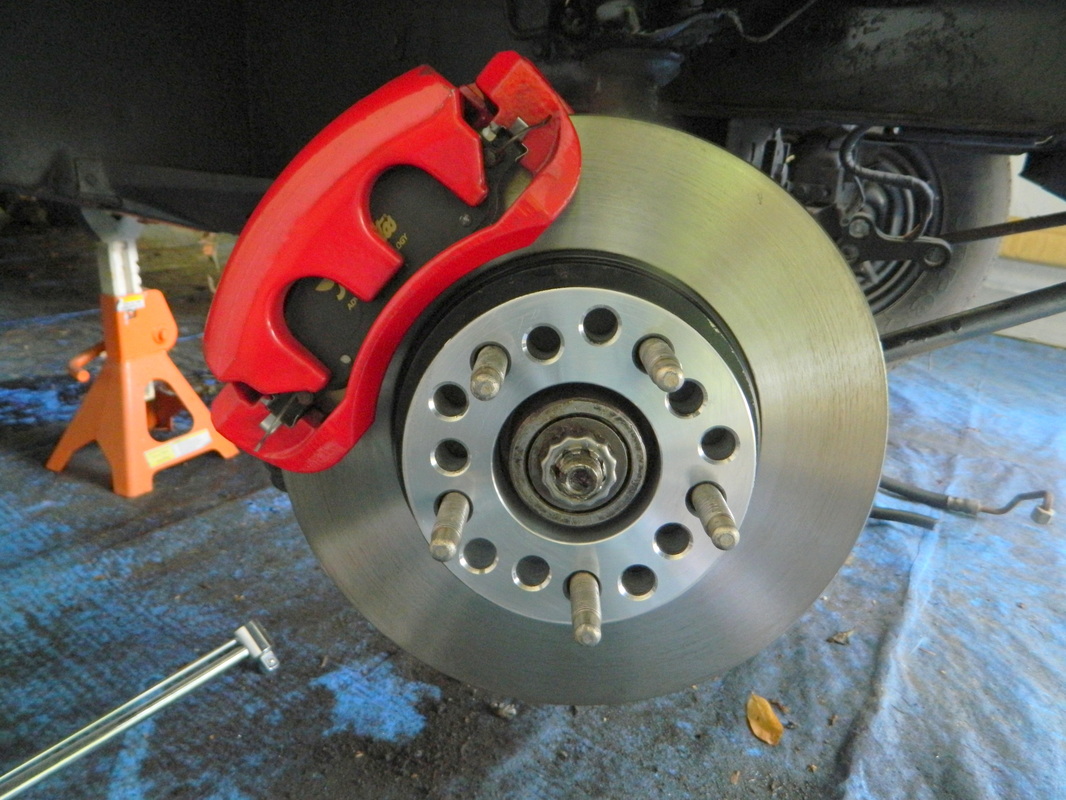
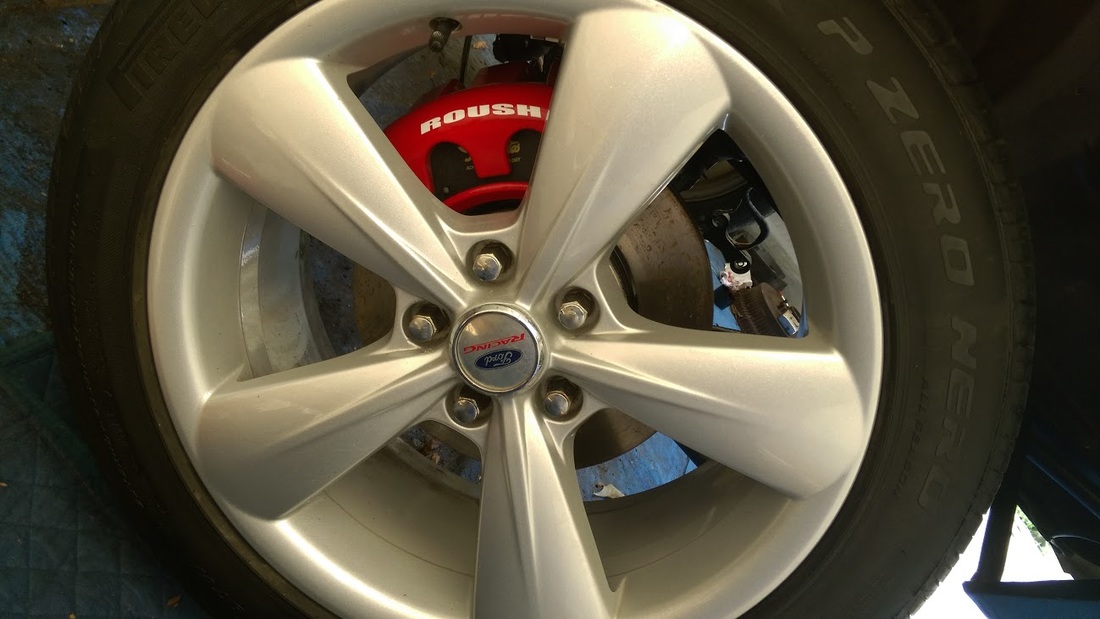
Yesterday I got a set of front disc brakes from a fellow Cougar forum member Andrew Borodin who recently moved near me. I couldn't wait to start putting them on! Yesterday I got the right side on except the line which I need an adapter for. Today I will do the other side and then trial fit the 2013 GT Mustang wheels. 3 hrs

May 30, 2016
So, today I finished installing the two front brakes on the spindles, just have to hook up the hoses when the adapters come in from Summit. It all went together good, I'm pleased with the looks even though they are only 11.5" rotors they look much smaller inside a 18" wheel. I can always upgrade to 12.5's with slots and holes, just have to change abutments. I may go ahead and use the rear drums for now, as I did replace the wheel cylinders and hoses a couple years ago and would only need to put a new set of shoes on them. Now to finish the master cylinder/proportional valve plumbing. 3 hrs

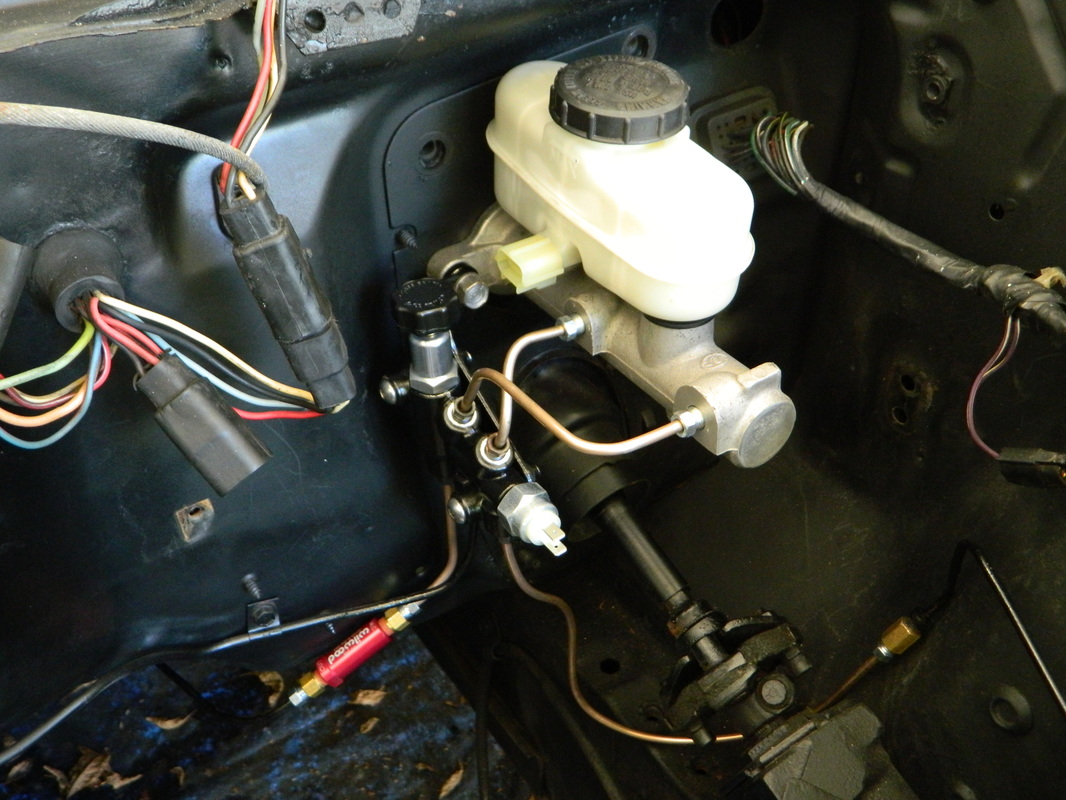
June 12, 2016
It's been a while since I posted anything, but I have done some things. I got my Wilwood proportioning valve and mounted it. Now the fun begins...I have to cut and bend and flare double flared brake lines! But wait, I'm a retired plumber this should be a piece of cake for me! Well, it's not! It's tedious and hard to do. In spite of that, I managed to run the two proportioning lines to the master cylinder and the one rear brake line to the bottom of the proportioning valve. You can see in the pics that there are two lines to the right not connected yet, they go to the two front brakes. Maybe sometime this week. 6hrs including... 4 trips to the auto parts and one to Northern Tool for a flaring tool.
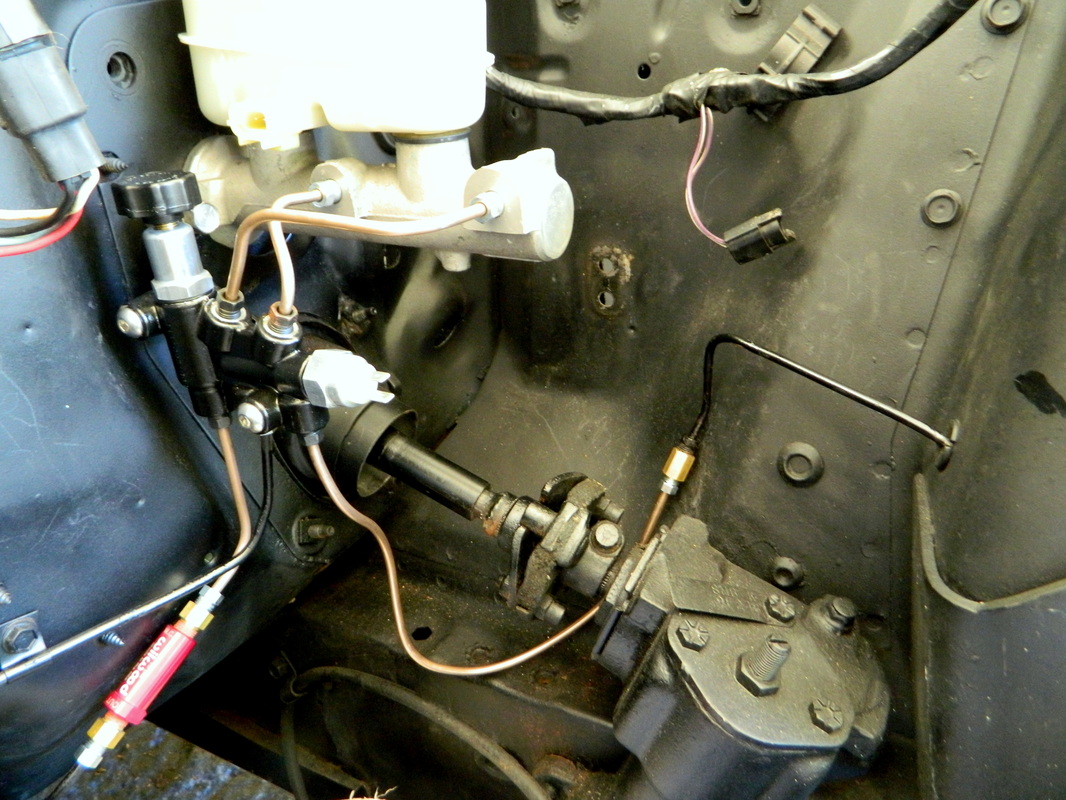
June 14, 2016
My residual valve came in today that I needed to finish the brake lines. Sunday, I connected one of the front brake lines to the proportioning valve, and today I connected the other extended the other one and connected it and the single back line which needed the #10 residual valve. In my last post I said that I connected the rear line but it had to have the residual valve so, it had to come off and be cut. All that's left for the brakes is to have the rear drums resurfaced and new shoes installed and then bleed and adjust the brakes. Then I will have a car that can stop on a dime, but can't move an inch on its own. 3 hrs

June 16, 2016
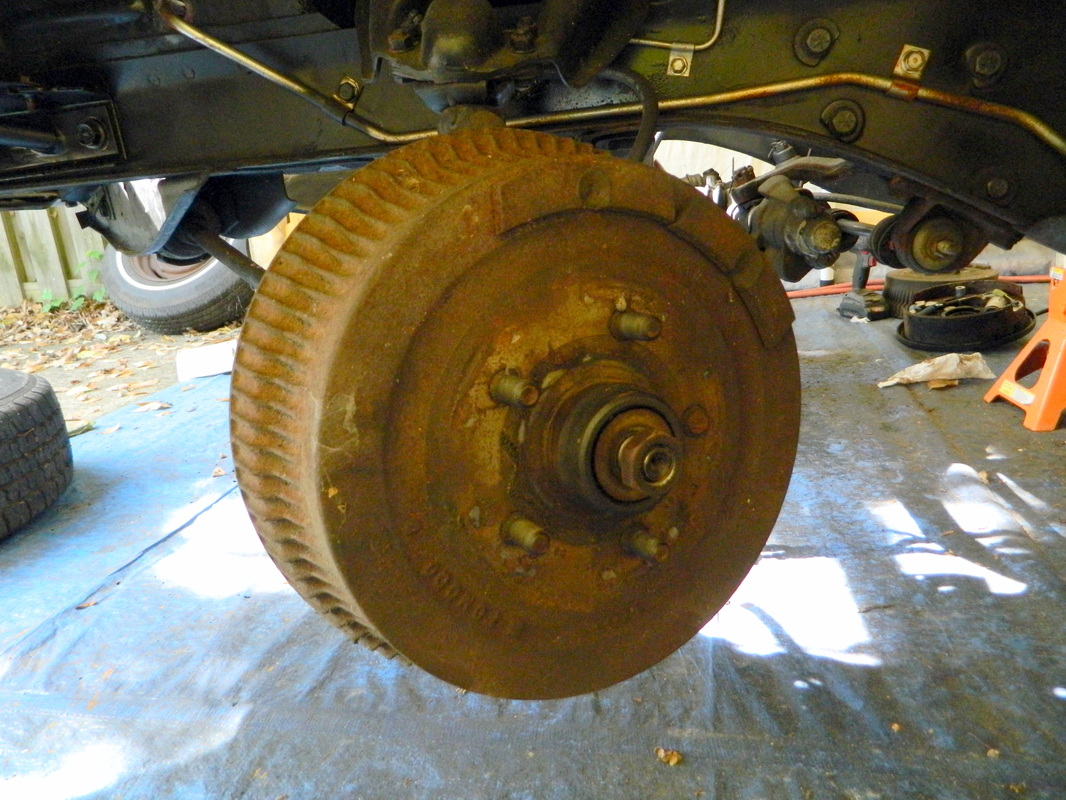
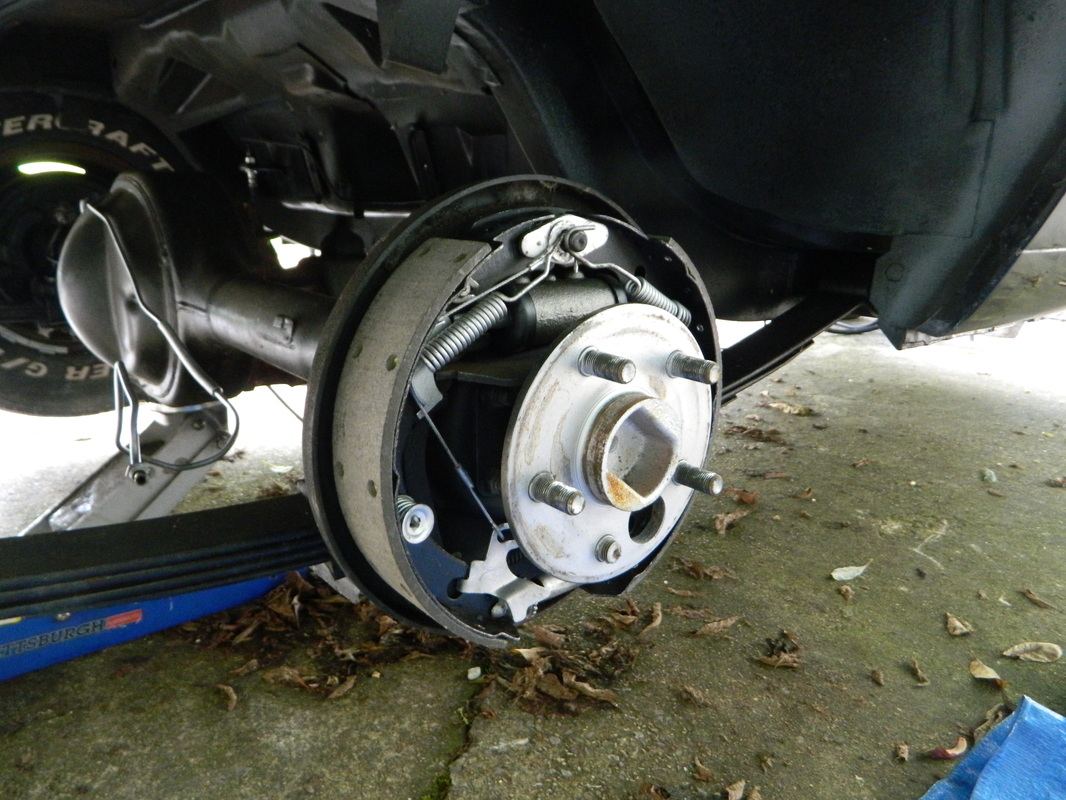
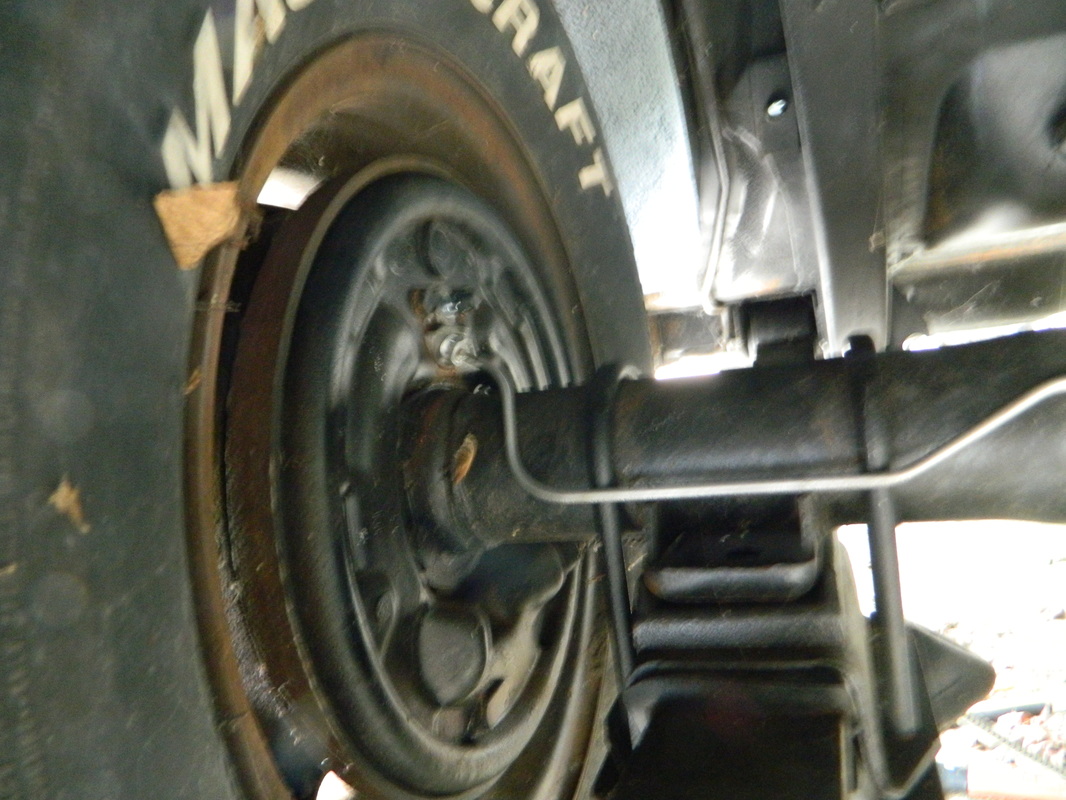
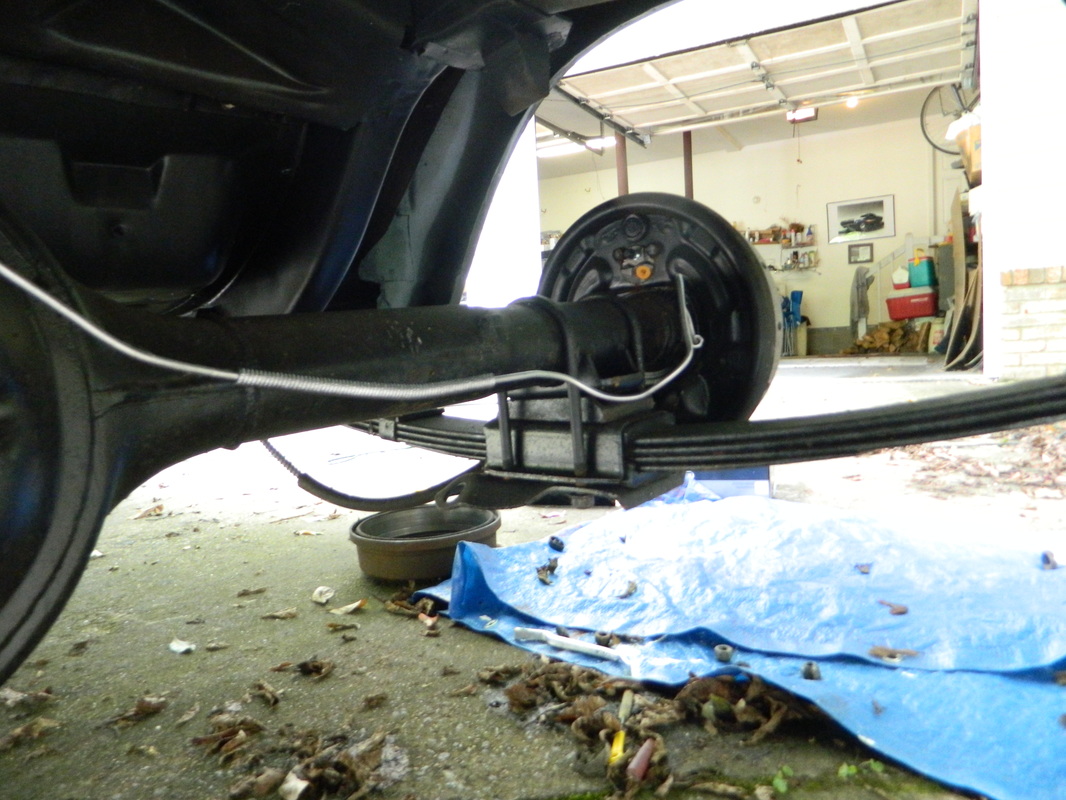
Today's adventure is the rear brakes. When I started this restoration 4 years ago, I quickly "overhauled" the drum brakes front and back just so I could drive the car before taking it apart. I did replace the wheel cylinders on all four as they were frozen, and also the brake hose lines. But, now that I have decided to use the rear drums for a while, I knew I needed at least new shoes, and to have the drums resurfaced. Well, as it turns out, the "old new" wheel cylinders were junk now, so those were added, as well as the shoes and the rubber flex line at the axle. I haven't had the drums turned yet, I will do it Saturday and bleed them too. 6 hrs with the trips to two different auto parts stores.

June 23, 2016
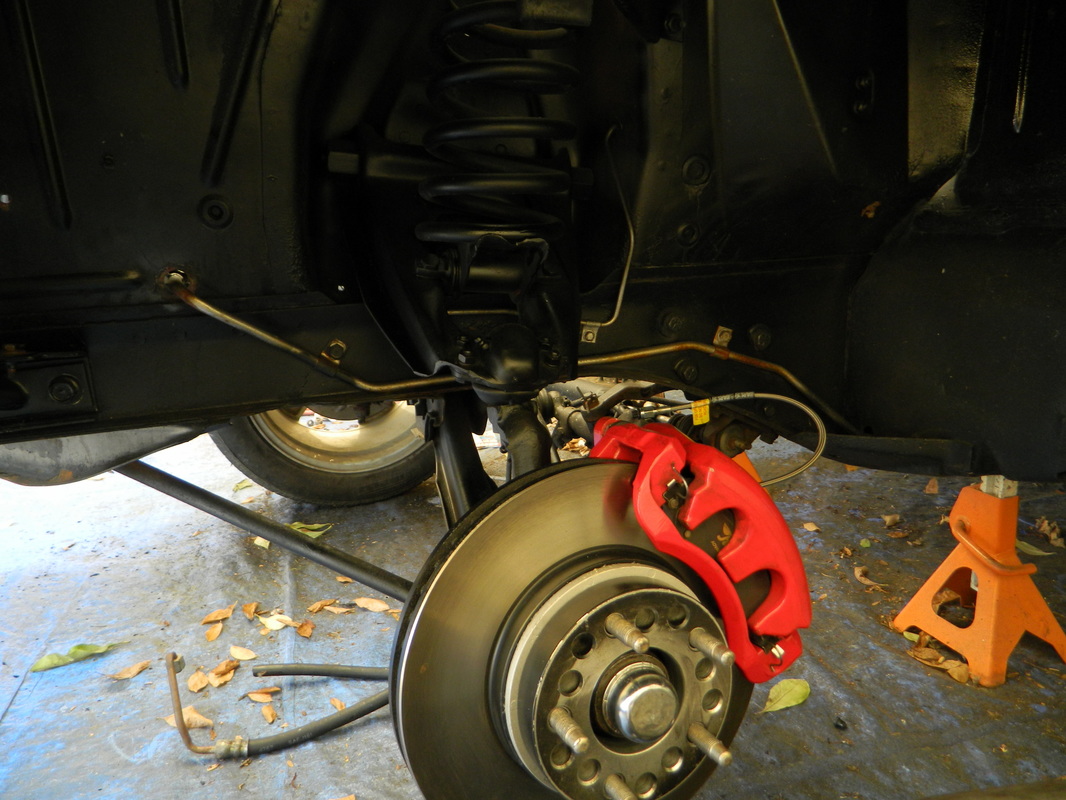
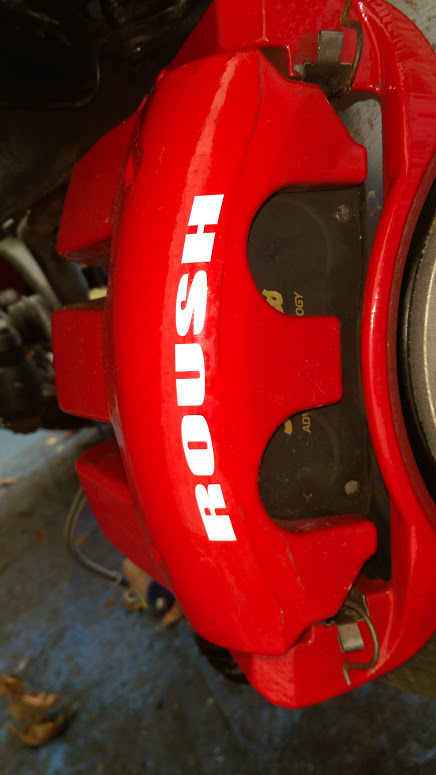
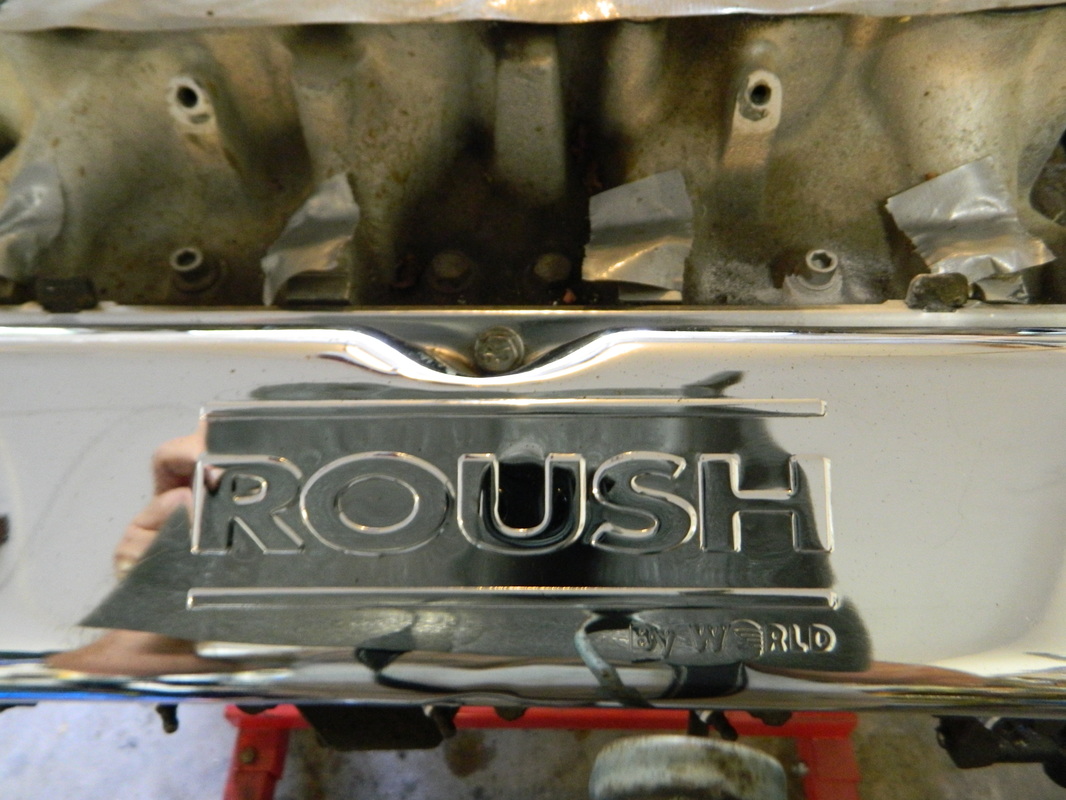
Today, I tried to bleed the brakes, but failed due to the wrong fittings in the master cylinder. I thought they were tight but were actually leaking. I think I know which ones to get now. I put some Roush decals on my calipers, I think they look good even though they're not real Roush calipers. Those cost $2000.
June 26, 2016
Yesterday I got the right brake line to hook up the master cylinder but after bending the new lines, I was too hot and tired to tackle bleeding the brakes. So, today I went out after lunch and pre-bled the brakes by myself using a minivac brake bleeder. And then after that I got my wife to come out and pump the brakes for the final bleeding. Since I had most of the air out already, it only took a couple of rounds of bleeding on each wheel. Now I have about 1"of pedal travel and solid after that. There's no pics today just hot and hard work. 4 hrs for today and yesterday.
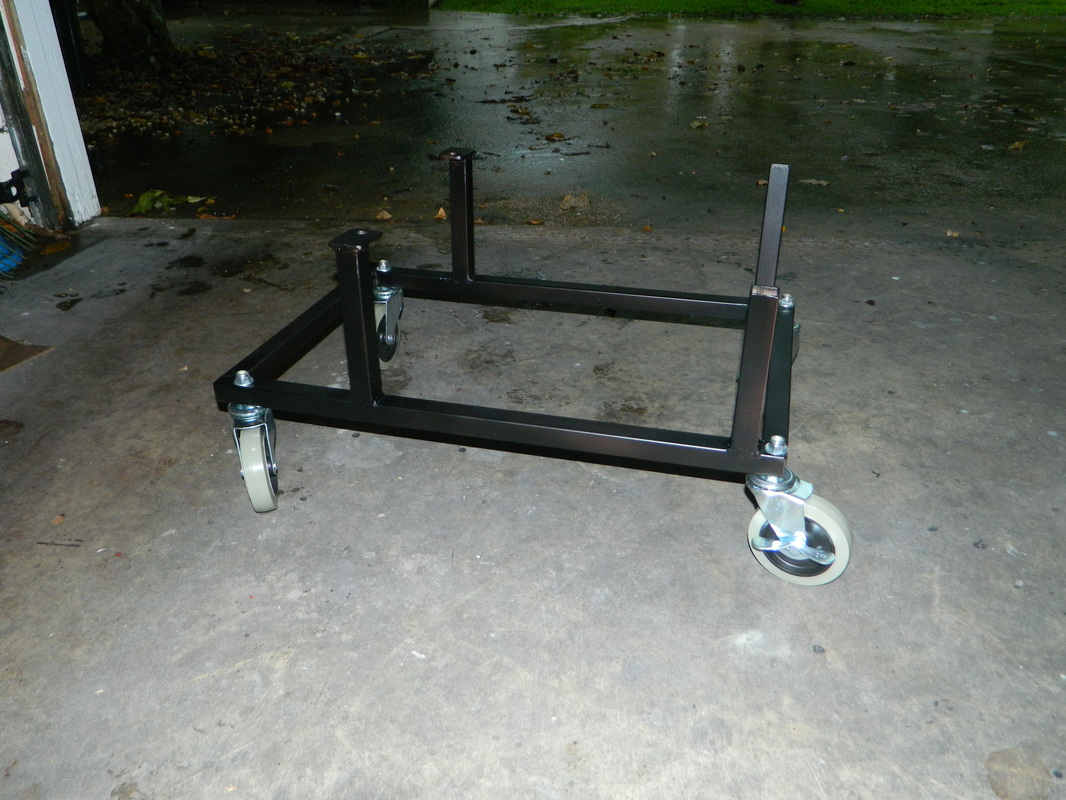
July 9, 2016
I ordered a hydraulic clutch setup and it should be here Monday, so I decided to make an engine cradle, something I will need once I pull the engine out of the Ranger. I have an engine stand, but the 351W has been on it since I pulled it out of the Cougar. So, it is now on the cradle, and the 306W will go on the stand to work on it prior to installing it in the Cougar. Anyways, I could have bought one for about what I built this one for, but that wouldn't be any fun and I got to waste about 4 hrs doing it.
July 12, 2016
The clutch setup arrived today, so I put it in since I had the day off. It was a little difficult to do by myself, but I managed. I made a pattern out of masonite, to drill the holes in a jig to locate the location for a hole saw. Getting the bolts into the master cylinder was really tricky. Next up is, tearing out the old power steering and replacing it with manual steering link, idler arm and pitman arm. Then I will be ready to install the engine. 4 hours.


July 29, 2016
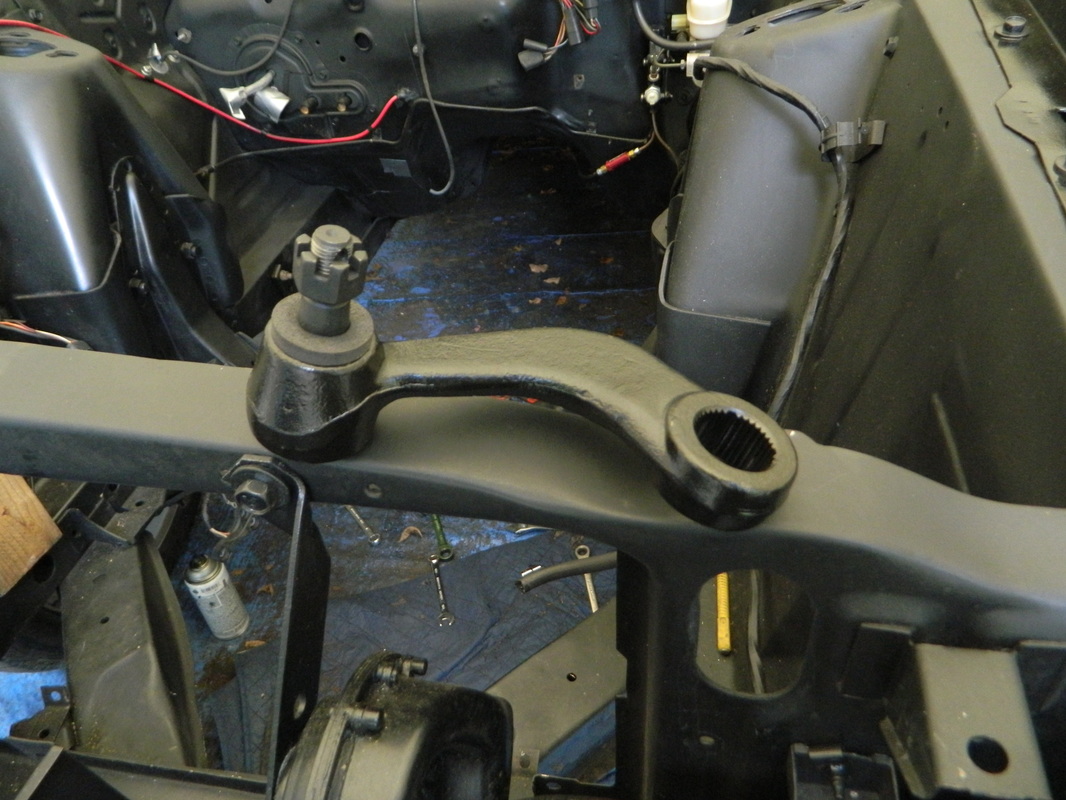
I received my steering components order the day I left for vacation, so now that I'm back, I started to work at removing the old stuff and install the new. Removal went about like I expected, with some ease and some difficulty. Once I got the old stuff out, I started to put the stud off the old drag link on the new link. However, the stud wouldn't fit, so I looked back in the catalog at the link that I ordered and sure enough, the one I got was for a 65-66 not a 67-69, but it was labeled correctly. So, after calling NPD they said they would send the correct one in a couple days. I did install the new pitman arm and idler arm. 4 hrs.
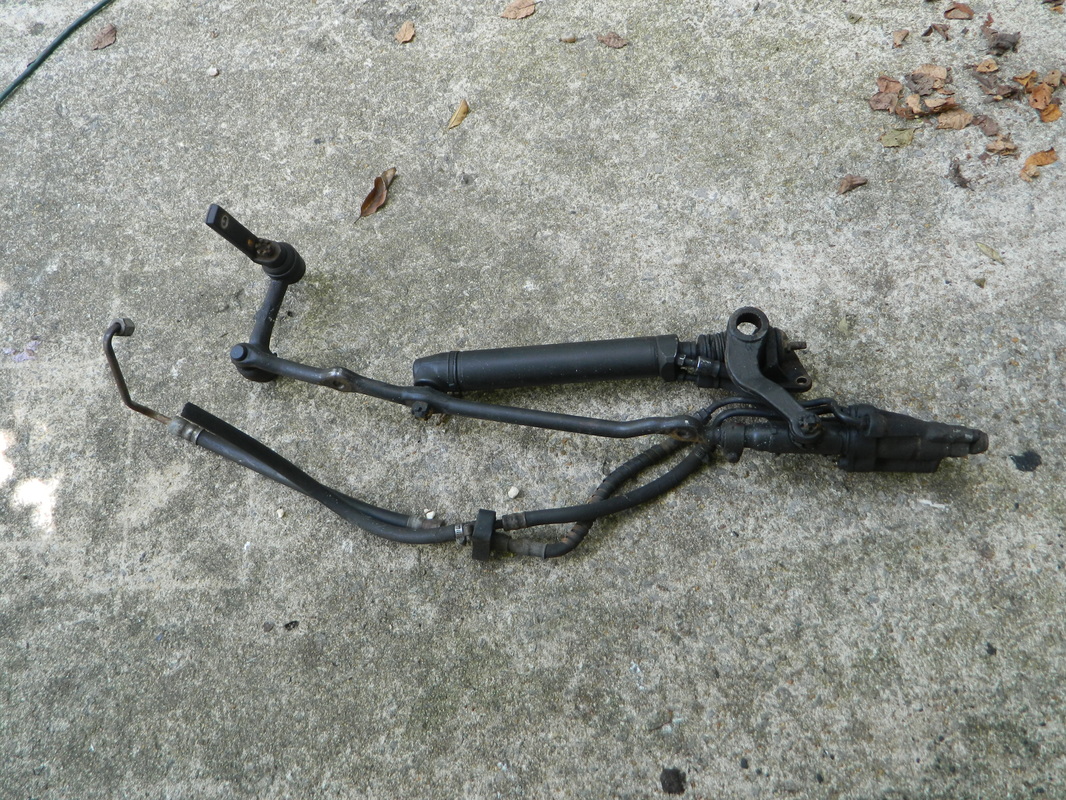
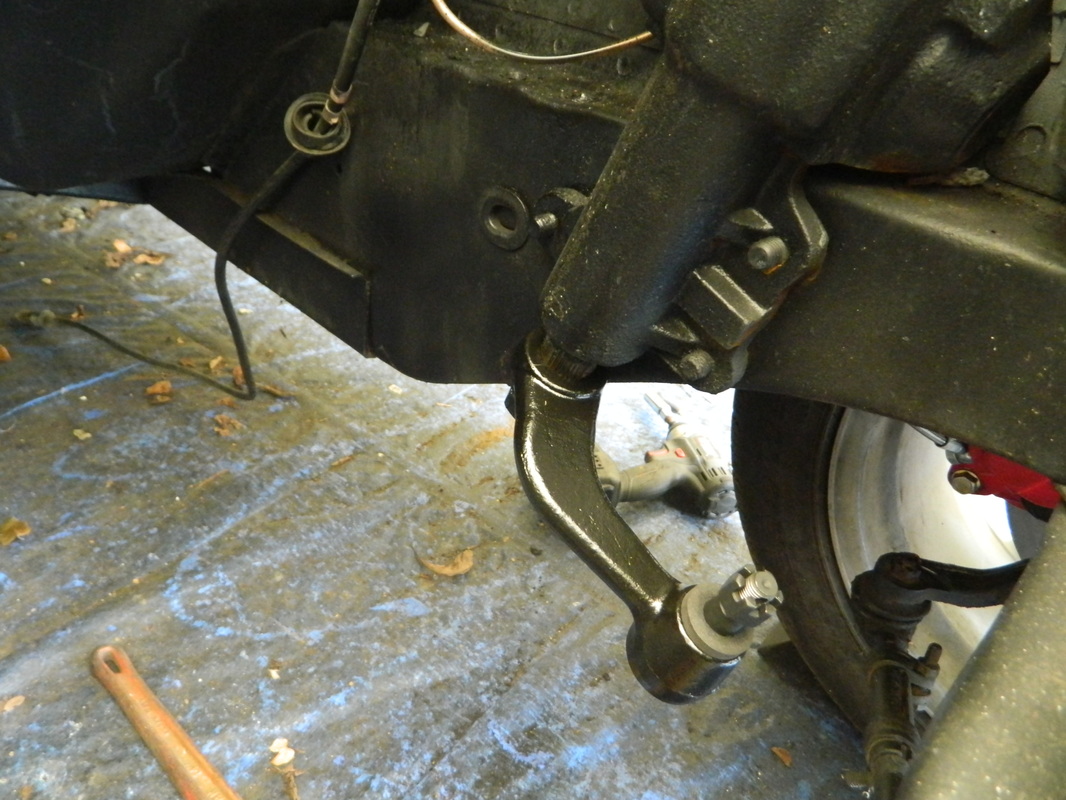
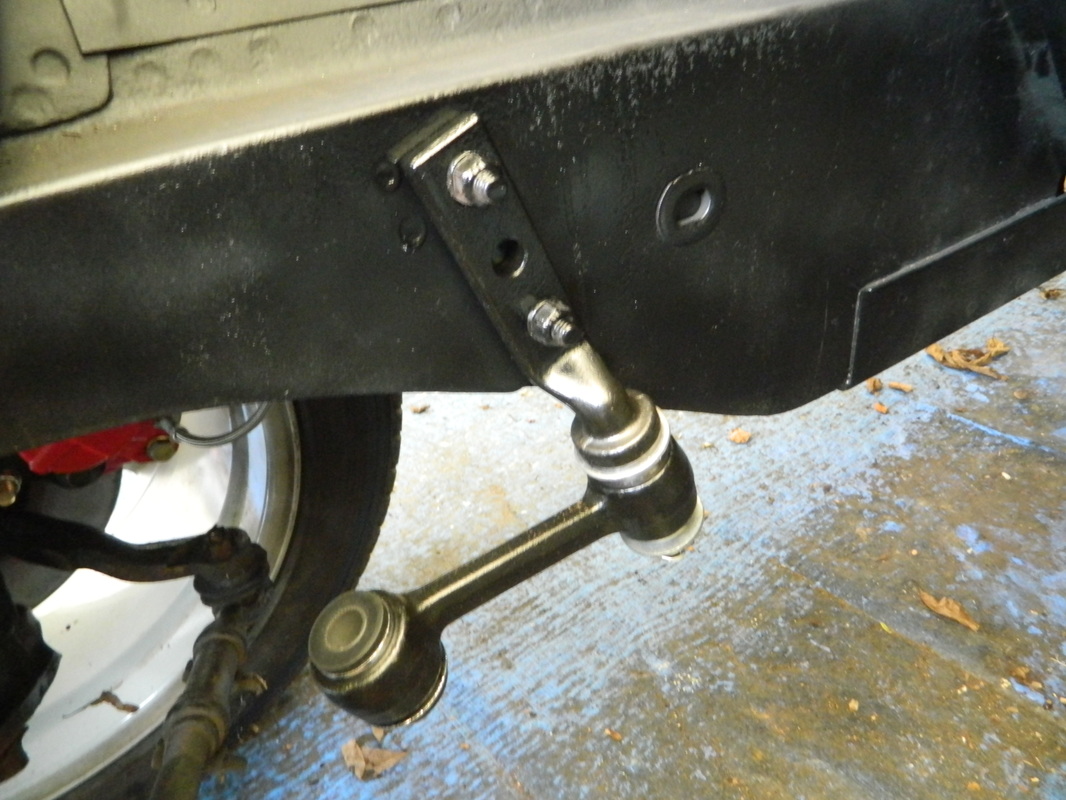
My drag link came in yesterday, so I took advantage of the day off and installed it. It wasn't very difficult, but I'm not sure if the alignment is correct. I also started unhooking everything on the Ranger to pull the engine and transmission. I had to sawzall off the radiator fan, as my brother had it welded on when it failed. Don't know if I will get much more done, it's 105 heat index. Went back out for another hour and got the whole fuel injection system off and the radiator and distributor. so 5 hrs.


Aug 06, 2016
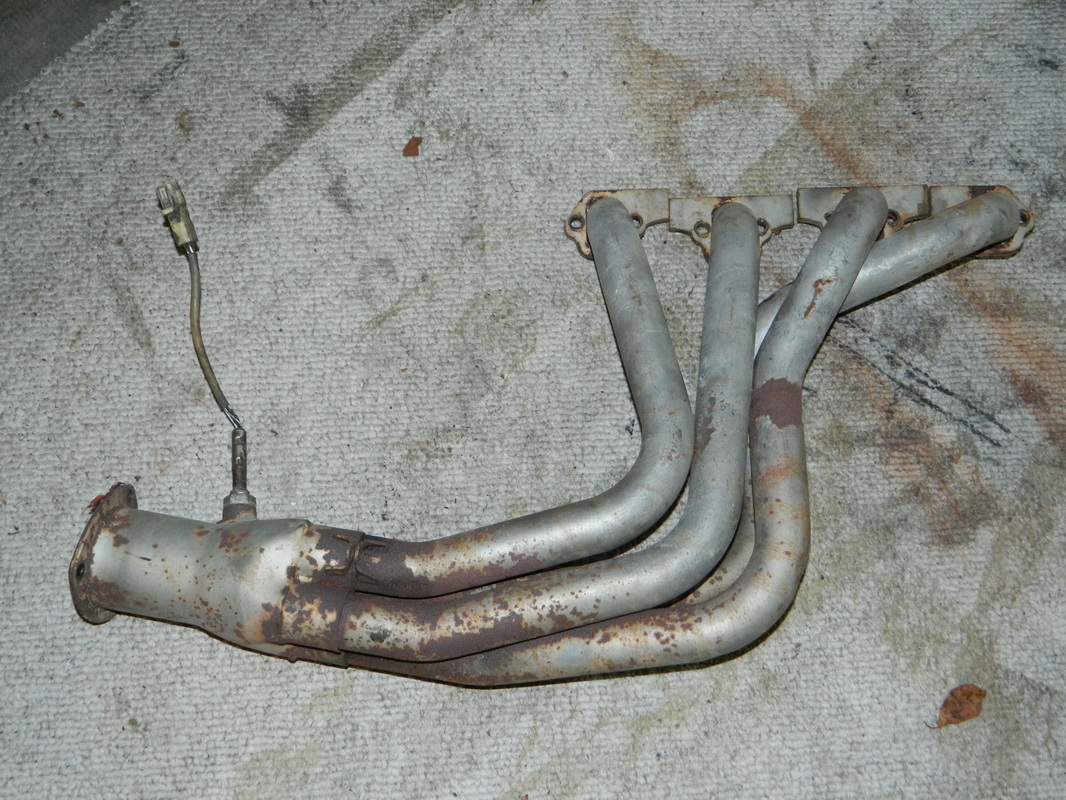
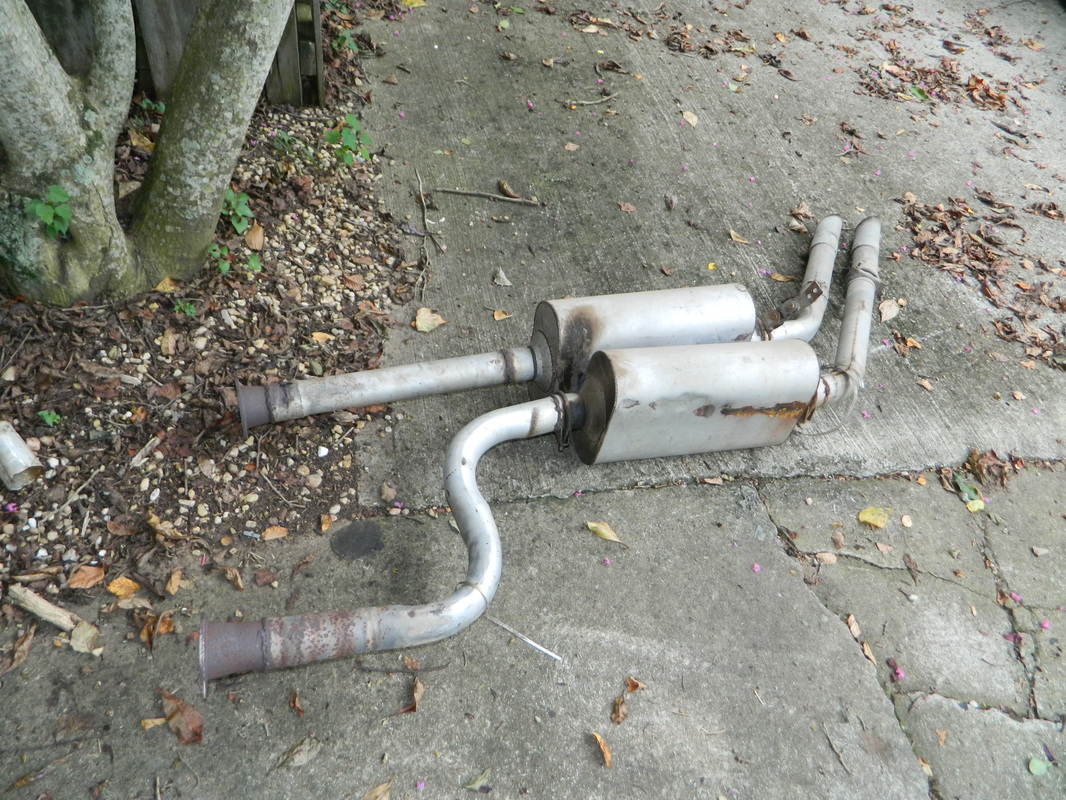
Today I unhooked a few more wires and freon lines to the A/C and then removed the entire exhaust system and the right side header.
It started lightening, so...called it quits! 3 hrs.
It started lightening, so...called it quits! 3 hrs.
Aug 07, 2016
All I did today was remove the other header. Next, is pulling driveshaft, crossmember, transmission and bellhousing and then the engine.
Aug 20, 2016
Today, I pulled the engine out and mounted it on the engine stand. There was the usual problems with engine removal, but it came out all right. Mounting it was ok except I had to remove the flywheel due to clearance problems. 3 hrs.
Aug 21, 2016
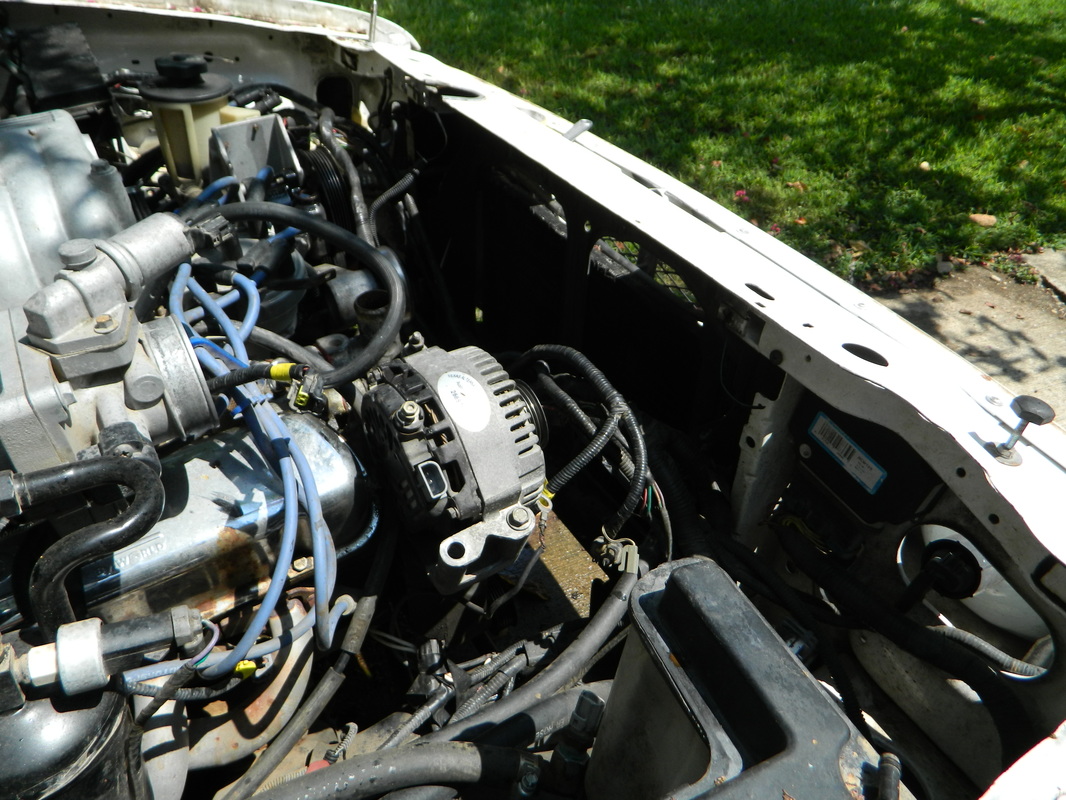
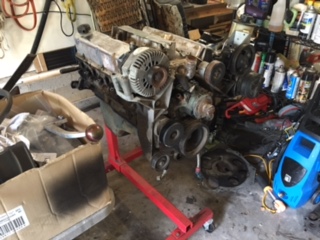
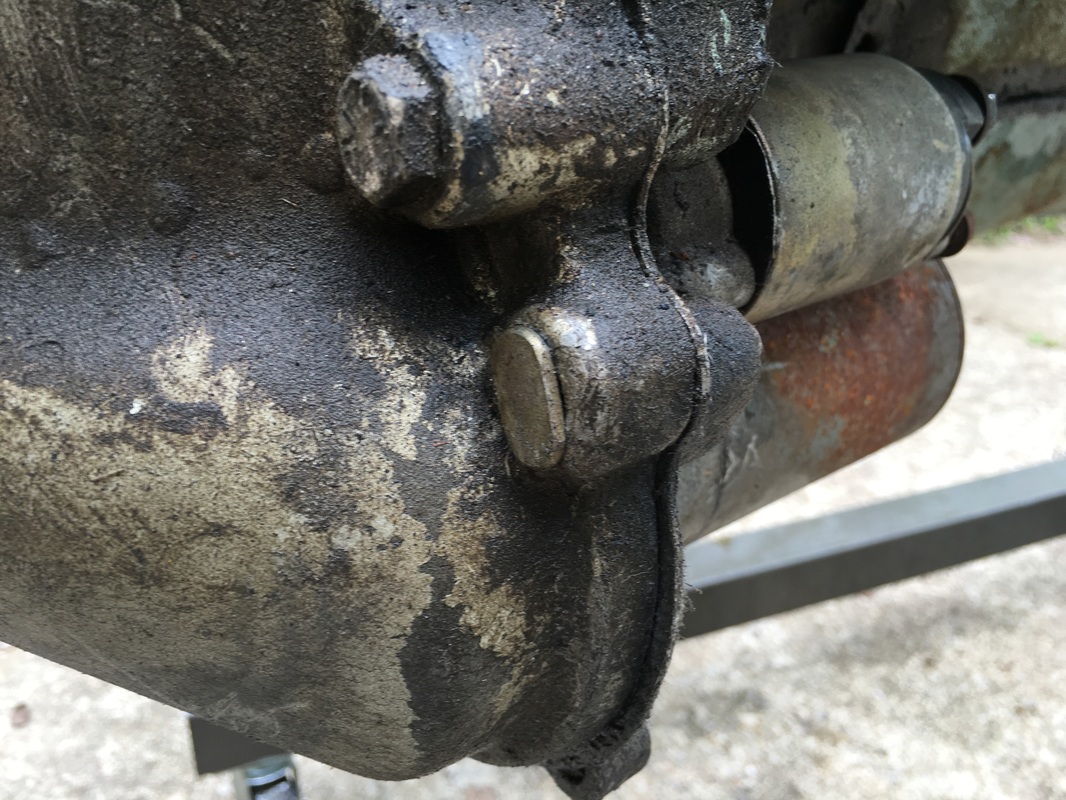
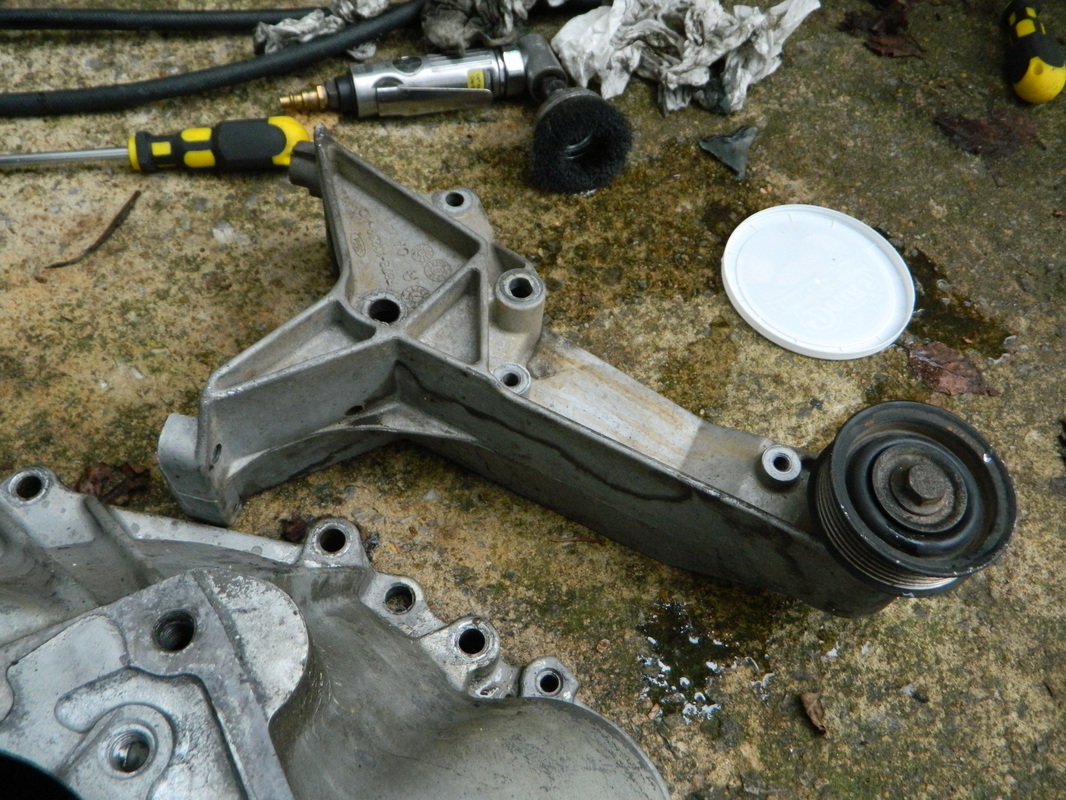
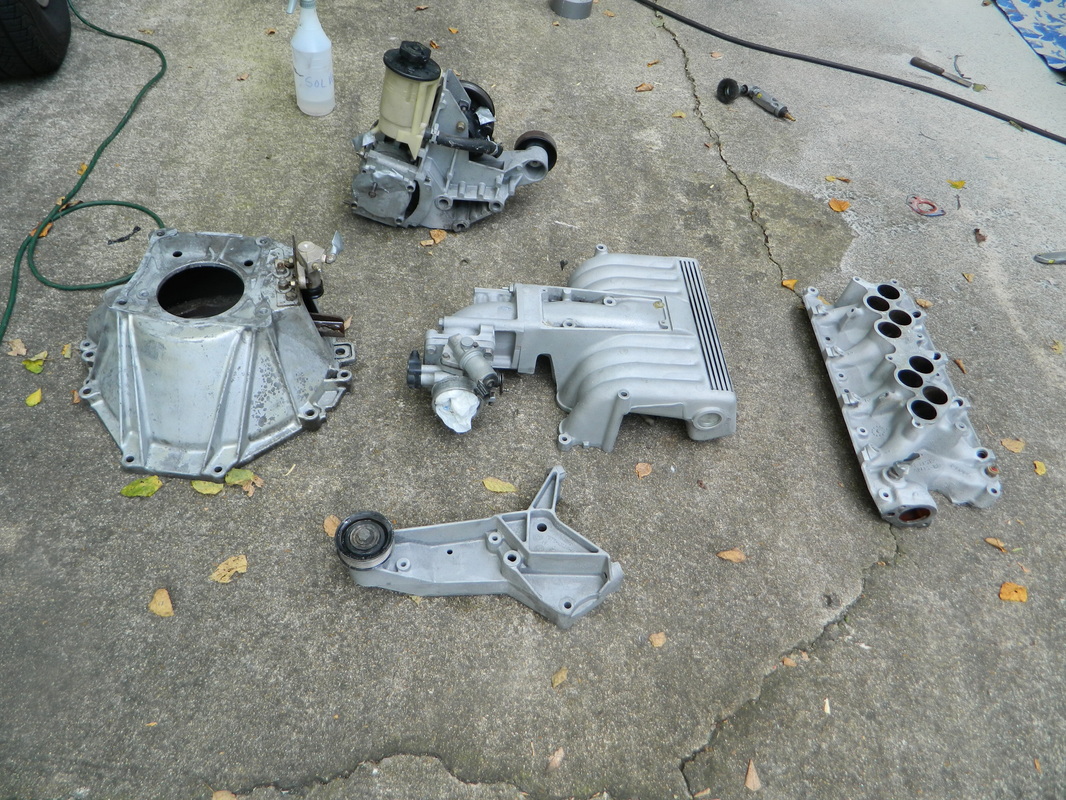
Today, I removed the front accessories off the engine, so I could media blast the brackets and paint the pulleys and stuff. The photos below show a lot of the stuff removed from the truck. Everything usable will be cleaned, blasted and or painted. As I took the Ranger apart, I couldn't but help notice some mechanical atrocities my brother did to the Ranger in the 4 years he had it. One, I found a toilet bolt, (that holds a toilet to the floor) used on the lower hole of the starter. Next, was the oil filter relocation setup I had which consisted of a $90 Canton billet block adapter and two custom braided SS lines with AN fittings. After a leak developed on one of the lines he substituted a brass nipple, a galvanized 45 degree iron pipe fitting, and some off the shelf hydraulic line probably for a backhoe. He's was a plumber so that's why the plumbing parts used. I also cleaned up one of the valve covers and may just just them, since they still look good. Anyways, at least the engine survived and will serve to power the Cougar. Today just worked 2 hrs.


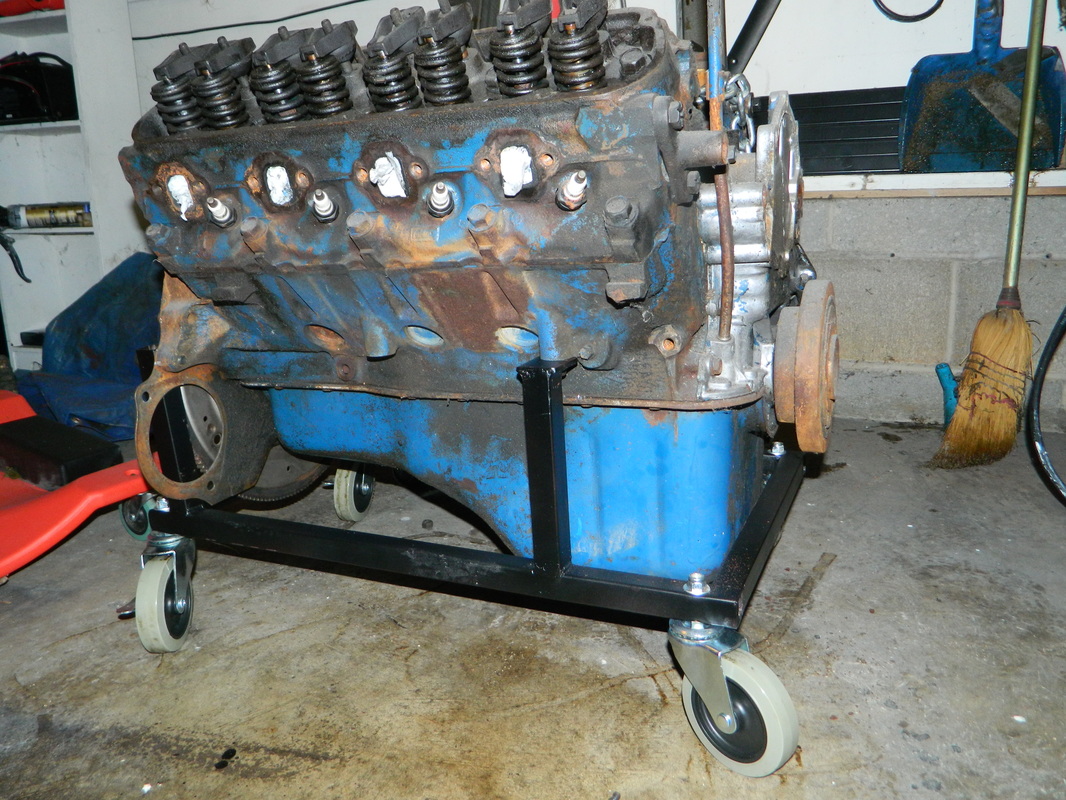
Aug 22, 2016
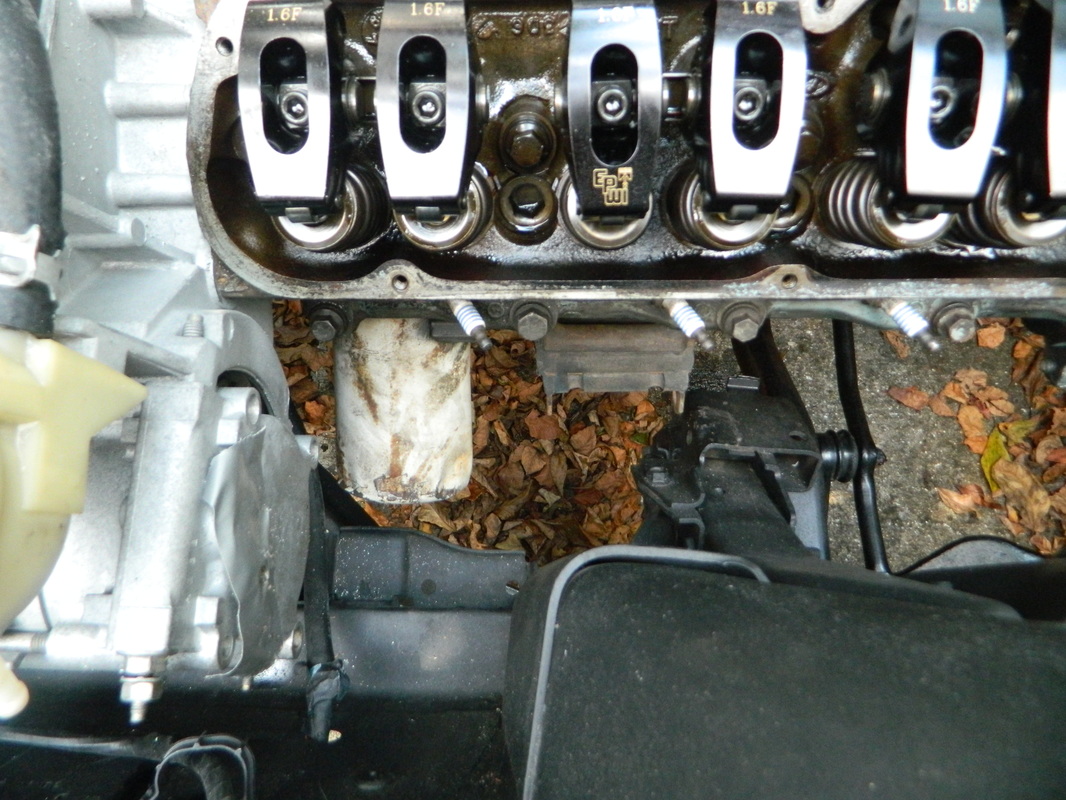
I had a doctor appointment today, so after getting told i could stop taking Plavix, I went home and started cleaning the engine. I used some engine degreaser, purple stuff, and solvent and a pressure washer. It didn't clean as well as I thought with just the degreaser and pressure washer, so out came the little brushes and solvent. It's not finished, but about half done. I took the intake off too, I don't want to paint it, so it will be easier to clean (sand blast) it first then after the block is painted reinstall it. I was a bit surprised how clean the engine was under the intake (not really as I was the one who built and maintained it most of it's life). The engine is over ten years old and has 40,000+ miles, but still runs really strong without burning any oil. 4 hrs
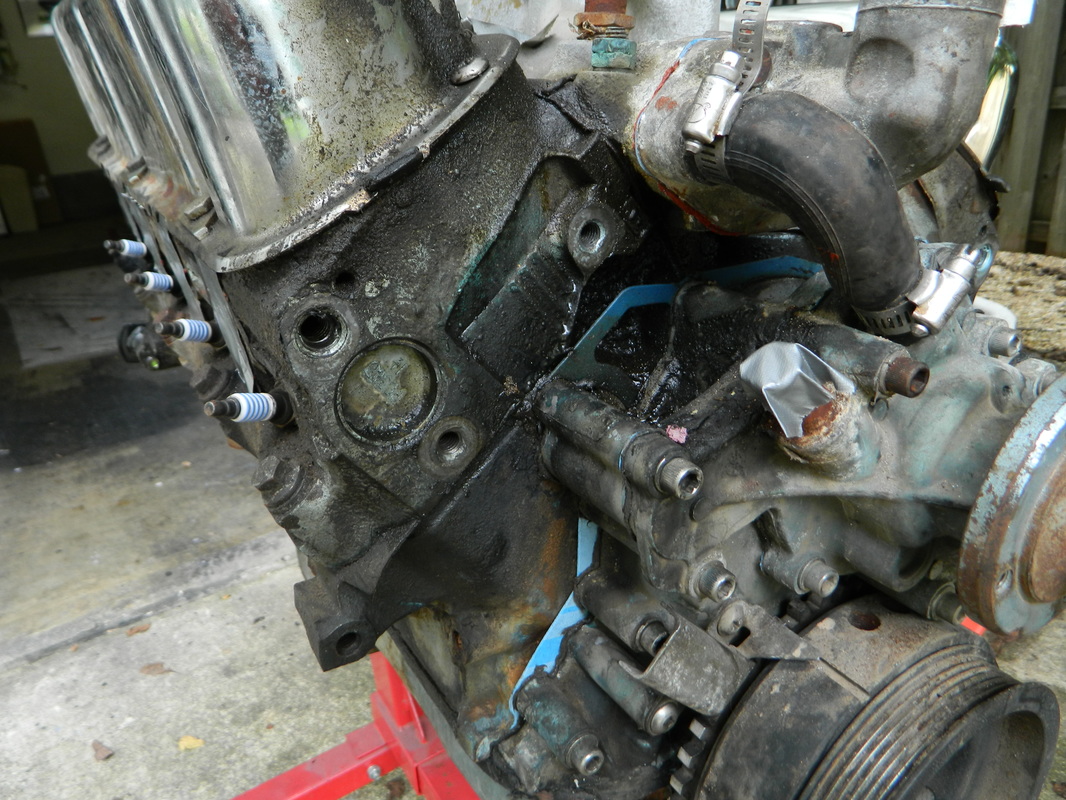

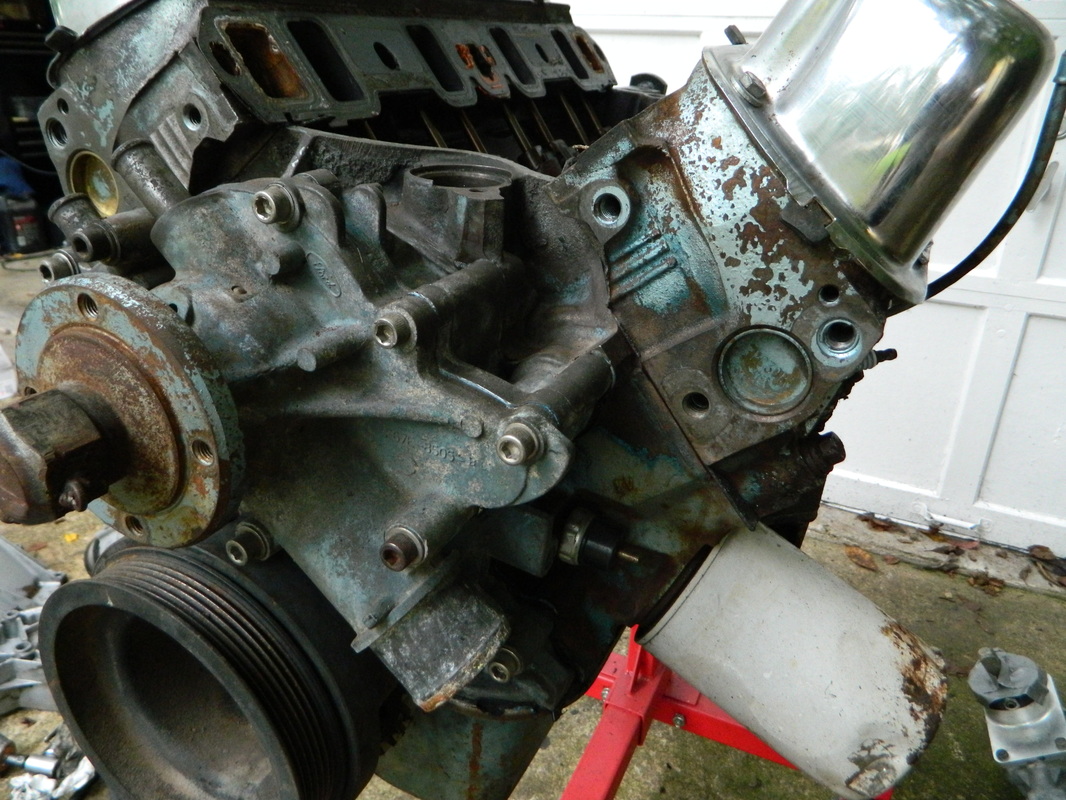


Aug 30, 2016
I forgot how tedious cleaning engines is. I cleaned these parts with pressure washer, gasoline, pressure washer, sand blaster and one more round of pressure washer. I think they're good enough now! Just have to paint some of the black stuff. Need to get my oil pan, so I can install a dipstick and then put it on and paint the block. 3 hrs today

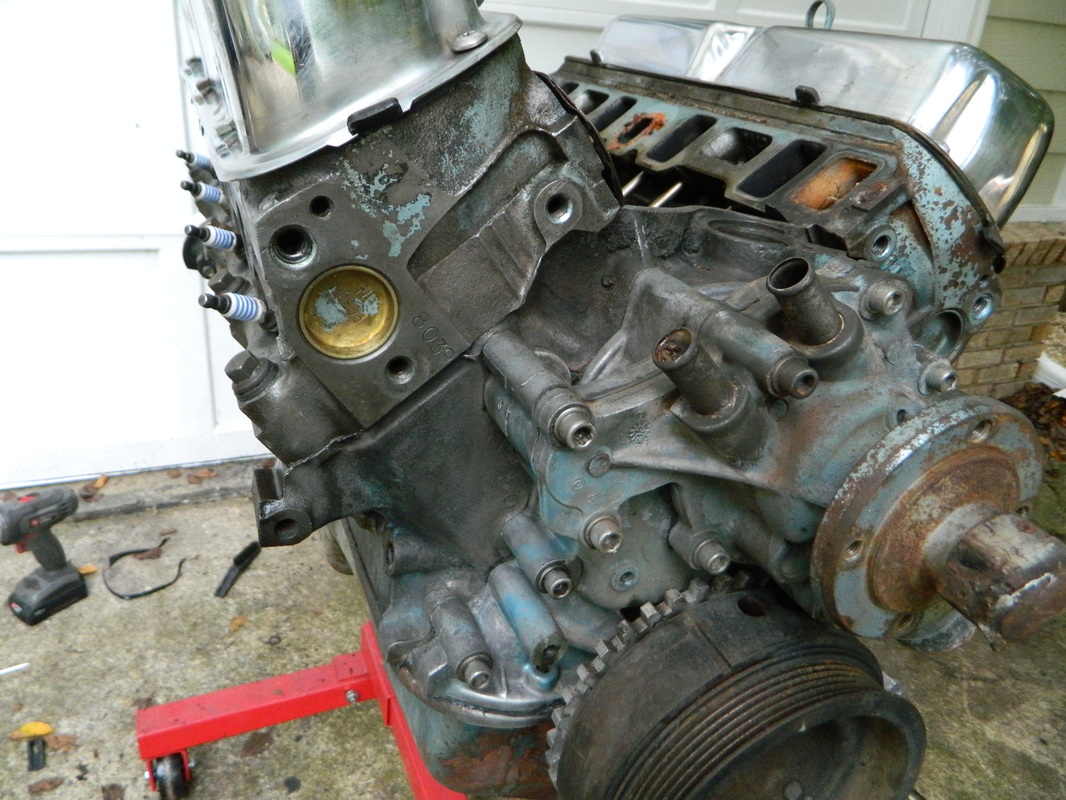
Sept 1, 2016
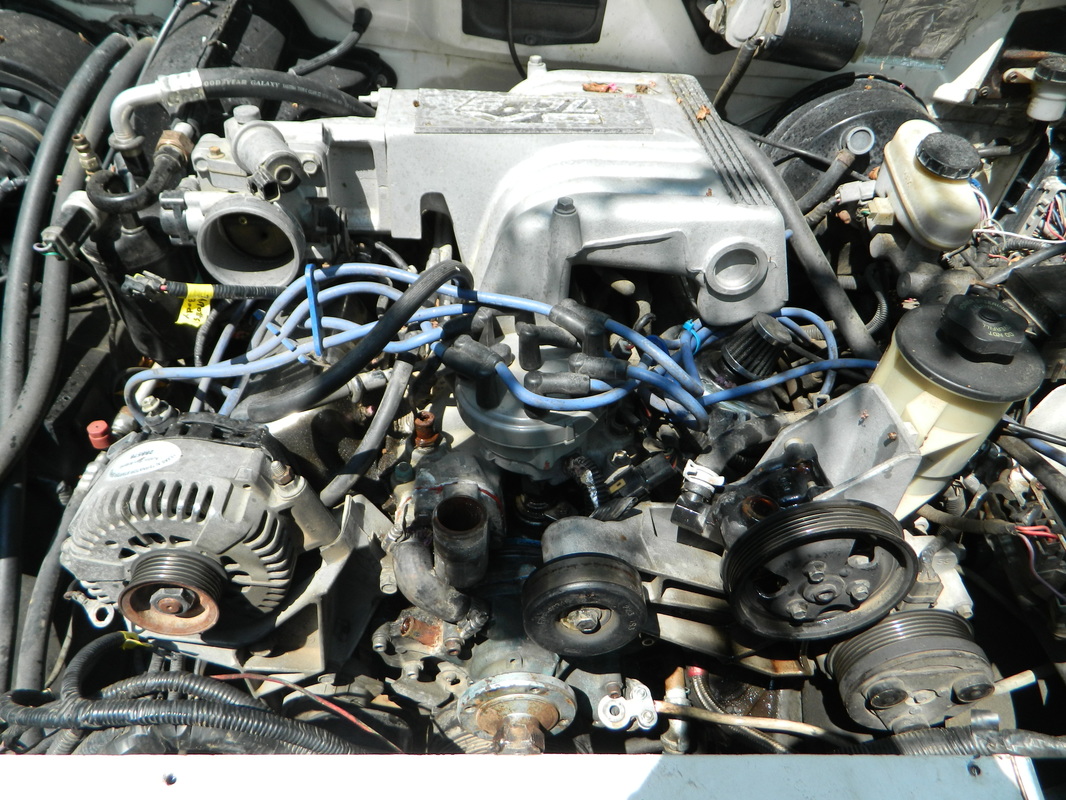
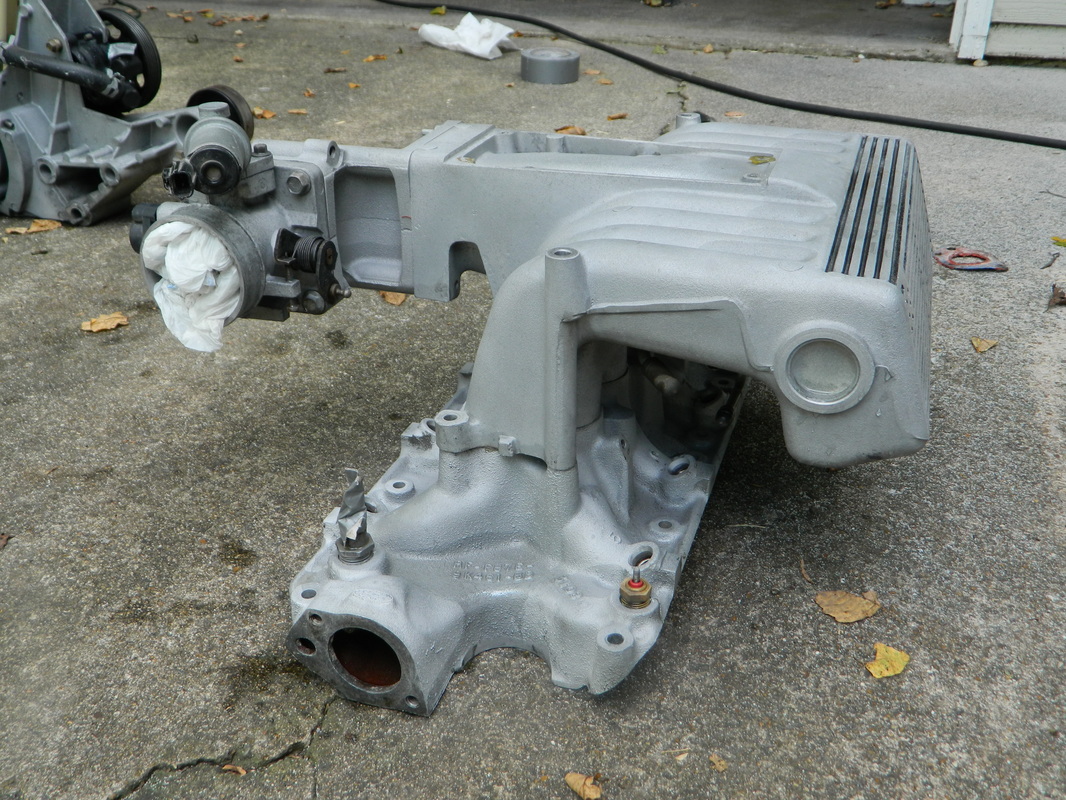
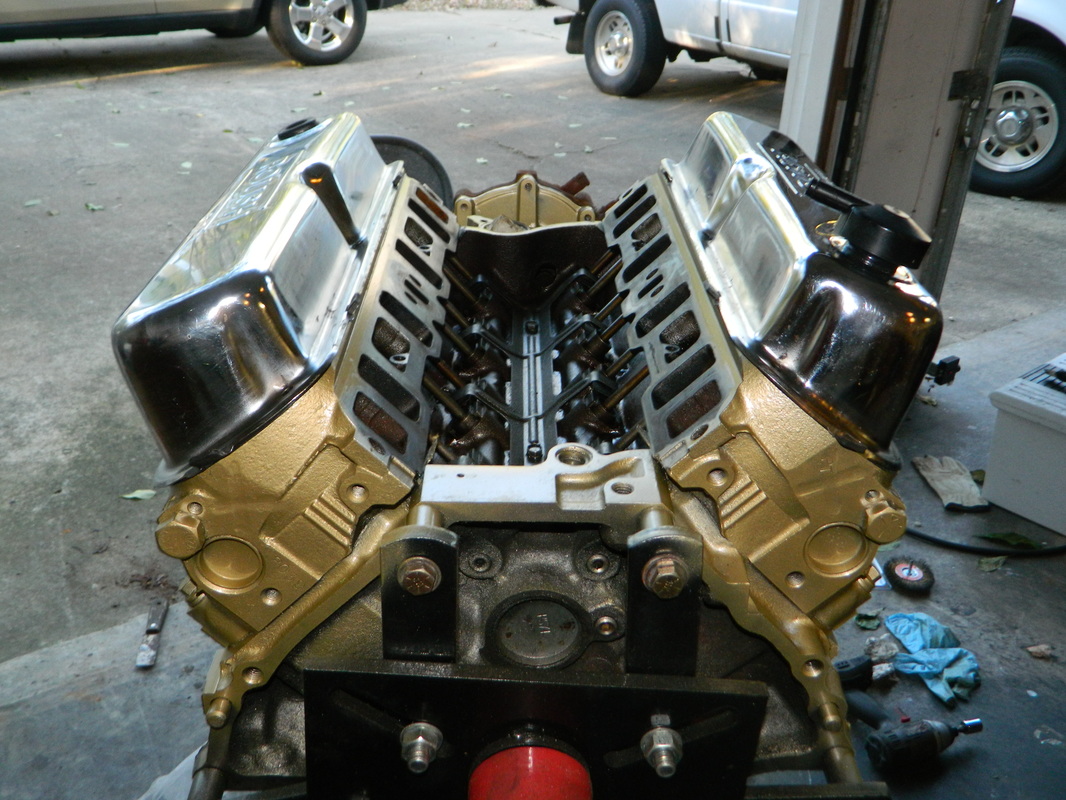
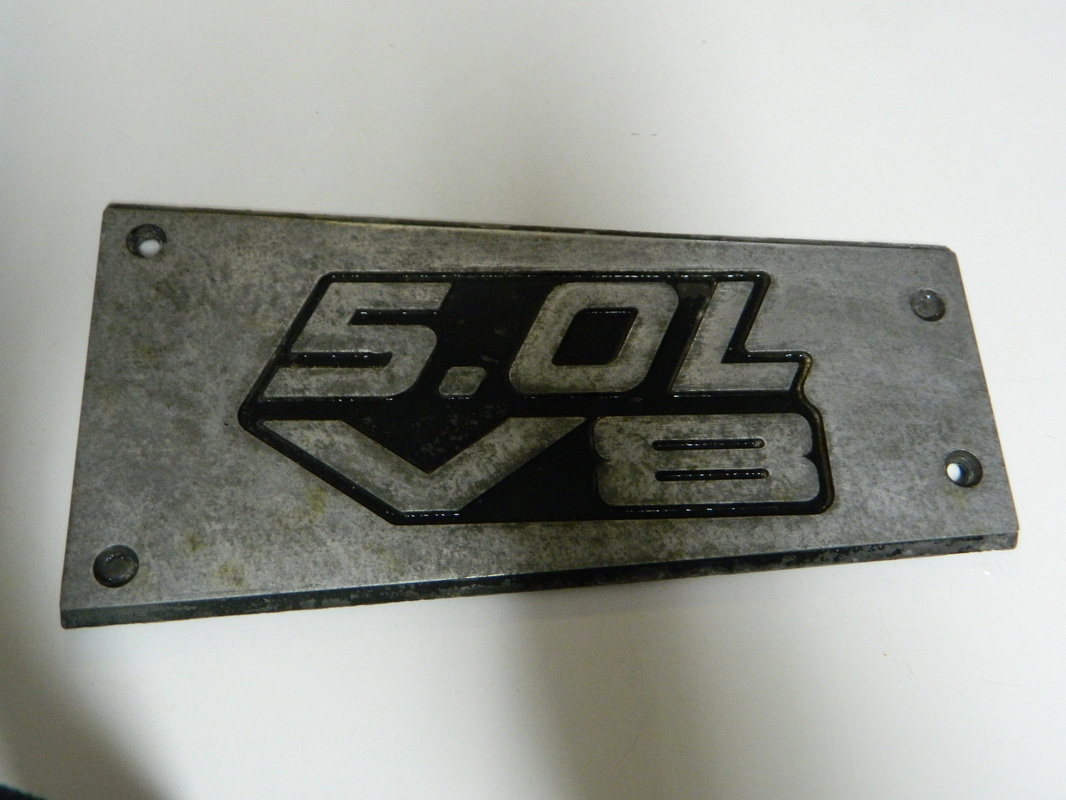
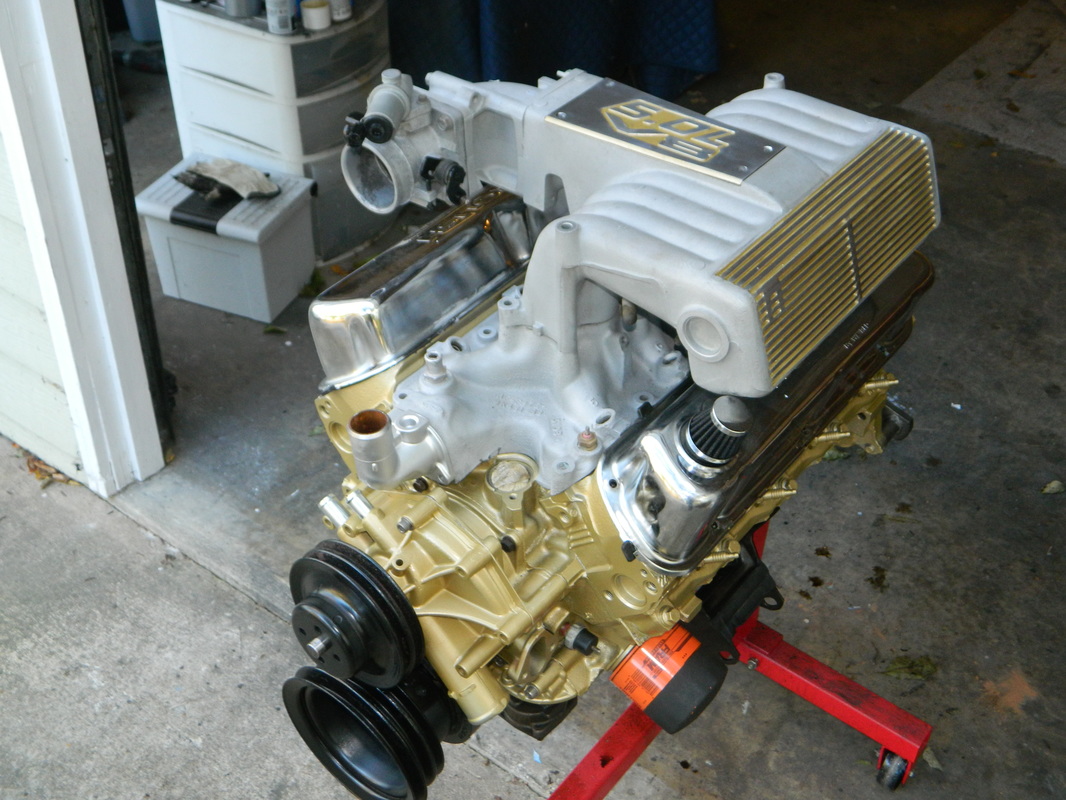
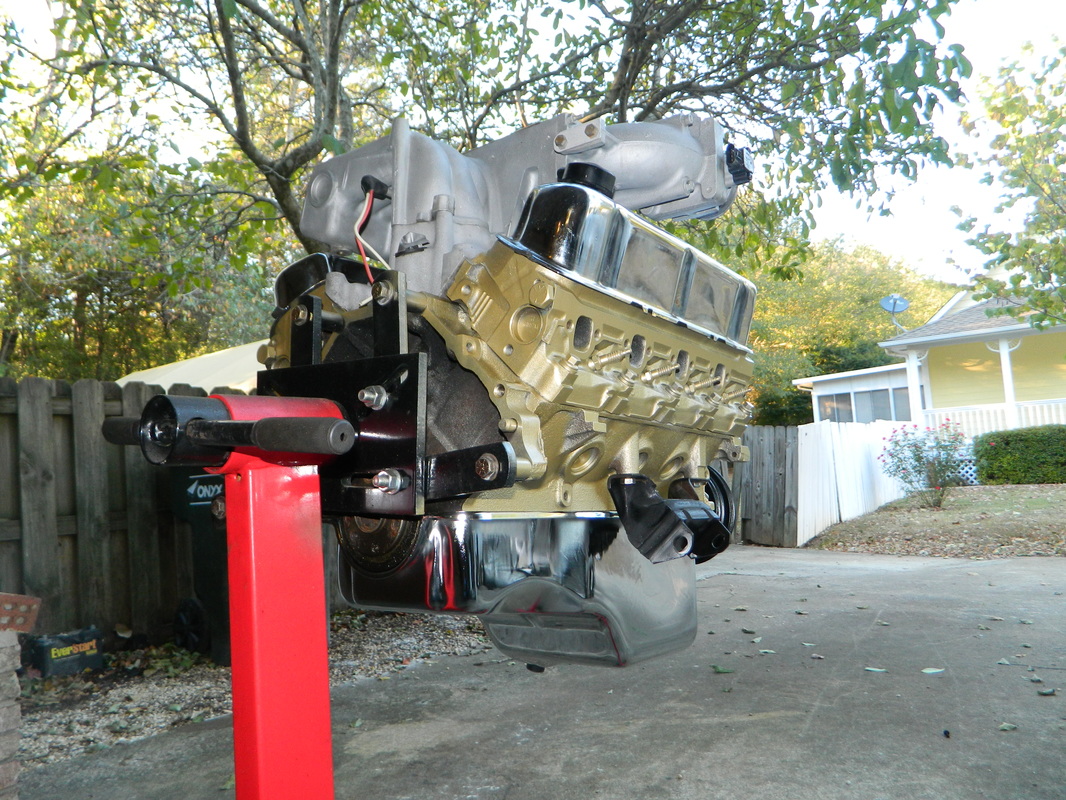
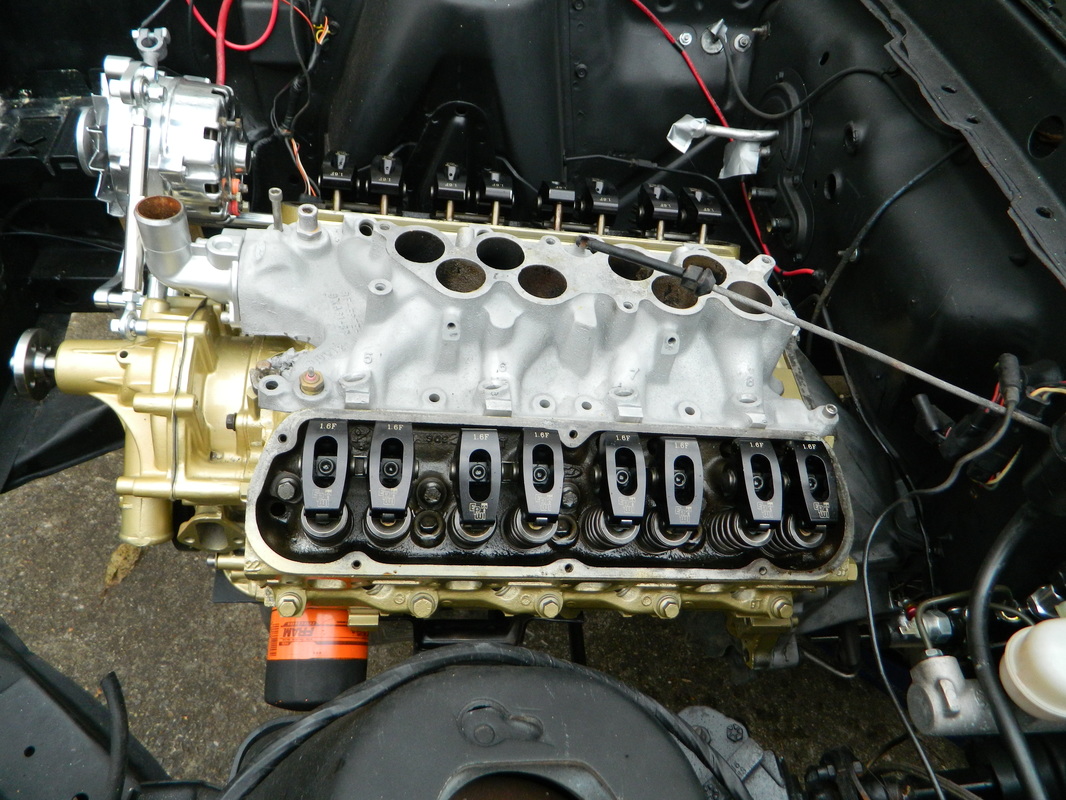
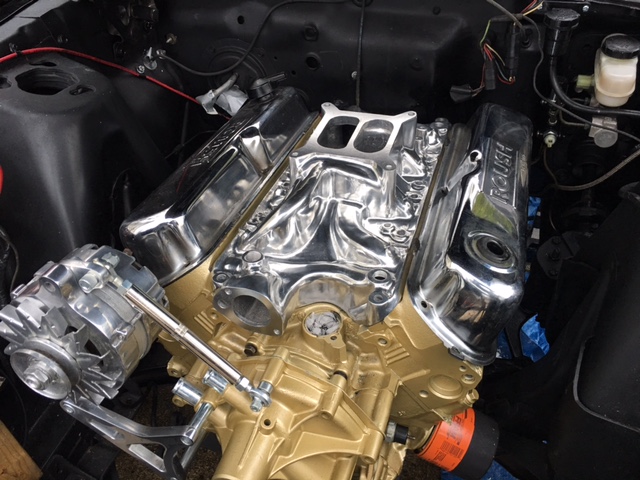
So, today I worked on the intake polishing the ribs and painting inside the ribs. I also cleaned up the alternator and painted the pulley and back cover. And I bought some gold engine paint and sprayed a little on the side of the block to see what it would look like. I think I may use it. That's it. 3hrs


Sept 8, 2016
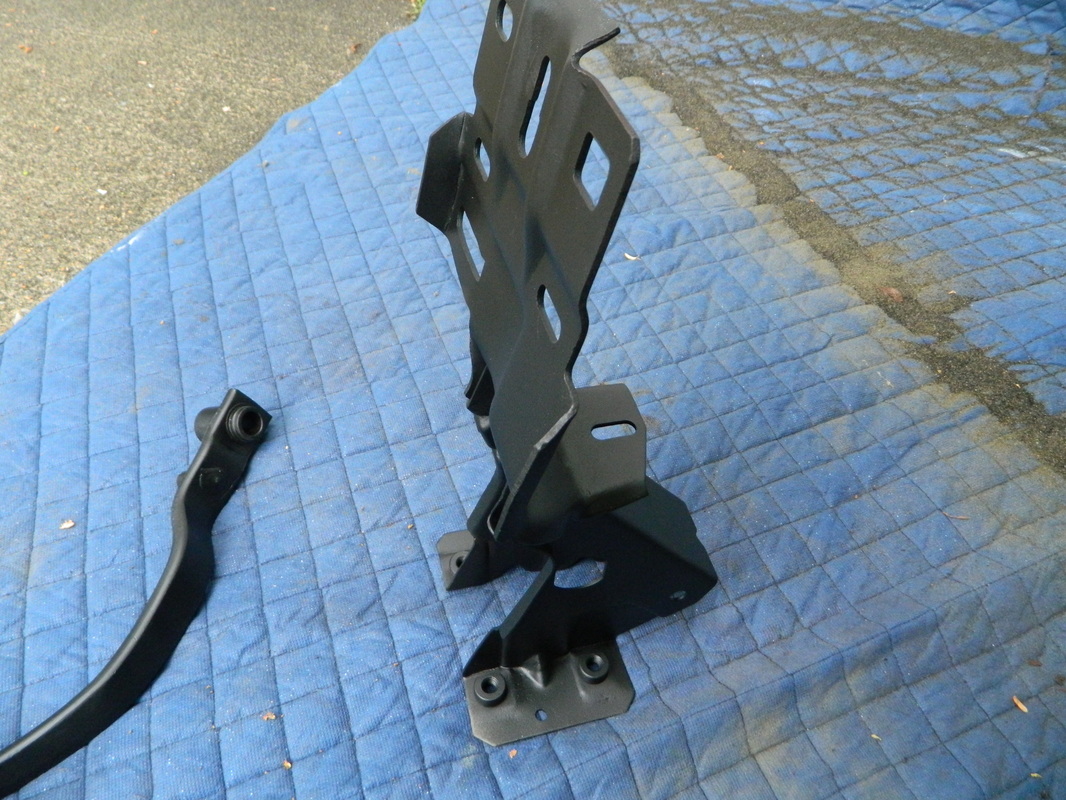
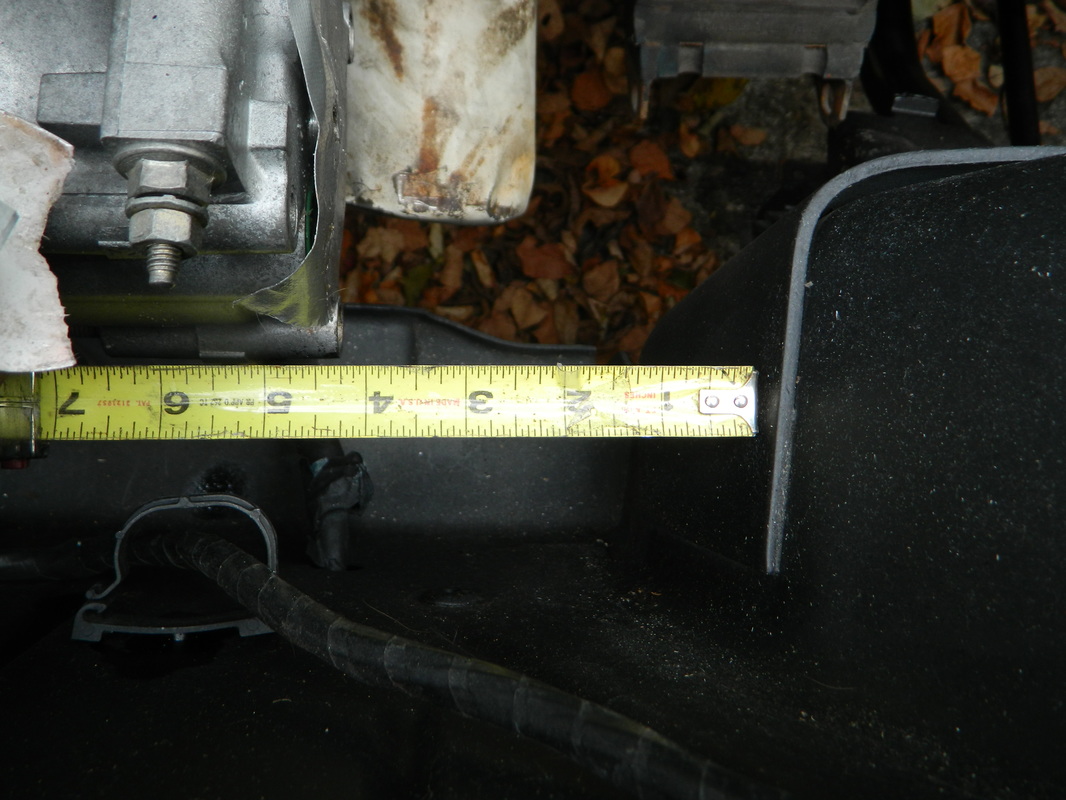
Today I decided to see for sure if the Explorer engine I have will fit into the Cougar. No, it will NOT! I did a trial fit and although I didn't actually get the motor mounts connected, by measuring them and the clearance between the shock tower and the back of the A/C compressor, I can see that, with it all in place there would maybe be 1/4" between the tower and compressor and the freon manifold has to bolt on there and it's over an 1" thick. I will need to use late model Mustang brackets and pulleys. Only took 2 hrs to put it in and out.
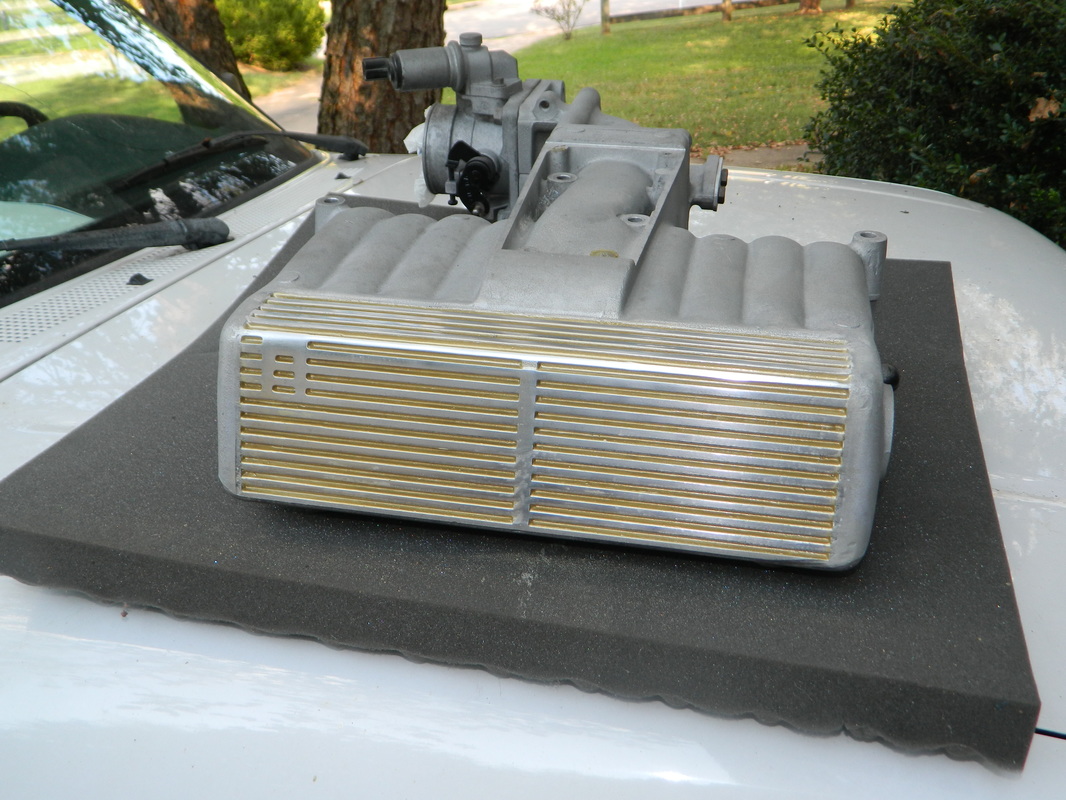
A dual post. I went back out and cleaned and painted the thermostat housing, and cleaned the rust off the fuel injector rail. Then I painted the Explorer intake gold metallic between the ribs, and I think that's what the engine will be painted. Two more hrs

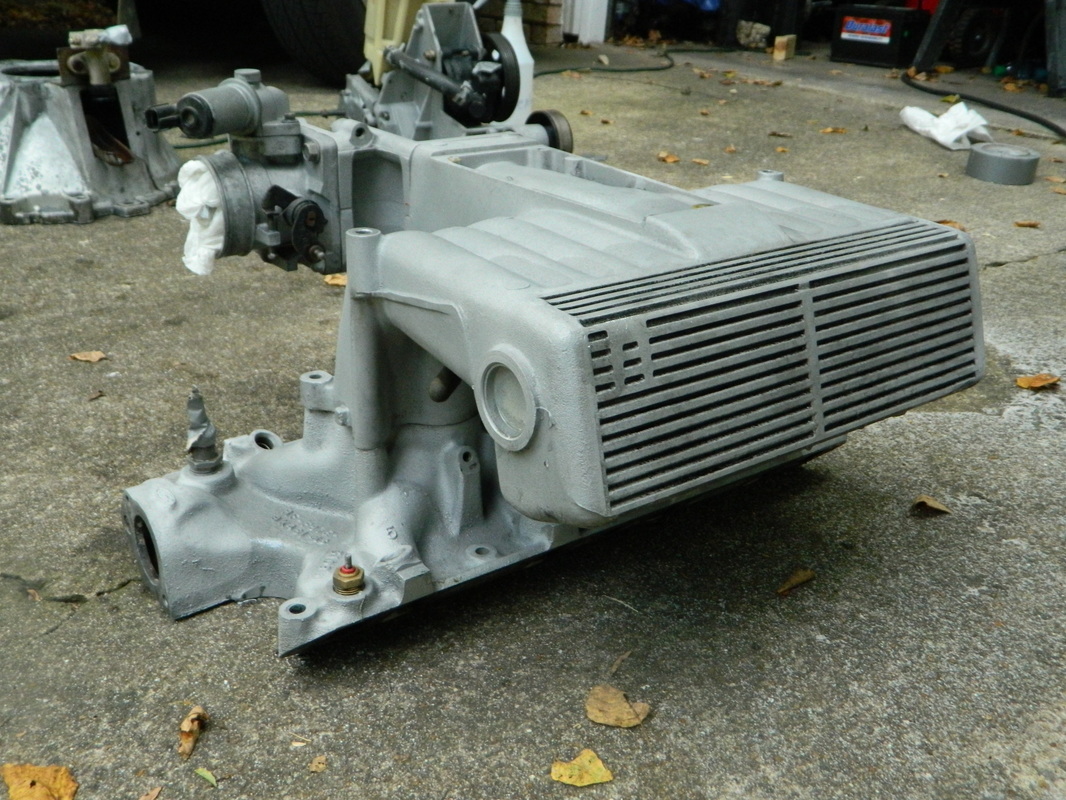
Oct 6, 2016
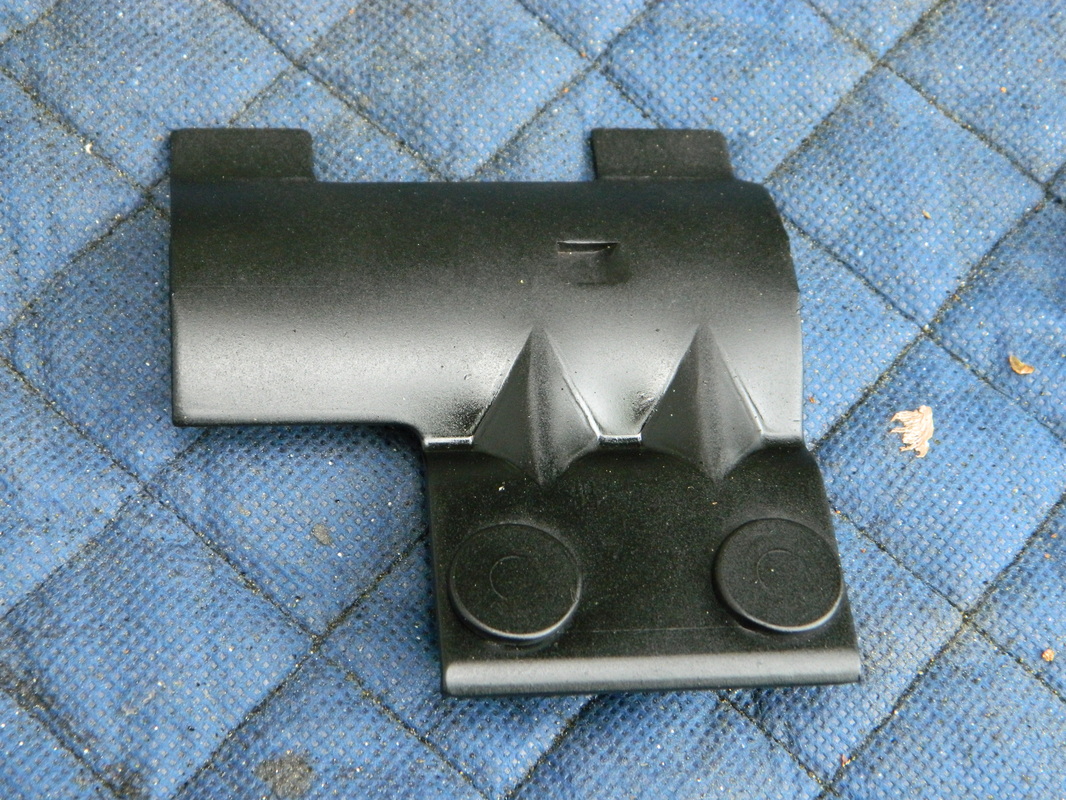
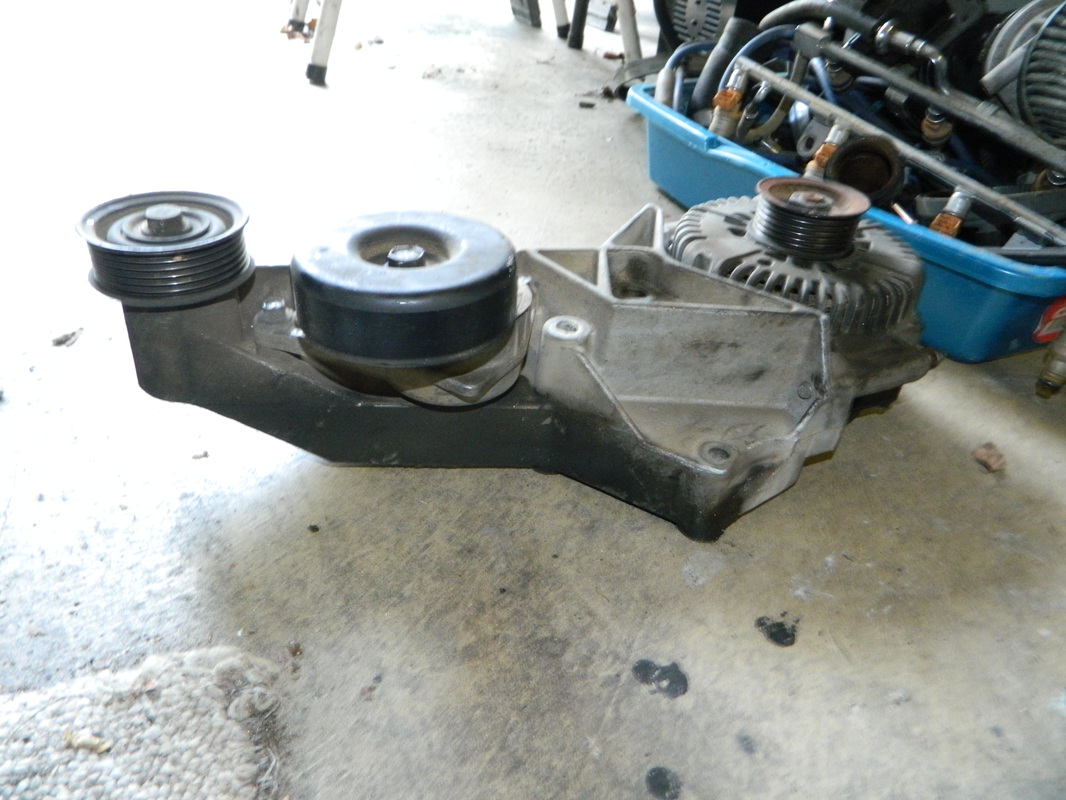
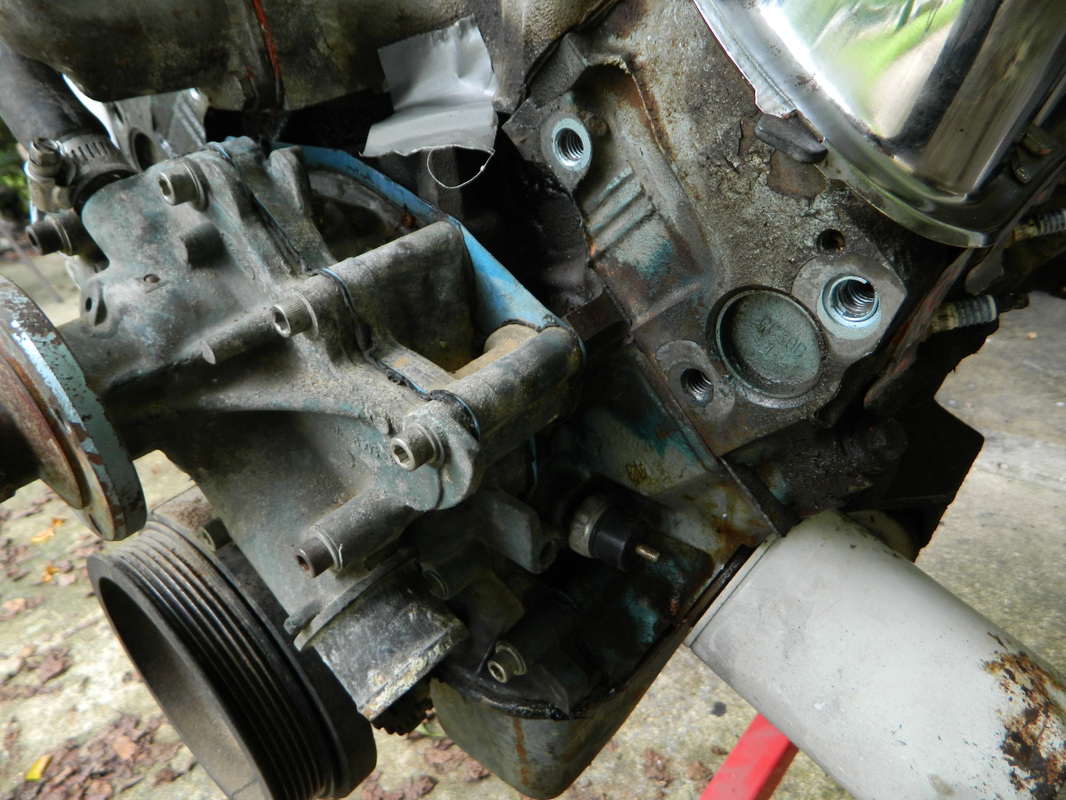
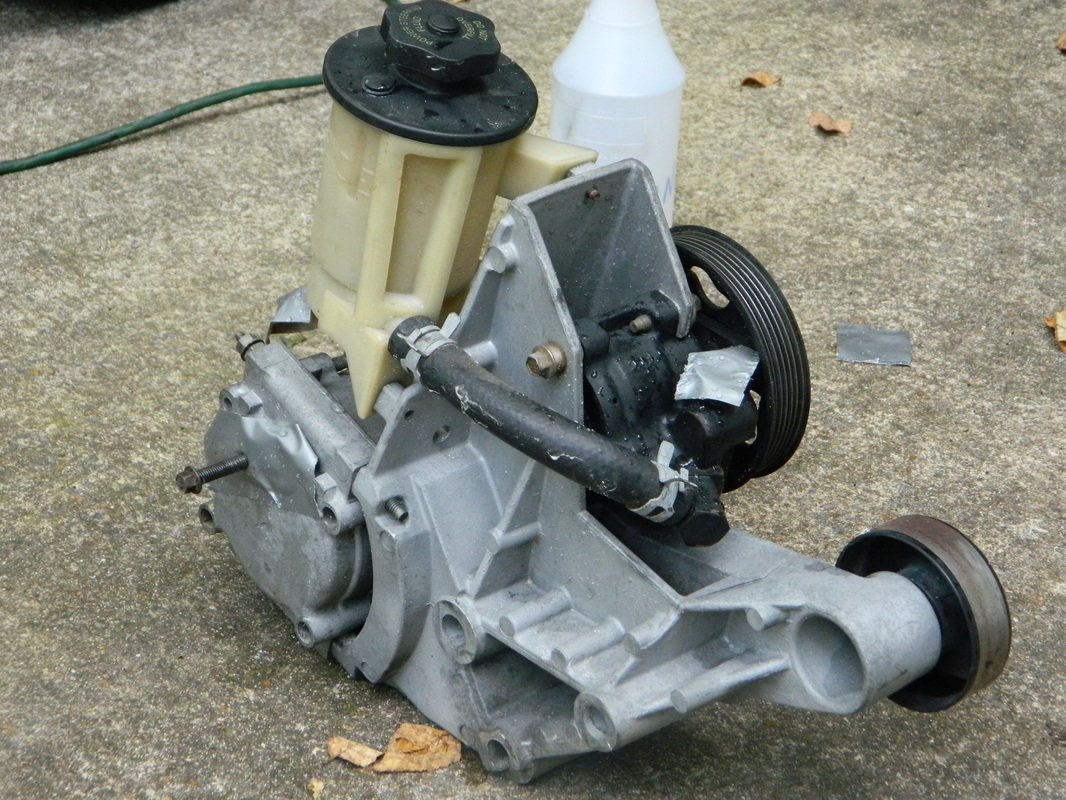
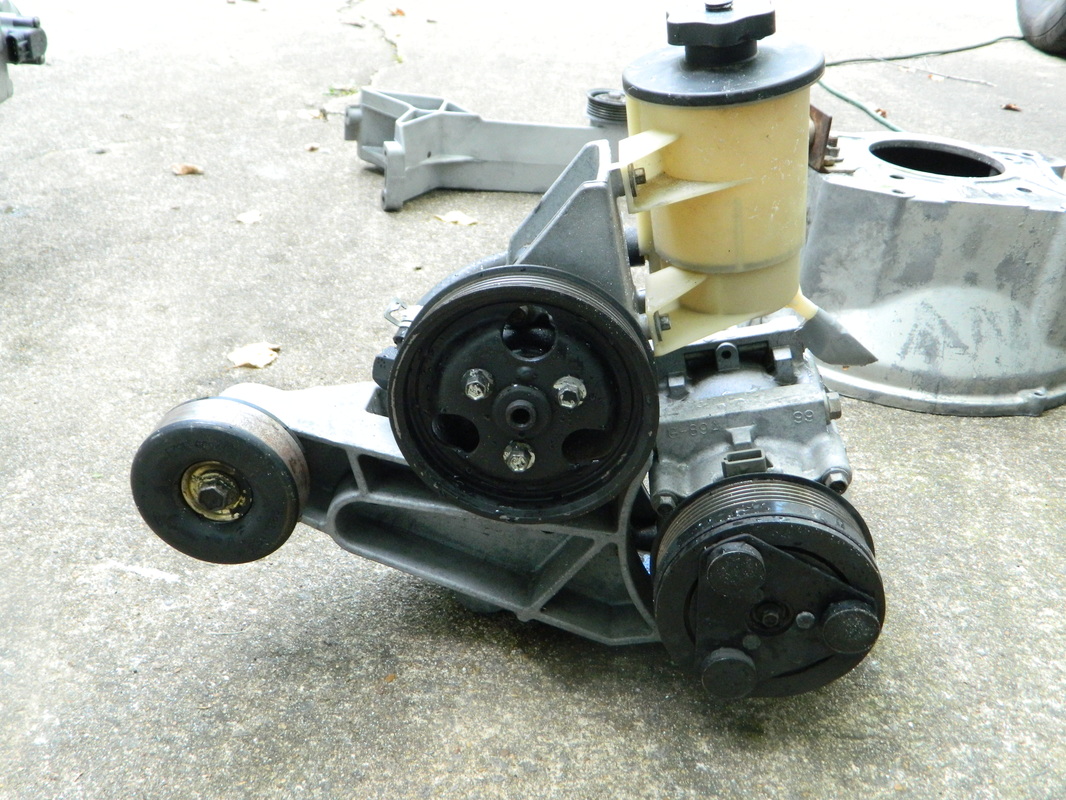
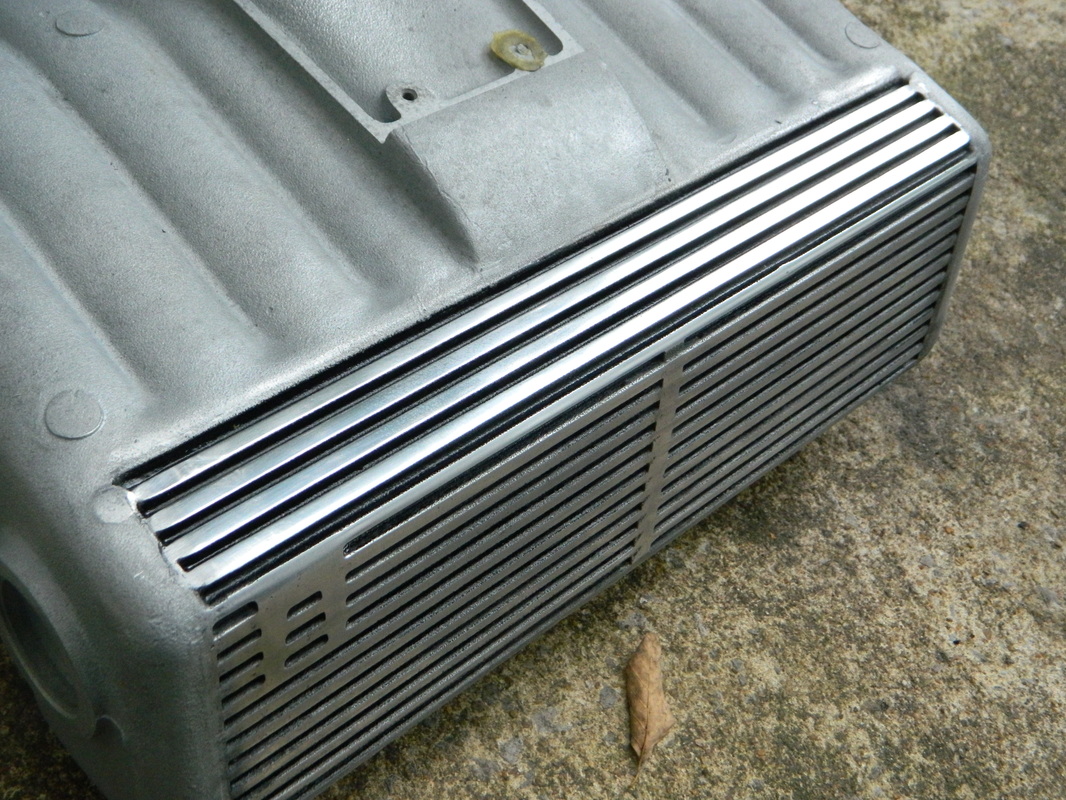
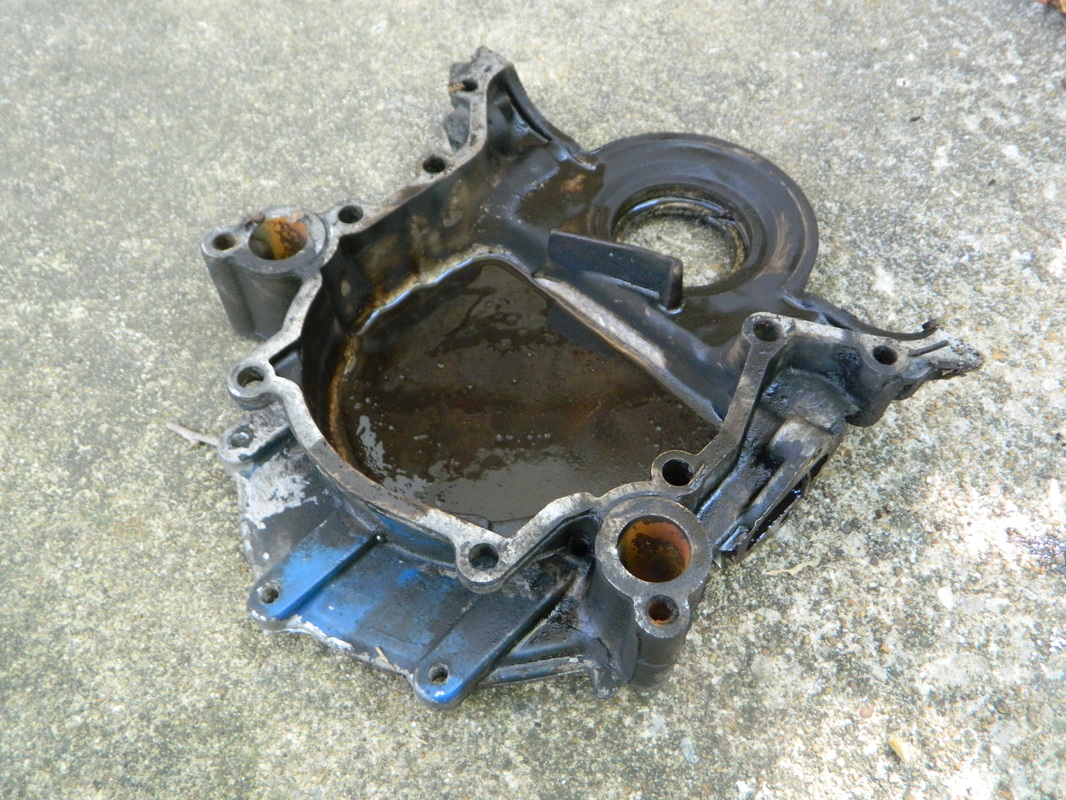
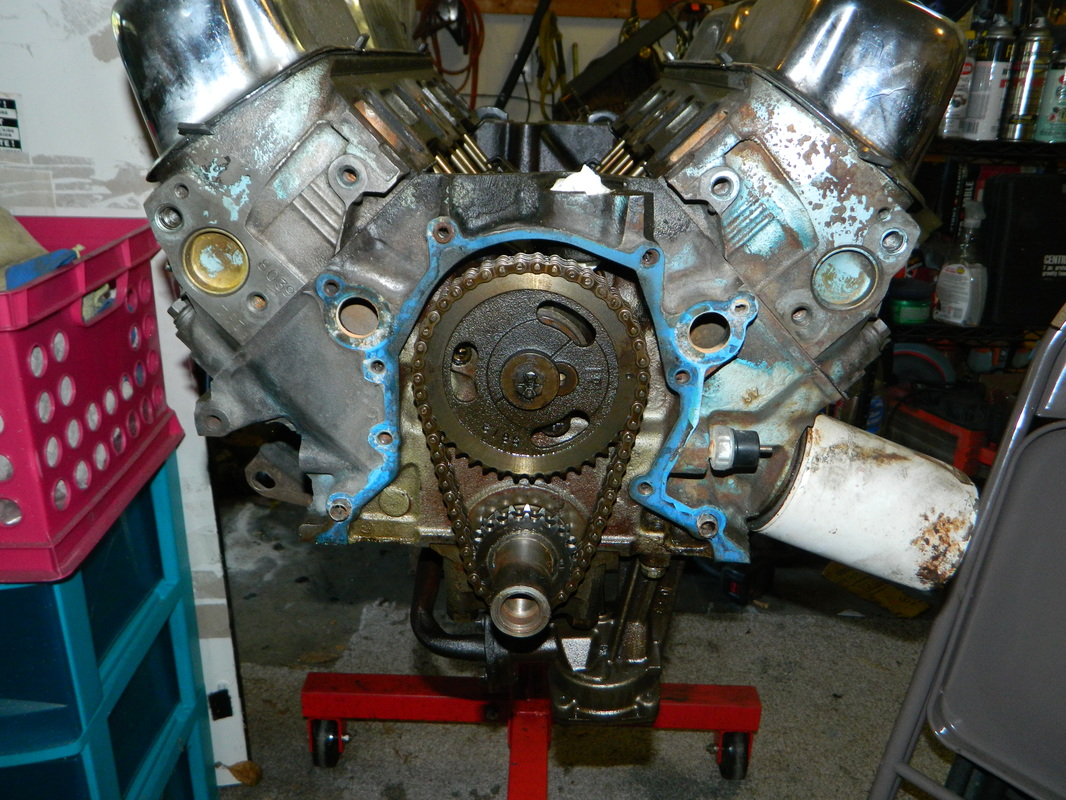
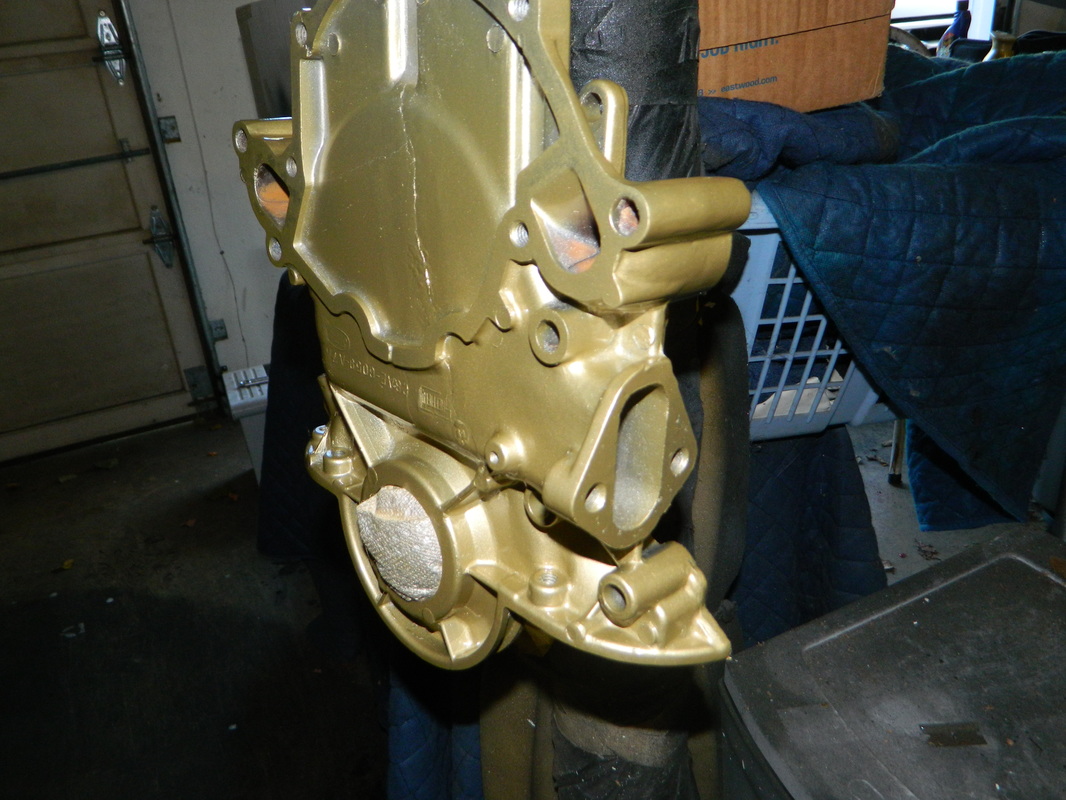
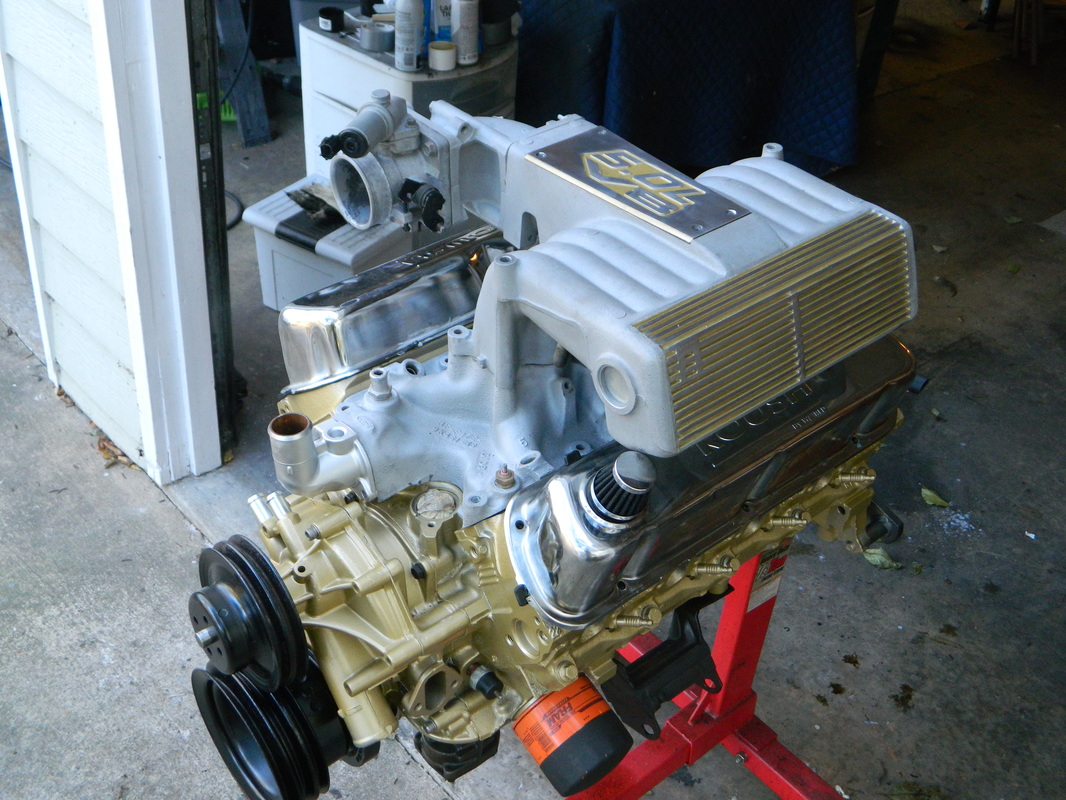
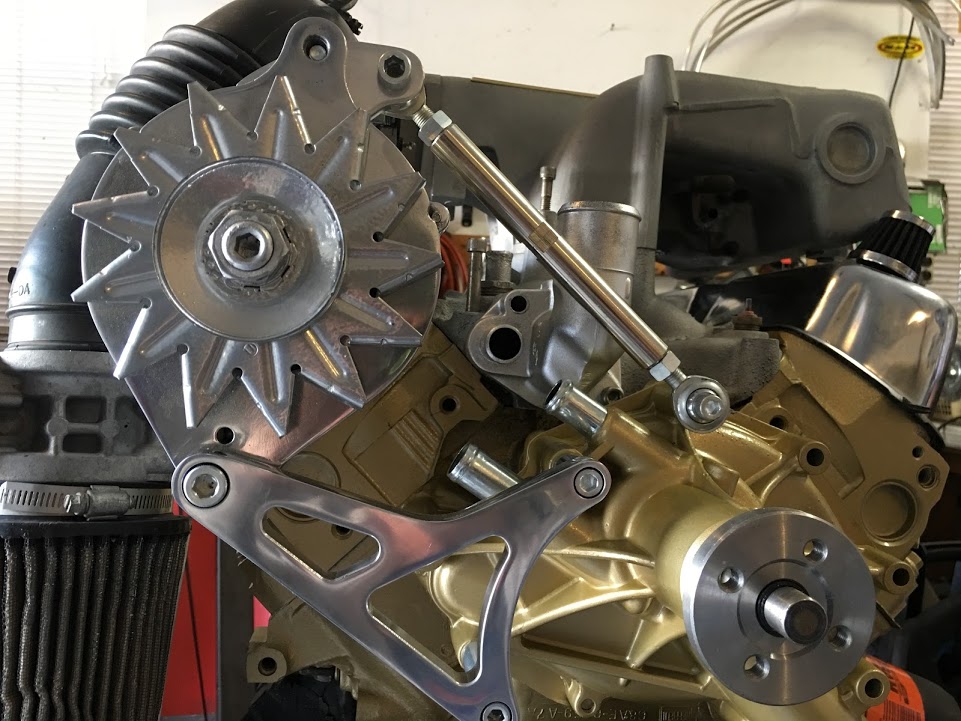
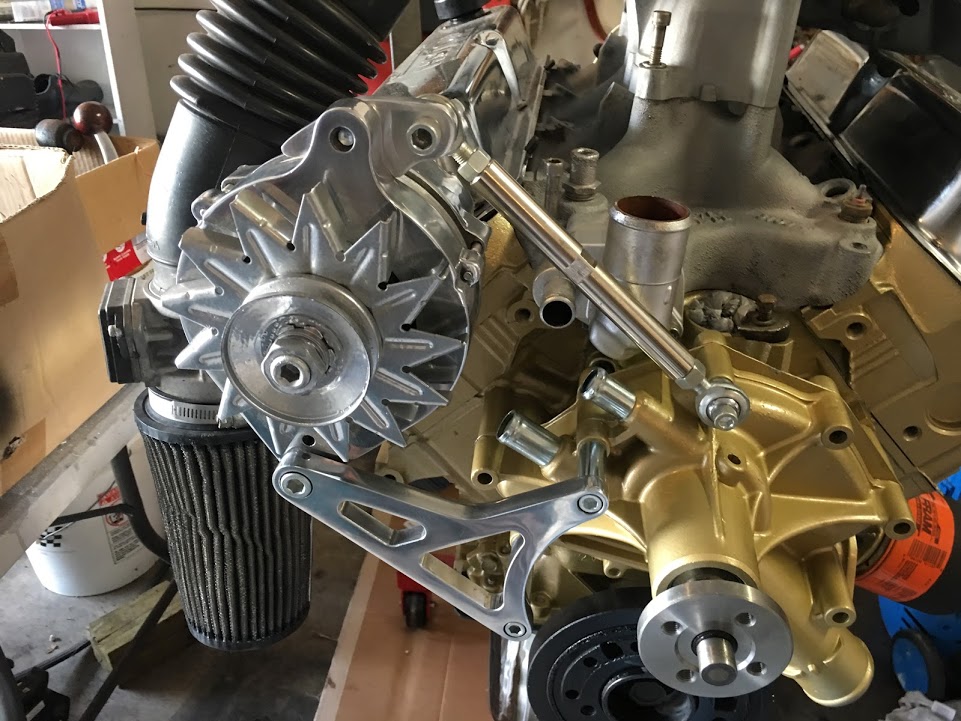
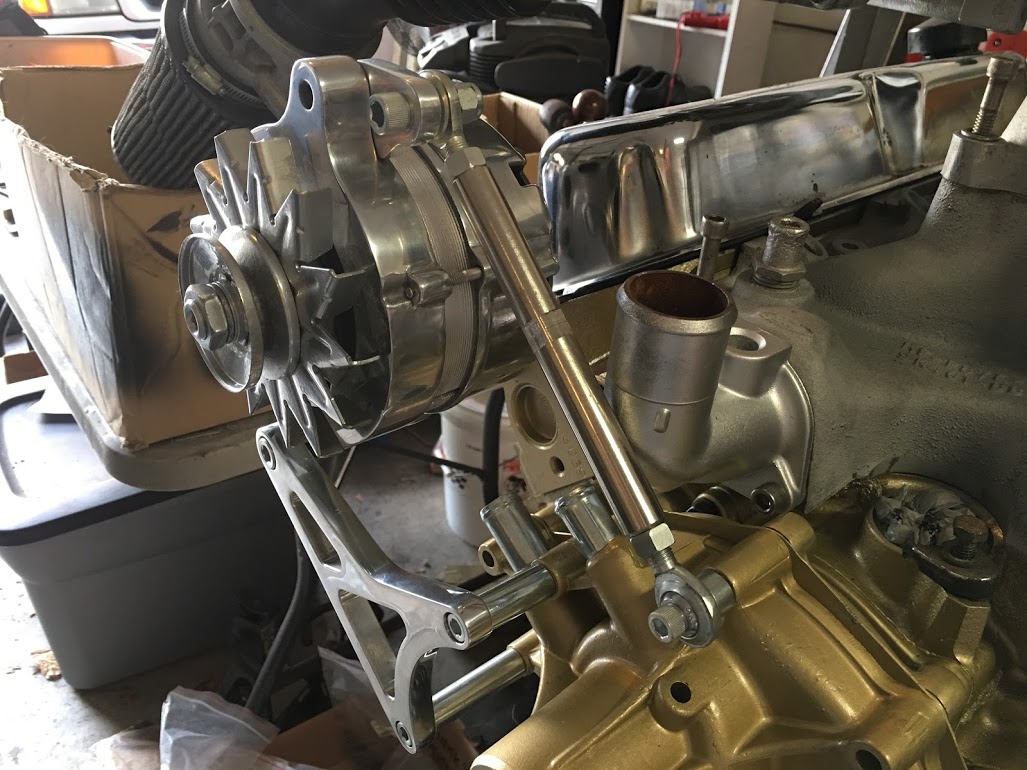
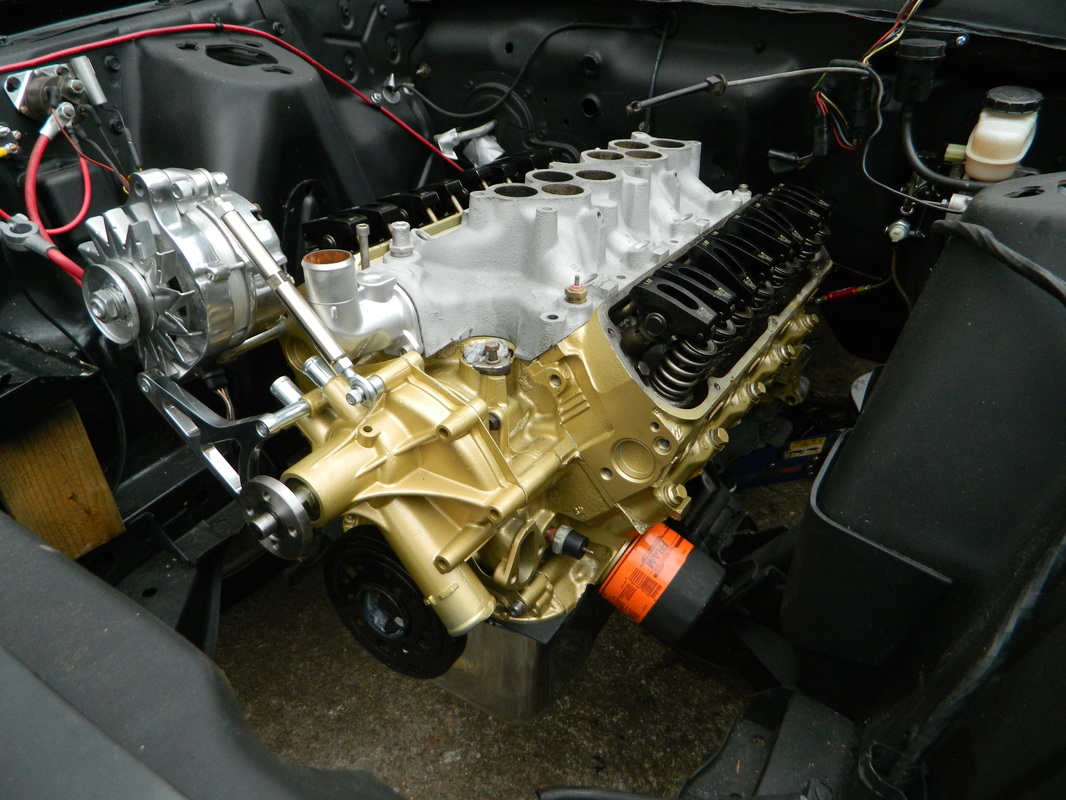
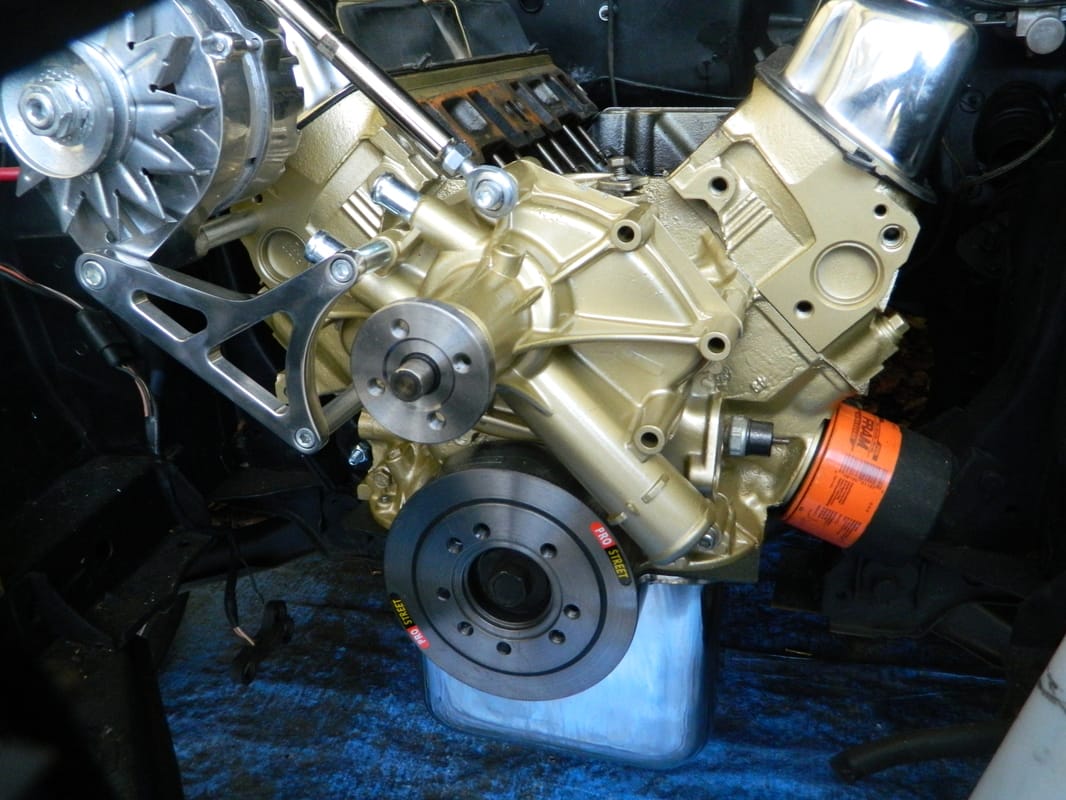
I know..it's been a while! But, today I made a major change in the engine setup. The Explorer A/C compressor was going to hit the shock tower, so I did a little research and decided to use the 94-95 Mustang setup, as it uses the same A/C compressor, just different alternator. So, I bought the brackets from a forum acquaintance, both sides. Then I discover that, the compressor is in pretty much the same location as the Explorer is! Thankfully, I was able to cancel the purchase before he shipped them. So, now what I'm going to use is a custom alternator and A/C bracket which looks WAY better, even though is just a single v pulley. I will have to use a separate belt for each one. Another, plus is that by using this setup, I can reuse the Cougar timing cover, which has the dipstick in it, eliminating the need to weld one into the oil pan. Today I pulled both harmonic balancers and timing covers off of the old and new engines. Then, I pressure washed the 69 one and did some grinding and sanding to clean up some of the casting flash sharp edges. Then degreased it and painted it with the new gold engine paint. The pictures show the cover after a mild clean up, then after wire brushing, grinding and sanding, and then after painting. Today, I used up 4 hrs to do this.
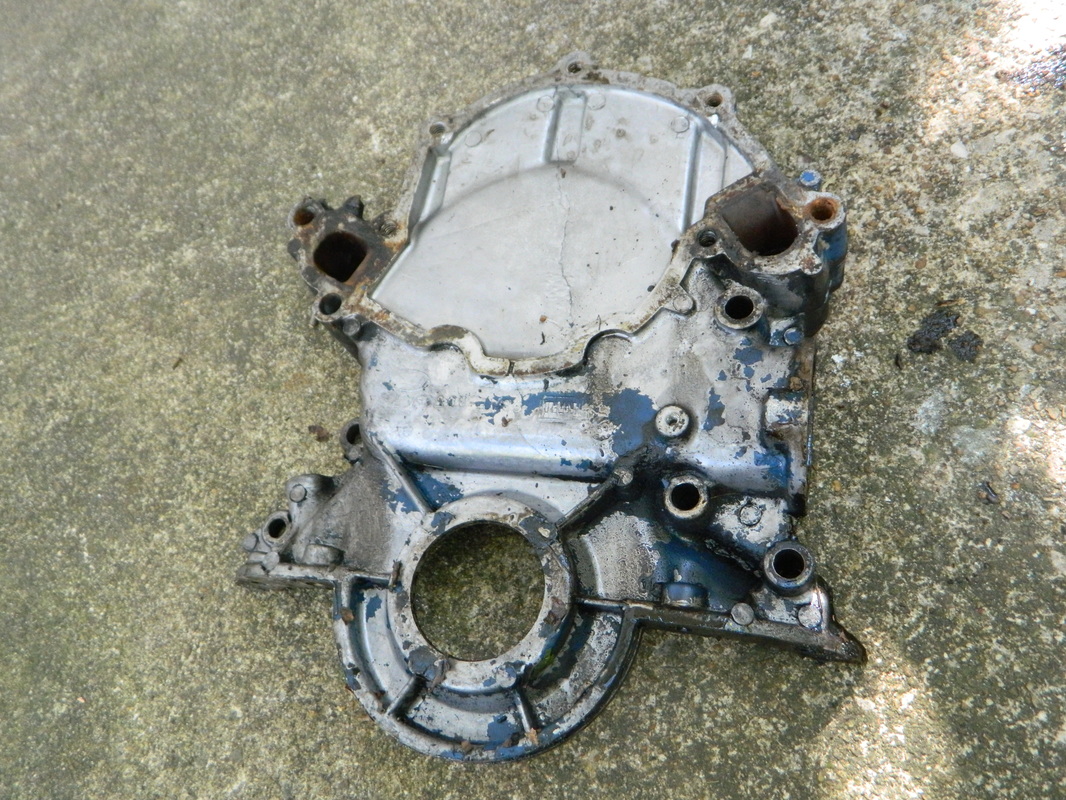

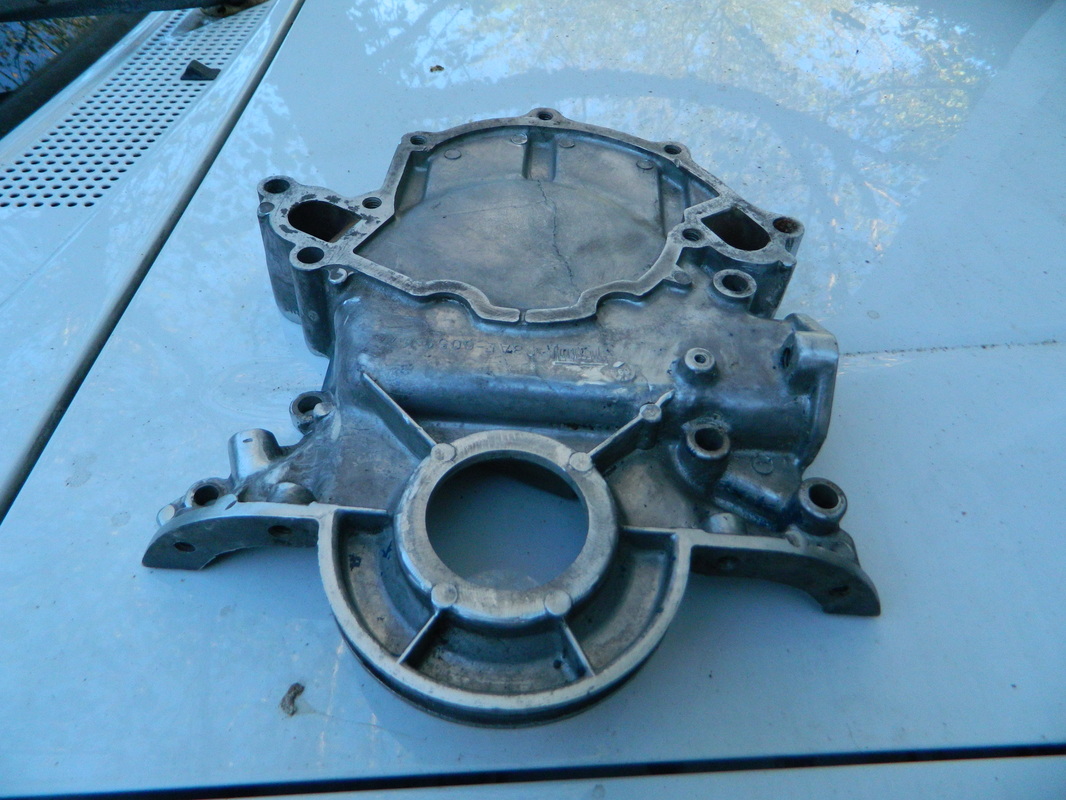

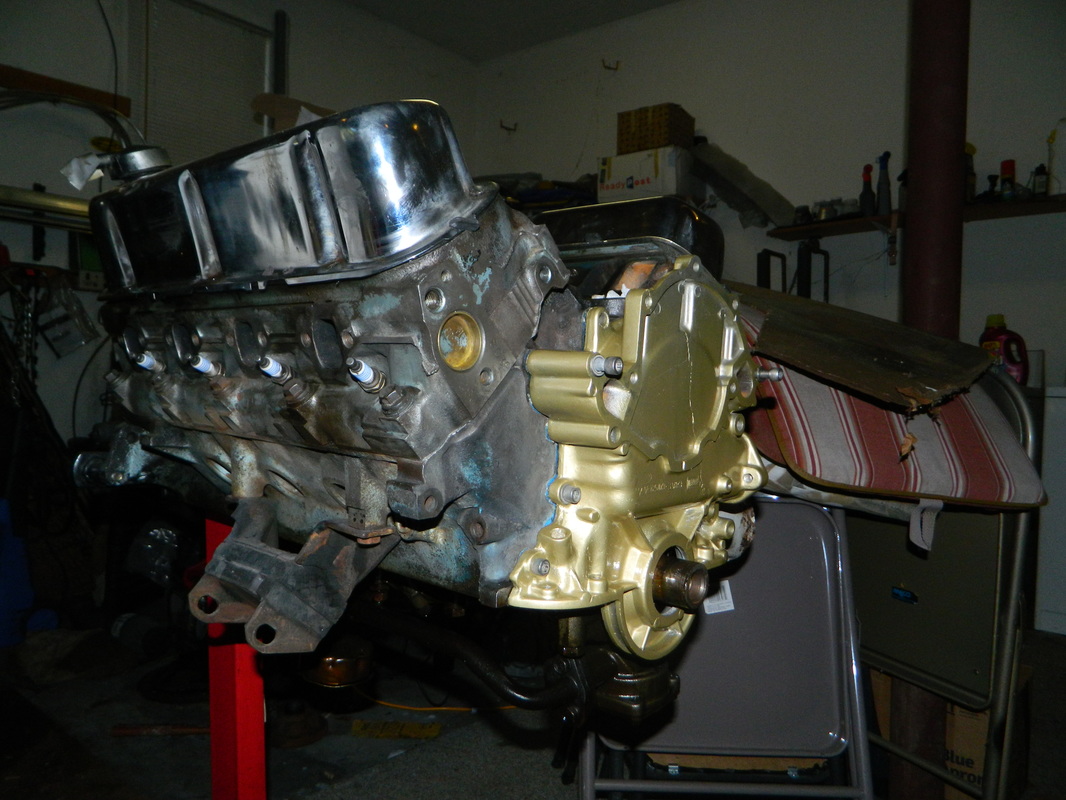
Oct 9, 2016
Last night, I ordered a new chrome oil pan, pickup sump and oil pan and valve cover gaskets. So, today I did a little more clean up on the engine and then painted it and installed the timing cover. I also cleaned up the original motor mounts and painted and installed them too. I still need a water pump, as the original one from the 351 was shot and isn't the right one anyway. I put the old pump on just to get some measurements for some new bolts. I will soon get a new balancer, alternator brackets and pulleys. today 4 hrs.


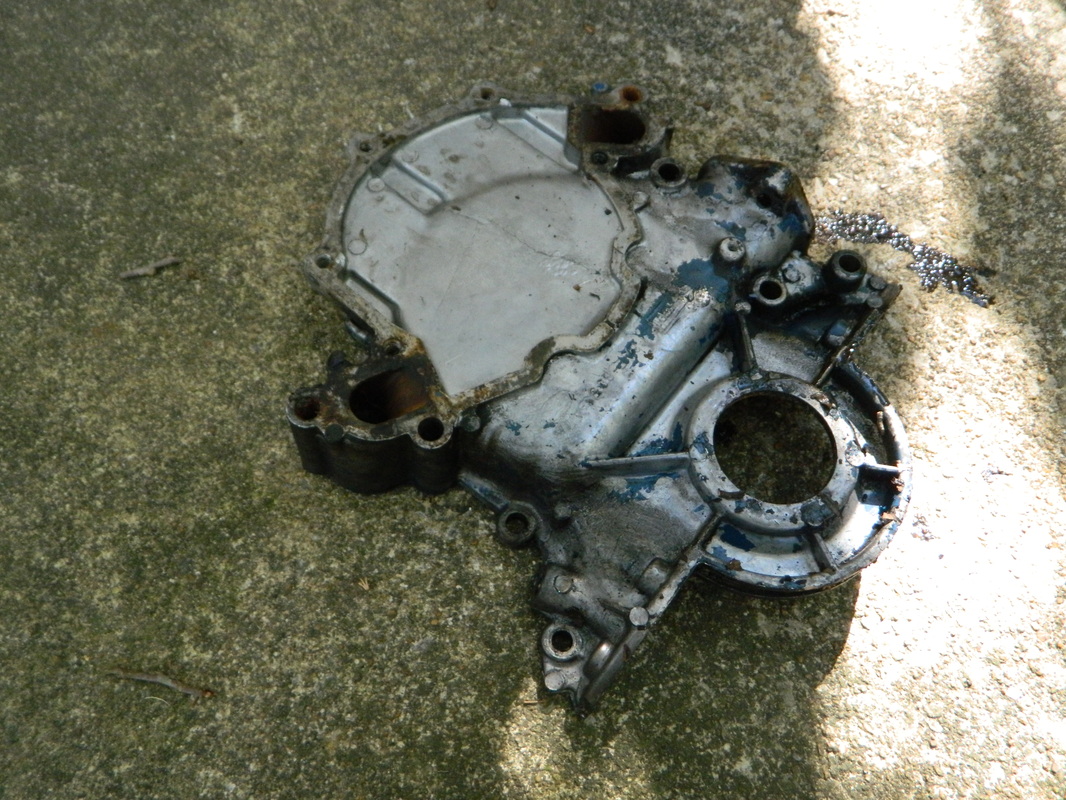
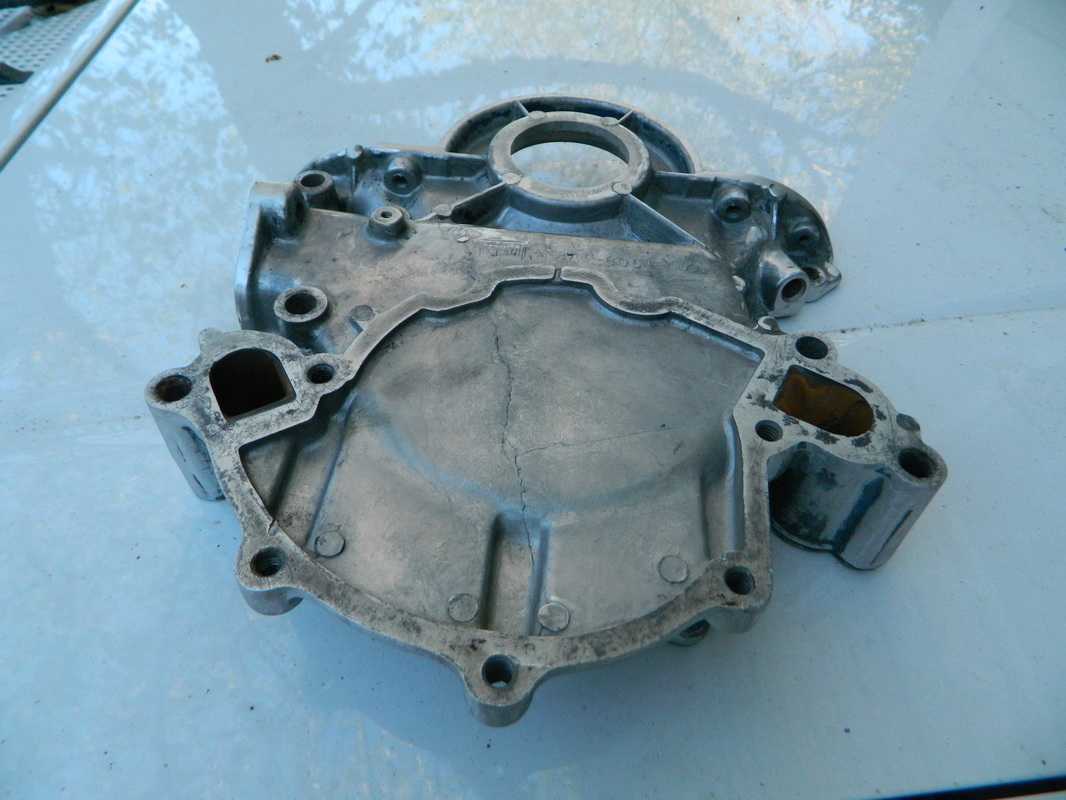
Oct 11, 2016
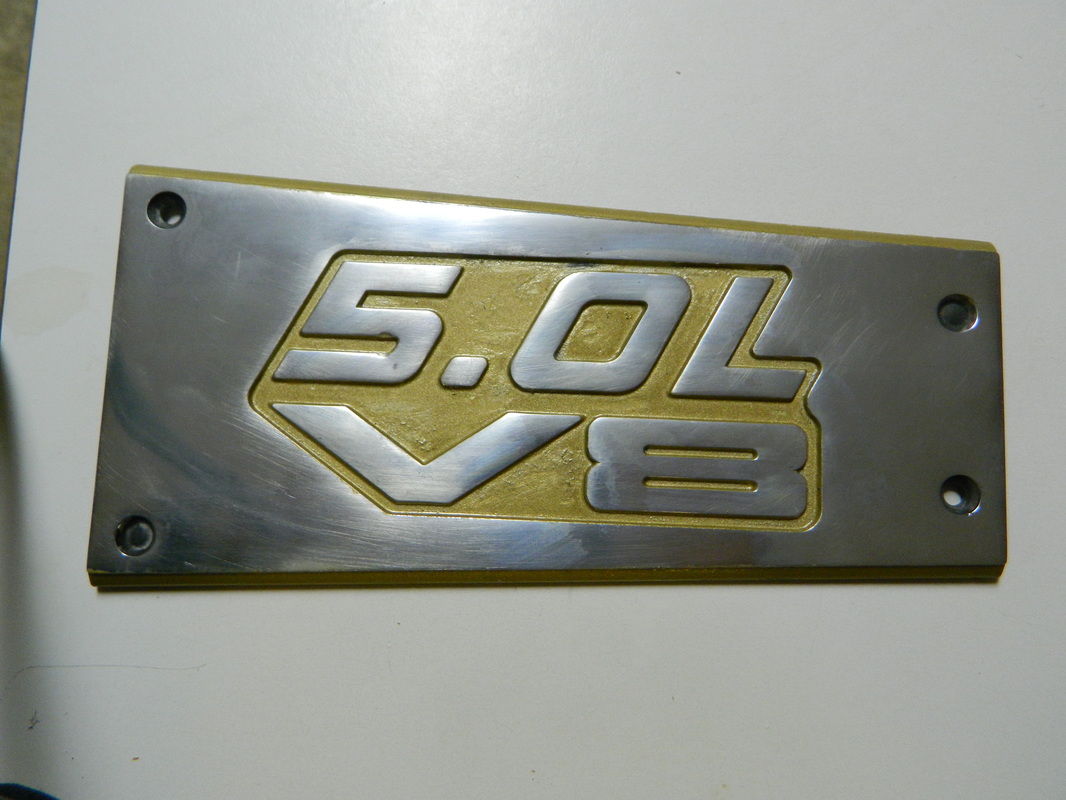
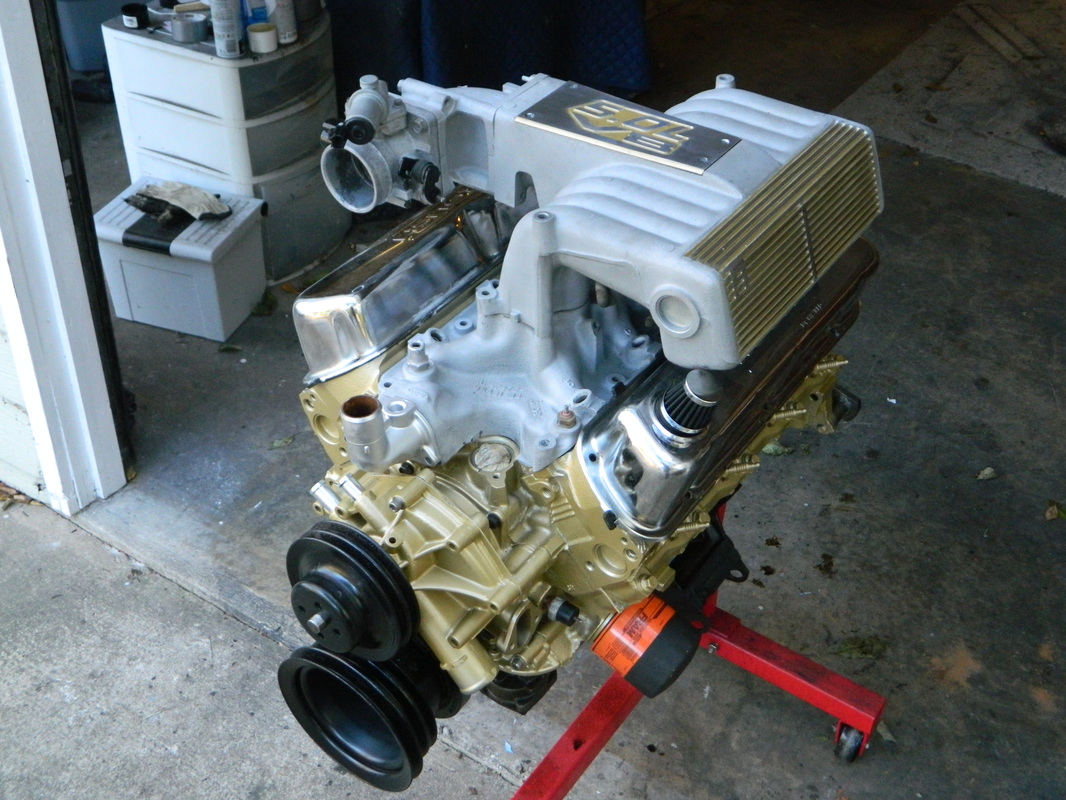
Today I went to ORiellly's and picked up a 88 Crown Vic 5.0 water pump and came home and painted it and installed it. I also stuck the crank and water pump pulley on it just to see if it all aligns up with the other pulley...and it does. Later today I received my chrome oil pan and related hardware, so I bolted the pan on for some shots. I also refinished the intake emblem in gold and polished it.4 hrs.


Oct 13, 2016
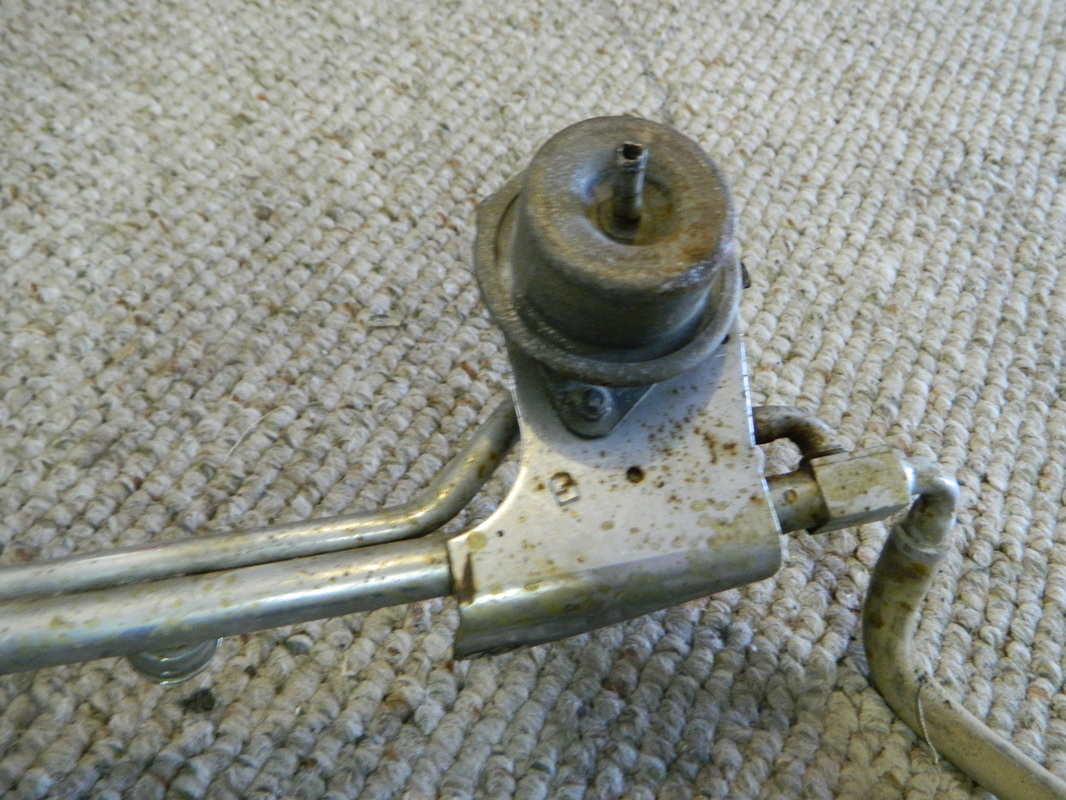
Today I bought a new oil pump because I accidentally dug a trench into the mating surface of the oil pump with a scraper and a hammer while trying to scrape off the old gasket. I know...is that even possible? Well, anyway the pump was the original so it had at least 50 to 100 thousand miles on it. So a new standard pressure/volume Mellings pump was put in along with the new Mellings front sump pick-up assembly. I need some new stainless steel allen head bolts for the oil pan, to permanently seal up the pan. 3 hrs

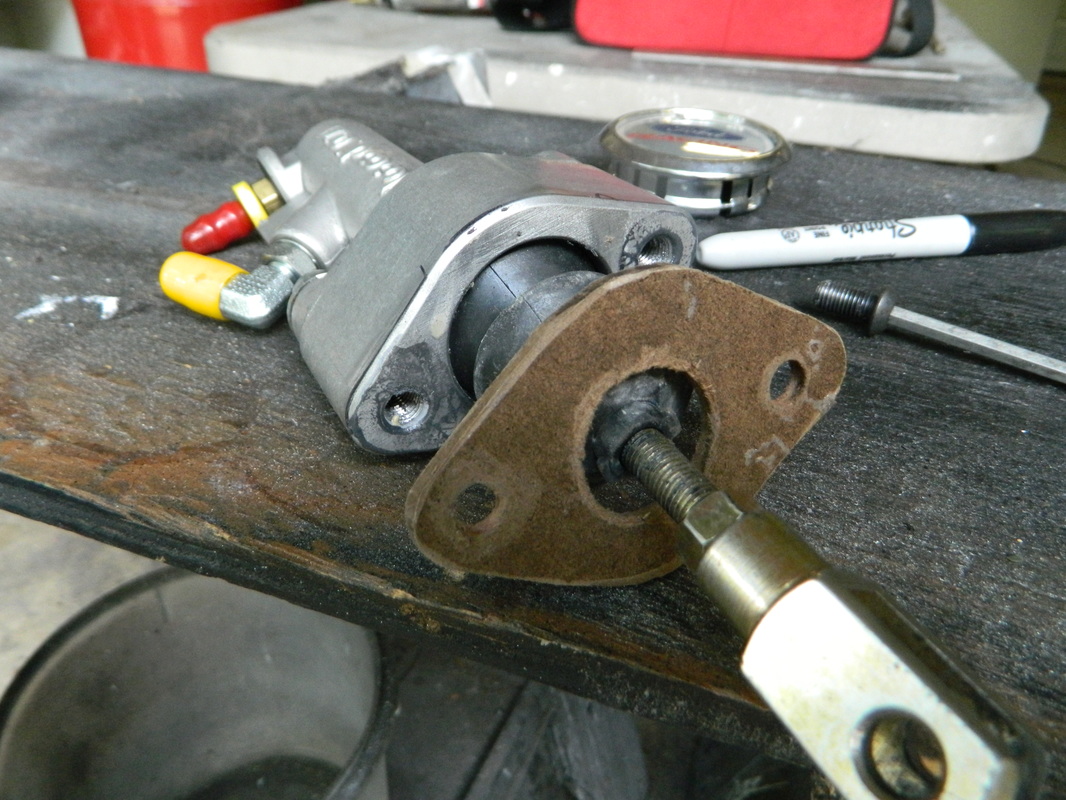
Nov 10, 2016
Been a while, but today I worked on the clutch slave, mounting it on the bellhousing and making a push rod and some spacers. I lost the old push rod that I made 13 years ago, so I bought a stainless steel gate I bolt and cut off the I and rounded the end. Next, I mounted the clutch slave which was original equipment on a 84 Datsun pickup. The alignment was off on the slave so, I make a couple of brackets of two different thicknesses to space it out about a 1/4". 3 hours


Nov 12, 2016
I ordered an alternator bracket kit from ebay and it arrived today, so I bolted it on, along with the original 69 alternator which I polished the case on a couple years ago. Now I need matching chrome or polished aluminum water pump and crankshaft pulleys. 1 hr
Nov 14, 2016
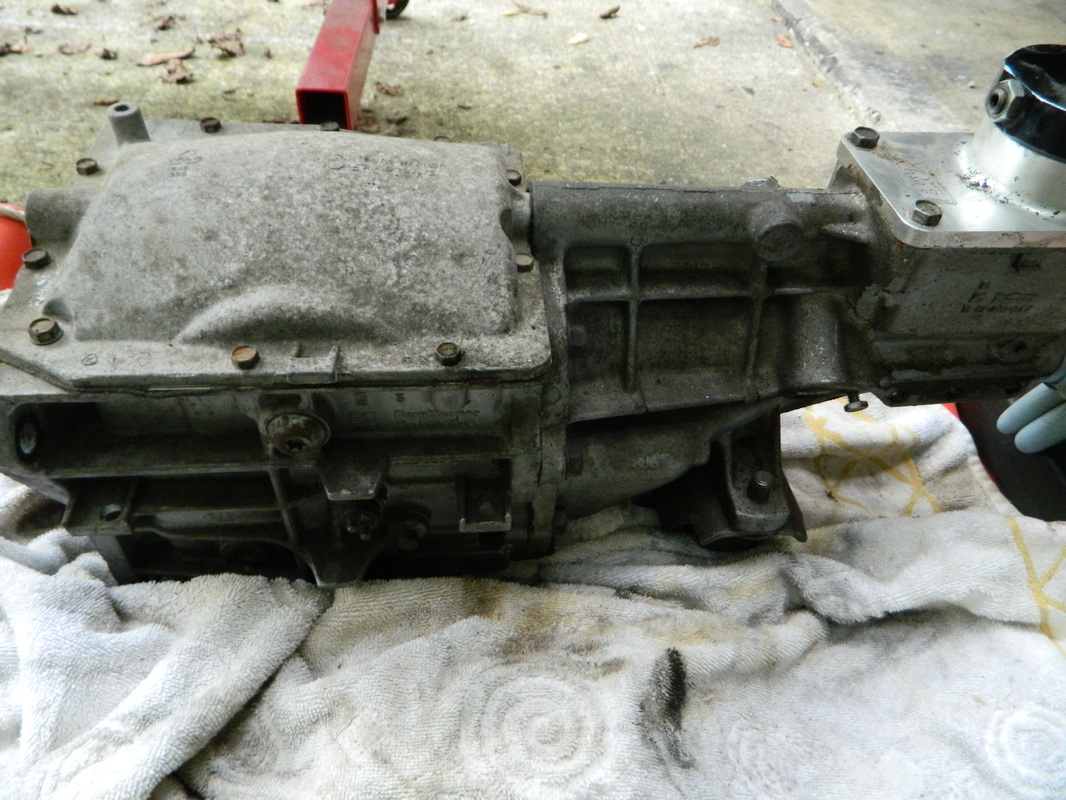
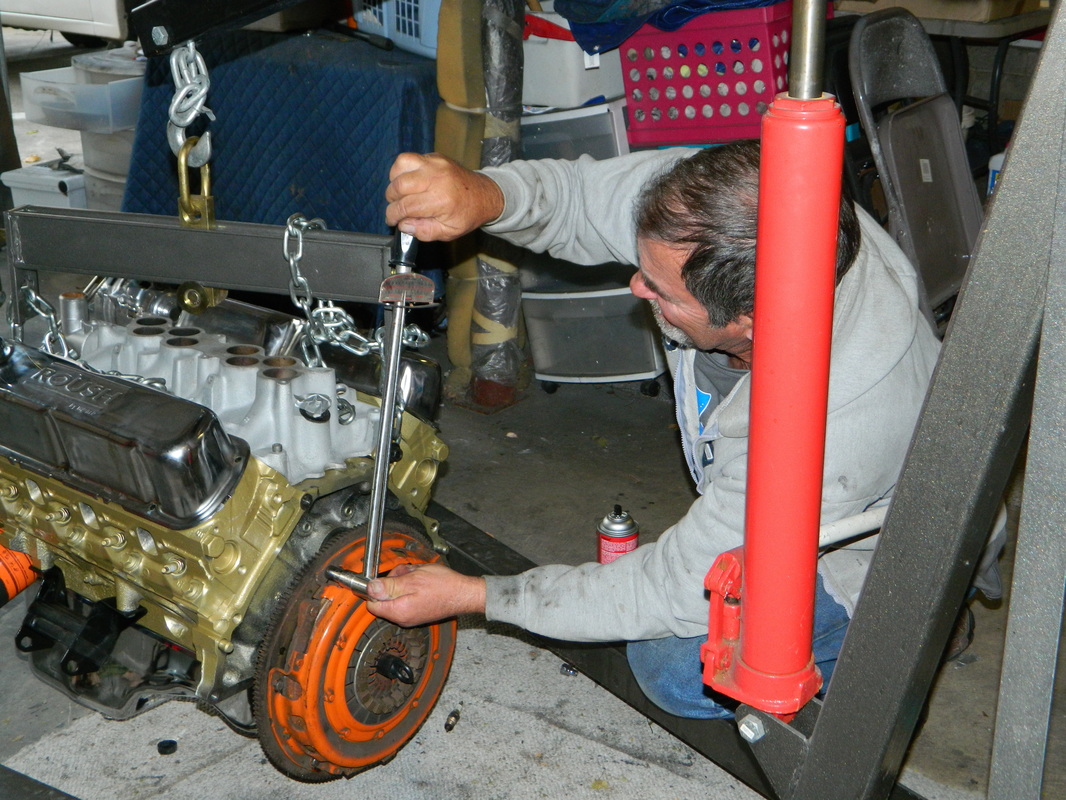
Yesterday, I started mounting the transmission on the engine in order to install the assembly in the Cougar. I first forgot to put the dust shield/separator plate on prior to putting the flywheel and clutch on, so i had to take it back apart and do it again. Then, when I got it all together, I found that one of the bolts that secures the transmission to the bellhousing, was loose. So, I tried to reinstall it and for some reason it would tighten up before bottoming out. After several attempts, I gave up. Today after work, I pulled the transmission out and found nothing wrong with the threads in the bellhousing, so I reassembled it and this time it all went together just fine. Don't know why. Tomorrow, I plan on trying to drop it in the Cougar. 4 hrs Some pics of me torquing the clutch and installing the transmission.

Nov 15, 2016
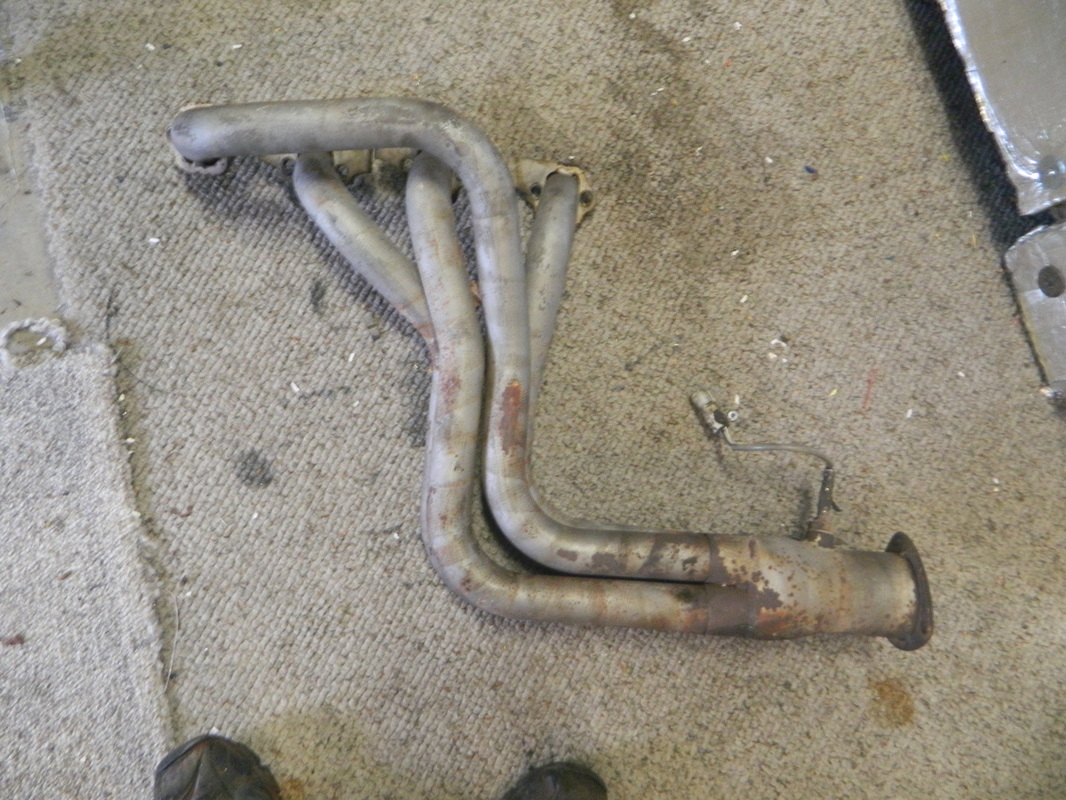
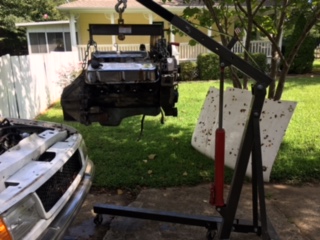
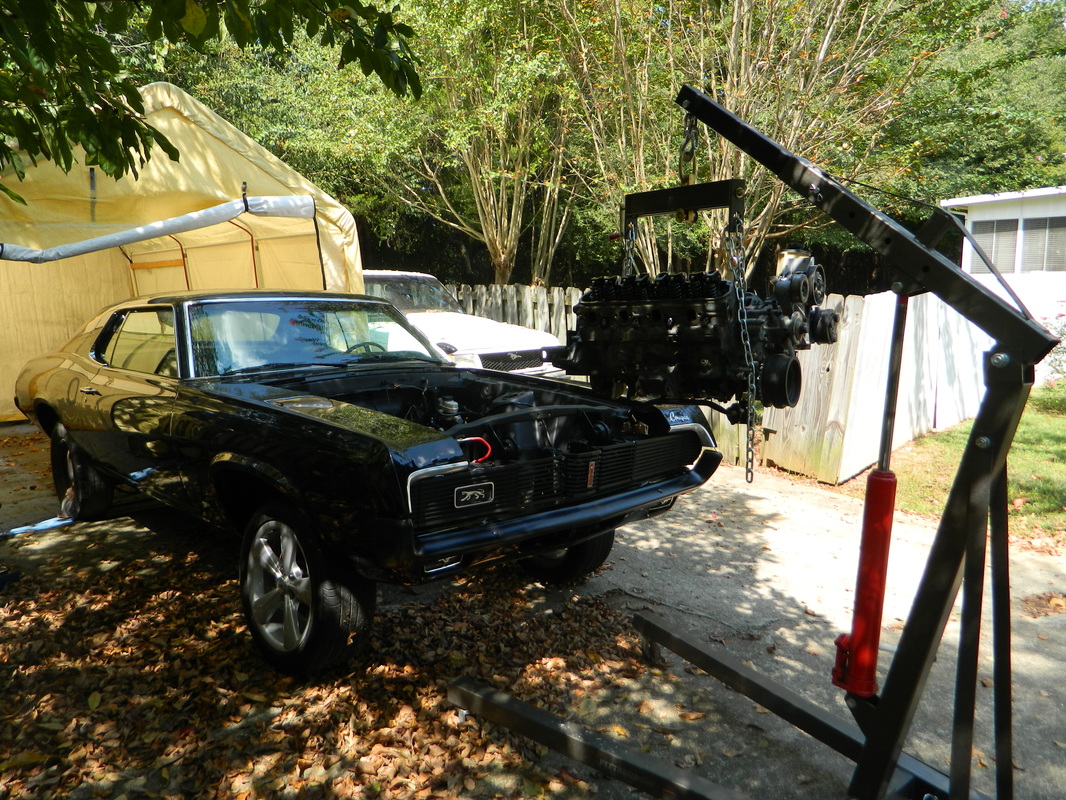
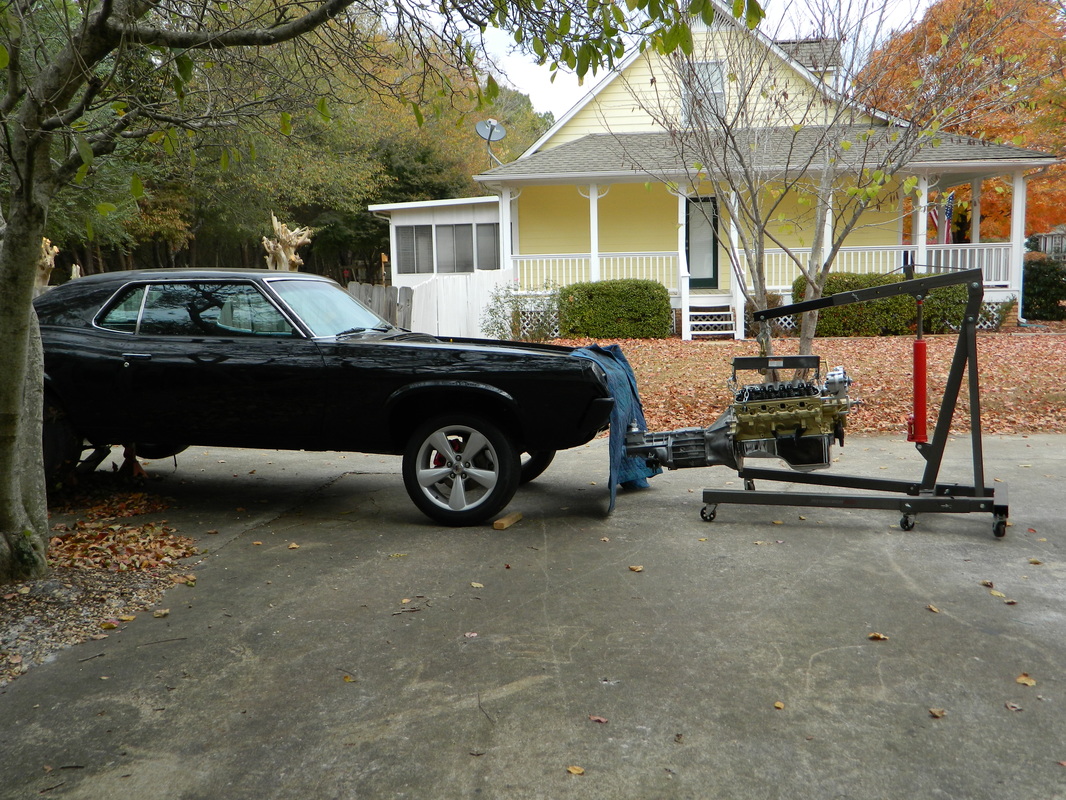
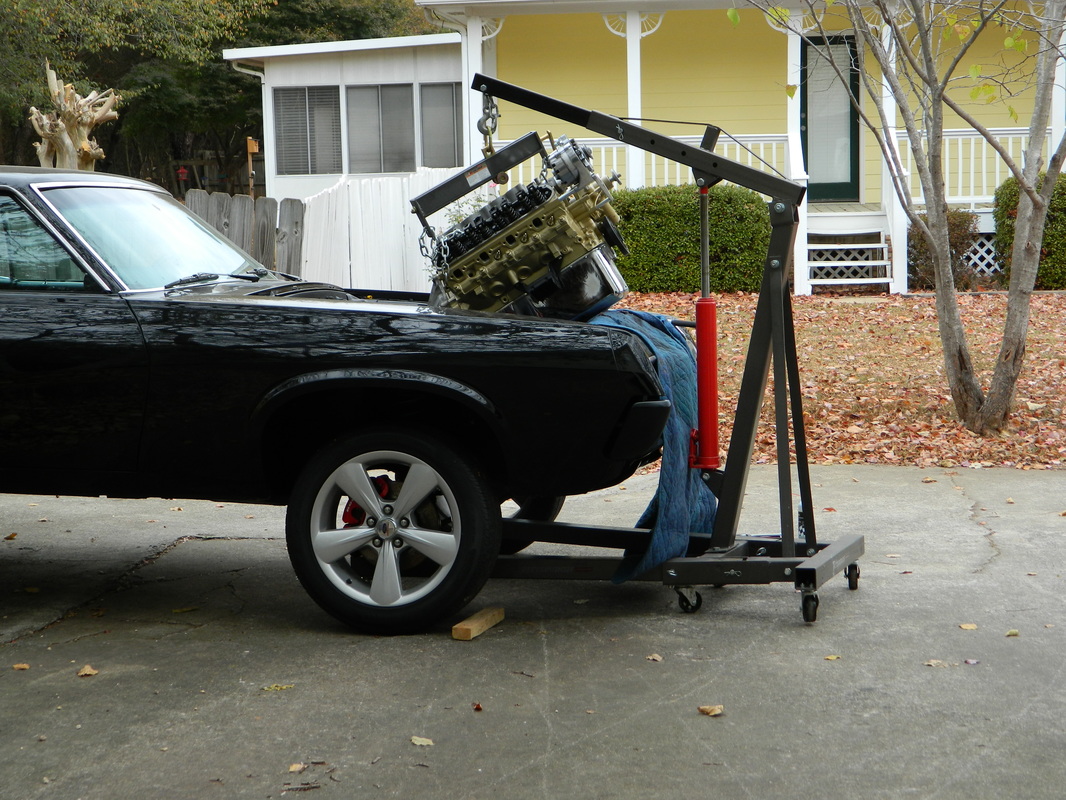
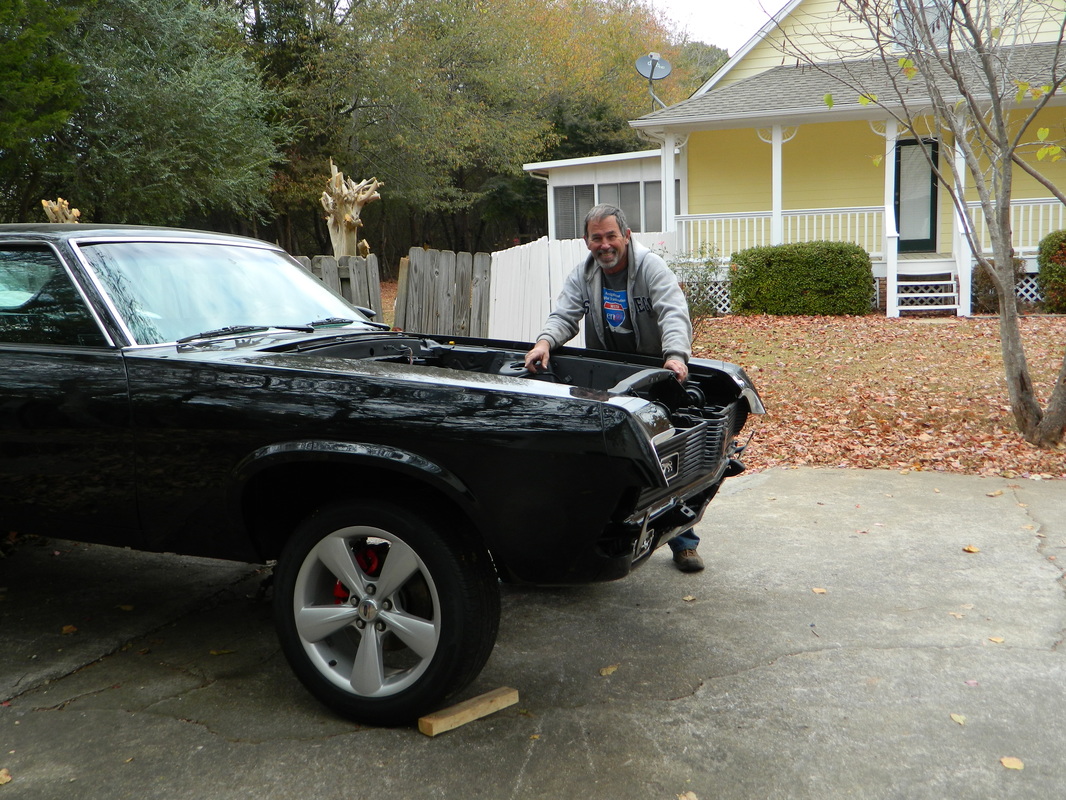
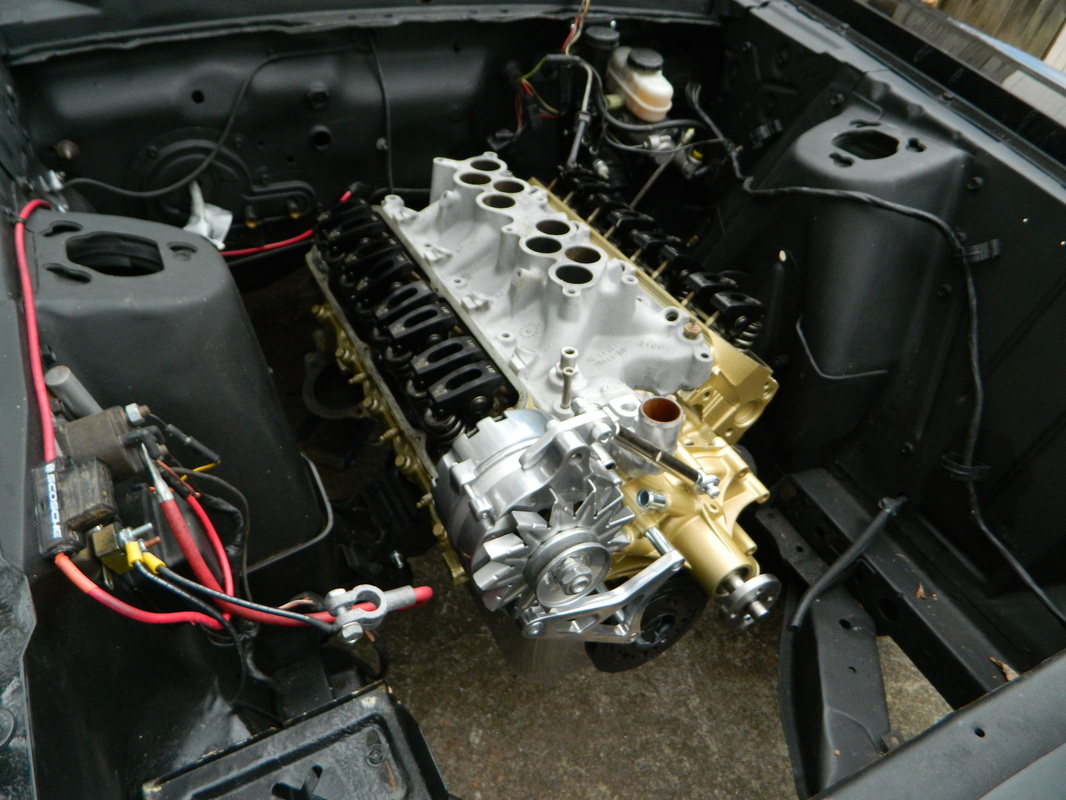
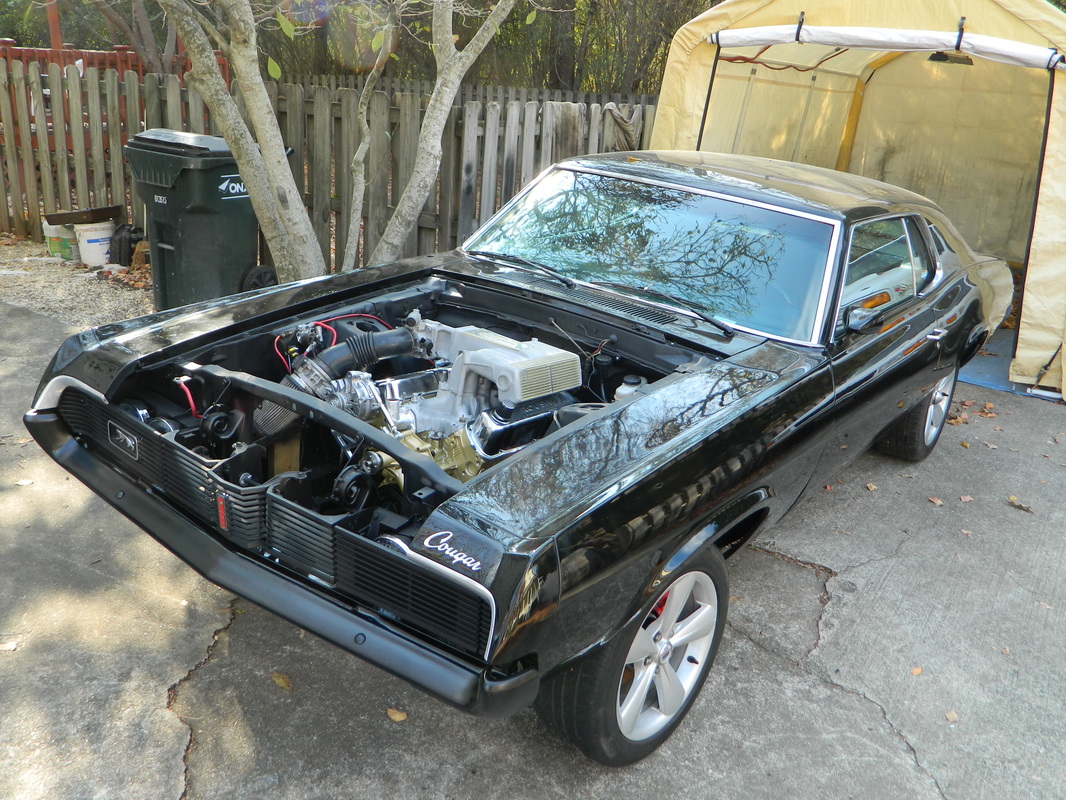
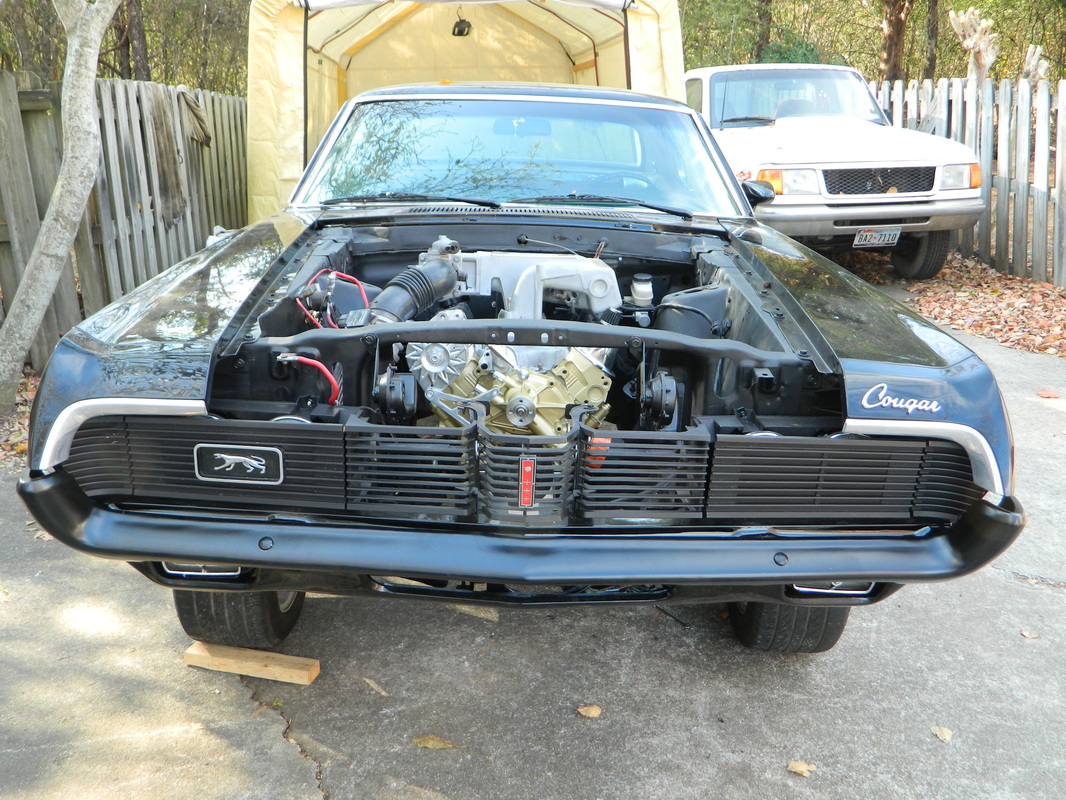
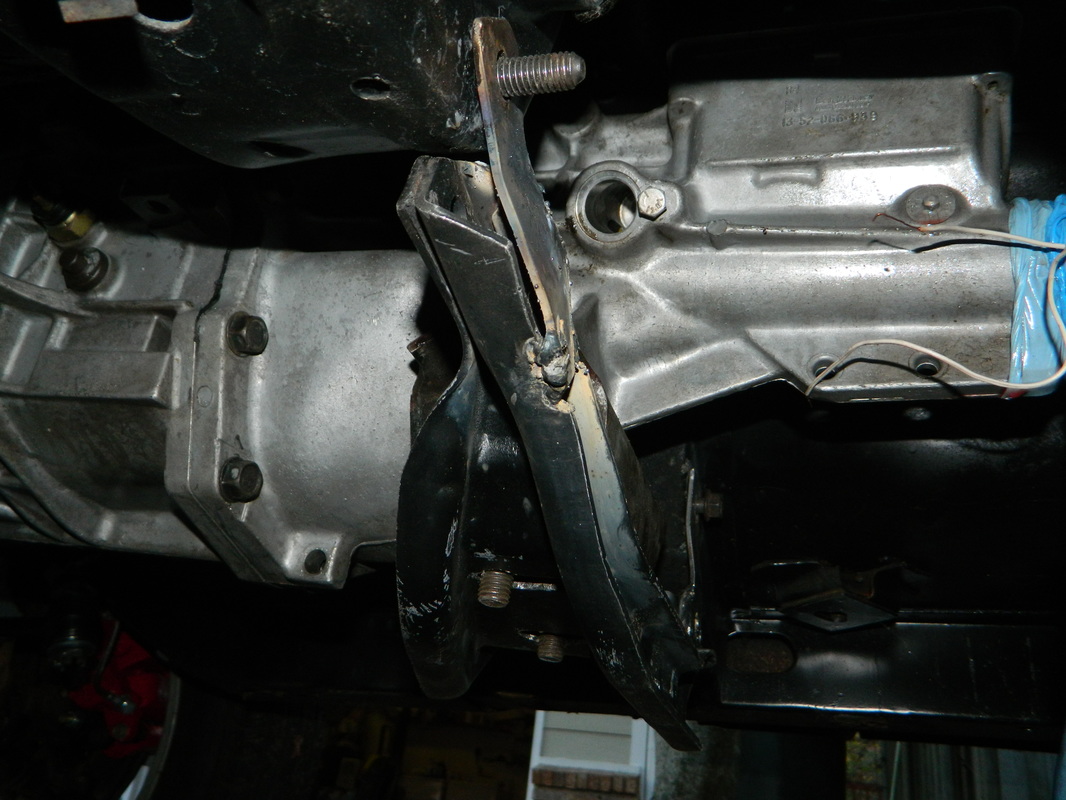
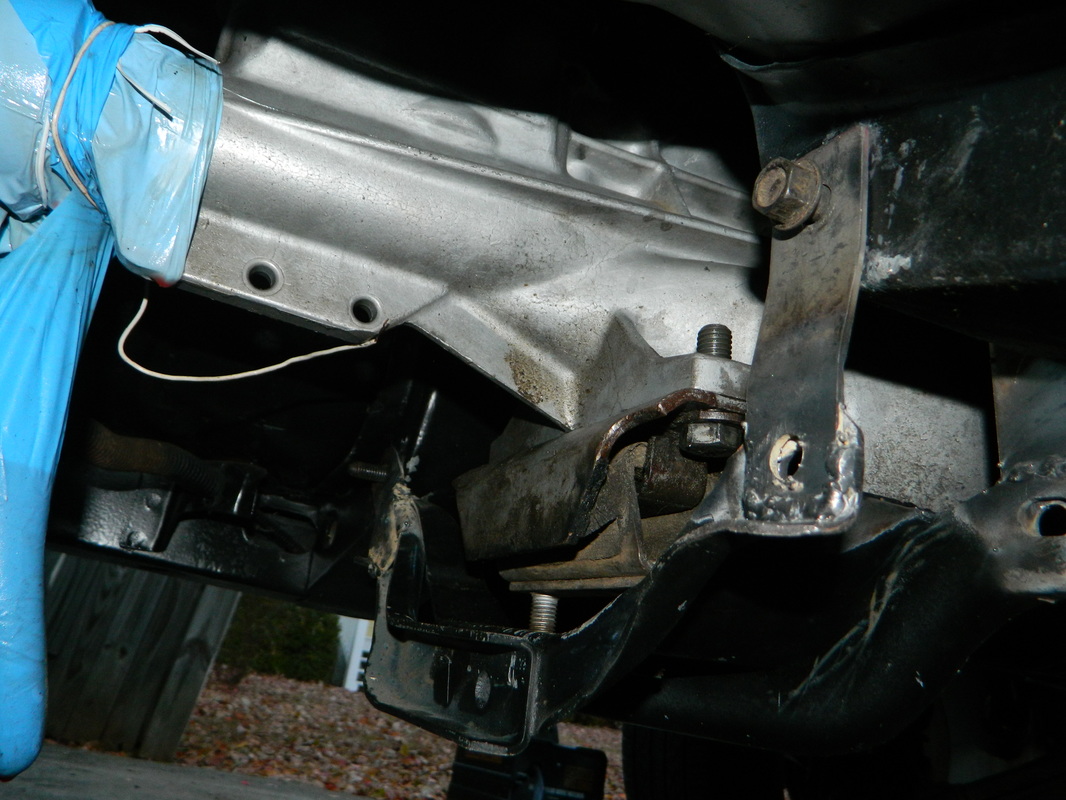
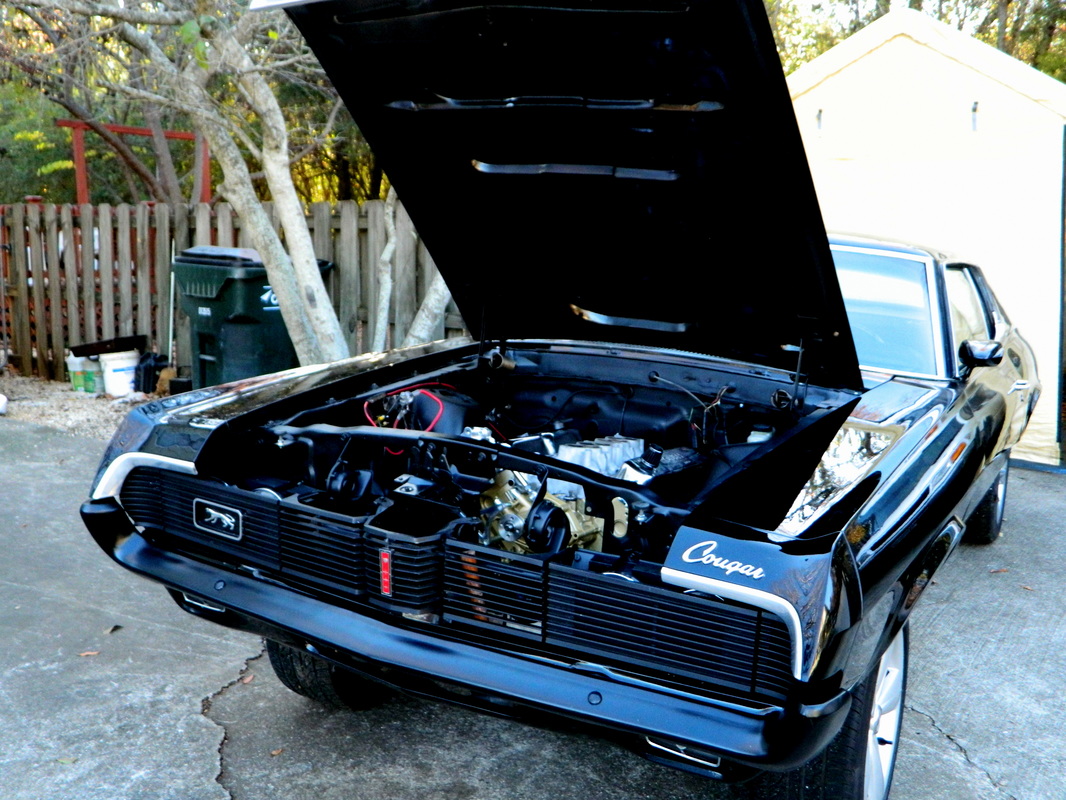
Well...big day today! I finally have installed the engine in the Cougar. This is the final hook-up too. Motor mounts are bolted in, but the transmission mount has to be fabricated or purchased. I am going to try to fabricate one to save money for the bling and performance enhancing parts. So, it went fairly well, until I realized that the engine hoist won't reach far enough to get the engine onto the mounts. I NOW remember when i last tried it, I had to unbolt the front bumper to get the extra clearance. After that, it was still a little short, so I had to use a 6' piece of square tubing as a shoe horn and shove it in. Would have been easier with some help, but everybody I know is working, so anyway I got it done. This is about the 8th engine installation I have done, and all but a couple were done alone. The transmission shifter came right up thru the factory console hole, so that's a plus. I tried a couple of the header pipes from the Ranger swap, and they will not work, as they hit the steering linkage. Now I have a multitude of things to get done, including the aforementioned transmission mount, intake manifold, carburetor, distributor, exhaust headers, hook up wiring to engine, and so on and so on. Surprisingly it only took me about 4 hrs to get the engine in today, including the bumper removal and a trip to Lowes for a motor mount bolt.


Nov 20, 2016
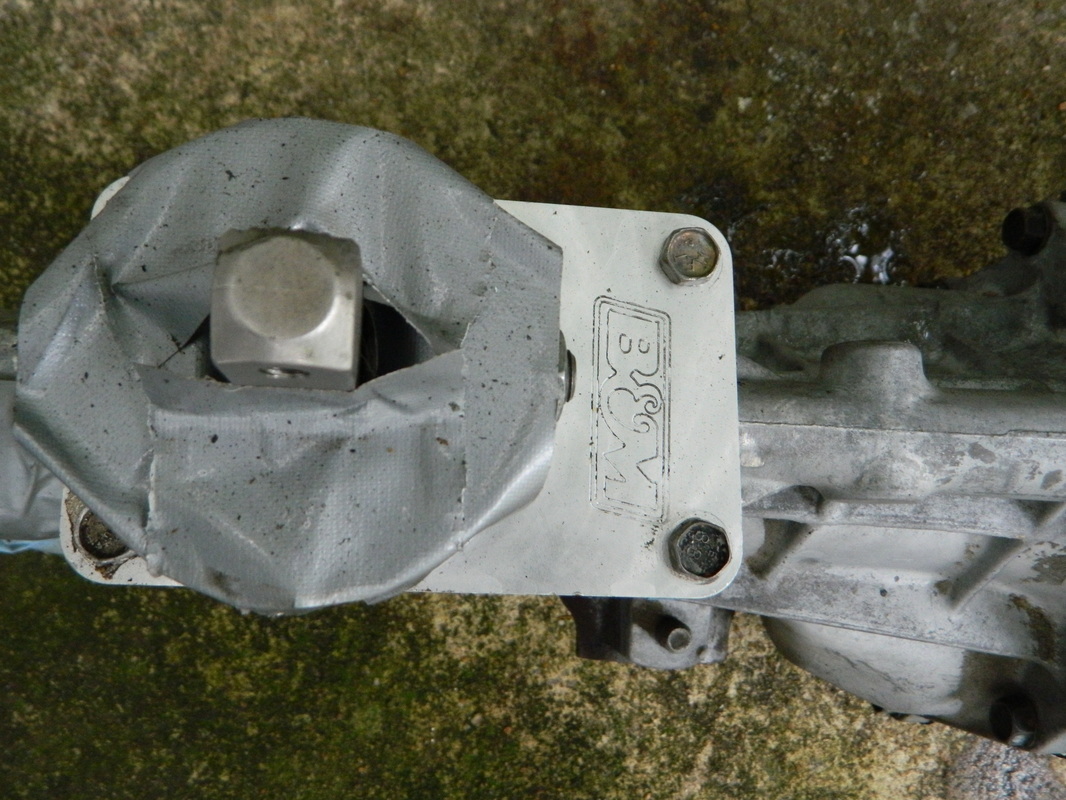
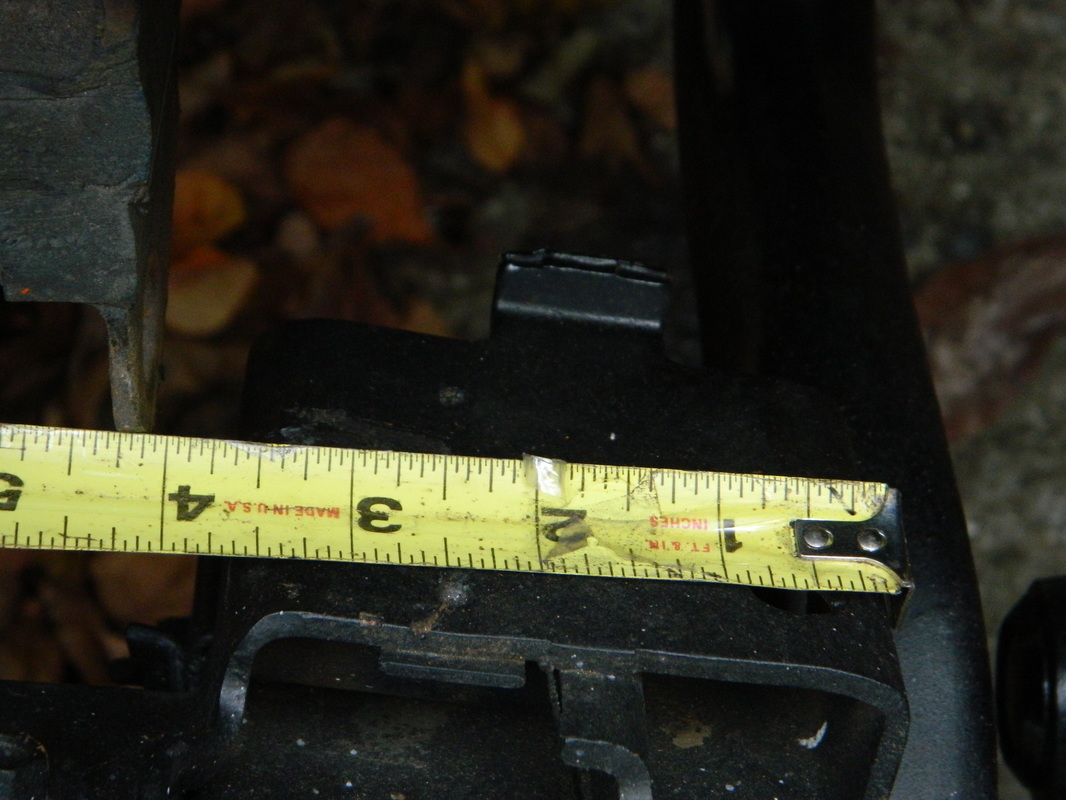
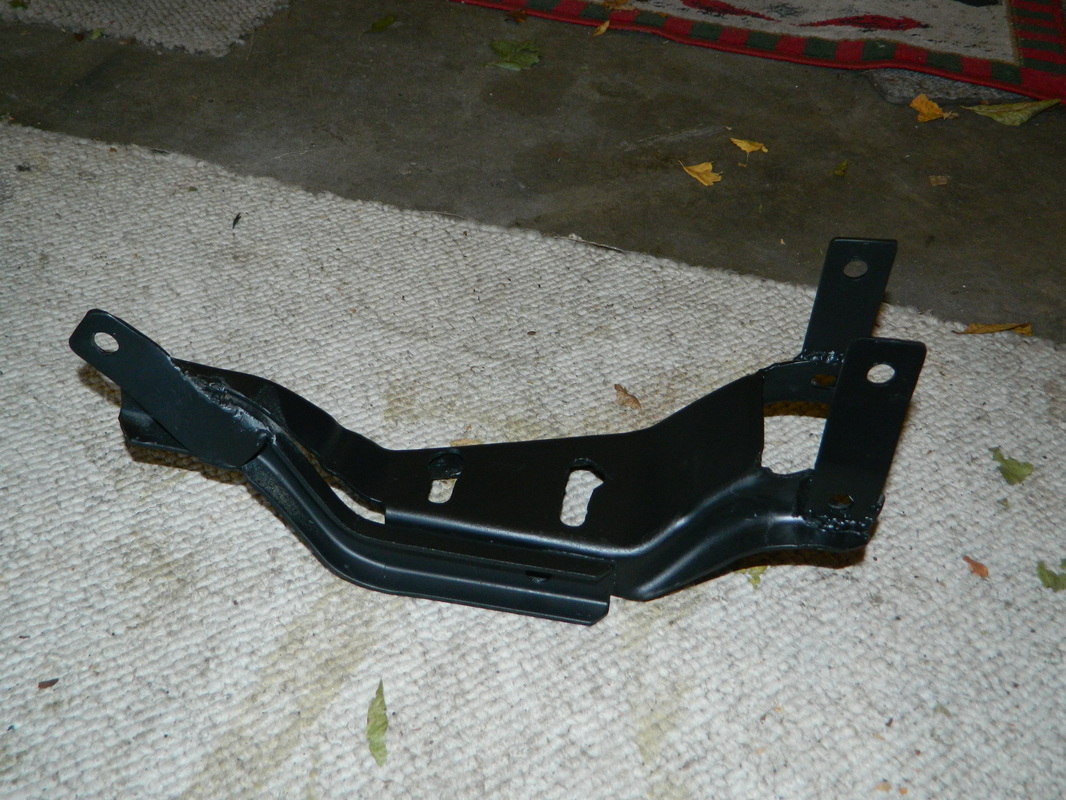
Now that I have the engine installed, it seems like I've been too busy to do anything else, but I took today to modify my transmission crossmember to work with the T5. I first elongated the mounting holes as the T5 trans mount is about 1/'4" wider. Then, I found that i would need about 6- 1/8" washers between the mount and the crossmember to space it out correctly. Next, I made a couple of cardboard templates for the extensions. Then, I cut and drilled them out and welded them onto the crossmember. Next, I finished them out by grinding the welds down a little and painting it. 4 hrs

Nov 22, 2016
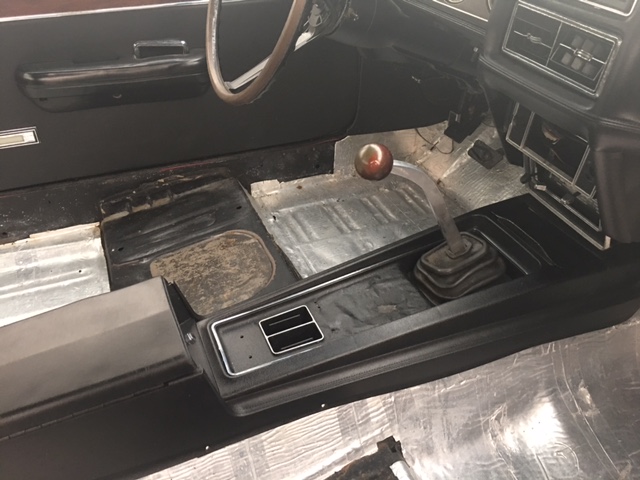
I worked on a remodel project for a friend today, but afterwards, I decided to see what the console would look like since the tranny is in. I Put a shifter boot and my old stick from the Ranger on it just to see what it would look like. Then I got out my old broken console trim plate and glued it back together and then contact cemented some of the cherry wood veneer that I had left over from the door panels I made. It turned out ok, but I might just get a new one and then make another wood insert for it. 2 hrs

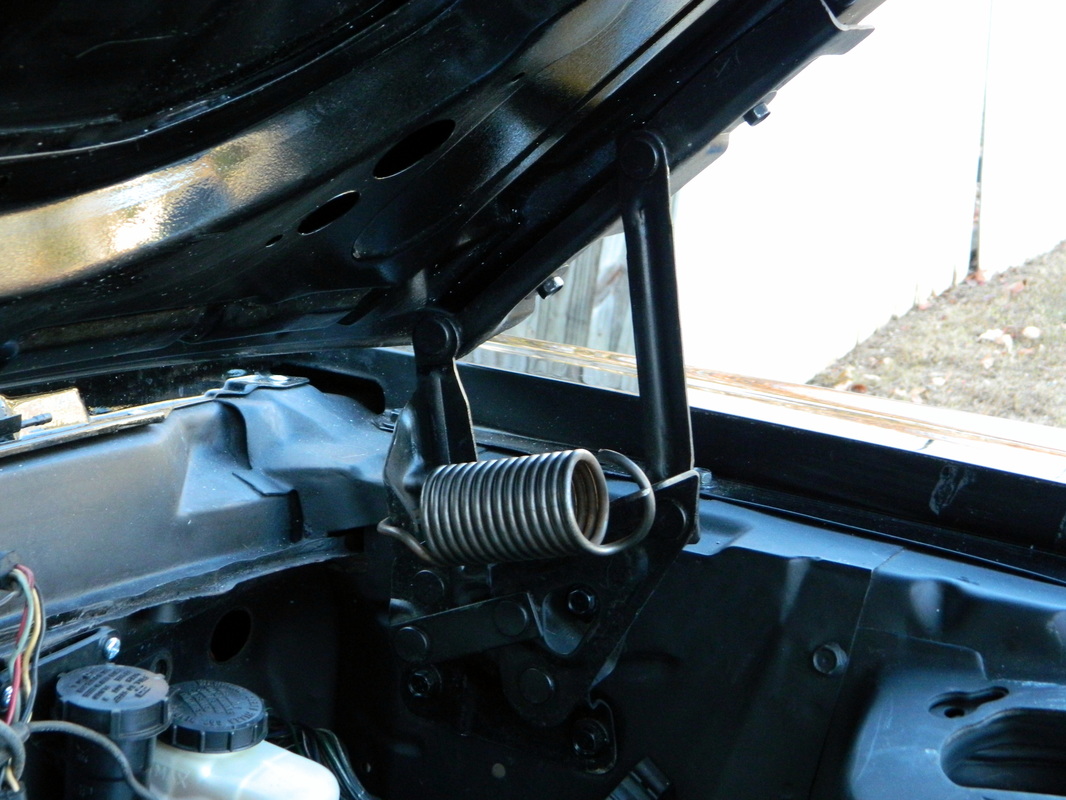
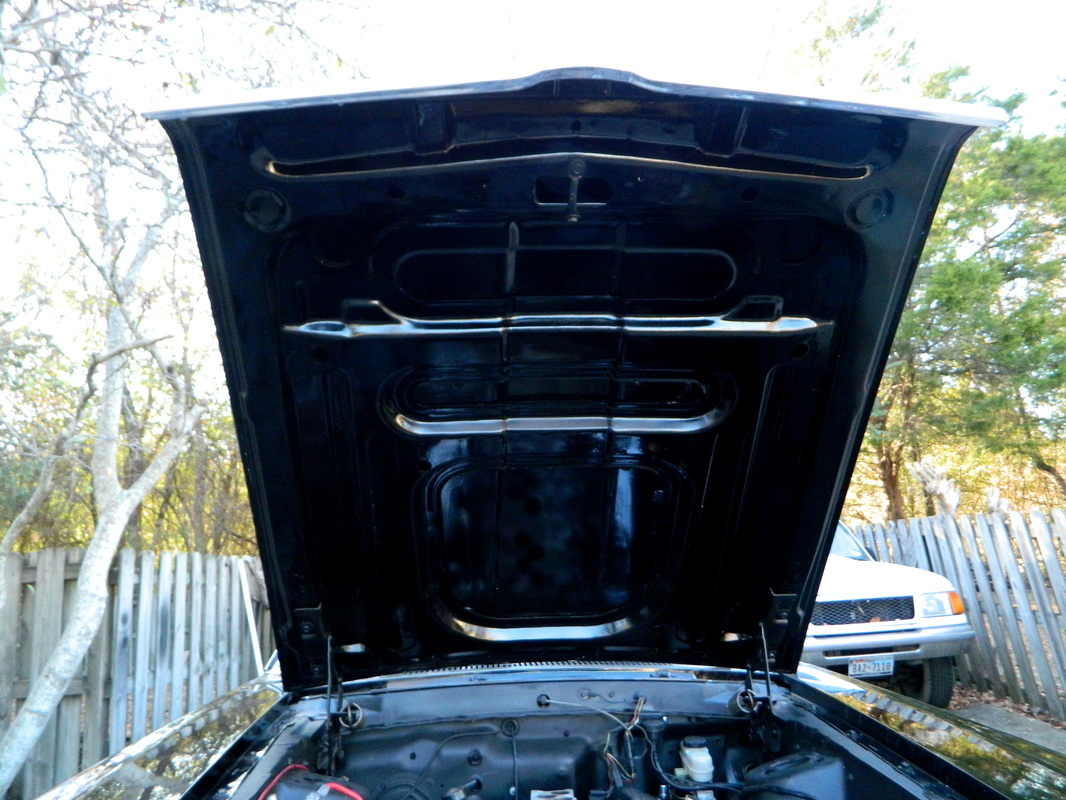
Nov 26, 2016
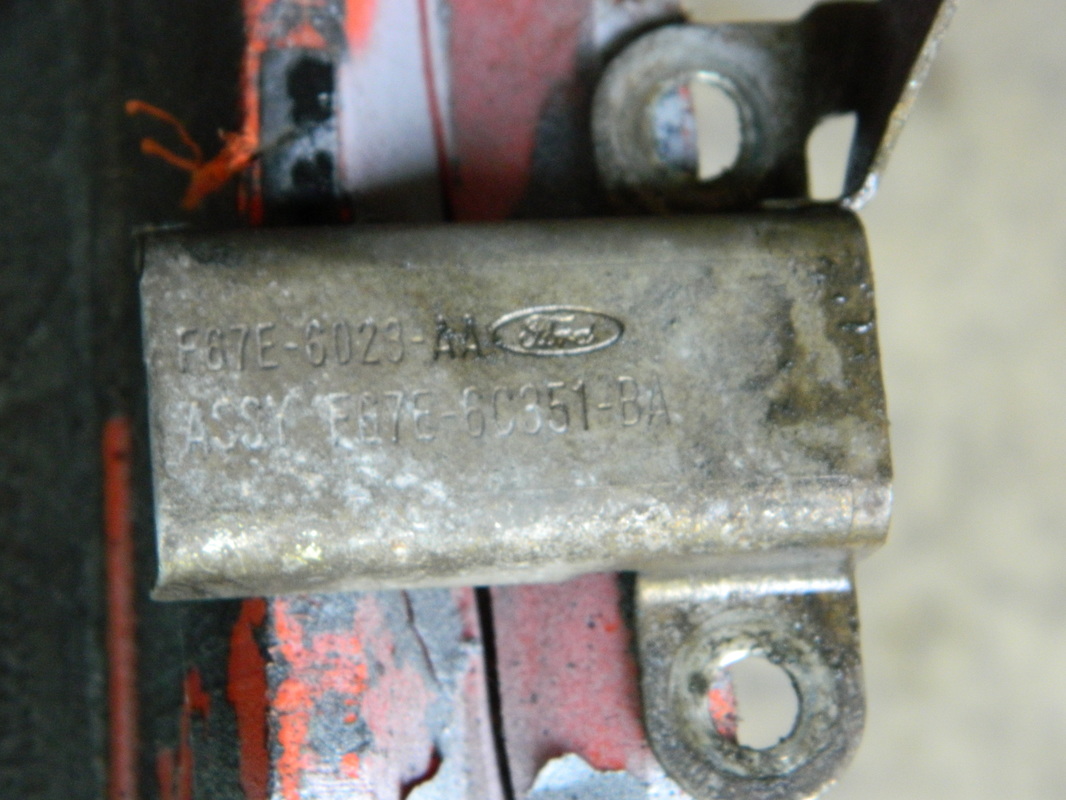
My son-in-law, Gabe came over and helped me put the hood back on the car. It's been off the car for over 3 years, I didn't put it back on after painting it. So, I had to re-align the fenders and hood. Next, I installed the hood latch and hood bumpers and adjusted them too. 5 hrs.


Dec 6, 2016
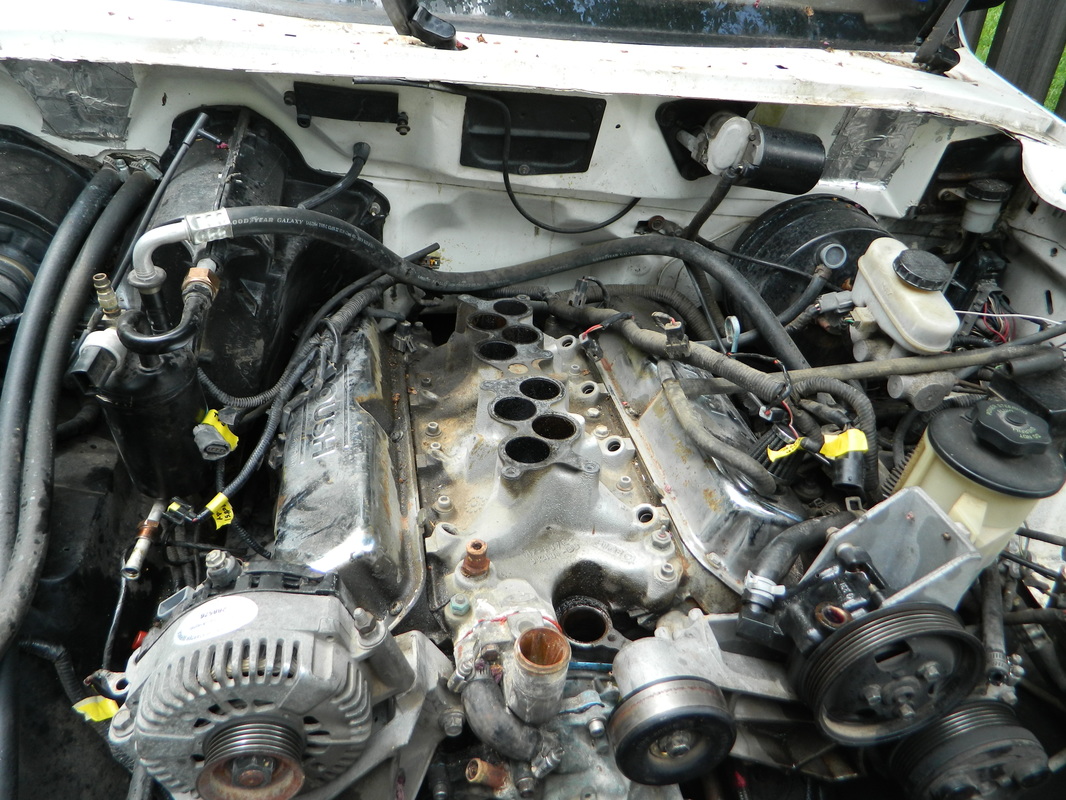
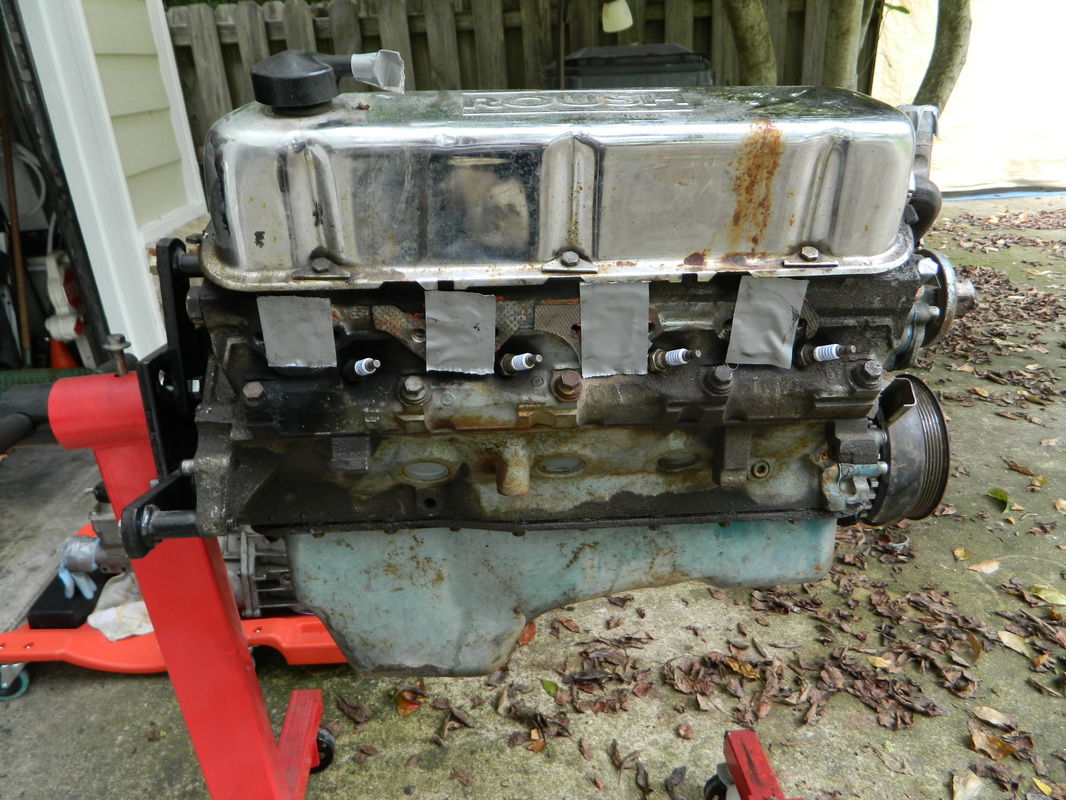
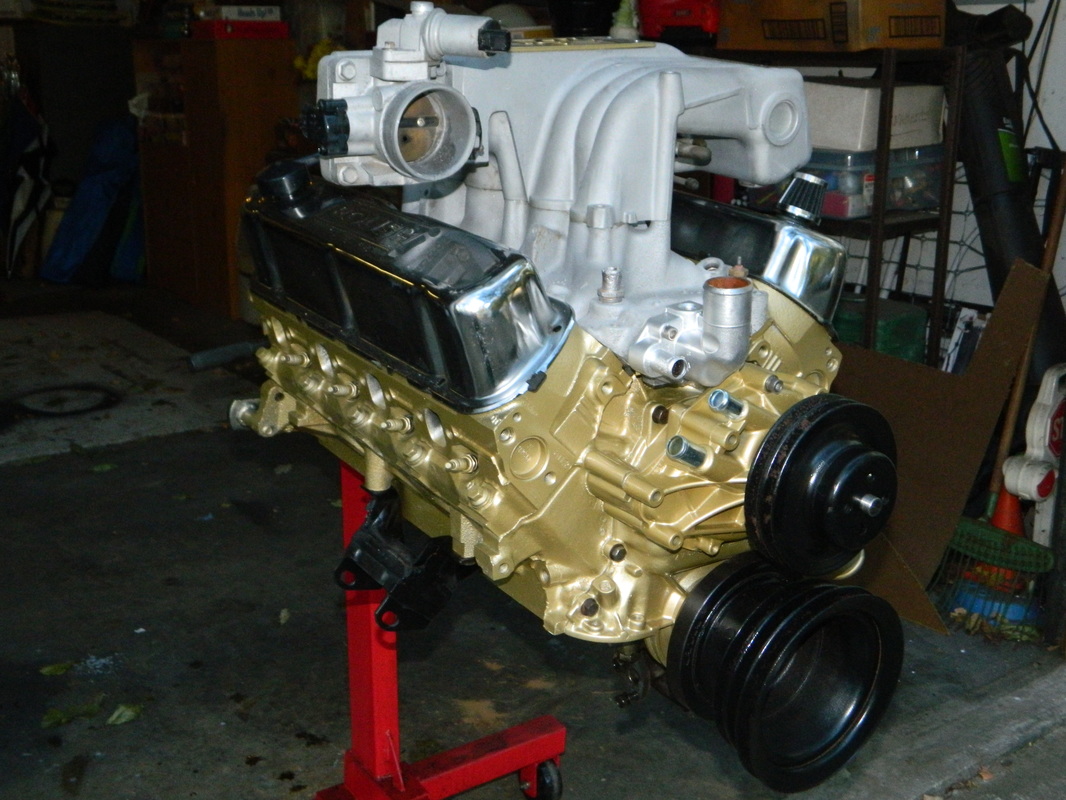
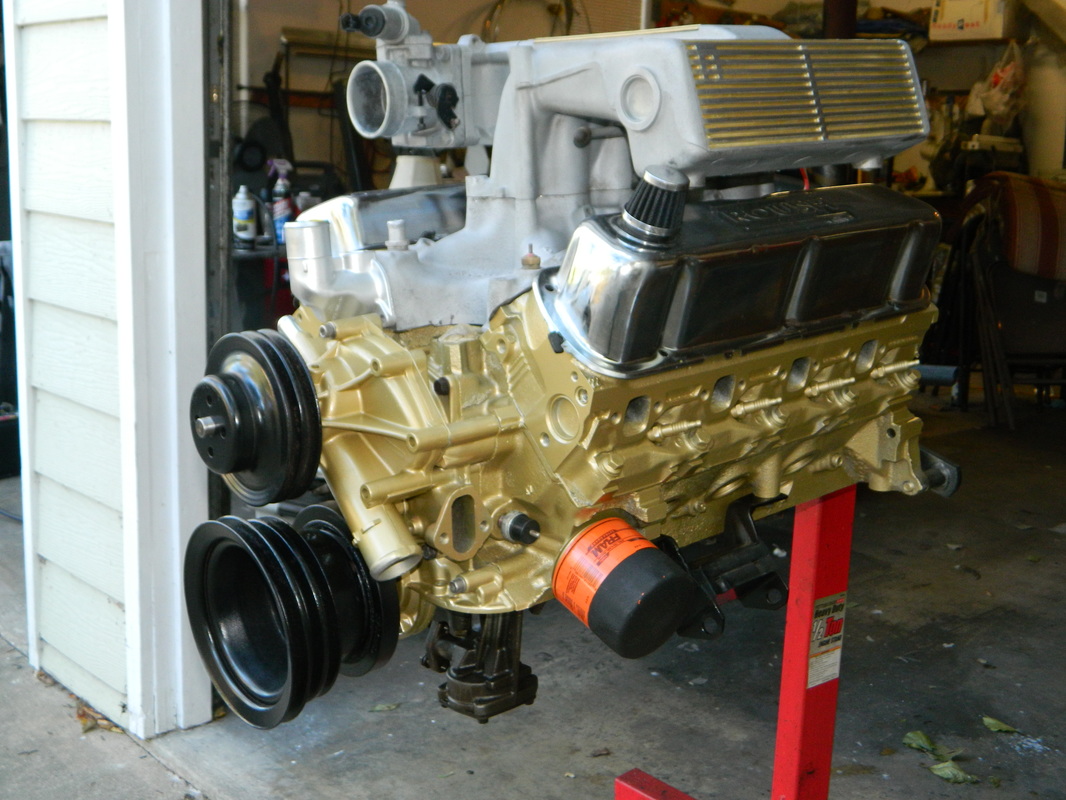
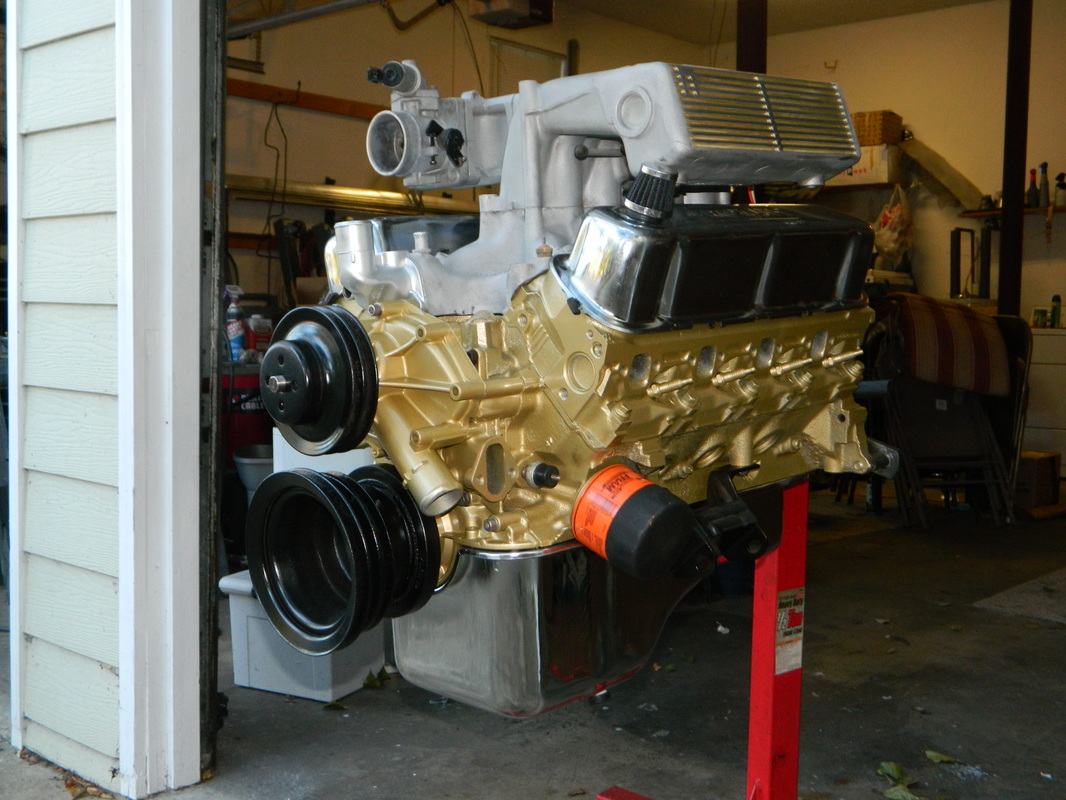
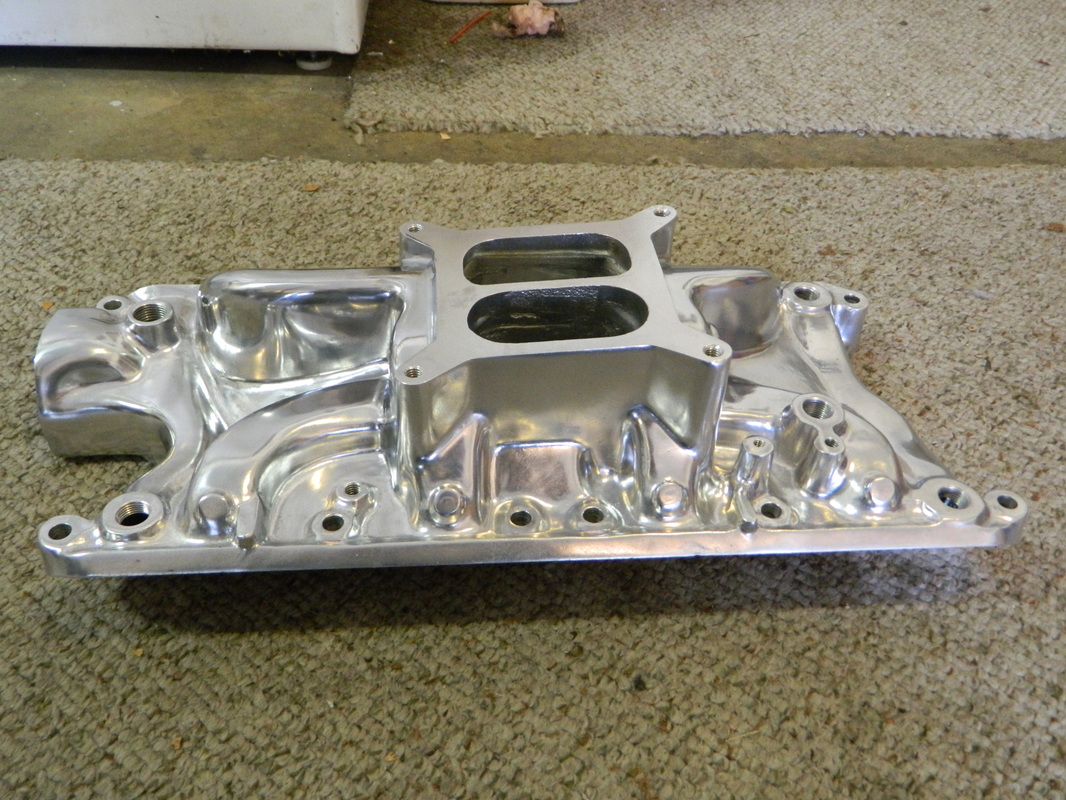
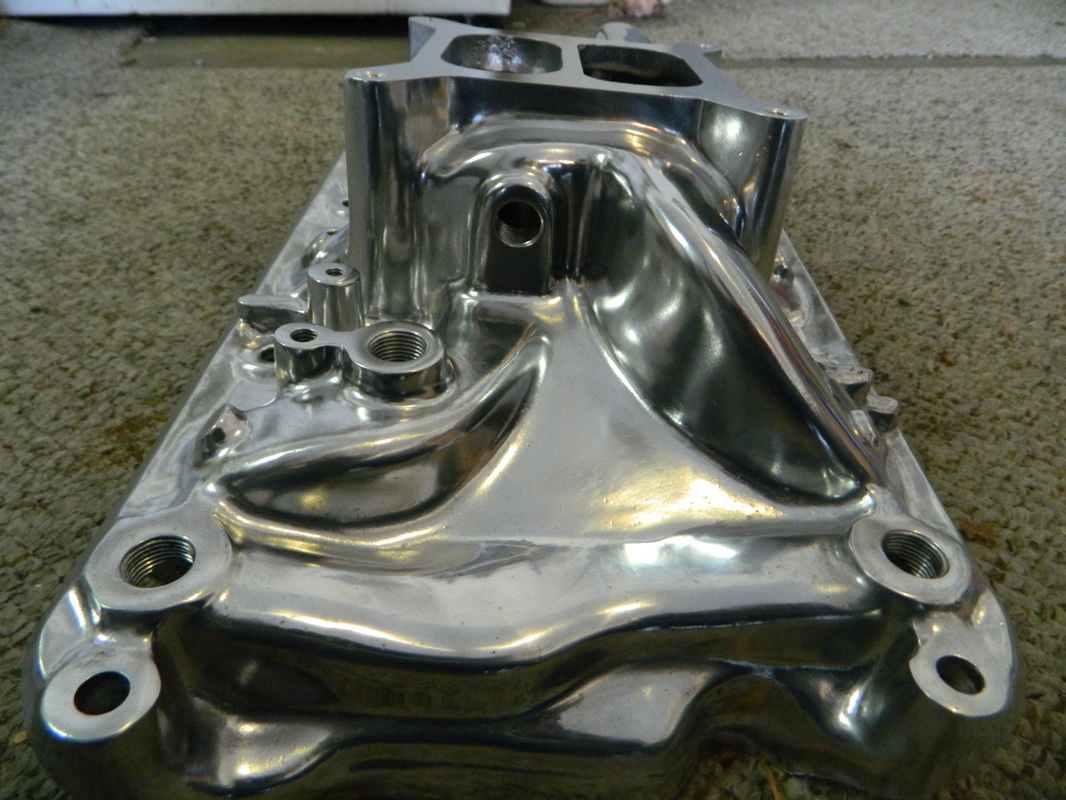
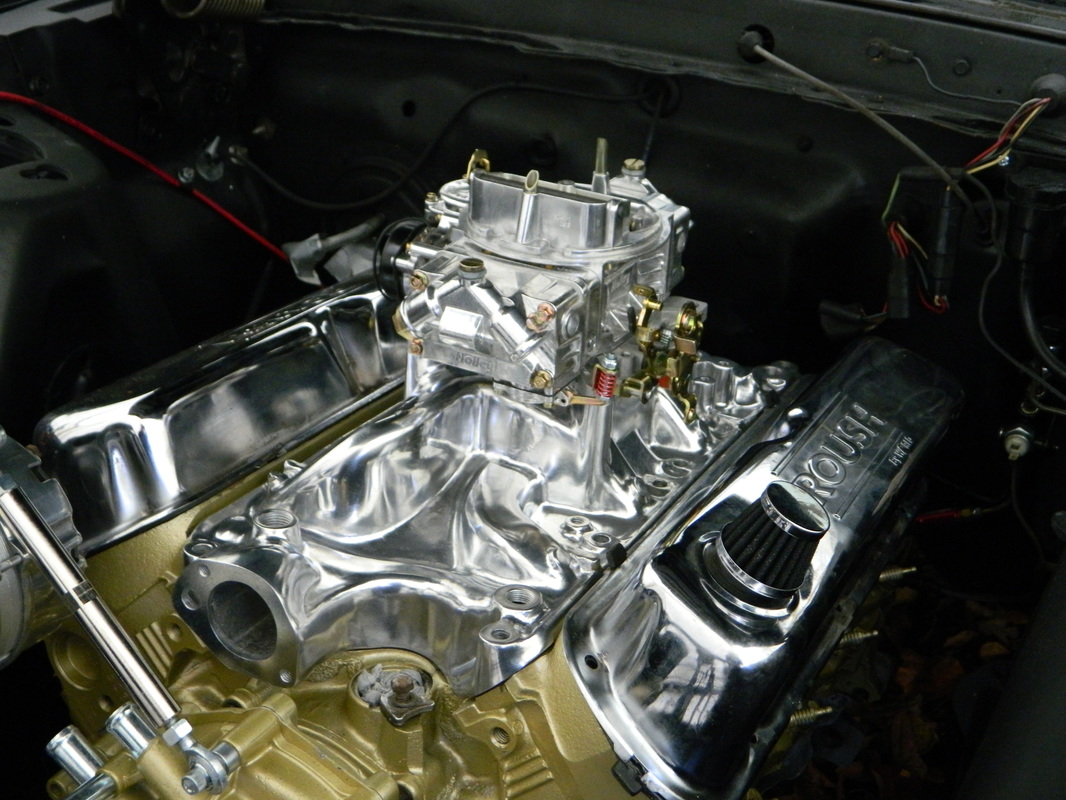
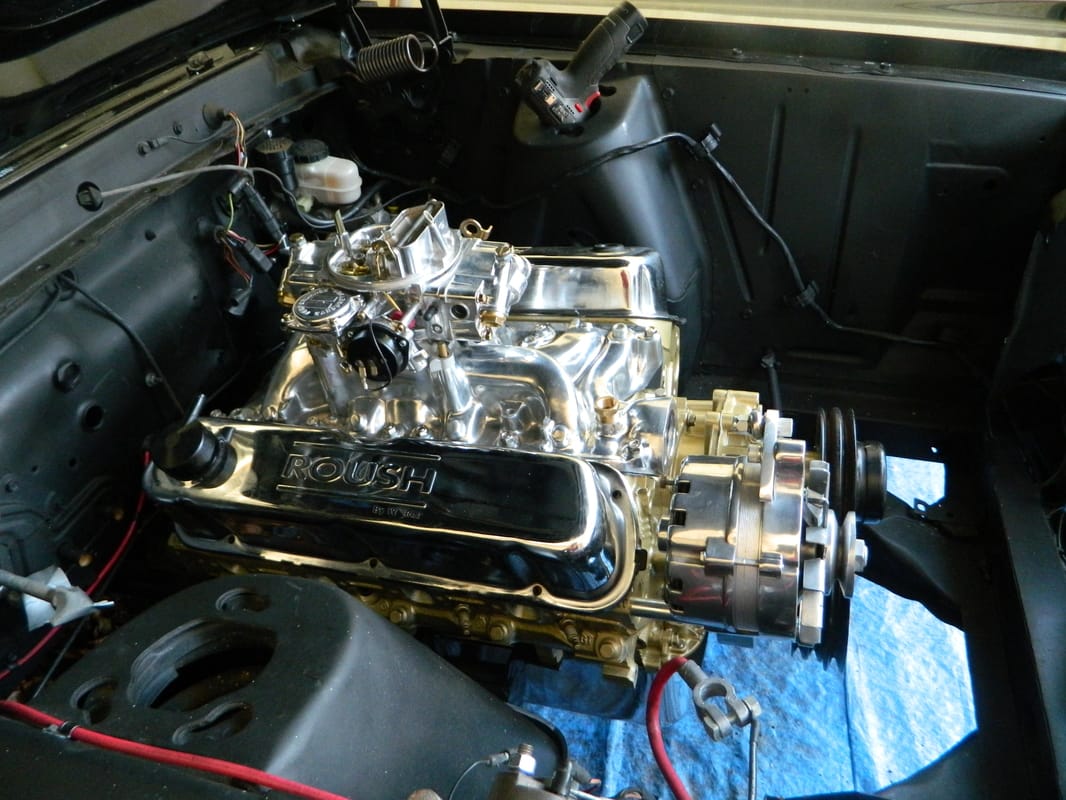
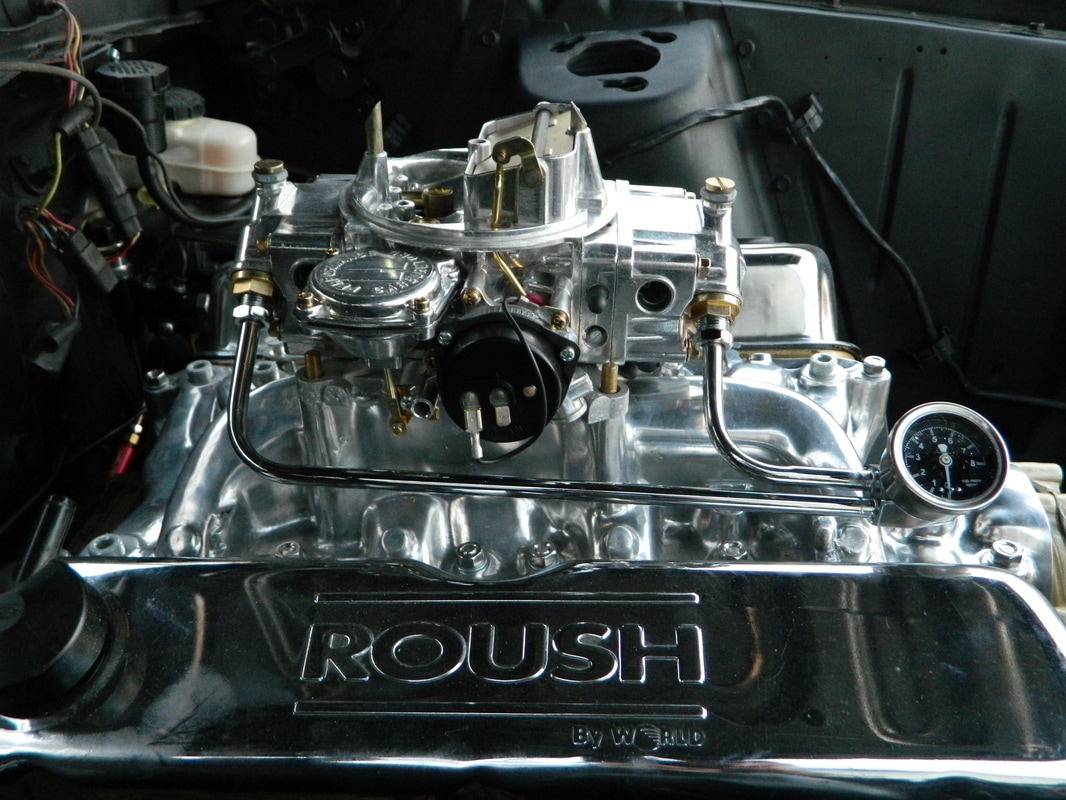
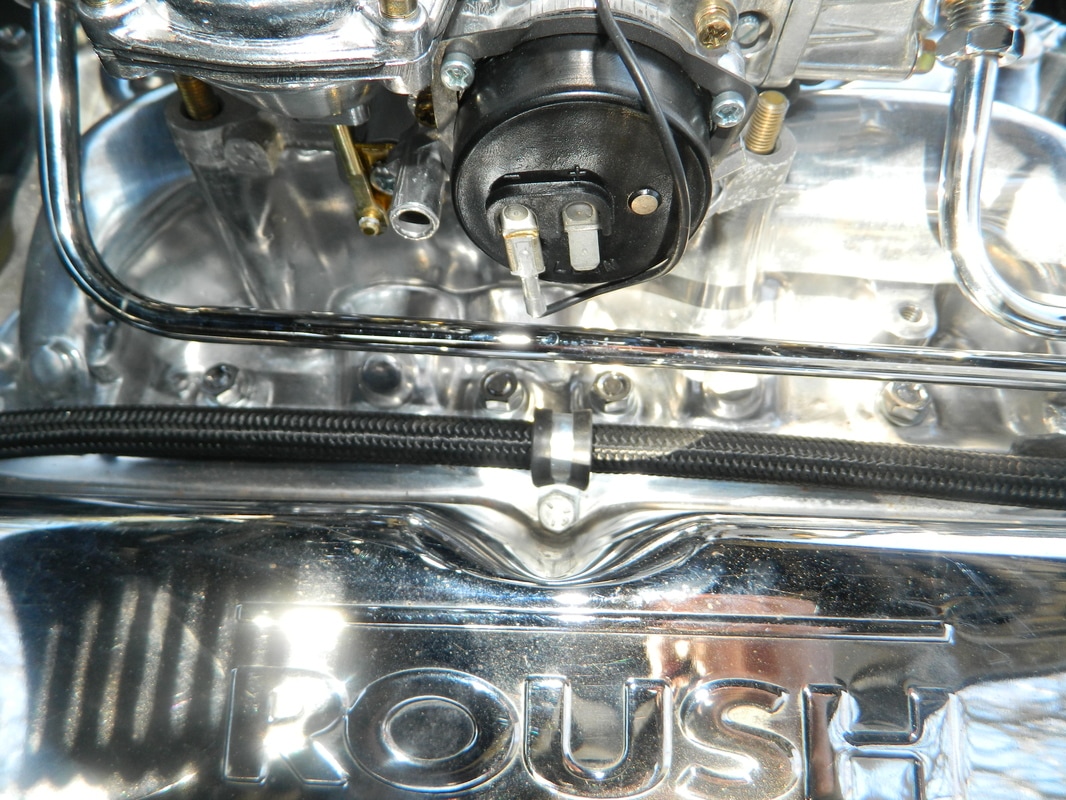
My day off, and I recieved my intake today, while I was outside working on the hydraulic clutch trying to bleed it. The clutch bleed was the easiest I ever had, I used to dread the clutch bleed on the Ranger and would have to have my daughter help by pumping the pedal. I used a little compressed air on the reservoir and got some fluid coming out of the loosened supply line, then used a "Mighty Vac" to pull vacuume on the slave while I opened the bleeder. After two bleeds it was done! Now for the early Christmas present that came today. I ordered a Professional Products Typhoon aluminum intake manifold a few days ago from Newegg for $148 shipped. What a deal, Summit sells the same one for $229. It looks great, only a couple of rough spots, but I believe it is actually an endura shine finish, some sort of chrome powder coating, as its shiny on the bottom which wasn't smoothed out. I have a shiny Holley Classic 600 cfm vacuum secondary carburetor ordered, which should arrive tomorrow. That's it for today, 2hrs.

Dec 7, 2016
I got home last night from dinner out with my wife and she came walking in with a brand new Holley carburetor that was left on the front porch. It wasn't supposed to be delivered until today! SO..just like the intake I just sat it on the engine to see what it would look like.

Dec 11, 2016
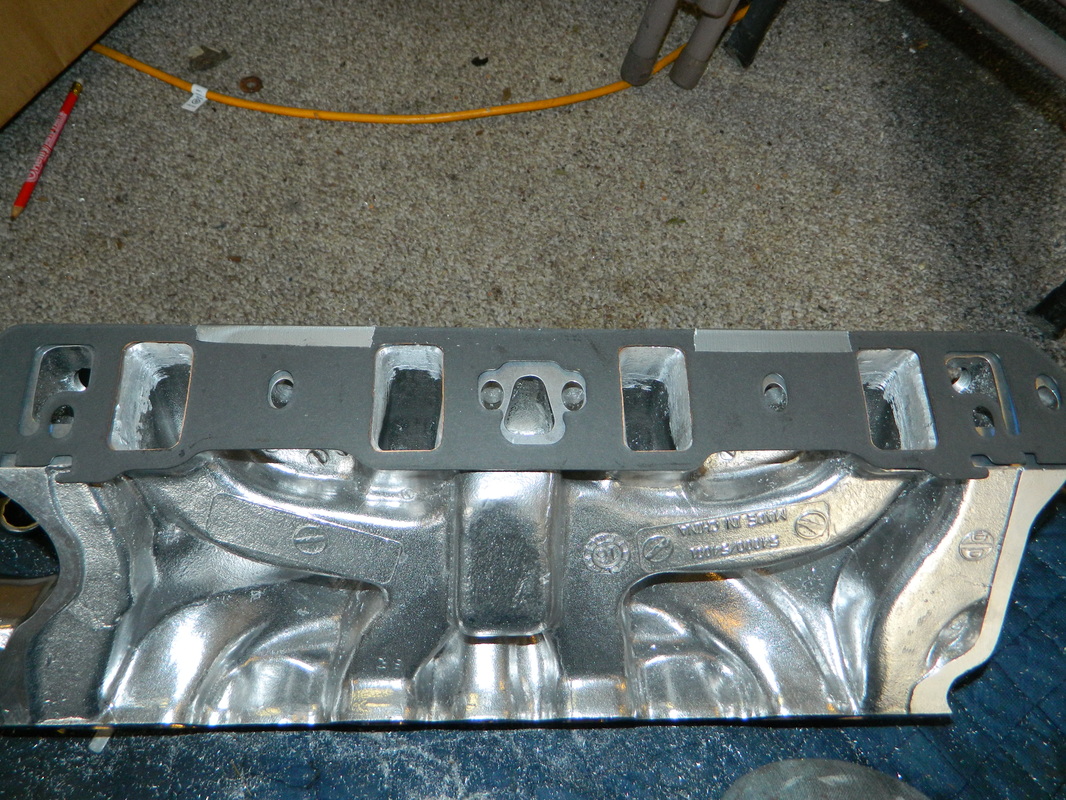
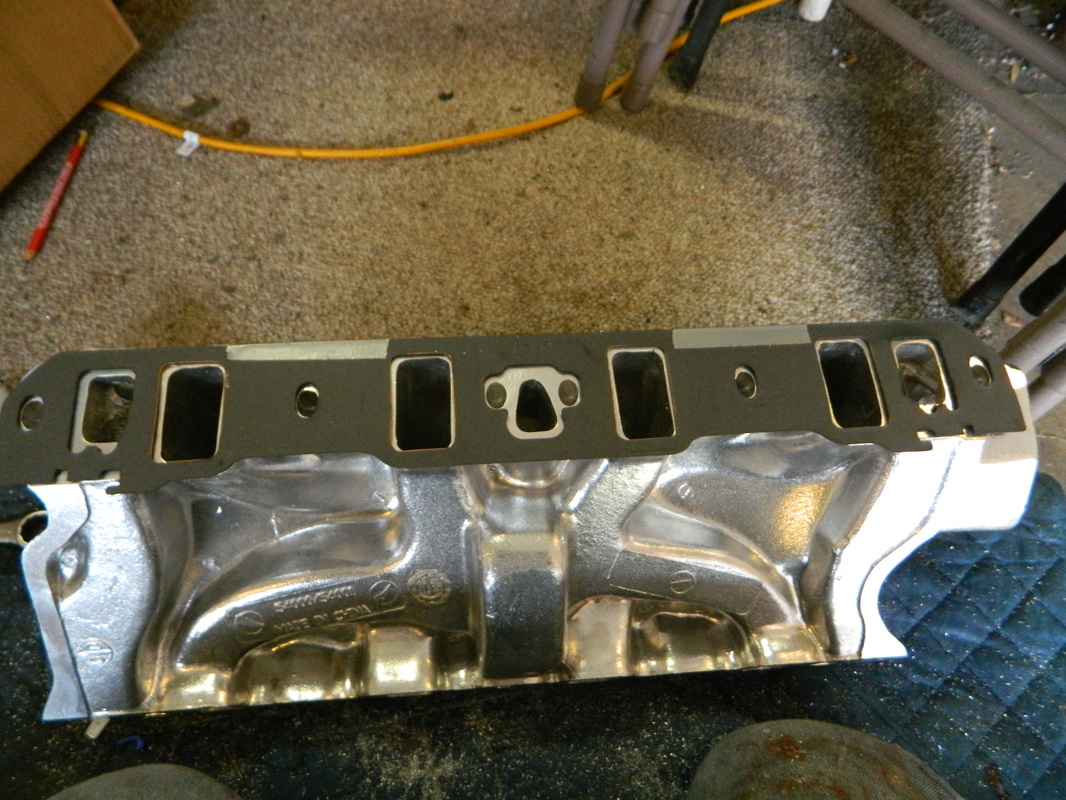
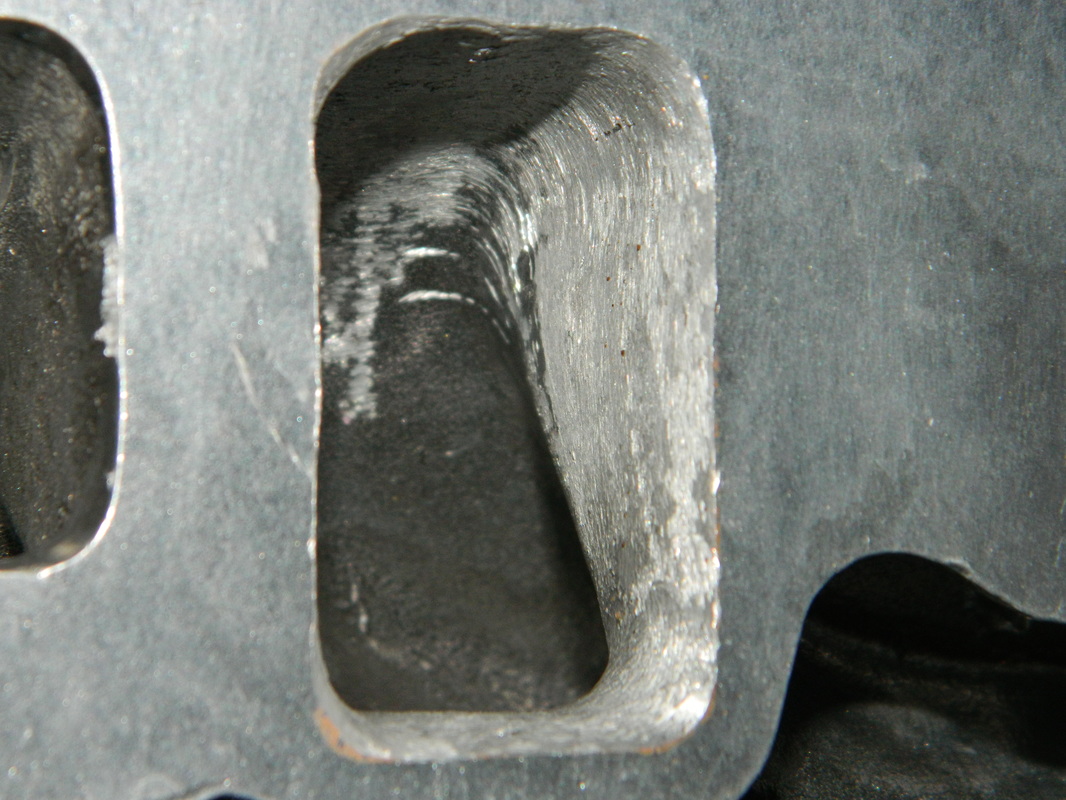
I picked up a set of intake gaskets that match the GT40 heads I have, but the intake ports are the smaller GT Mustang size. So, I aligned them up on the intake and scribed the outline on the intake. Next, I used a carbide burr to enlarge the ports, going down about 1 1/2" into the port. It may not make much difference, but I feel better about it. 2 hrs
12/24/2016
Yes, I'm working on the Cougar on Christmas eve. The wife and kids are out shopping, and the weather is..70 degrees and sunny. So, I decided to take advantage of it and install my new harmonic balancer. I preheated the balancer in the oven at 250 degrees per instructions and stopped by O'Reilly's and picked up a rental balancer installer. But when I slid the hot balancer on the crank, it slid almost all the way on without much force behind it. So, I just put the bolt and washer on and tightened it up to 90 ft lbs. along with some loctite, that should hold it. Next, I put the old lower pulley on to check it for alignment, and it was about an 1/8-1/4" off. I will probably just get two new pulleys in polished aluminum or chrome, the right offset if possible. I dummied up the intake and carb and took some pics. 2 hrs Merry Christmas!

Jan 5, 2017
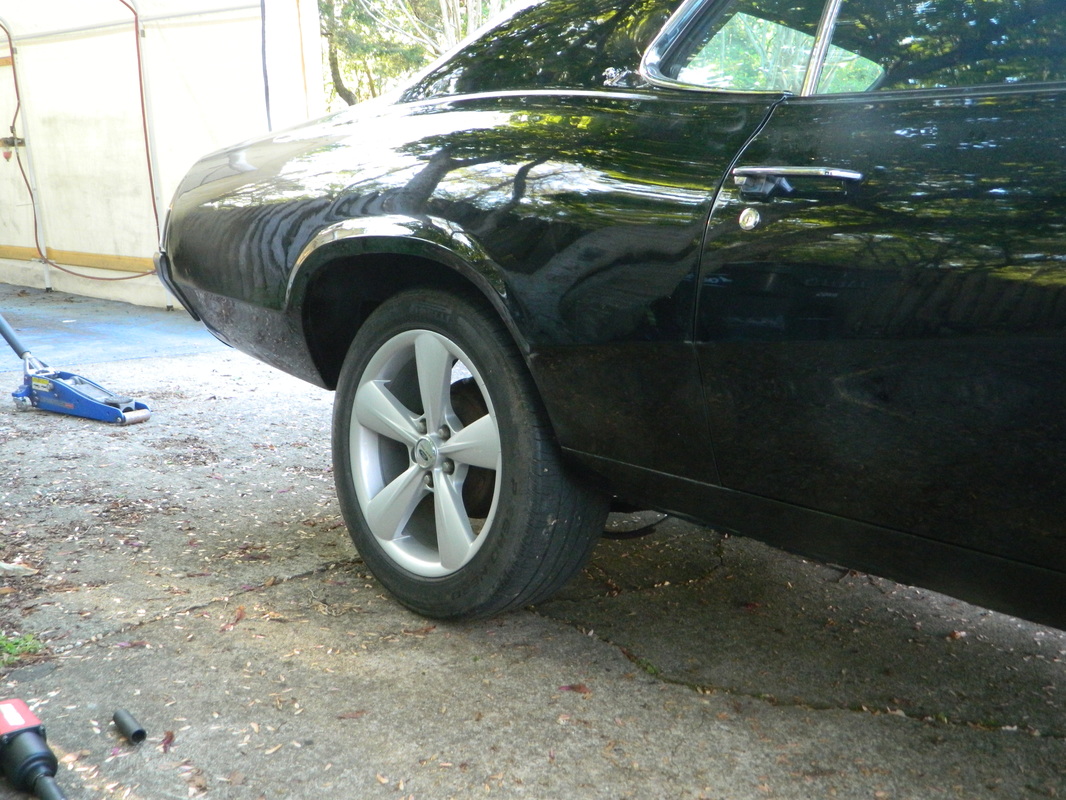
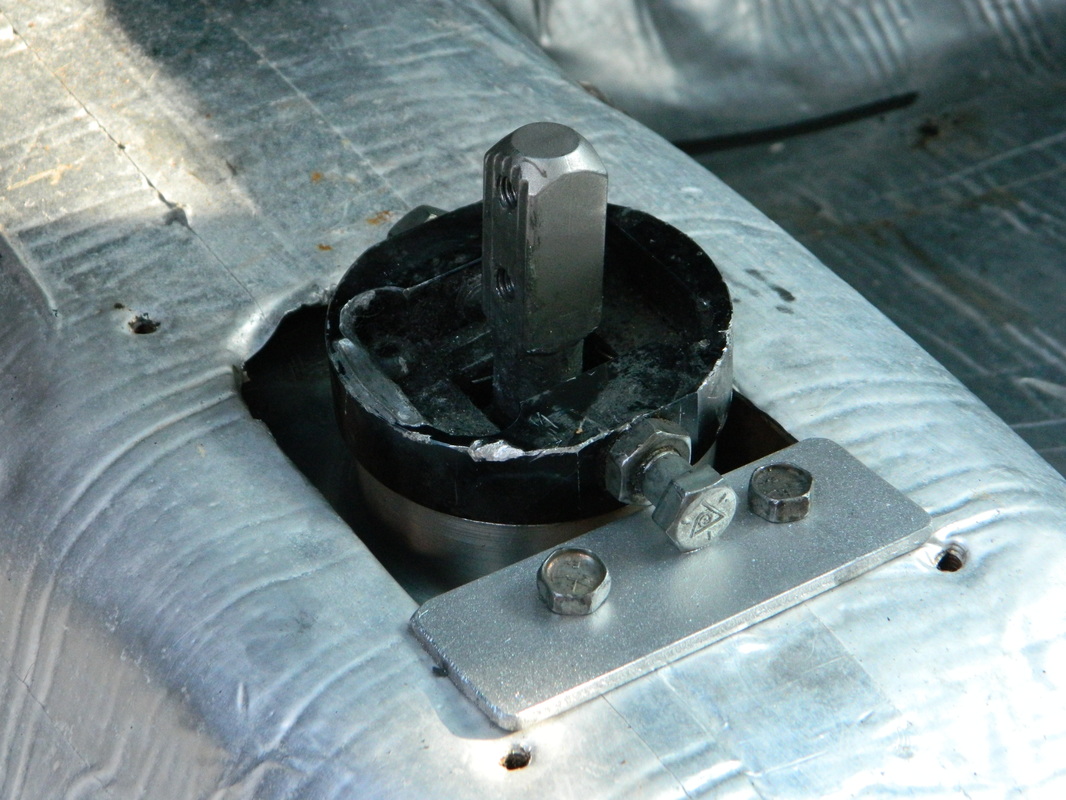
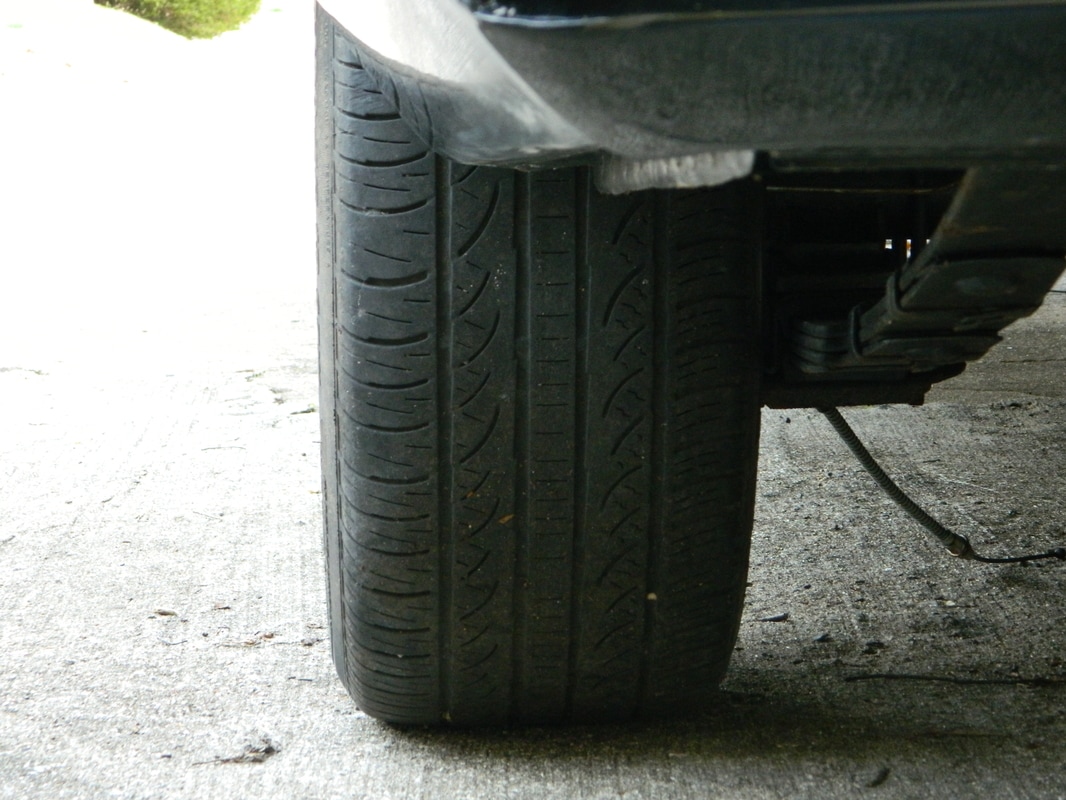
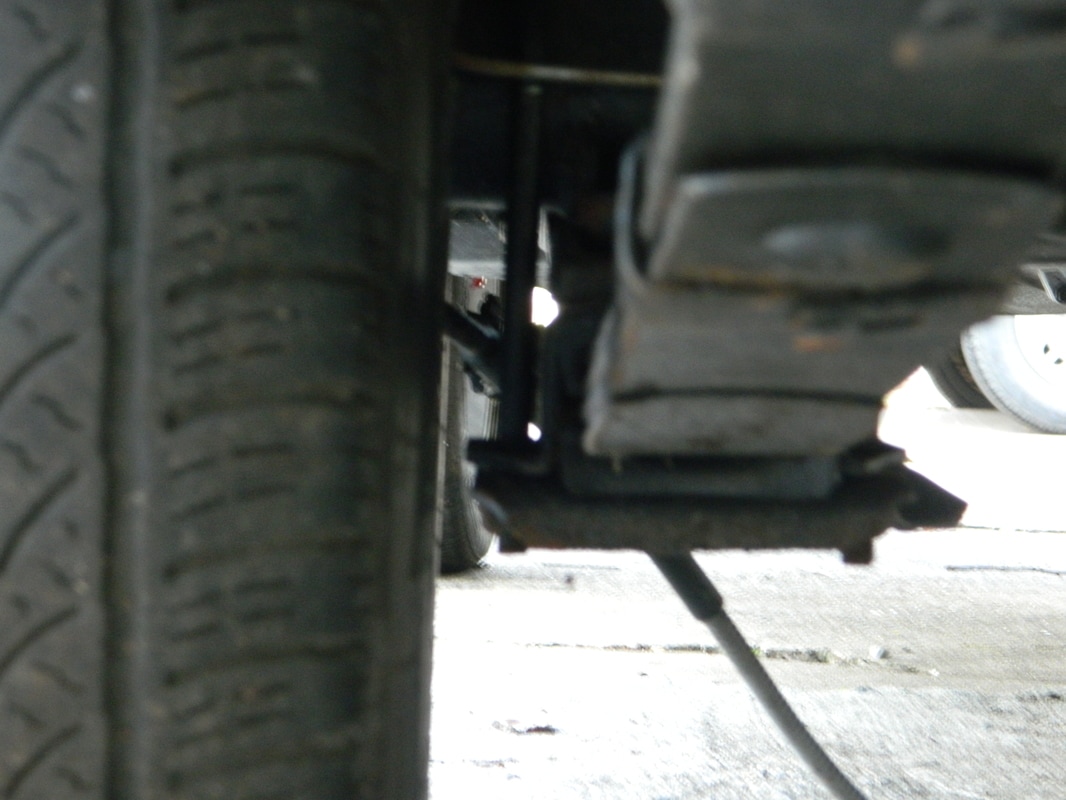
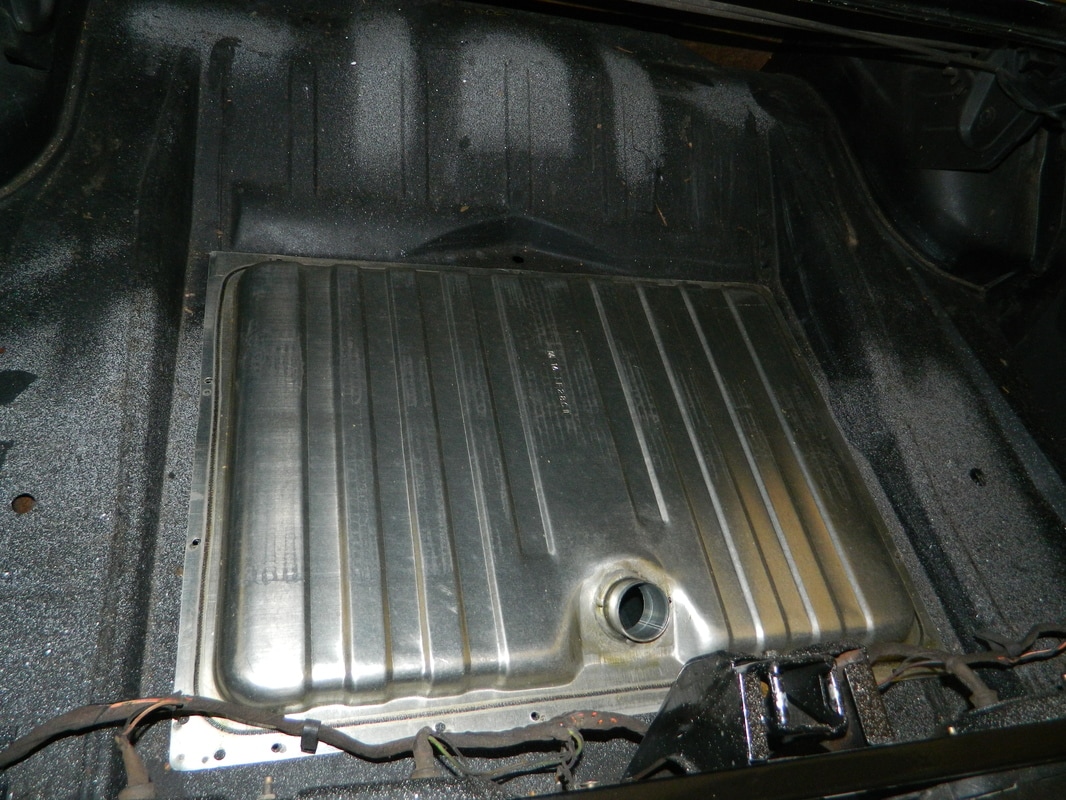
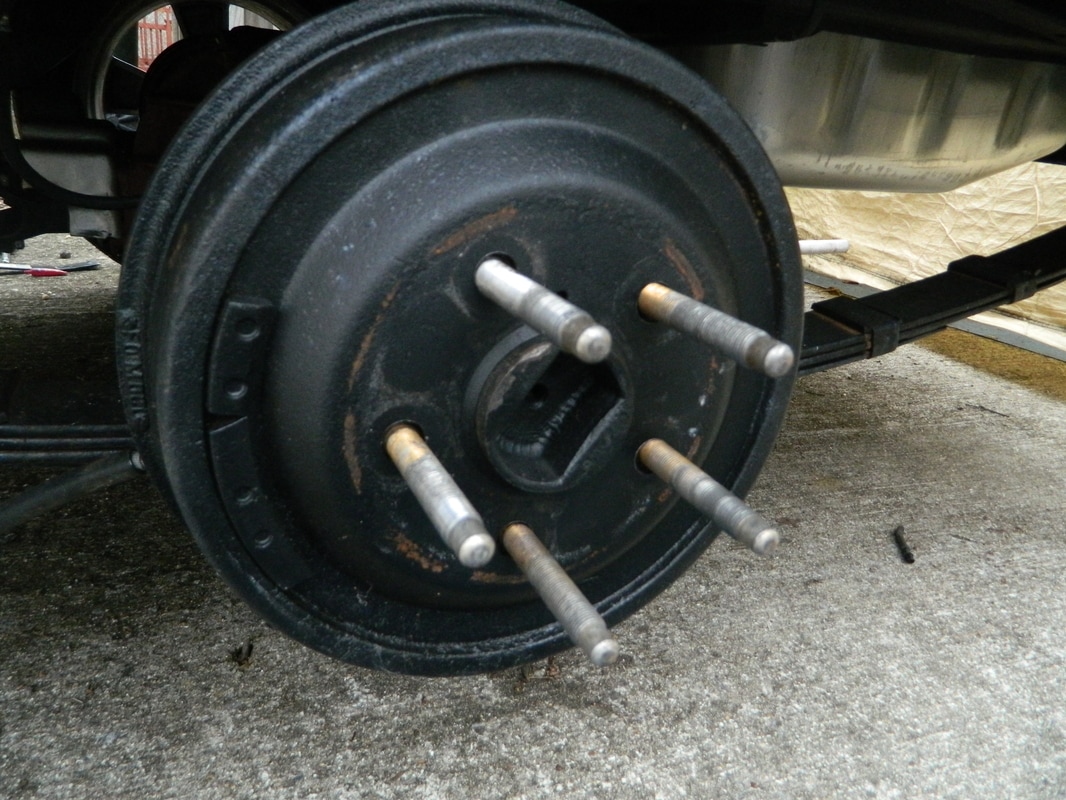
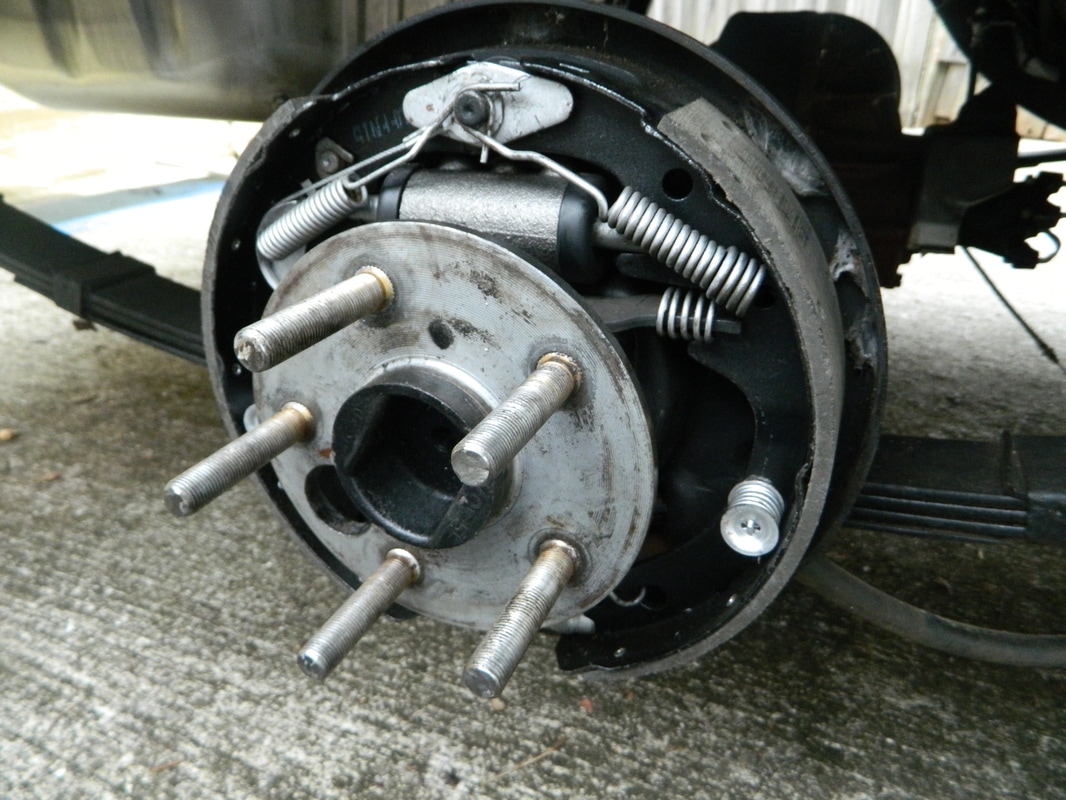
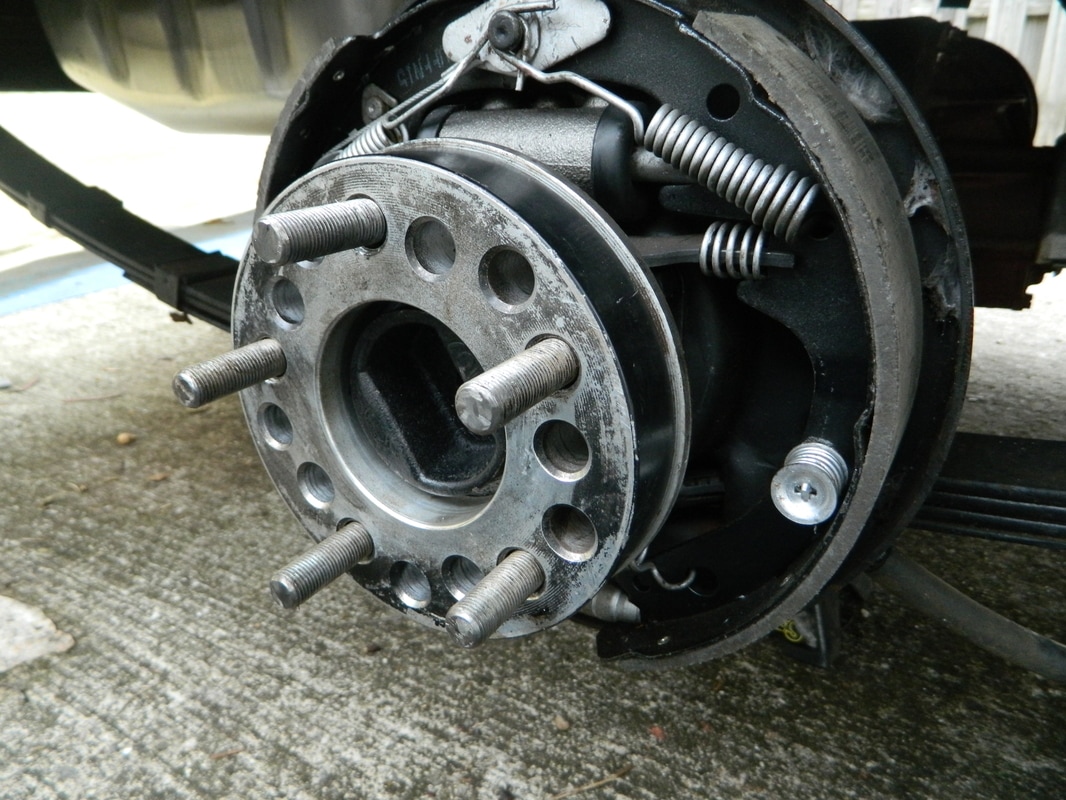
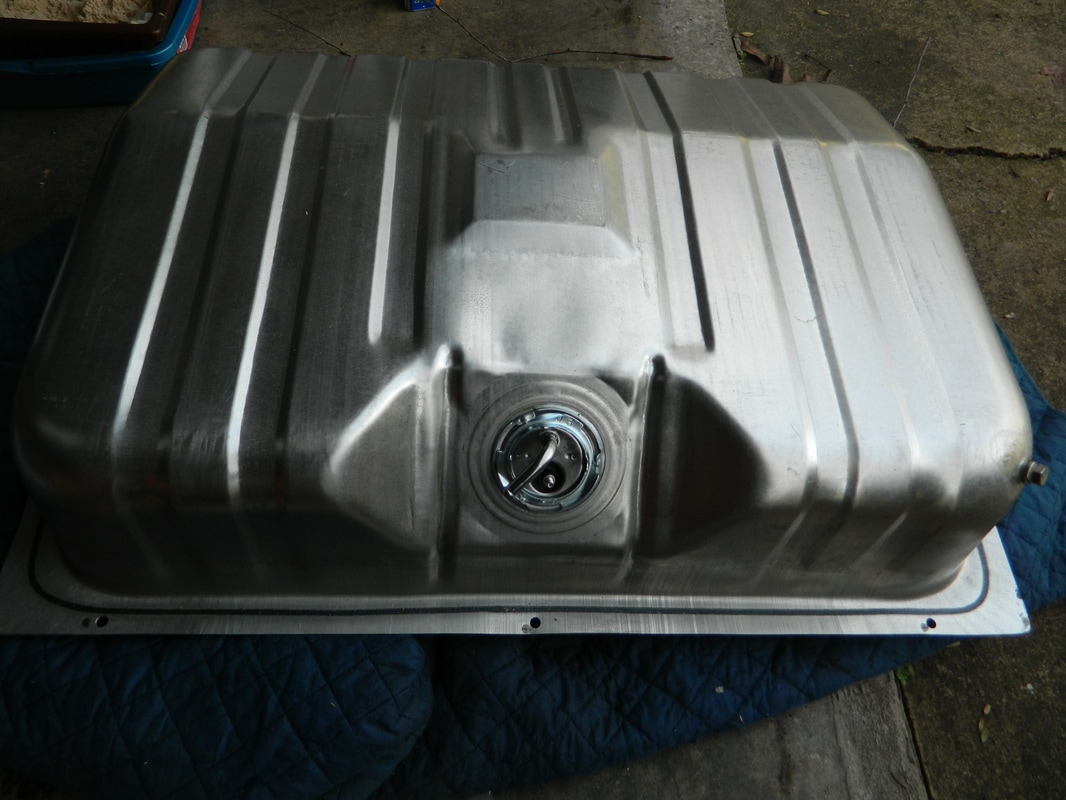
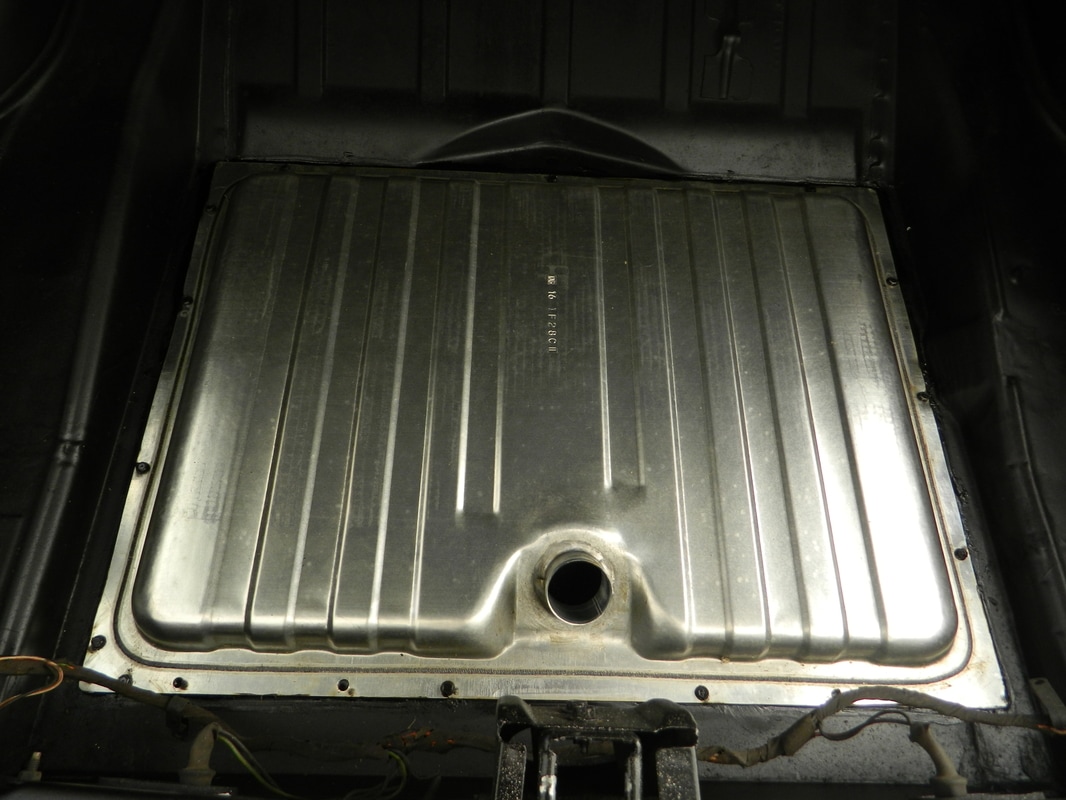
Happy New Year! Going on 5 years now on this Cougar. Was able to swap out the front 1" wheel spacers for my new 1 1/2" ones on New Year's day. It was pretty easy but did take 3 hrs to do it. Today, I took the 4" studs from the front and did the driver's side rear axle, But, I had to pull the axle out of the housing inorder to do it. It was about the same as the front, an hour and a half to do it. Afterwards, my gas tank arrived, so I test fitted it, and all looks good. Starting to build some momentum now! Fuel line and fittings on the way, arriving Monday.


Jan 10, 2017
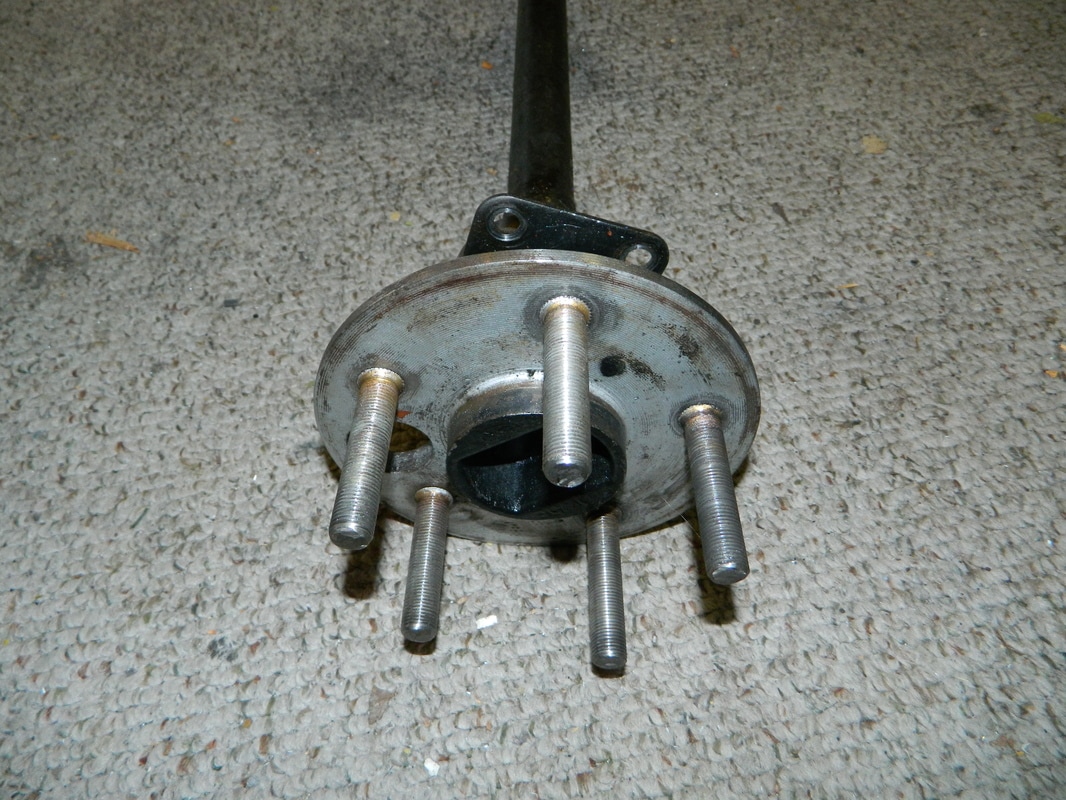
It warmed up today, so I finished the rear axle studs. I was able to pull the right side axle without disconnecting the brake line, as I did on the left side. All together it was much easier on this side. After doing the left side, I found that the studs were going to be too long for the closed end nuts to work, so I did some measurements and cut the studs down about 5/8". I did the ones on the right side before installing them, and then I pulled the wheel off the left side and cut them down on the car. I started out using my sawzall, but it was eating up blades, so I got out the air powered cutoff tool, that worked twice as fast. 3 hours.
Jan 21, 2017
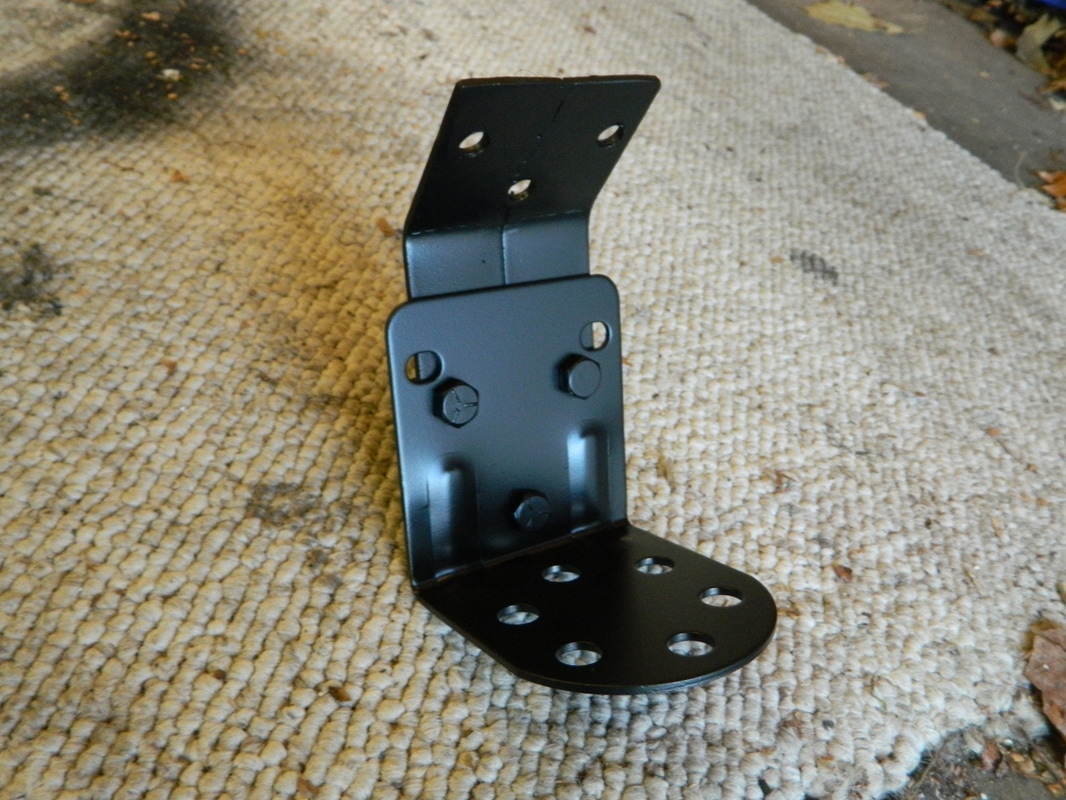
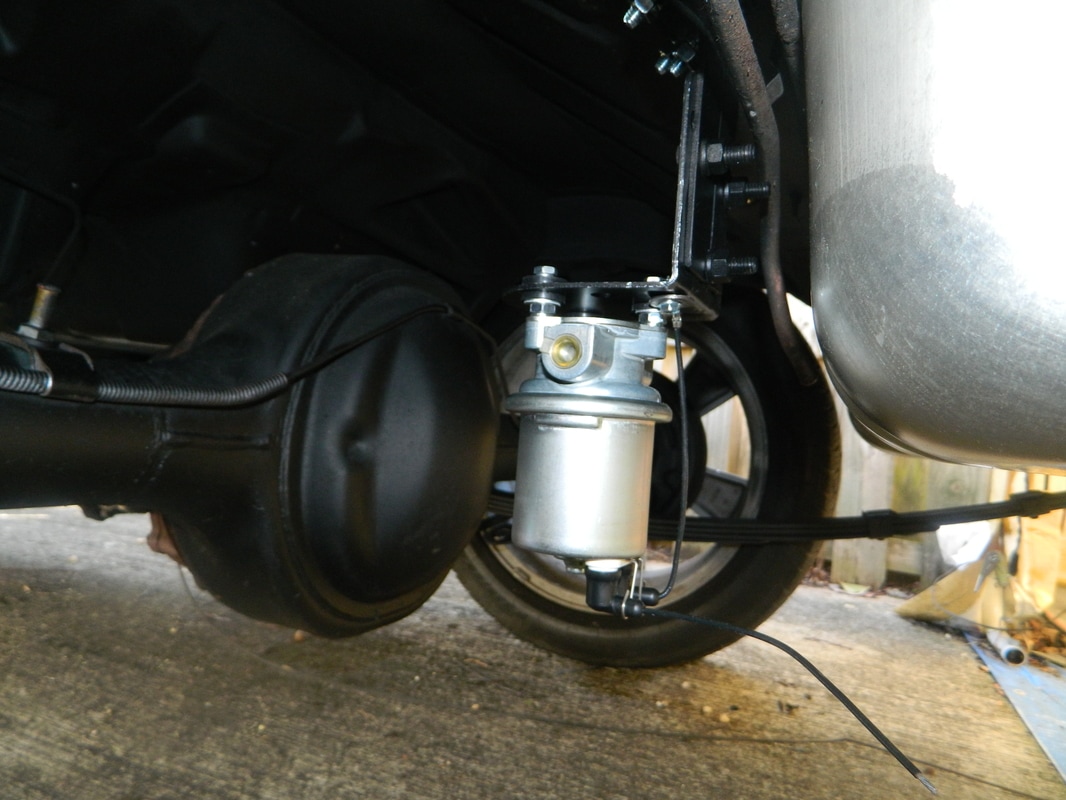
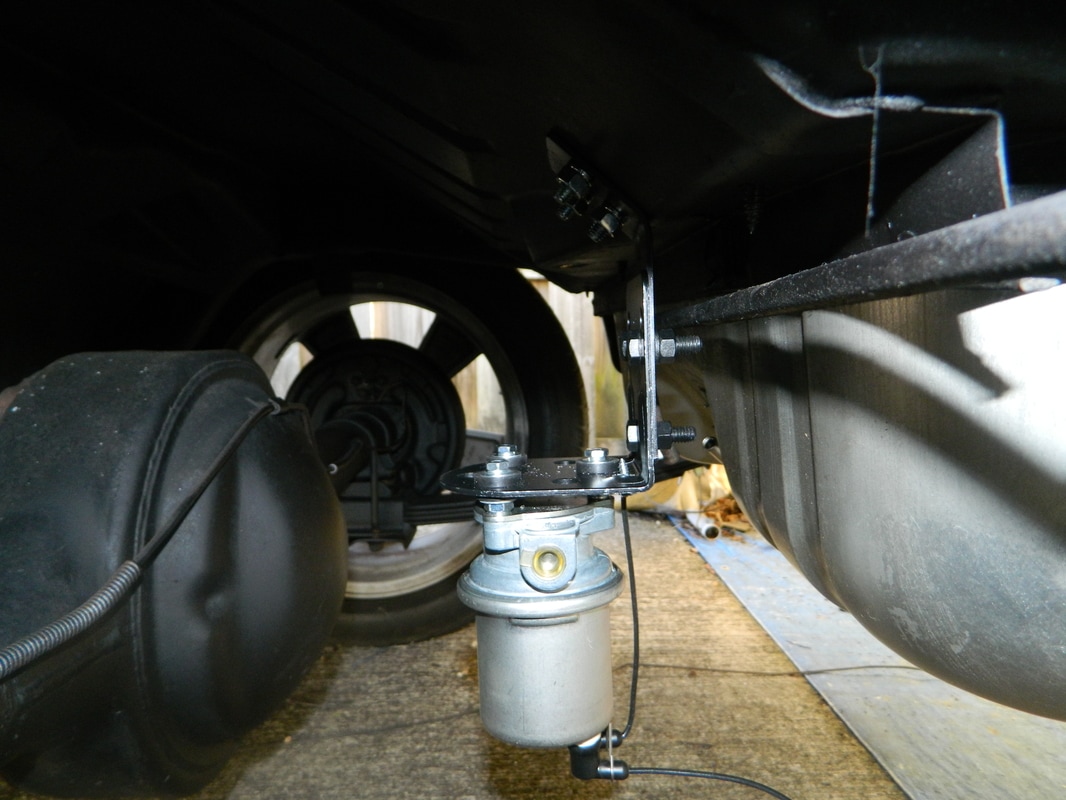
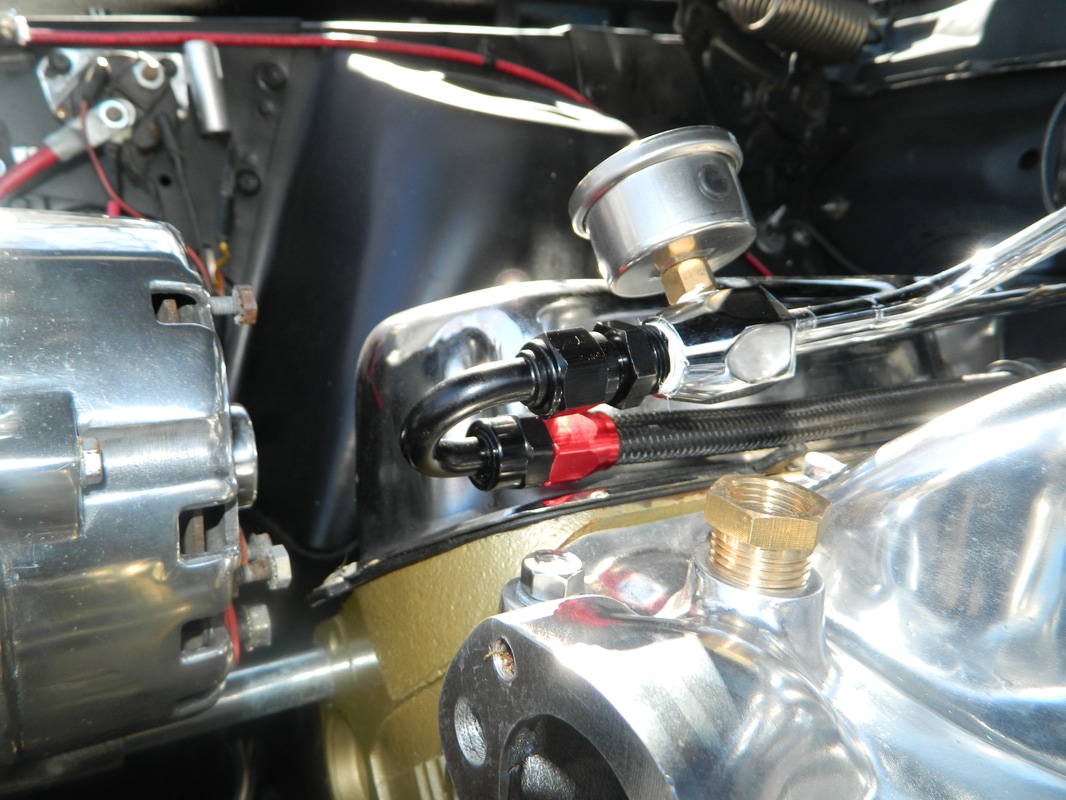
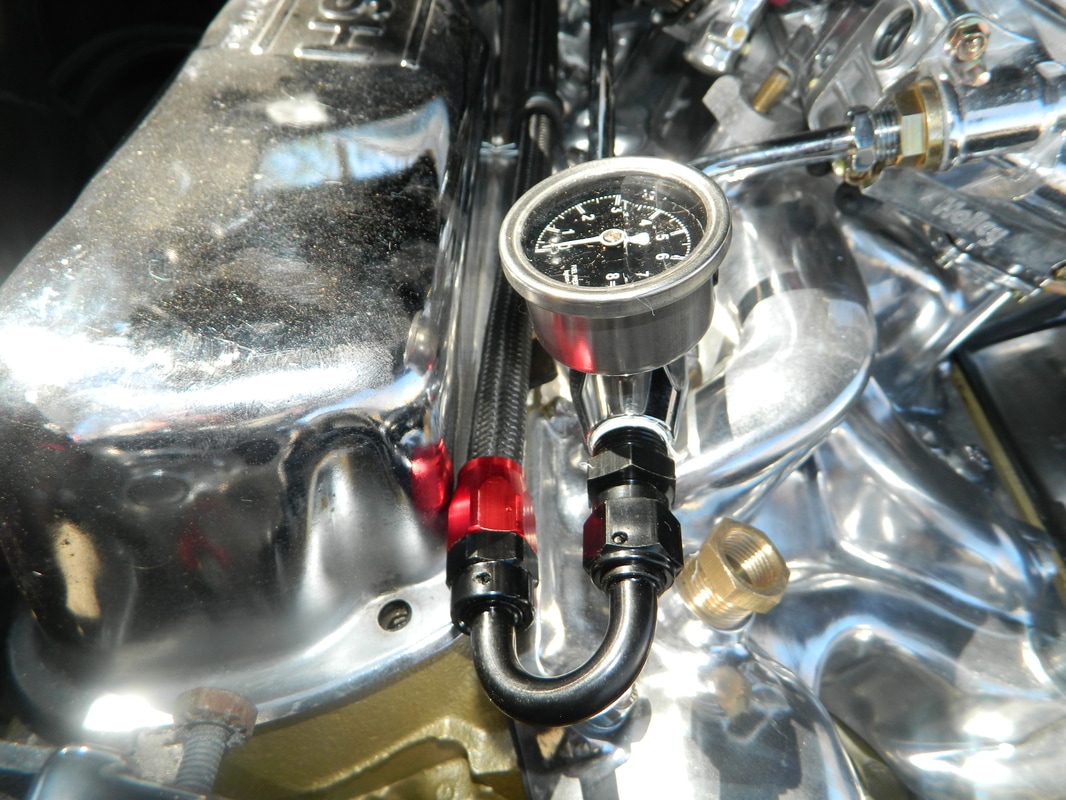
i been a little busy and the weather bad, but today I started on the fuel system. Installed the sending unit in the gas tank, and mounted the tank in the trunk, using roofing asphalt sealer to waterproof it. Then, I fabbed up a angle mount to mount the fuel pump mount on. Wow! I used mount 3 times in a sentence! There wasn't a good place to mount it where it would be low enough and perpendicular. I got my fuel line yesterday, so I mounted the gauge on it and screwed it into the Holley. So, that's it. I'll try to mount the pump tomorrow. 3 hrs

Jan 24, 2017
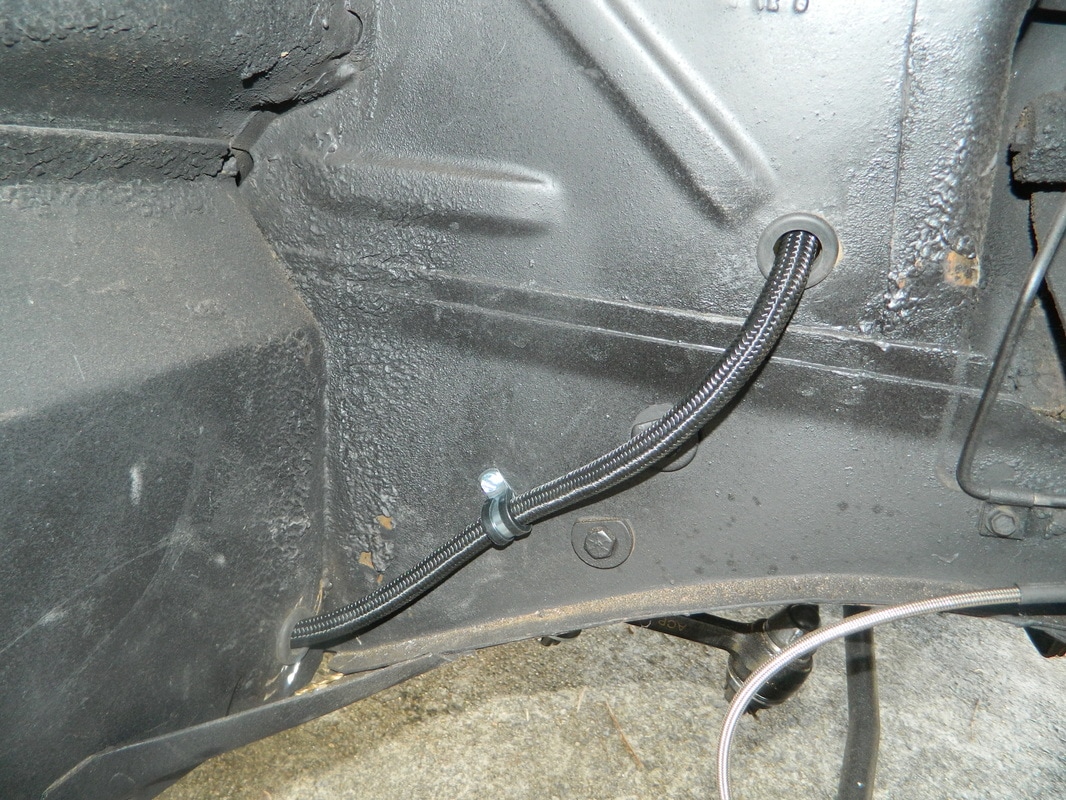
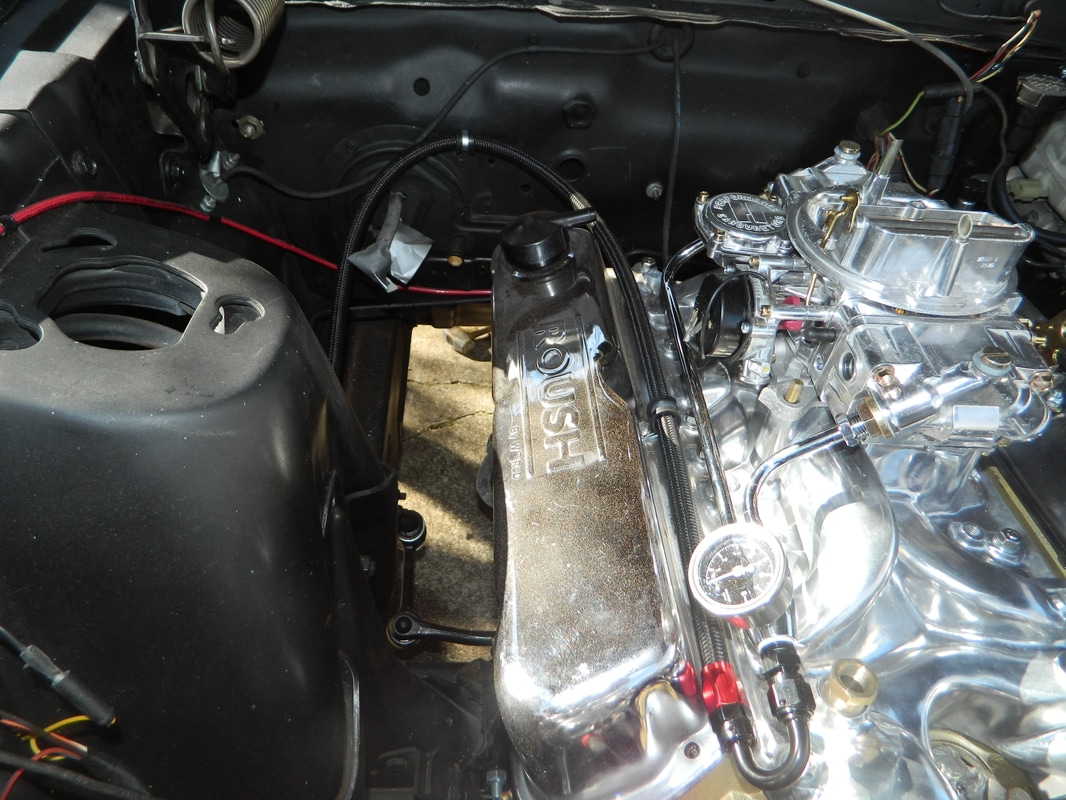
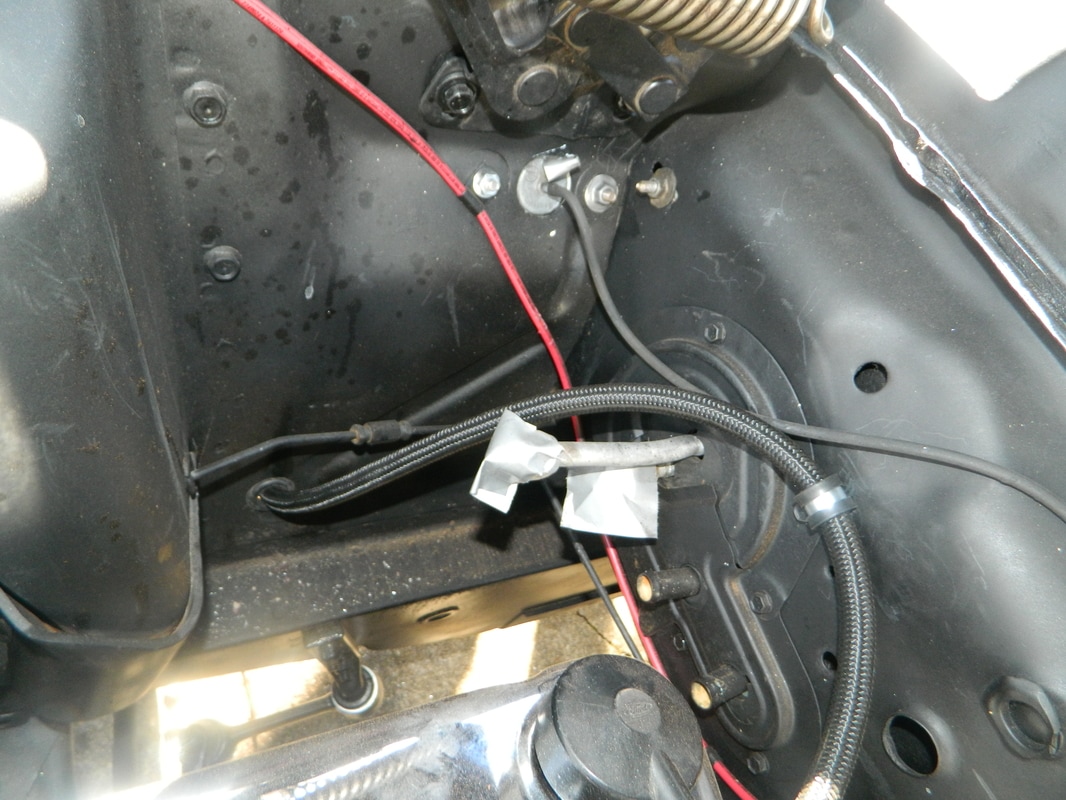
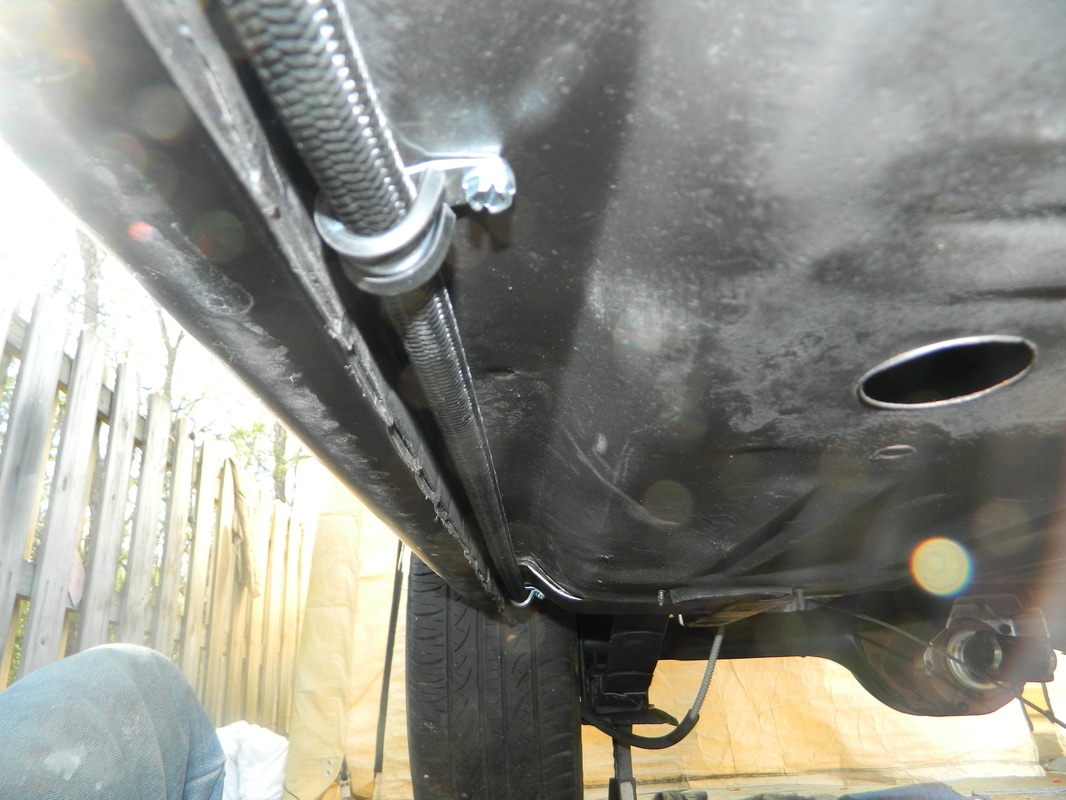
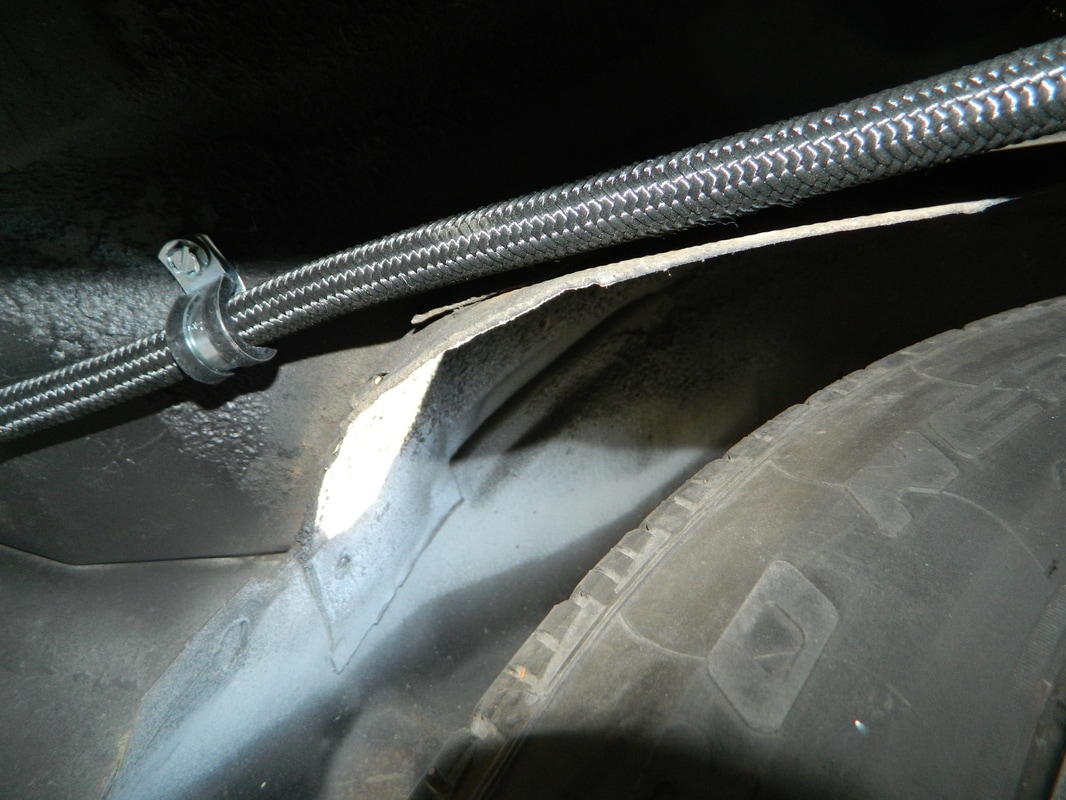
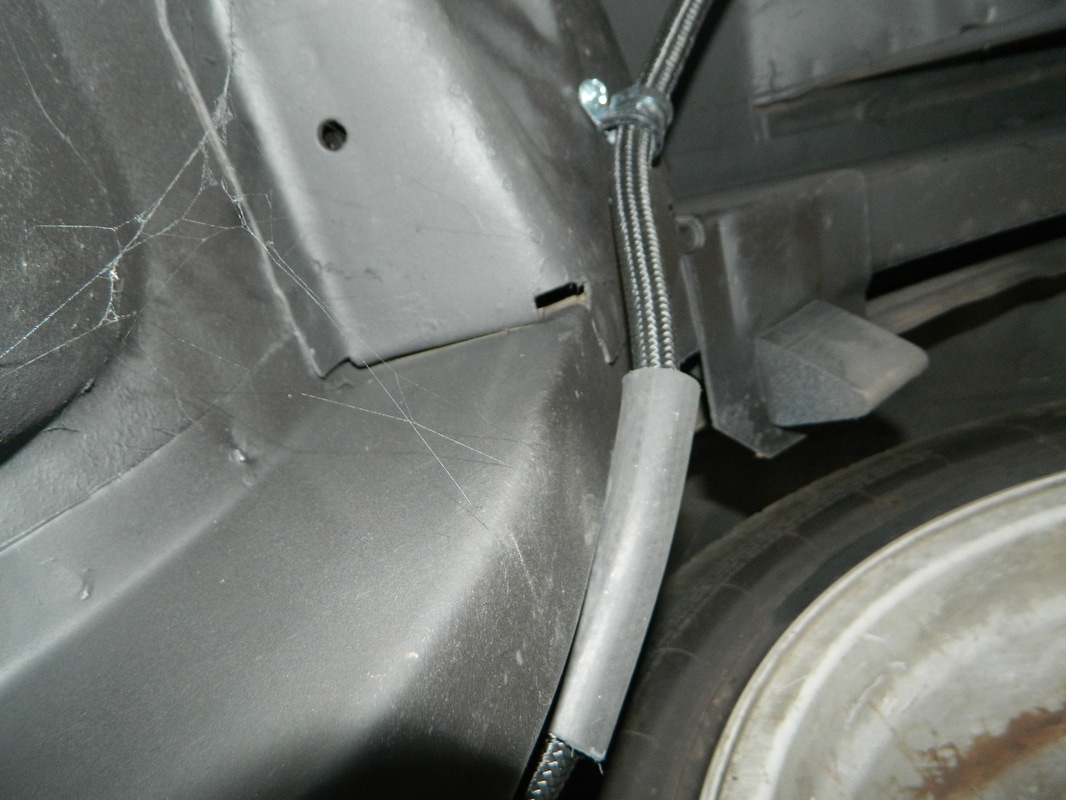
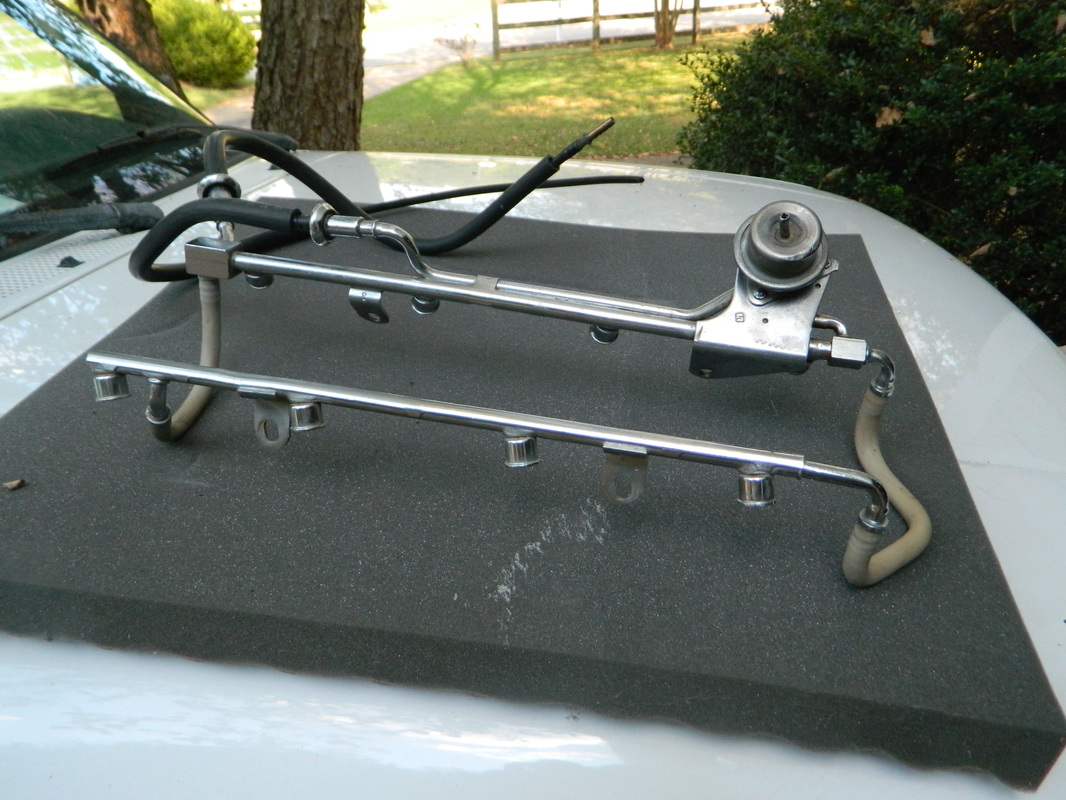
Continuing the fuel system today. I mounted the fuel pump on the bracket I made and then mounted it on the underside of the trunk, next to the sending unit/fuel line exit. I also started routing the fuel line from the carburetor back, just got the engine portion done for now. 4 hrs today

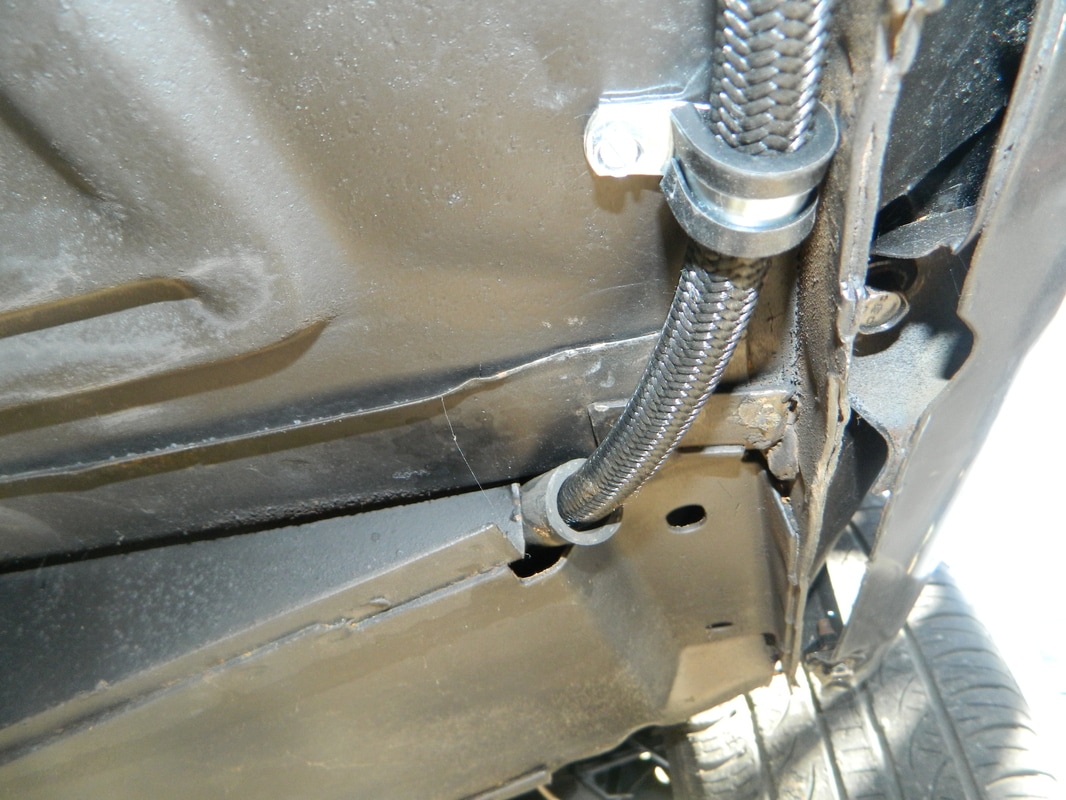
Jan 26, 2017
Today I finished running the fuel line to the tank, but still need a filter to hook it up to the pump and tank. I routed the line to the back of the engine on the passenger side and then down the side of the A/C to the fender well and then under the rocker panel to the rear axle. It's well protected along the way. I also cut the first 18" of the original fuel line out and tapped it on the ground and a few teaspoons full of rust and crud came out. 2 hrs